Introduction
Hey there, friend! Do you ever get that craving? The one that hits hard and needs something sweet, maybe a little salty, and definitely satisfying, like right now? And ideally, without turning on the oven? Yep, I know the feeling! That’s exactly why I whipped up this recipe for No-Bake Peanut Butter Oat Cups. It’s one of those treats that tastes like pure comfort but is so unbelievably simple to make, you’ll wonder where it’s been all your life. Think of your favorite chewy granola bar met a perfect little peanut butter cup, and they decided to skip the baking part. It’s a winner every single time, and honestly, it brings back happy memories of simple kitchen fun.
Why You’ll Love This Recipe
- Fast: Seriously, we’re talking minutes to mix and shape. The hardest part is waiting for them to chill!
- Easy: If you can stir, you can make these. No fancy equipment or techniques required.
- Giftable: Pop a few in a cute tin or bag, and you’ve got a thoughtful homemade gift for a friend or neighbor.
- Crowd-pleasing: Who doesn’t love the classic combo of peanut butter and a hint of sweetness? Kids and adults gobble these up.
Ingredients
You only need a handful of simple things you probably already have in your pantry!
- 1 cup rolled oats: Also called old-fashioned oats. These give our cups that perfect chewy texture. Stay away from instant oats for this one, they get a bit mushy.
- 1/2 cup creamy peanut butter: Use your favorite! Creamy works best here for a smooth texture that binds everything together. Natural or conventional is fine, just make sure it’s well stirred if using natural.
- 1/4 cup honey or maple syrup: Your liquid sweetener of choice! Honey gives a classic flavor, while maple syrup keeps them vegan (if you use vegan chocolate chips too!). This is what holds it all together and adds sweetness.
- 1/4 cup mini chocolate chips (optional): Because who can resist chocolate and peanut butter? Mini chips distribute nicely, but regular chips chopped up work too. You can skip them if you prefer!
How to Make It
Get ready for the easiest recipe instructions ever. Seriously, you got this!
- Get Ready: Line a mini muffin tin with mini paper liners. This recipe makes about 12-18 depending on how full you fill them. If you don’t have a mini muffin tin, you can just use regular-sized liners, or even roll the mixture into balls.
- Mix the Wet: In a medium bowl, add the creamy peanut butter and your choice of honey or maple syrup. Give them a good stir until they are completely smooth and well combined. It should be a thick, gooey mixture.
- Add the Dry (and Delicious!): Now, add the rolled oats to the peanut butter mixture. If you’re using them, toss in the mini chocolate chips too.
- Combine Everything: Stir everything together with a spoon or a sturdy spatula. Keep stirring until the oats and chocolate chips are evenly distributed and coated in the peanut butter mixture. You’ll end up with a thick, slightly sticky “dough.”
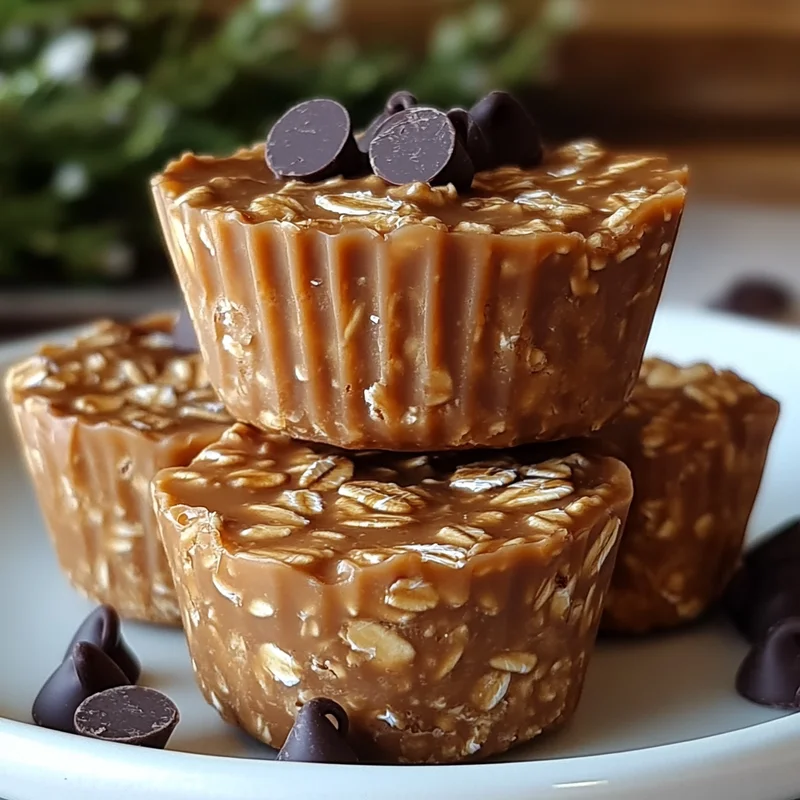
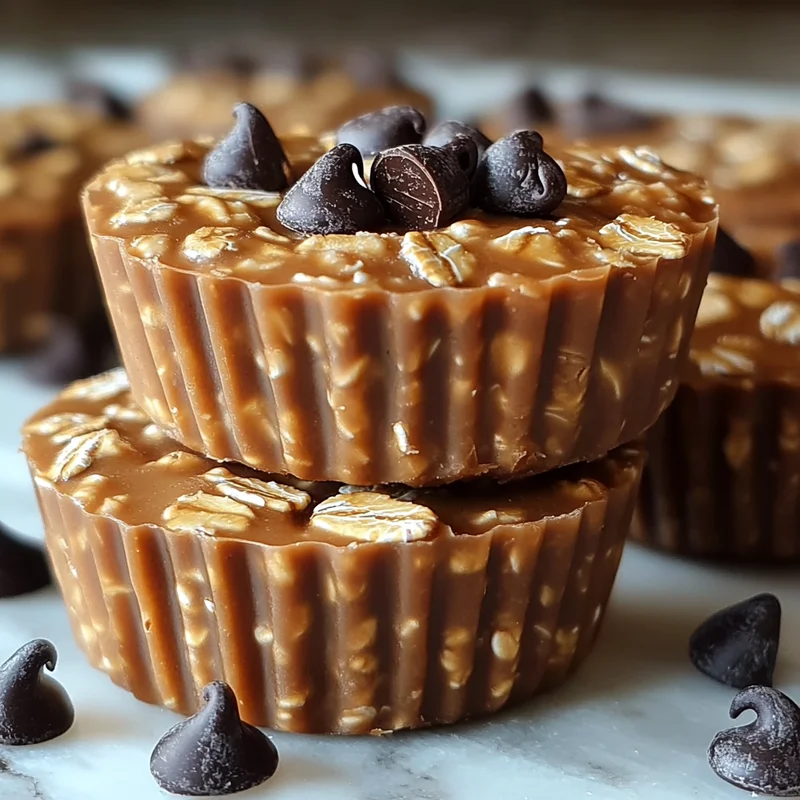
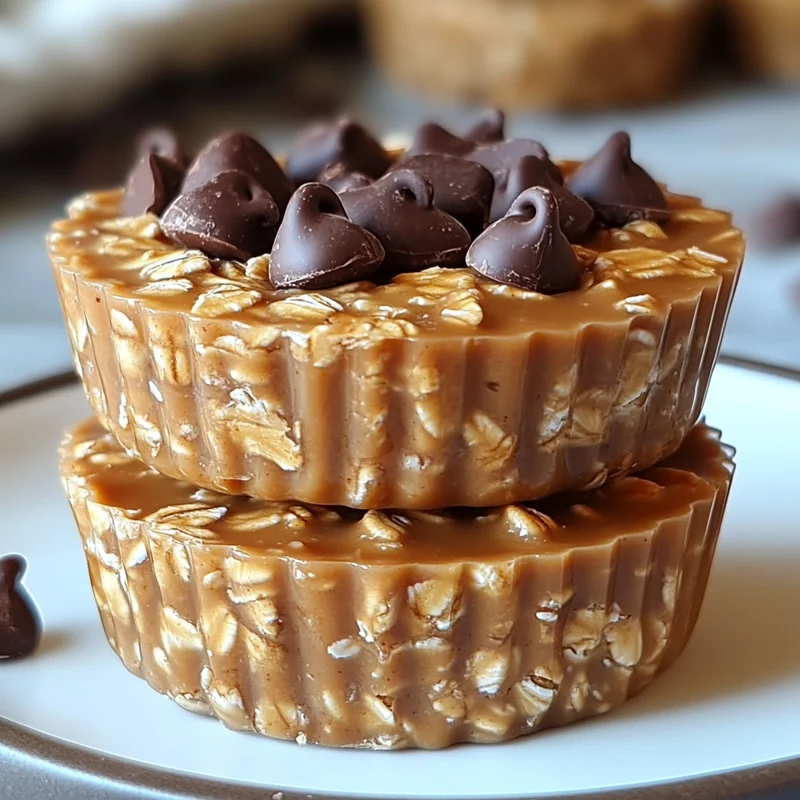
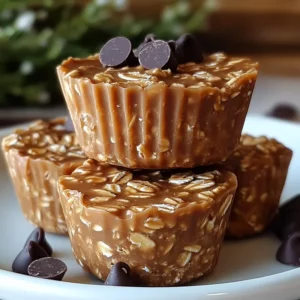
- Form the Cups: Spoon the mixture into your prepared mini muffin liners. Use the back of your spoon or your fingers to gently press the mixture down into each liner, making them compact and flat on top. This helps them hold their shape.
- Chill Out: Pop the muffin tin (or the cups on a plate if not using a tin) into the refrigerator for at least 30-60 minutes. This chilling time is crucial for the cups to firm up and become solid enough to handle.
- Enjoy! Once they are firm, lift them out of the tin (if using) and peel off the paper liners when you’re ready to eat. Nibble, savor, and enjoy your simple, homemade treat!
Substitutions & Additions
Want to shake things up? These cups are super flexible!
- Nut Butter Swap: Not a peanut butter fan? Almond butter, cashew butter, or even sunflower seed butter (for a nut-free option) work beautifully. The texture might vary slightly depending on how liquidy your nut butter is.
- Sweetener Swaps: Agave nectar or brown rice syrup can also be used instead of honey or maple syrup.
- Oat Texture: While rolled oats are recommended, you can use quick oats in a pinch, but they might result in a slightly softer, less chewy cup.
- Mix-Ins Galore: Get creative! Add a pinch of cinnamon or vanilla extract to the wet mixture, stir in some chia seeds or flax seeds for extra nutrition, add shredded coconut, chopped nuts, or even finely chopped dried fruit like cranberries or raisins.
- Chocolate Variations: Use dark chocolate chips, white chocolate chips, or chop up your favorite chocolate bar. You could even dip the finished cups in melted chocolate for extra decadence!
Tips for Success
These are pretty foolproof, but here are a couple of things I’ve learned along the way:
- Stir That Peanut Butter: If you’re using natural peanut butter, make sure it’s really well stirred before you measure it. This ensures you get the right consistency for the recipe.
- Consistency is Key: The mixture should be thick enough to scoop but still a little sticky. If it seems too dry, add a tiny splash more sweetener. If it’s too wet, stir in a few more oats.
- Press Them Down: Don’t skip pressing the mixture into the liners. This helps the cups hold their shape nicely once chilled.
- Chilling Time: Be patient! The full chilling time is essential for them to set up properly. If you try to unmold them too soon, they might fall apart.
- Prep Ahead: You can absolutely make the mixture a day ahead of time and store it in an airtight container in the fridge before scooping and chilling. Or, make the finished cups and store them as directed below.
How to Store It
Keeping these cups properly stored will ensure they stay fresh and firm.
The best way to store your No-Bake Peanut Butter Oat Cups is in an airtight container in the refrigerator. They can be stacked, but I like to place a small piece of parchment or wax paper between layers to prevent them from sticking together, especially if you used chocolate chips. Stored this way, they should last for 1-2 weeks (if they aren’t all eaten before then!).
For longer storage, you can also freeze them! Place them in a single layer on a plate or small baking sheet until frozen solid, then transfer them to a freezer-safe bag or container. They should last for a couple of months in the freezer. Just let them sit at room temperature for a few minutes before enjoying, or eat them straight from the freezer for a super chewy, cold treat!
FAQs
Got questions? Let’s answer a couple of common ones!
Can I use quick oats instead of rolled oats?
While you can use quick oats, I highly recommend sticking to rolled oats (old-fashioned oats) for the best texture. Quick oats are cut smaller and absorb liquid faster, which can result in a softer, slightly mushier cup instead of the satisfying chew you get from rolled oats.
Are these healthy?
They contain wholesome ingredients like oats and peanut butter, offering fiber and protein. However, they also contain added sugar from the honey or maple syrup and optional chocolate chips. I like to think of them as a “healthier-ish” treat or snack, part of a balanced diet rather than a health food staple. They’re definitely a better choice than many store-bought candy bars!
Can I omit the sweetener?
The honey or maple syrup is crucial not only for sweetness but also as the binder that holds the cups together. If you omit it entirely, the mixture likely won’t stick or firm up properly. You could try reducing the amount slightly if you prefer less sweet, but don’t leave it out completely.
Easy 4-Ingredient No-Bake Peanut Butter Oat Cups
Equipment
- Medium bowl
- Spoon
- sturdy spatula
- Mini muffin tin optional, can use regular liners or roll into balls
- mini paper liners optional
Ingredients
Main Ingredients
- 1 cup rolled oats Also called old-fashioned oats. Stay away from instant oats.
- 0.5 cup creamy peanut butter Use your favorite! Creamy works best here. Natural or conventional is fine, just make sure it's well stirred if using natural.
- 0.25 cup honey or maple syrup Your liquid sweetener of choice! Honey gives a classic flavor, while maple syrup keeps them vegan.
- 0.25 cup mini chocolate chips Optional. Mini chips distribute nicely, but regular chips chopped up work too. You can skip them if you prefer!
Instructions
- Get Ready: Line a mini muffin tin with mini paper liners. This recipe makes about 12-18 depending on how full you fill them. If you don't have a mini muffin tin, you can just use regular-sized liners, or even roll the mixture into balls.
- Mix the Wet: In a medium bowl, add the creamy peanut butter and your choice of honey or maple syrup. Give them a good stir until they are completely smooth and well combined. It should be a thick, gooey mixture.
- Add the Dry (and Delicious!): Now, add the rolled oats to the peanut butter mixture. If you're using them, toss in the mini chocolate chips too.
- Combine Everything: Stir everything together with a spoon or a sturdy spatula. Keep stirring until the oats and chocolate chips are evenly distributed and coated in the peanut butter mixture. You'll end up with a thick, slightly sticky "dough."
- Form the Cups: Spoon the mixture into your prepared mini muffin liners. Use the back of your spoon or your fingers to gently press the mixture down into each liner, making them compact and flat on top. This helps them hold their shape.
- Chill Out: Pop the muffin tin (or the cups on a plate if not using a tin) into the refrigerator for at least 30-60 minutes. This chilling time is crucial for the cups to firm up and become solid enough to handle.
- Enjoy! Once they are firm, lift them out of the tin (if using) and peel off the paper liners when you're ready to eat. Nibble, savor, and enjoy your simple, homemade treat!