Introduction
Hey there, kitchen adventurer! Ever walked past one of those giant, glorious bloomin’ onions at a restaurant and thought, “Man, I wish I could make something like that at home… but maybe, you know, smaller? And healthier? And way, way easier?” Well, friend, you’re in luck! Get ready to meet your new obsession: Air Fried Pearl Onions, or as I like to call them, Mini Blooming Onions!
These little bites of crispy, seasoned goodness are ridiculously simple to make and disappear even faster. Forget the deep-frying mess! With your trusty air fryer, you can achieve that satisfying crunch with minimal oil. Trust me, once you try these, you’ll never look at a bag of frozen pearl onions the same way again. They’re perfect for game day, a quick snack, or just because!
Why You’ll Absolutely Adore These Mini Blooming Onions
- Lightning Fast: You’ll have crispy snacks ready in minutes – perfect for those sudden snack attacks!
- Ridiculously Easy: No complicated steps, just simple dipping and air frying magic. Seriously, anyone can make these!
- Perfect for Sharing: Whip up a batch for game day, a movie night, or just because – they disappear in a flash and are always a crowd-pleaser.
- Seriously Delicious: That crispy, seasoned coating on tender, slightly sweet pearl onions? Chef’s kiss! Add your favorite dipping sauce, and you’re in snack heaven.
Gather Your Simple Ingredients
You won’t need anything fancy for this recipe. Just a few pantry staples and a bag of those often-overlooked pearl onions!
- 1/2 bag frozen pearl onions: The star of the show! No need to thaw them completely, just enough so they separate a bit. They get tender and sweet inside the crispy coating.
- 1 cup all-purpose flour: Our base for that fantastic crispy coating.
- 2 teaspoons paprika: Adds beautiful color and a lovely, slightly sweet flavor.
- 1 teaspoon salt: Essential for bringing out all the flavors.
- 1/2 teaspoon black pepper: A little classic spice!
- 1/2 teaspoon cayenne pepper: For just a touch of warmth and heat. Feel free to adjust this or leave it out if you’re sensitive to spice.
- 1/2 teaspoon garlic powder: Because garlic makes everything better, right? It adds that savory punch we all love.
- 1 egg: Our binding agent to help the coating stick perfectly to each little onion.
- Oil in a spray bottle (like avocado or olive oil spray): Our secret weapon for achieving that gorgeous golden brown, crispy finish in the air fryer without the mess of deep frying.
Let’s Get Cooking! (It’s SO Easy)
Okay, grab your apron (or don’t, it’s that easy!) and let’s turn these little onions into golden, crispy delights. It’s a simple process, I promise!
Here’s your step-by-step guide:
- Step 1: Prep Your Onions. If your frozen pearl onions are stuck together, gently separate them. Running them under cool water for just a few seconds or letting them sit at room temp for 5-10 minutes usually does the trick. You want them separated but still mostly frozen. The most important part is to pat them very dry with paper towels after separating them. Excess moisture is the enemy of crispy!
- Step 2: Set Up Your Dredging Stations. You’ll need two shallow bowls or plates. In the first bowl, whisk together the flour, paprika, salt, black pepper, cayenne pepper, and garlic powder until everything is well combined. In the second bowl, whisk the egg until it’s scrambled and looks smooth.
- Step 3: First Flour Coat. Working in batches (so you don’t overcrowd the bowls), take a handful of the dried pearl onions and toss them generously in the seasoned flour mixture. Make sure each little onion is fully coated. Gently shake off any excess flour.
- Step 4: Egg Dip! Next, transfer the flour-coated onions to the bowl with the whisked egg. Dip them around, making sure they get a good coating of egg. Let any excess egg drip off for a moment.
- Step 5: Double Dip for Extra Crispy! Now, transfer the egg-dipped onions back into the seasoned flour mixture for a second coating. This double dip is what gives you that satisfyingly thick and crispy crust! Toss them gently until they are well coated again, then shake off any extra flour. Place the coated onions on a clean plate or baking sheet while you coat the remaining batches.
- Step 6: Preheat Your Air Fryer. Preheat your air fryer to 400°F (200°C) according to your model’s instructions. Preheating helps ensure they start crisping up right away.
- Step 7: Air Fry Time! Lightly spray the bottom of your air fryer basket with oil spray (this prevents sticking). Arrange the coated onions in a single layer in the basket, making sure not to overcrowd them. Cook these in batches – overcrowding will steam them instead of making them crispy!
- Step 8: Spray and Fry! Once the onions are arranged, generously spray the tops of the onions in the basket with oil spray. This oil interacts with the hot air to give you that beautiful golden brown color and crispy texture. Air fry for 8-12 minutes, flipping or shaking the basket halfway through, until they are golden brown and deliciously crispy. Keep an eye on them, as air fryer times can vary!
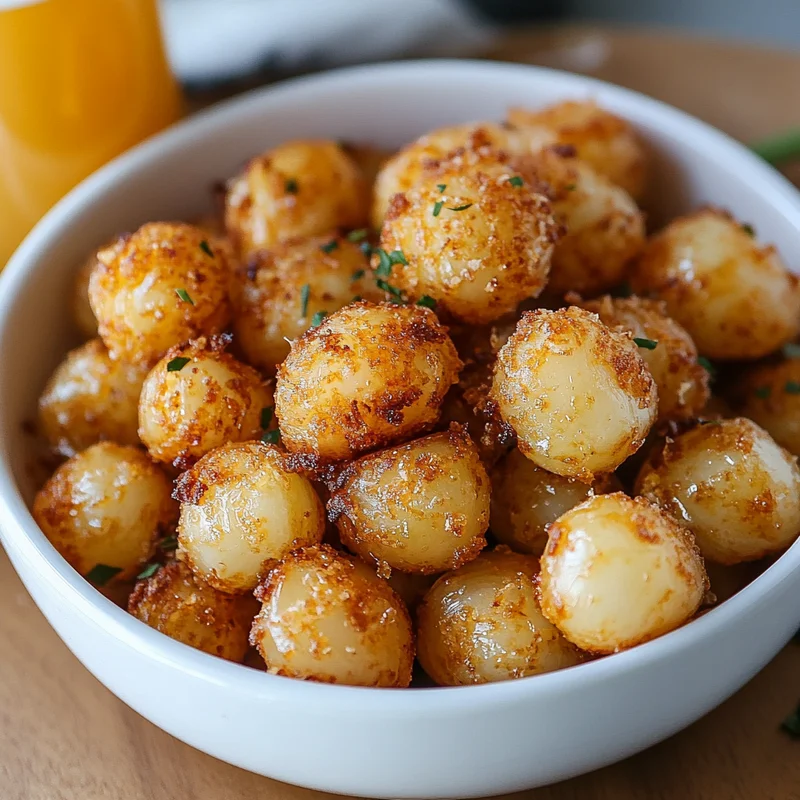
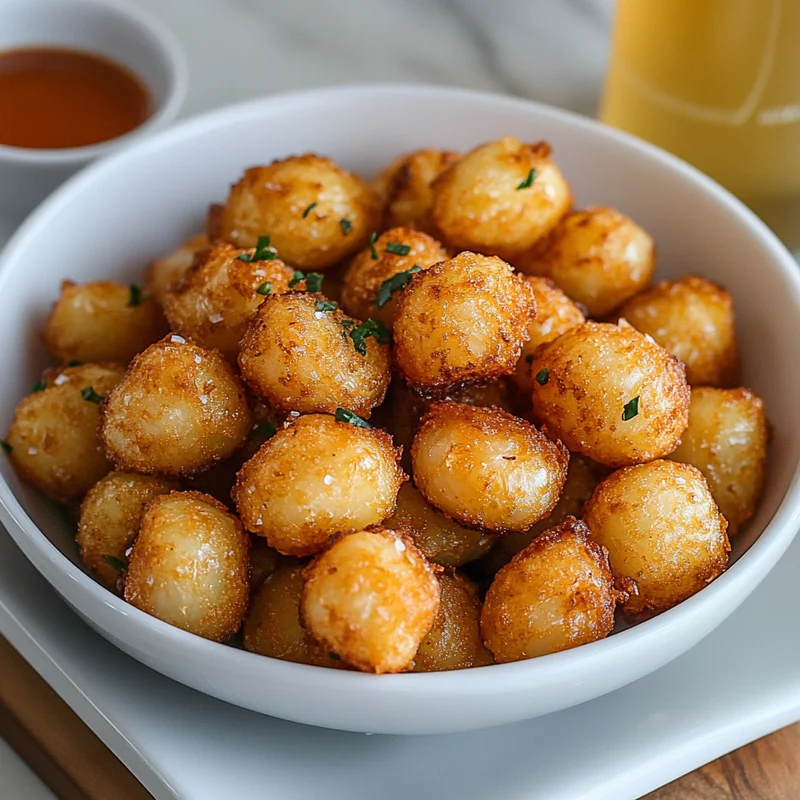
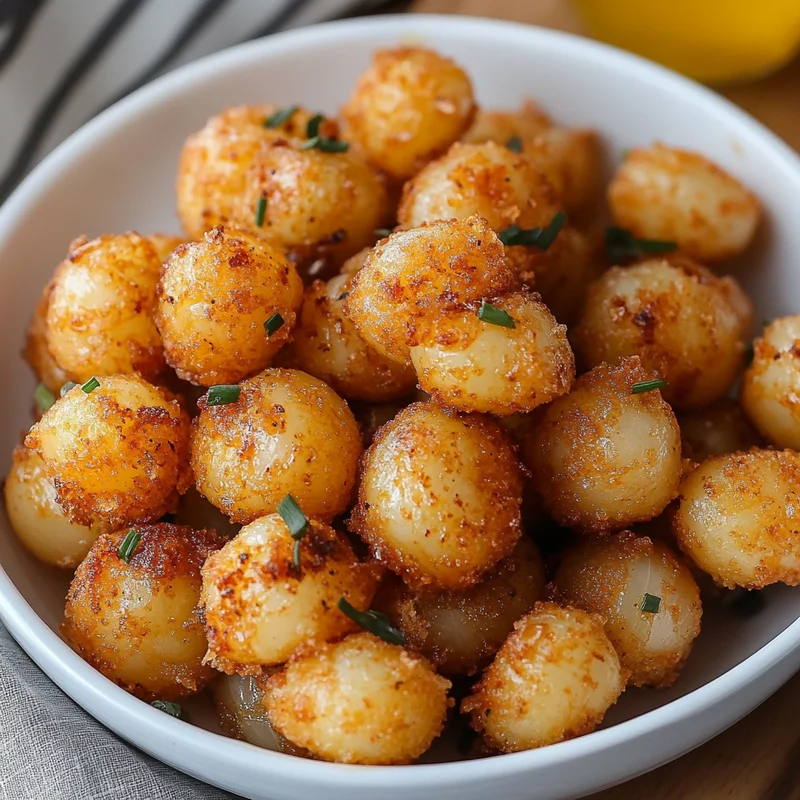
- Step 9: Serve Hot! Carefully remove the crispy pearl onions from the air fryer. They are absolutely best enjoyed right away while they are hot and crunchy! Serve them with your favorite dipping sauce (ranch, remoulade, spicy mayo – whatever makes you happy!).
Spice It Up! (Substitutions & Additions)
This recipe is super forgiving and easy to customize based on what you have or what you’re craving. Here are a few ideas to make it your own:
- Mix Up the Spices: Feel free to play with the seasoning blend! Add onion powder, smoked paprika for a deeper flavor, a pinch of chili powder, or even some dried herbs like oregano or thyme for an Italian twist.
- Go Gluten-Free: Easily swap the all-purpose flour for your favorite gluten-free flour blend. The cooking process remains the same!
- Turn Up the Heat: Love things extra spicy? Increase the cayenne pepper amount or add a pinch of red pepper flakes to the flour mixture. You could also add a dash of your favorite hot sauce to the egg wash.
- Different Dipping Sauces: The possibilities are endless! Classic ranch dressing, creamy blue cheese, a tangy remoulade, spicy aioli (mayo + sriracha/hot sauce), or even just good ol’ ketchup are all fantastic options. Get creative!
- Cheese, Anyone?: For extra flavor, you could mix a couple of tablespoons of finely grated Parmesan cheese into your flour mixture!
Tips for Achieving Crispy Perfection
Just a couple of pointers from my kitchen to yours to make sure your mini blooming onions turn out amazing every single time:
- Pat Those Onions DRY: I know I mentioned it in the steps, but it’s so important I’m saying it again! Any excess moisture on the surface of the onion will prevent the coating from sticking properly and getting truly crispy.
- Don’t Overcrowd the Basket: This is maybe the most crucial air frying tip! Cooking in a single layer with a little space between each onion allows the hot air to circulate freely, which is what makes them crispy. If you pile them up, they’ll steam instead of fry. Cook in batches!
- Don’t Skip the Oil Spray: Giving the coated onions a generous spray of oil before they go in the air fryer helps the coating brown beautifully and develop that wonderful crispy texture.
- Watch Your Air Fryer: All air fryers cook a little differently. The suggested time is a guideline. Start checking your onions around 8 minutes and add time as needed until they are your desired level of golden brown and crispiness.
- Serve Them Hot! Seriously, these are at their absolute peak when they are piping hot and fresh out of the air fryer. The crispiness is unparalleled!
Storing Leftovers (If There Are Any!)
Let’s be honest, leftovers are a rare phenomenon when these mini blooming onions are around! But if you do happen to have a few stragglers, here’s the best way to handle them to keep them as crispy as possible:
Store cooled leftovers in an airtight container in the refrigerator for 1-2 days. To reheat them and bring back that glorious crunch, pop them back into the air fryer at 375°F (190°C) for 3-5 minutes, or until they are heated through and crispy again. A toaster oven works well too! Microwaving is generally not recommended, as it will make them soft and sad.
Quick Answers to Your Burning Questions
Can I use fresh pearl onions?
Yes, you absolutely can! If using fresh, you’ll need to blanch them first to make them tender. Boil them for 1-2 minutes, then immediately transfer them to an ice bath to stop the cooking. Drain them thoroughly and pat them very dry before proceeding with the coating steps.
Can I bake these instead of air frying?
Absolutely! If you don’t have an air fryer, you can bake them. Place the double-coated onions on a wire rack set over a baking sheet. Spray generously with oil spray and bake in a preheated oven at 425°F (220°C) for 15-20 minutes, flipping them halfway through, until they are golden brown and crispy. Air frying usually gets them crispier a bit faster, though!
What’s the best way to get the coating to stick properly?
The main keys are making sure your onions are very dry after separating (if frozen) or blanching (if fresh), setting up your flour and egg stations efficiently, and doing that crucial double dip (flour -> egg -> flour). Don’t rush it!
What kind of dipping sauce do you recommend?
My personal favorite is a super simple spicy mayo – just mix mayonnaise with a little sriracha or your favorite hot sauce and a squeeze of lime or lemon juice. Classic ranch dressing or a zesty, store-bought bloomin’ onion sauce are also fantastic choices that everyone loves!

Crispy Air Fryer Mini Blooming Onions
Equipment
- Air Fryer
- Shallow bowls or plates
- paper towels
- Spray bottle for oil
- Whisk
Ingredients
Main Ingredient
- 0.5 bag frozen pearl onions No need to thaw completely, just enough so they separate a bit. Pat very dry.
Dry Coating Mixture
- 1 cup all-purpose flour
- 2 teaspoons paprika
- 1 teaspoon salt
- 0.5 teaspoon black pepper
- 0.5 teaspoon cayenne pepper Adjust or omit for heat sensitivity.
- 0.5 teaspoon garlic powder
Wet Coating
- 1 egg
For Frying & Serving
- Oil in a spray bottle like avocado or olive oil spray
- Dipping sauce your favorite, e.g., ranch, remoulade, spicy mayo (optional)
Instructions
- Step 1: Prep Your Onions. If your frozen pearl onions are stuck together, gently separate them. Running them under cool water for just a few seconds or letting them sit at room temp for 5-10 minutes usually does the trick. You want them separated but still mostly frozen. The most important part is to pat them very dry with paper towels after separating them. Excess moisture is the enemy of crispy!
- Step 2: Set Up Your Dredging Stations. You'll need two shallow bowls or plates. In the first bowl, whisk together the flour, paprika, salt, black pepper, cayenne pepper, and garlic powder until everything is well combined. In the second bowl, whisk the egg until it's scrambled and looks smooth.
- Step 3: First Flour Coat. Working in batches (so you don't overcrowd the bowls), take a handful of the dried pearl onions and toss them generously in the seasoned flour mixture. Make sure each little onion is fully coated. Gently shake off any excess flour.
- Step 4: Egg Dip! Next, transfer the flour-coated onions to the bowl with the whisked egg. Dip them around, making sure they get a good coating of egg. Let any excess egg drip off for a moment.
- Step 5: Double Dip for Extra Crispy! Now, transfer the egg-dipped onions back into the seasoned flour mixture for a second coating. This double dip is what gives you that satisfyingly thick and crispy crust! Toss them gently until they are well coated again, then shake off any extra flour. Place the coated onions on a clean plate or baking sheet while you coat the remaining batches.
- Step 6: Preheat Your Air Fryer. Preheat your air fryer to 400°F (200°C) according to your model's instructions. Preheating helps ensure they start crisping up right away.
- Step 7: Air Fry Time! Lightly spray the bottom of your air fryer basket with oil spray (this prevents sticking). Arrange the coated onions in a single layer in the basket, making sure not to overcrowd them. Cook these in batches – overcrowding will steam them instead of making them crispy!
- Step 8: Spray and Fry! Once the onions are arranged, generously spray the tops of the onions in the basket with oil spray. This oil interacts with the hot air to give you that beautiful golden brown color and crispy texture. Air fry for 8-12 minutes, flipping or shaking the basket halfway through, until they are golden brown and deliciously crispy. Keep an eye on them, as air fryer times can vary!
- Step 9: Serve Hot! Carefully remove the crispy pearl onions from the air fryer. They are absolutely best enjoyed right away while they are hot and crunchy! Serve them with your favorite dipping sauce (ranch, remoulade, spicy mayo – whatever makes you happy!).
Notes
- Pat onions very dry before coating.
- Do not overcrowd the air fryer basket; cook in batches.
- Don't skip the oil spray on the coated onions.
- Air fryer times vary; check for doneness around 8 minutes.
- Serve immediately for best crispiness. Spice It Up! (Substitutions & Additions):
- Mix up spices: Add onion powder, smoked paprika, chili powder, dried herbs (oregano, thyme), or red pepper flakes.
- Go Gluten-Free: Substitute all-purpose flour with a gluten-free blend.
- Turn Up the Heat: Increase cayenne or add hot sauce to the egg wash.
- Different Dipping Sauces: Try ranch, blue cheese, remoulade, spicy aioli, or ketchup.
- Add Cheese: Mix finely grated Parmesan into the flour mixture. Fresh Onions:
- Can use fresh pearl onions. Blanch them for 1-2 minutes in boiling water, then ice bath, drain, and pat very dry before coating. Baking Option:
- If no air fryer, bake on a wire rack over a baking sheet at 425°F (220°C) for 15-20 minutes, flipping halfway, until golden and crispy. Storing Leftovers:
- Store cooled leftovers in an airtight container in the refrigerator for 1-2 days.
- Reheat in the air fryer at 375°F (190°C) for 3-5 minutes, or in a toaster oven. Do not microwave.