Introduction
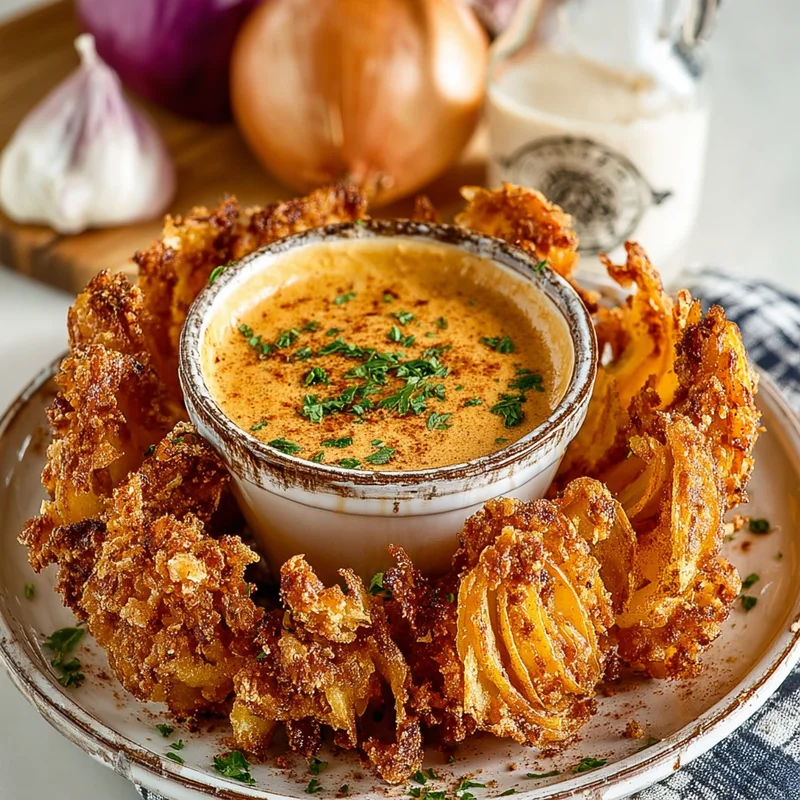
Oh, the glorious sight and smell of a perfectly fried onion! You know the one – those gorgeous, flower-like creations that are just begging to be dipped and devoured. If you’ve ever craved that restaurant-quality appetizer at home, you’re in for a real treat. Today, we’re diving into a recipe for an “Awesome Blossom” that’s so simple, so delicious, and so satisfying, it’ll become your new go-to for parties, family dinners, or even just a special weeknight indulgence. Get ready to impress yourself (and anyone lucky enough to be around)!
Why You’ll Love This Recipe
- Fast: While it takes a little prep, the actual frying time is quick, meaning you’ll be enjoying this delight in no time!
- Easy: Don’t let the fancy appearance fool you. This recipe is straightforward and forgiving, perfect for beginner and experienced cooks alike.
- Giftable: Okay, maybe not the whole blossom, but the dipping sauce is absolutely delicious and makes a fantastic homemade gift!
- Crowd-Pleasing: Seriously, who can resist a perfectly fried onion? This is a guaranteed hit for game days, holidays, or any gathering.

Ingredients
Let’s gather our goodies! The beauty of this recipe is that most of these are pantry staples you probably already have.
For the Awesome Dipping Sauce:
- 2 tablespoons mayonnaise (the creamy base!)
- 2 tablespoons sour cream (for that tangy zing)
- 1½ tablespoons ketchup (a classic for a reason)
- 1½ teaspoons prepared horseradish (this is where the magic happens – a little kick!)
- ½ teaspoon sweet paprika (for color and a hint of sweetness)
- ¼ teaspoon salt (to enhance all those flavors)
- ⅛ teaspoon black pepper (just a touch of warmth)
- ⅛ teaspoon cayenne pepper (optional, but highly recommended for a gentle heat!)
For the Crispy Fried Onion:
- Vegetable oil for frying (you’ll need enough to generously cover your onion, so the amount will vary depending on your pot)
- 1 large Vidalia onion (approximately 1 pound) – these are super sweet and hold their shape beautifully!
- 1½ cups all-purpose flour (our all-star coating)
- 2 tablespoons cornstarch (for extra crispiness – don’t skip this!)
- 1½ teaspoons sweet paprika (more lovely color and flavor)
- 1½ teaspoons garlic powder (because everything is better with garlic!)
- 1½ teaspoons salt (essential for that savory crunch)
- ½ teaspoon black pepper (more peppery goodness)
- 1½-2 cups buttermilk (this is key for getting the coating to stick and creating those irresistible crispy bits)
How to Make It
Alright, let’s get our hands a little floury and create some deliciousness!
Step 1: Whip Up That Glorious Dipping Sauce
In a small bowl, grab your whisk and combine the mayonnaise, sour cream, ketchup, prepared horseradish, sweet paprika, salt, black pepper, and cayenne pepper (if you’re using it). Give it a good stir until everything is beautifully blended into a lovely pinkish hue. Pop a lid on it and pop it in the fridge. It needs a little time to chill and for those flavors to really get to know each other.
Step 2: Prep Your Star – The Onion
Now for the fun part! Take your big, beautiful Vidalia onion. Carefully slice off the very top where the stem was. Then, slice off the root end, but only about ½ inch from the base. You want to leave the root intact – think of it as the onion’s little anchor that will help keep all those gorgeous petals together.
Starting about ¼ inch from the root end, make four evenly spaced cuts straight down towards the base, stopping just before you reach the very bottom. Gently peel back and separate those layers to create a “blossom” effect. If your onion decides to give you rings instead of petals, don’t worry! That’s totally fine too. The flavor is what matters most.
Step 3: Craft Your Crispy Coating
Grab a shallow dish (a pie plate works great for this!) and whisk together the all-purpose flour, cornstarch, sweet paprika, garlic powder, salt, and black pepper. This is your flavor playground!
Step 4: Get Ready to Coat
Pour your buttermilk into another shallow dish. Now, it’s time to get that onion nice and wet! Dip each onion petal or ring into the buttermilk, making sure every nook and cranny is coated. Let any excess drip off.
Step 5: Flour Power!
Carefully transfer your buttermilk-coated onion into the dry flour mixture. Gently press and turn to ensure it’s thoroughly coated. Give it a gentle shake to get rid of any extra flour. This is what will give us those amazing crispy bits.
Step 6: Fry to Golden Perfection
Heat your vegetable oil in a deep fryer or a heavy-bottomed pot over medium-high heat until it reaches about 350°F (175°C). This temperature is crucial for getting that perfect crisp without burning. Carefully, and I mean carefully, place your coated onion into the hot oil. If it’s a big blossom, you might need to gently lower it using a spider strainer or two forks. Fry it for about 3-5 minutes, or until it’s a beautiful golden brown and wonderfully crispy. If you’re frying in batches, which I highly recommend to avoid overcrowding, just keep an eye on the oil temperature between batches.
Step 7: Drain and Devour!
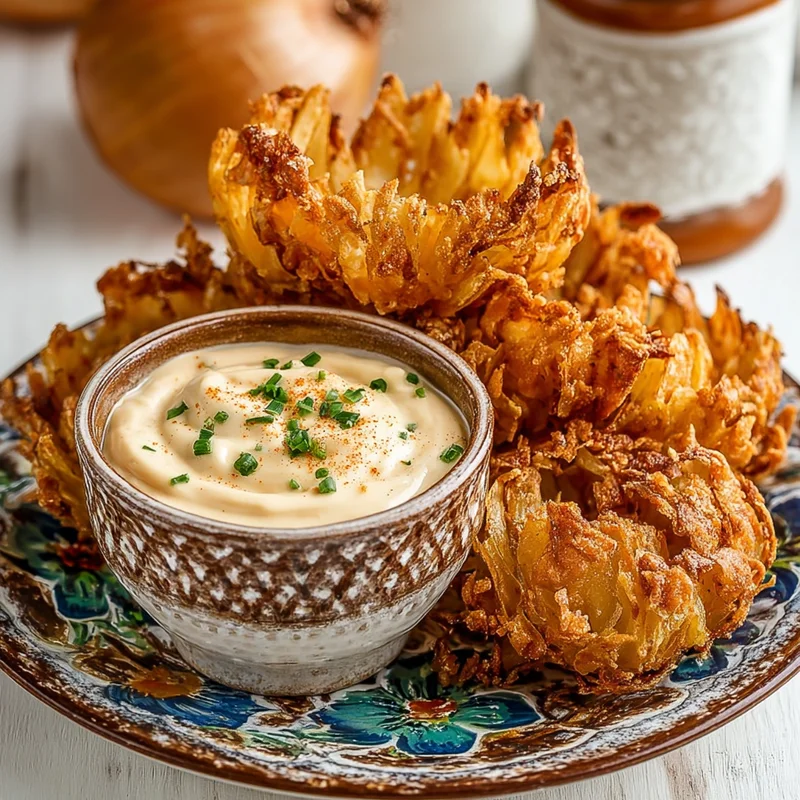
Once your blossom is perfectly golden, carefully remove it from the hot oil. I like to place mine on a wire rack set over a baking sheet to let any excess oil drain away. A paper towel-lined plate works too! And there you have it – your glorious Awesome Blossom, ready to be served immediately with that incredible dipping sauce you made earlier. Get ready for the applause!
Substitutions & Additions
This recipe is fantastic as is, but here are a few ways you can make it your own:
- Spice it Up: If you love a little extra heat, add a pinch more cayenne pepper to the dipping sauce or a touch of smoked paprika to the dry coating for a smoky twist.
- Herbal Notes: Finely chopped fresh parsley or chives can be added to the dipping sauce for a fresh, herby flavor.
- Different Onions: While Vidalia is ideal, sweet onions like Walla Walla or even yellow onions can work in a pinch, though they might have a slightly sharper flavor.
- Gluten-Free Option: Try a gluten-free all-purpose flour blend and ensure your cornstarch is also gluten-free.
Tips for Success
A few little secrets to make sure your Awesome Blossom is truly awesome:
- Don’t Overcrowd the Pot: This is probably the most important tip! Frying too many onions at once will lower the oil temperature, resulting in greasy, soggy onion instead of crispy perfection. Fry in batches!
- Proper Oil Temperature: Use a thermometer to ensure your oil is at 350°F (175°C). If it’s too cool, it’ll absorb too much oil; too hot, and it’ll burn before it gets crispy.
- Root Intact is Key: For that beautiful blossom shape, try your best to keep the root end of the onion intact when you’re cutting it.
- Prep Ahead: You can make the dipping sauce a day in advance, which allows the flavors to meld beautifully. Just give it a good stir before serving.
How to Store It
This dish is best enjoyed immediately after frying while it’s still warm and crispy. Leftovers are rare, but if you do have some, store any cooled, fried onion pieces in an airtight container at room temperature for up to a day. They will lose their crispiness, but you can try reheating them in an oven or air fryer at a moderate temperature to revive them a bit. The dipping sauce can be stored in an airtight container in the refrigerator for up to 3-4 days.
FAQs
Q: Can I make this ahead of time?
A: The dipping sauce can be made a day ahead. The onion is best fried right before serving for maximum crispiness.
Q: What if my onion separates into rings?
A: Don’t worry at all! Rings are perfectly delicious and still fry up beautifully. The dipping and frying process is the same.
Q: My onion didn’t get super crispy. What did I do wrong?
A: This is usually due to the oil not being hot enough or overcrowding the pot. Make sure your oil is at 350°F (175°C) and fry in small batches.
Q: Can I bake this instead of frying?
A: While you won’t get the exact same crispy texture, you could try coating the onion and baking it on a greased baking sheet at around 400°F (200°C) until golden brown, flipping halfway through. It will be a healthier, but different, version.

Awesome Blossom
Equipment
- Whisk
- Small bowl
- Knife
- Shallow dish for coating, pie plate works well
- Deep fryer or heavy-bottomed pot
- Spider strainer or two forks for handling the onion
- Wire rack set over a baking sheet for draining
Ingredients
Awesome Dipping Sauce
- 2 tablespoons mayonnaise
- 2 tablespoons sour cream
- 1.5 tablespoons ketchup
- 1.5 teaspoons prepared horseradish
- 0.5 teaspoon sweet paprika
- 0.25 teaspoon salt
- 0.125 teaspoon black pepper
- 0.125 teaspoon cayenne pepper optional
Crispy Fried Onion
- vegetable oil for frying, enough to generously cover onion
- 1 large Vidalia onion approximately 1 pound
- 1.5 cups all-purpose flour
- 2 tablespoons cornstarch for extra crispiness
- 1.5 teaspoons sweet paprika
- 1.5 teaspoons garlic powder
- 1.5 teaspoons salt
- 0.5 teaspoon black pepper
- 1.5 cups buttermilk 1.5-2 cups
Instructions
- In a small bowl, combine mayonnaise, sour cream, ketchup, prepared horseradish, sweet paprika, salt, black pepper, and cayenne pepper (if using). Stir until blended. Refrigerate.
- Slice off the top stem end and about ½ inch from the root end of the Vidalia onion, keeping the root intact. Make four evenly spaced cuts from about ¼ inch from the root end straight down towards the base, stopping just before the bottom. Gently peel back and separate layers to create a blossom shape. If it separates into rings, that's okay.
- In a shallow dish, whisk together all-purpose flour, cornstarch, sweet paprika, garlic powder, salt, and black pepper.
- Pour buttermilk into another shallow dish. Dip each onion petal or ring into the buttermilk, ensuring it's well coated. Let excess drip off.
- Transfer the buttermilk-coated onion to the dry flour mixture. Press and turn to coat thoroughly. Gently shake off excess flour.
- Heat vegetable oil in a deep fryer or heavy-bottomed pot over medium-high heat to 350°F (175°C). Carefully place the coated onion into the hot oil. Fry for 3-5 minutes, or until golden brown and crispy, being careful not to overcrowd the pot. Fry in batches if necessary.
- Carefully remove the fried onion from the oil and place on a wire rack set over a baking sheet to drain excess oil. Serve immediately with the prepared dipping sauce.