Introduction
Oh, friends, do you remember those days when you just needed something warm, comforting, and bursting with flavor? Maybe it was a chilly evening, or perhaps you were craving that perfect side dish to make any meal feel extra special. Well, get ready, because today we’re diving into a recipe that’s pure gold: Homemade Cheesy Garlic Biscuits! These aren’t just biscuits; they’re little clouds of cheesy, garlicky goodness that practically melt in your mouth. The best part? They’re surprisingly simple to whip up, meaning you can have this slice of heaven on your table in no time.
Why You’ll Love This Recipe
- Fast: From start to finish, these come together in a flash. Perfect for when you need a quick fix!
- Easy: Seriously, if you can whisk and stir, you can make these. No fancy skills required.
- Giftable: Bake a batch and share the love! They’re a thoughtful homemade gift for neighbors, friends, or family.
- Crowd-Pleasing: Who can resist cheesy garlic anything? These disappear fast at potlucks, family dinners, or just because.

Ingredients
Let’s gather our treasures. Having everything measured out makes the process so smooth. Trust me on this!
- 2 cups All-Purpose Flour: Your classic biscuit base.
- 2 teaspoons Baking Powder: This is what gives us that lovely lift and fluffy texture.
- 1/2 teaspoon Baking Soda: Works with the baking powder for extra puffiness.
- 1/2 teaspoon Salt: Enhances all those delicious flavors.
- 1 teaspoon Sugar: Just a touch to balance things out and help with browning.
- 1/2 cup Cold Butter (preferably frozen): This is key for flaky biscuits! Cold butter creates steam pockets when it bakes. I like to pop my butter in the freezer for about 15 minutes before I start.
- 1 cup Buttermilk: Adds a wonderful tang and tenderness. If you don’t have buttermilk, you can make your own by adding 1 tablespoon of white vinegar or lemon juice to regular milk and letting it sit for 5-10 minutes.
- 3/4 cup Shredded Cheddar Cheese: Get ready for that gooey, cheesy magic!
- 1/4 to 1/2 teaspoon Garlic Powder: Adjust this to your garlic-loving heart’s content.
- 4 Tablespoons Melted Butter (for brushing on top): The final touch that makes them extra special and adds that beautiful sheen.
How to Make It
Alright, apron on, let’s get baking! You’ve got this.
- Preheat Your Oven: First things first, get that oven preheating to 400°F (200°C). You want it nice and hot so those biscuits get a good puff right away.
- Whisk the Dry Stuff: Grab a big bowl and whisk together the flour, baking powder, baking soda, salt, and sugar. Give it a good mix so everything is evenly distributed.
- Cut in the Cold Butter: Now for the magic! Add your cold, cubed butter to the dry ingredients. You can use a pastry blender, two forks, or even your fingertips. The goal is to cut the butter into the flour until the mixture looks like coarse crumbs, with some pea-sized pieces of butter still visible. Don’t overwork it!
- Stir in the Flavor: Toss in your shredded cheddar cheese and garlic powder. Give it another gentle stir to distribute them throughout the crumbly mixture.
- Add the Buttermilk: Make a little well in the center of your dry ingredients. Pour in the buttermilk. Stir everything together with a fork or spatula until it just comes together. Be super careful not to overmix here! A few dry bits are okay; overmixing develops the gluten too much, which can make your biscuits tough.
- Gentle Kneading: Lightly flour a clean surface. Turn your shaggy dough out onto it. Gently knead it just a few times – maybe 4 or 5 turns – to bring it together. We’re not making bread here, so keep it light!
- Pat it Out: Pat the dough into a round or rectangle about 1-inch thick. You can use your hands or a rolling pin, but keep it gentle.
- Cut ‘Em Out: Now for the fun part! Use a biscuit cutter to cut out your biscuits. If you don’t have a cutter, you can just use a knife to cut them into squares or wedges. I like to press straight down with the cutter – no twisting! Twisting can seal the edges and prevent a good rise.
- Bake ‘Em Up: Place your cut biscuits onto an ungreased baking sheet. Give them a little space so they can puff up nicely. Pop them into your preheated oven and bake for 12-15 minutes, or until they’re beautifully golden brown on top and cooked through.
- The Grand Finale: As soon as those gorgeous biscuits come out of the oven, brush the tops generously with the melted butter. Oh, that aroma!
Substitutions & Additions
Want to jazz things up or work with what you have? I love getting creative in the kitchen!
- Herbs: Add a teaspoon of fresh chopped chives or parsley to the dough along with the cheese for an extra burst of freshness.
- Cheese: Feel free to swap cheddar for Monterey Jack, Colby Jack, or even a sprinkle of Parmesan for a different cheesy profile.
- Spice: A pinch of red pepper flakes can add a little warmth for those who like a hint of heat.
- Garlic Love: If you’re a true garlic devotee, you could even mince a clove of fresh garlic and add it to the melted butter before brushing the biscuits.
Tips for Success
A few little tricks can make all the difference between good biscuits and amazing biscuits.
- Keep it Cold: The colder your butter and buttermilk, the flakier your biscuits will be.
- Don’t Overmix: This is probably the most important tip! Overmixing develops the gluten and makes biscuits tough. Stop stirring as soon as the ingredients are just combined.
- Don’t Twist the Cutter: Press straight down with your biscuit cutter to help them rise tall and proud.
- Prep Ahead: You can cut out the biscuit dough and place them on the baking sheet, cover them loosely with plastic wrap, and refrigerate for up to a few hours before baking.
How to Store It
These biscuits are best enjoyed fresh, but if you happen to have leftovers (which is rare in my house!), here’s how to store them.
Once completely cooled, store them in an airtight container or a zip-top bag at room temperature for up to 2 days. For longer storage, you can wrap them tightly and freeze them for up to 1 month. To reheat, wrap them in foil and warm them in a 350°F (175°C) oven for about 5-10 minutes, or until warmed through.
FAQs
Got questions? I’ve got answers!
Q: Can I use regular milk instead of buttermilk?
A: Yes, you can! For every cup of buttermilk needed, use 1 cup of regular milk mixed with 1 tablespoon of white vinegar or lemon juice. Let it sit for 5-10 minutes until it looks slightly curdled.
Q: How do I get my biscuits to rise higher?
A: Ensure your baking powder is fresh, don’t overmix the dough, and use cold butter. Baking them at a hot temperature also helps with a quick rise.
Q: Can I make these biscuits ahead of time?
A: You can definitely cut out the dough ahead of time and store it in the refrigerator. For the best texture, it’s usually best to bake them the same day you mix the dough.
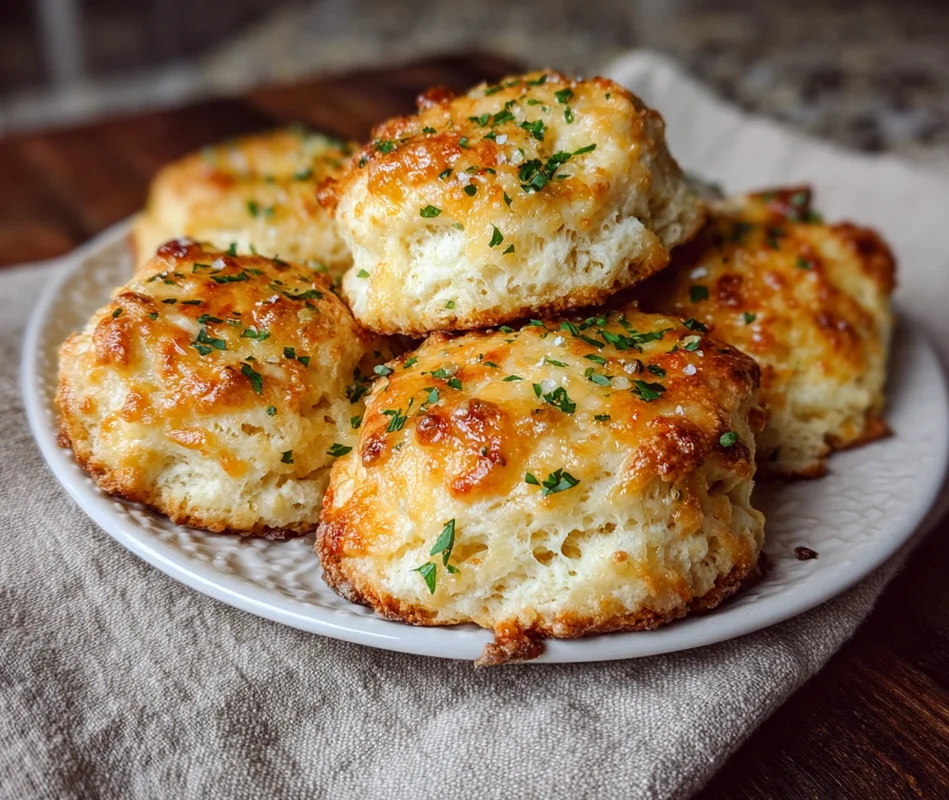
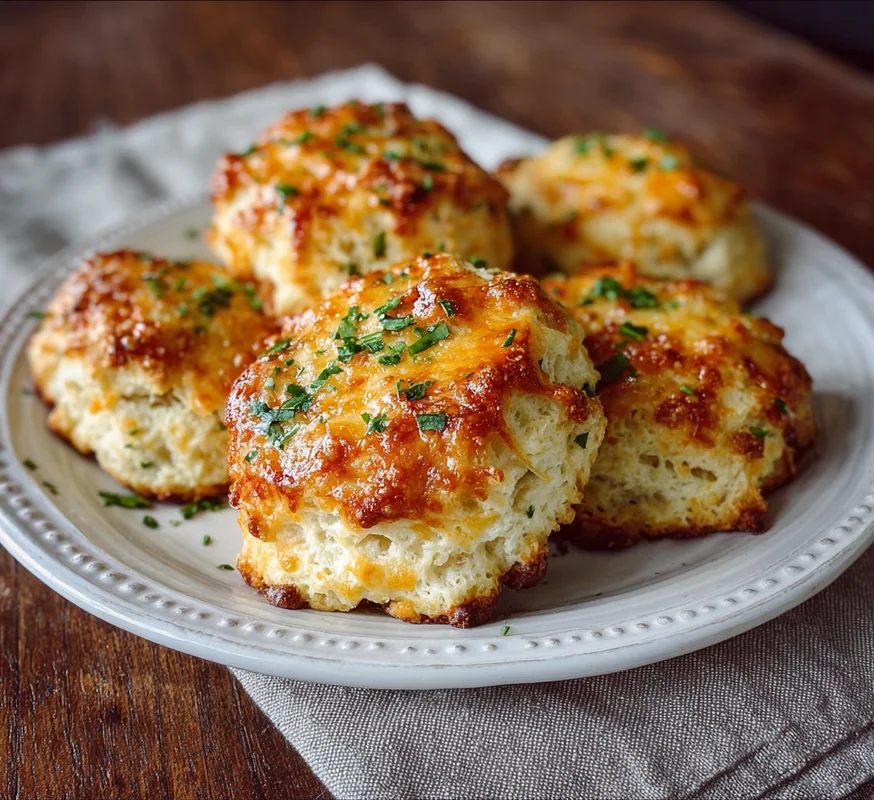
Cheesy Garlic Biscuits

Homemade Cheesy Garlic Biscuits are warm, comforting, and bursting with flavor. These little clouds of cheesy, garlicky goodness are surprisingly simple to whip up and melt in your mouth.
- Large bowl
- pastry blender
- Fork or spatula
- Clean surface
- biscuit cutter
- Baking Sheet
Dry Ingredients
- 2 cups All-Purpose Flour
- 2 teaspoons Baking Powder
- 0.5 teaspoon Baking Soda
- 0.5 teaspoon Salt
- 1 teaspoon Sugar
Wet Ingredients & Flavor
- 0.5 cup Cold Butter (preferably frozen, cubed)
- 1 cup Buttermilk (or homemade buttermilk substitute)
- 0.75 cup Shredded Cheddar Cheese
- 0.25 teaspoon Garlic Powder (adjust to taste, up to 1/2 teaspoon)
For Brushing
- 4 tablespoons Melted Butter
- Preheat oven to 400°F (200°C).
- Whisk together flour, baking powder, baking soda, salt, and sugar in a large bowl.
- Cut cold butter into the dry ingredients until the mixture resembles coarse crumbs with some pea-sized butter pieces.
- Stir in shredded cheddar cheese and garlic powder.
- Pour buttermilk into the center and stir until ingredients just come together. Do not overmix.
- Gently knead the dough a few times on a lightly floured surface.
- Pat the dough into a 1-inch thick round or rectangle.
- Cut out biscuits using a biscuit cutter or knife. Press straight down, do not twist.
- Place biscuits on an ungreased baking sheet and bake for 12-15 minutes, until golden brown.
- Brush the tops generously with melted butter as soon as they come out of the oven.
For flakier biscuits, ensure butter and buttermilk are very cold. Avoid overmixing the dough. Press straight down with the biscuit cutter instead of twisting. Dough can be cut and refrigerated for a few hours before baking. Store cooled biscuits in an airtight container at room temperature for up to 2 days, or freeze for up to 1 month.