Introduction
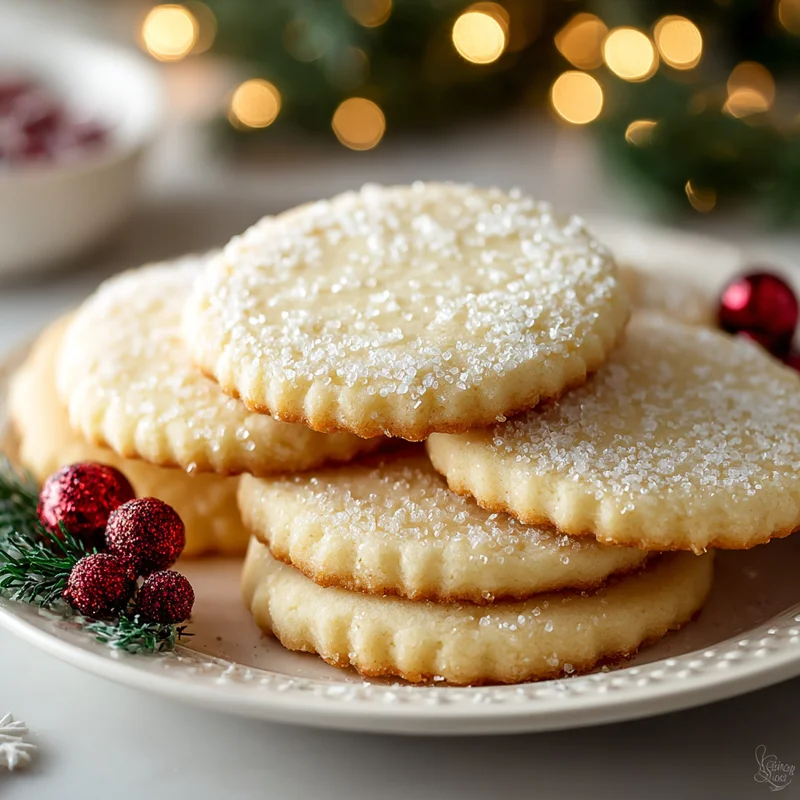
Oh, the scent of classic sugar cookies baking in the oven! Does anything bring back those cozy childhood memories quite like it? I can almost feel the warmth of my grandma’s kitchen, the joy of decorating those simple, sweet treats. And guess what? You can recreate that magic right in your own home, with a recipe that’s so straightforward, you’ll be wondering why you haven’t made them sooner. These aren’t just any sugar cookies; they’re the kind that melt in your mouth, with that perfect balance of sweet and buttery. Ready to bake up some happiness?
Why You’ll Love This Recipe
- Fast: From start to finish, you can have these cookies ready to enjoy in under an hour!
- Easy: Seriously, if you can stir ingredients together, you can make these cookies. No fancy techniques needed!
- Giftable: Pack them in a cute tin or bag, and you’ve got an instant, heartfelt gift for neighbors, friends, or colleagues.
- Crowd-pleasing: Who doesn’t love a good sugar cookie? They’re a guaranteed hit at parties, bake sales, or just a regular Tuesday.
Ingredients
Let’s gather up what you’ll need for these delightful cookies. Keep it simple, keep it sweet!
- 1 cup unsalted butter, softened: Make sure your butter isn’t cold from the fridge. Softened means it’s pliable enough to cream easily.
- 1 cup granulated sugar: This is the sweet backbone of our cookies.
- 1 large egg: Helps bind everything together and adds a little richness.
- 1 teaspoon vanilla extract: The secret to that comforting, classic flavor. Use a good quality one if you have it!
- 2 ½ cups all-purpose flour: The foundation of our cookie dough.
- ½ teaspoon baking powder: Just a touch to give them a little lift without making them cakey.
- ¼ teaspoon salt: Balances out the sweetness and enhances all the other flavors.
How to Make It
Alright, apron on? Let’s get baking! Follow these simple steps, and you’ll be smelling those delicious cookies in no time.
- Cream the butter and sugar: In a large bowl, beat together your softened butter and granulated sugar. You want to do this until the mixture looks light, fluffy, and pale yellow. This is a super important step for a tender cookie! A stand mixer makes this a breeze, but your trusty hand mixer or even a strong arm and a whisk will work.
- Add the wet ingredients: Now, beat in your egg and vanilla extract. Mix until everything is beautifully combined.
- Whisk the dry ingredients: In a separate, medium-sized bowl, give your flour, baking powder, and salt a good whisk together. This ensures they’re evenly distributed, so you don’t get pockets of baking powder or salt in your cookies.
- Combine wet and dry: Gradually add the dry ingredients to your wet ingredients. Mix on low speed (or stir gently with a spatula) until just combined. Overmixing can lead to tough cookies, so be gentle here!
- Chill the dough: This is a crucial step for easy handling and perfect shape. Wrap your dough in plastic wrap and pop it in the refrigerator for at least 30 minutes. You can even chill it for a couple of days if you like!
- Preheat your oven: While the dough is chilling, preheat your oven to 375°F (190°C). Line your baking sheets with parchment paper for easy cleanup and to prevent sticking.
- Roll and cut: Once the dough is chilled, it’s time for the fun part! Lightly flour your work surface and rolling pin. Roll the dough out to about ¼-inch thickness. Use your favorite cookie cutters to create all sorts of shapes!
- Bake to perfection: Carefully place your cut cookies onto the prepared baking sheets, leaving a little space between them. Bake for 8-10 minutes, or until the edges are just starting to turn a light golden brown. Keep an eye on them, as ovens can vary!
- Cool down: Let the cookies rest on the baking sheets for a few minutes. This allows them to set up a bit. Then, gently transfer them to a wire rack to cool completely. Resist the urge to decorate them while they’re warm – the frosting will just melt off!
Substitutions & Additions
Want to put your own spin on these classic cookies? Here are a few ideas!
- Almond Extract: Swap out half of the vanilla extract for almond extract for a lovely subtle flavor.
- Citrus Zest: Add the zest of one lemon or orange to the dough for a bright, fresh twist.
- Sprinkles: Mix some colorful sprinkles directly into the dough for a festive look!
- Decorations: Once cooled, have fun decorating with royal icing, buttercream, or even just a dusting of powdered sugar.
Tips for Success
A few little tricks can make all the difference!
- Don’t overmix: I know I said it before, but it’s worth repeating! Overmixing develops the gluten in the flour, making your cookies tough.
- Chill, chill, chill: If your dough feels sticky or hard to handle, pop it back in the fridge for another 15-20 minutes. Patience pays off!
- Even thickness: Try to roll your dough as evenly as possible so all your cookies bake at the same rate.
- Prep ahead: You can make the dough a day or two in advance and keep it chilled. Just let it soften for a few minutes before rolling.
How to Store It
Once your beautiful sugar cookies are completely cool, you’ll want to store them properly to keep them tasting their best.
Store them in an airtight container at room temperature. They’ll stay wonderfully fresh for up to 5-7 days. If you’ve decorated them with a lot of frosting, you might want to add a layer of parchment paper between the layers of cookies to prevent the frosting from sticking.
FAQs
Got a quick question? I’ve got you covered!
Q: Why are my sugar cookies spreading too much?
A: This usually happens if the butter is too soft, the dough isn’t chilled enough, or you’ve added too much sugar. Make sure your butter is just softened and chill the dough thoroughly!
Q: Can I freeze sugar cookie dough?
A: Absolutely! Shape the dough into a disc, wrap it tightly in plastic wrap, and then place it in a freezer-safe bag. It will keep for up to 3 months. Thaw it in the refrigerator overnight before using.
Q: How long do sugar cookies last?
A: Un-decorated sugar cookies stored in an airtight container at room temperature will stay fresh and delicious for about 5-7 days. Decorated cookies might have a slightly shorter shelf life depending on the frosting.

Classic Sugar Cookies
Equipment
- Large bowl
- Medium-sized bowl
- Stand Mixer or hand mixer/whisk
- Hand mixer optional
- Whisk
- Spatula
- Plastic wrap
- Baking sheets
- Parchment paper
- Rolling Pin
- Cookie cutters
- Wire rack
- Airtight container
Ingredients
Main ingredients
- 1 cup unsalted butter softened
- 1 cup granulated sugar
- 1 large egg
- 1 teaspoon vanilla extract
- 2.5 cups all-purpose flour
- 0.5 teaspoon baking powder
- 0.25 teaspoon salt
Instructions
- In a large bowl, beat together your softened butter and granulated sugar until the mixture looks light, fluffy, and pale yellow.
- Beat in your egg and vanilla extract until everything is beautifully combined.
- In a separate, medium-sized bowl, whisk together your flour, baking powder, and salt.
- Gradually add the dry ingredients to your wet ingredients. Mix on low speed or stir gently with a spatula until just combined.
- Wrap your dough in plastic wrap and refrigerate for at least 30 minutes.
- Preheat your oven to 375°F (190°C). Line your baking sheets with parchment paper.
- Lightly flour your work surface and rolling pin. Roll the dough out to about ¼-inch thickness. Use your favorite cookie cutters to create shapes.
- Place your cut cookies onto the prepared baking sheets. Bake for 8-10 minutes, or until the edges are just starting to turn a light golden brown.
- Let the cookies rest on the baking sheets for a few minutes. Gently transfer them to a wire rack to cool completely.