Introduction
Oh, the smell of pumpkin spice! Does anything say “fall” quite like it? I have such fond memories of baking with my mom when I was a kid, and pumpkin cookies were always a highlight of the season. They just wrap you up in a warm, cozy hug, don’t they? Today, I’m so excited to share a recipe for Pumpkin Crinkle Cookies that’s not only incredibly delicious but also surprisingly simple to make. Get ready for a treat that’s perfect for sharing (or not!) and will fill your kitchen with the most wonderful aroma.
Why You’ll Love This Recipe
- Fast: These cookies come together in a flash, perfect for those spontaneous baking urges!
- Easy: Seriously, even if you’re new to baking, you can totally master these.
- Giftable: Package them up in a cute tin, and you’ve got the perfect homemade gift.
- Crowd-pleasing: From kids to grown-ups, everyone falls in love with these soft, sweet delights.
Ingredients
Let’s gather our goodies! Don’t worry, most of these are pantry staples. I’ve added a little note on each one to help you out.
- 1 cup pumpkin puree: Make sure you’re using plain pumpkin puree, not pumpkin pie filling, which already has spices and sugar.
- 2 cups all-purpose flour: Your trusty all-purpose flour will do the trick here.
- 1 teaspoon baking powder: This is what helps our cookies get a little lift.
- 1/2 teaspoon baking soda: Another leavening agent that works with the acidity in the pumpkin.
- 1/2 teaspoon salt: Just a pinch to balance all that sweetness and bring out the flavors.
- 1 teaspoon ground cinnamon: The star of our fall spice show!
- 1/2 teaspoon ground ginger: Adds a little warmth and zing.
- 1/4 teaspoon ground nutmeg: A classic for a reason.
- 1/4 teaspoon ground cloves: Just a whisper to deepen the spice flavor.
- 1/2 cup unsalted butter, softened: Let it sit on the counter for a bit so it’s easy to cream.
- 1 cup granulated sugar: For that classic cookie sweetness.
- 1/2 cup packed brown sugar: This adds a lovely chewiness and a hint of molasses flavor.
- 1 large egg: Our binder and enricher!
- 1 teaspoon vanilla extract: Because everything is better with a touch of vanilla.
- 1/2 cup powdered sugar: This is for that magical crinkly coating.
How to Make It
Alright, let’s get our aprons on and make some magic happen! It’s easier than you think.
- Whisk Up Your Dry Ingredients: Grab a medium bowl and whisk together your flour, baking powder, baking soda, salt, cinnamon, ginger, nutmeg, and cloves. Give it a good whisk until everything is nicely combined. Set this bowl aside for now.
- Cream the Butter and Sugars: In a large bowl (this is where all the action happens!), cream together your softened butter with the granulated sugar and packed brown sugar. You want this mixture to become light and fluffy. If you have an electric mixer, this is where it shines, but a sturdy whisk and some elbow grease work too!
- Add the Wet Ingredients: Now, beat in your large egg and the vanilla extract. Mix until everything is beautifully incorporated.
- Introduce the Pumpkin: Stir in the pumpkin puree until it’s fully mixed into the batter. It will turn a lovely shade of orange!
- Combine Wet and Dry: This is a crucial step! Gradually add the dry ingredients you set aside earlier into the wet ingredients. Mix until just combined. Seriously, don’t go overboard here. Overmixing can make your cookies tough, and we want soft and chewy!
- Get Ready for the Crinkle: Pour your powdered sugar into a small, shallow bowl. This is going to be our magic dust!
- Shape Your Cookies: Take about a rounded tablespoon of dough and roll it into a ball between your palms.
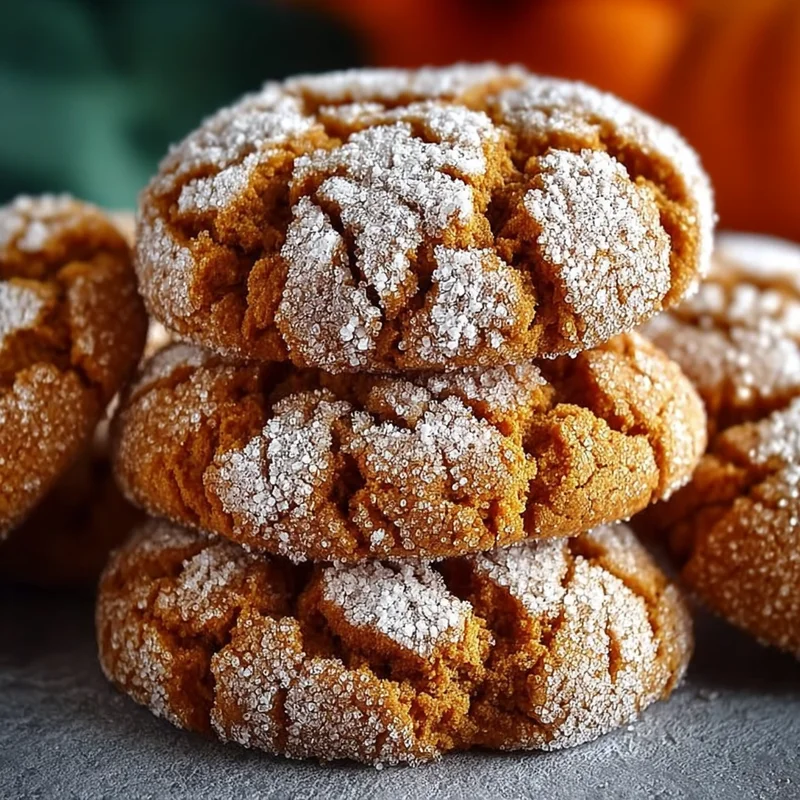
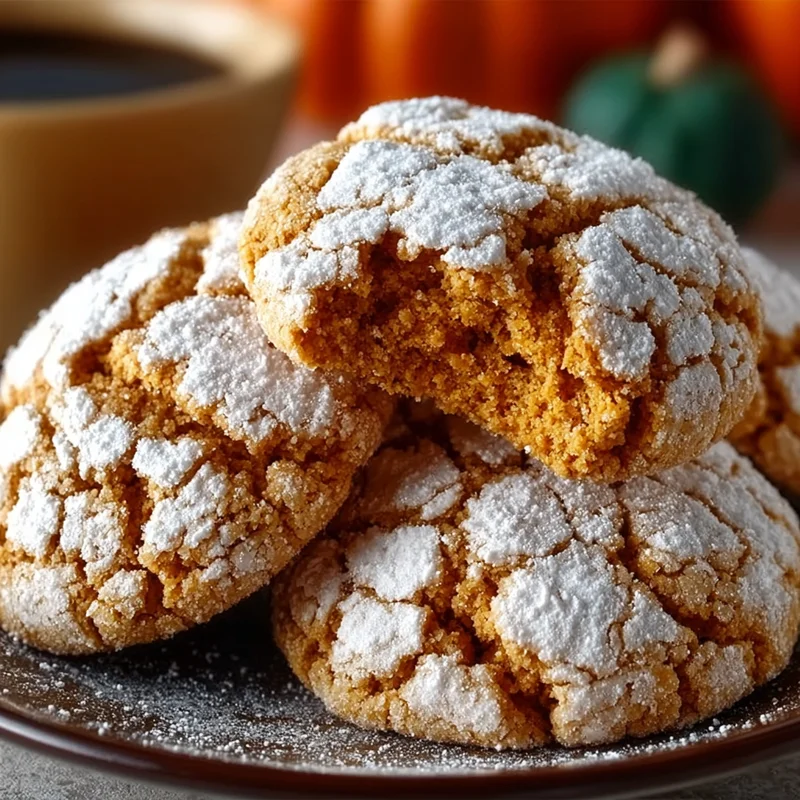
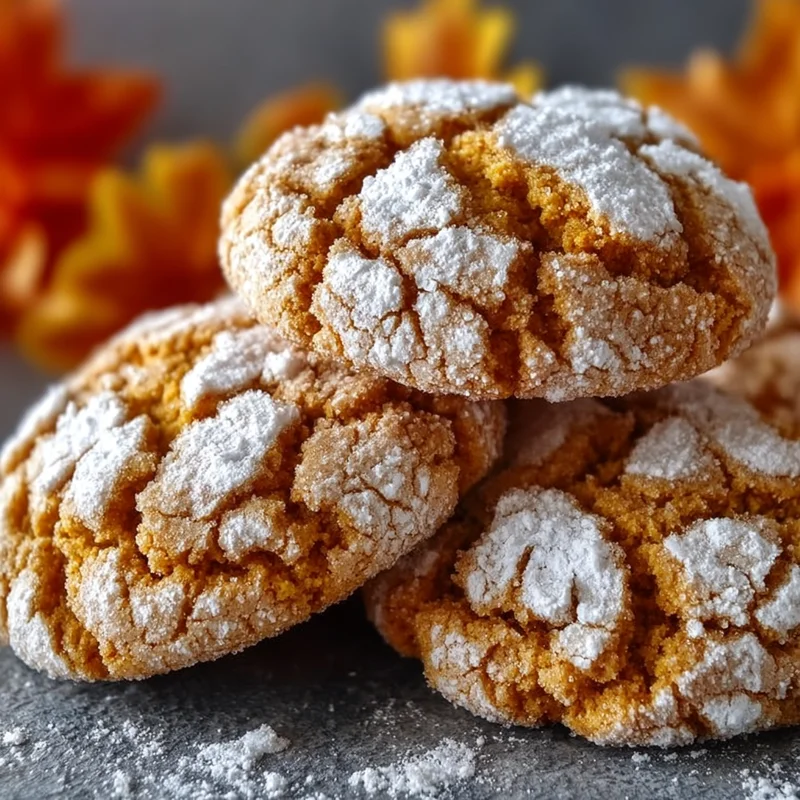
- Coat Them in Snow: Roll each dough ball generously in the powdered sugar. Make sure it’s fully coated – this is what gives us those beautiful crinkles!
- Arrange on the Baking Sheet: Place your perfectly sugared dough balls onto a baking sheet that you’ve lined with parchment paper. Give them about 2 inches of space between each one, as they will spread a little.
- Bake to Perfection: Pop these into your preheated oven at 350°F (175°C). Bake for about 10-12 minutes. You’re looking for the edges to be set, but the centers should still look a little soft. They’ll firm up as they cool.
- Cool Down Time: Let the cookies cool on the baking sheet for a few minutes. This helps them set up. Then, carefully transfer them to a wire rack to cool completely. Enjoy that amazing smell!
Substitutions & Additions
Feeling a little adventurous? Here are some ways you can make these cookies your own:
- Spice it Up: If you’re a big spice fan, feel free to add an extra pinch of cinnamon or ginger. You could even add a touch of allspice!
- Chocolate Lovers: A handful of mini chocolate chips stirred into the dough before baking would be divine.
- Nutty Goodness: Chopped pecans or walnuts folded into the dough add a lovely crunch.
- Cream Cheese Glaze: For an extra decadent treat, whip up a simple cream cheese glaze (powdered sugar, a little cream cheese, and a splash of milk) and drizzle it over the cooled cookies.
- Different Sugar Coating: Instead of powdered sugar, you could try rolling them in turbinado sugar for a bit of sparkle and crunch.
Tips for Success
A few little tricks can ensure your cookies turn out perfectly every time.
- Don’t Overmix the Dough: I know I said it before, but it’s worth repeating! Overmixing develops the gluten in the flour, leading to tough cookies. Mix until just combined.
- Chill the Dough (Optional but Recommended): If your dough seems a little too sticky to handle, you can pop the bowl in the refrigerator for about 30 minutes before rolling. This makes it firmer and easier to work with.
- Uniform Size Matters: Try to make your cookie dough balls all about the same size. This ensures they bake evenly. A cookie scoop is your best friend here!
- Watch Them Closely: Ovens can be quirky! Keep an eye on your cookies during the last few minutes of baking. You want them baked but not overdone.
- Prep Ahead: You can make the cookie dough balls, roll them in powdered sugar, and place them on a baking sheet lined with parchment paper. Then, cover the sheet tightly with plastic wrap and refrigerate for up to 2 days, or freeze them for up to 2 months. Just bake them straight from frozen, adding a couple of extra minutes to the baking time.
How to Store It
Once your cookies have cooled completely, you’ll want to store them properly to keep them fresh and delicious.
Store your Pumpkin Crinkle Cookies in an airtight container at room temperature. They should stay wonderfully soft and tasty for about 3-4 days. If you stacked them, place parchment paper between layers to prevent sticking.
FAQs
Here are a few common questions I get about these yummy cookies:
Q: Can I use fresh pumpkin instead of canned?
A: While you can use fresh pumpkin, I highly recommend using canned pumpkin puree. Fresh pumpkin often has a lot more water content, which can make your dough too wet and affect the cookie’s texture. If you do use fresh, make sure to cook it down and drain off as much moisture as possible first.
Q: Why didn’t my cookies crinkle?
A: The crinkles come from the cookie spreading as it bakes and the powdered sugar coating cracking. Make sure you’re rolling the dough balls thoroughly in the powdered sugar before baking. Also, not overmixing the dough and baking them until the edges are set but the centers are soft will help achieve those beautiful cracks!
Q: Can I make these gluten-free?
A: Yes, you can! You’ll likely need to use a good quality gluten-free all-purpose flour blend that contains xanthan gum. You might need to adjust the liquid slightly, so start with the recommended amount and add a tiny bit more if the dough seems too dry.

Pumpkin Crinkle Cookies
Equipment
- Medium bowl for dry ingredients
- Large bowl for wet ingredients and mixing
- Electric mixer optional, for creaming butter and sugars
- Whisk for dry ingredients and creaming
- Small shallow bowl for powdered sugar coating
- Baking Sheet lined with parchment paper
- Parchment paper for lining baking sheets
- Wire rack for cooling
- Airtight container for storage
- Cookie scoop recommended for uniform size
Ingredients
Dry Ingredients
- 2 cups all-purpose flour Your trusty all-purpose flour will do the trick here.
- 1 teaspoon baking powder This is what helps our cookies get a little lift.
- 0.5 teaspoon baking soda Another leavening agent that works with the acidity in the pumpkin.
- 0.5 teaspoon salt Just a pinch to balance all that sweetness and bring out the flavors.
- 1 teaspoon ground cinnamon The star of our fall spice show!
- 0.5 teaspoon ground ginger Adds a little warmth and zing.
- 0.25 teaspoon ground nutmeg A classic for a reason.
- 0.25 teaspoon ground cloves Just a whisper to deepen the spice flavor.
Wet Ingredients
- 0.5 cup unsalted butter softened. Let it sit on the counter for a bit so it's easy to cream.
- 1 cup granulated sugar For that classic cookie sweetness.
- 0.5 cup packed brown sugar This adds a lovely chewiness and a hint of molasses flavor.
- 1 large egg Our binder and enricher!
- 1 teaspoon vanilla extract Because everything is better with a touch of vanilla.
- 1 cup pumpkin puree Make sure you're using plain pumpkin puree, not pumpkin pie filling, which already has spices and sugar.
For Coating
- 0.5 cup powdered sugar This is for that magical crinkly coating.
Instructions
- Whisk together your flour, baking powder, baking soda, salt, cinnamon, ginger, nutmeg, and cloves in a medium bowl. Set aside.
- In a large bowl, cream together softened butter, granulated sugar, and packed brown sugar until light and fluffy.
- Beat in the egg and vanilla extract until incorporated.
- Stir in the pumpkin puree until fully mixed into the batter.
- Gradually add the dry ingredients to the wet ingredients and mix until just combined. Do not overmix.
- Pour powdered sugar into a small, shallow bowl.
- Roll about a rounded tablespoon of dough into a ball.
- Roll each dough ball generously in the powdered sugar until fully coated.
- Place the sugared dough balls onto a parchment-lined baking sheet, about 2 inches apart.
- Bake at 350°F (175°C) for 10-12 minutes, or until the edges are set and the centers are still soft.
- Let the cookies cool on the baking sheet for a few minutes before transferring to a wire rack to cool completely.