Introduction
Oh, the cozy vibes of autumn! There’s something truly magical about the crisp air, the changing leaves, and the comforting aromas that fill the kitchen. And speaking of comforting aromas, have you ever experienced the pure joy of roasted butternut squash? It’s one of those recipes that instantly transports me back to simpler times, perhaps a Thanksgiving gathering or a chilly weeknight dinner. This Brown Sugar Roasted Butternut Squash recipe is ridiculously easy, super quick, and I promise, it’ll become a staple in your fall cooking repertoire. Get ready to fall in love!
Why You’ll Love This Recipe
- Fast: From pantry to plate in under 45 minutes, perfect for busy weeknights!
- Easy: Seriously, if you can chop a squash, you can make this. No fancy skills needed!
- Giftable: While this dish is best enjoyed fresh, the components are so simple, it’s a great dish to share at potlucks or bring to a friend.
- Crowd-pleasing: Even picky eaters can’t resist the sweet, caramelized goodness. It’s a side dish that disappears fast!
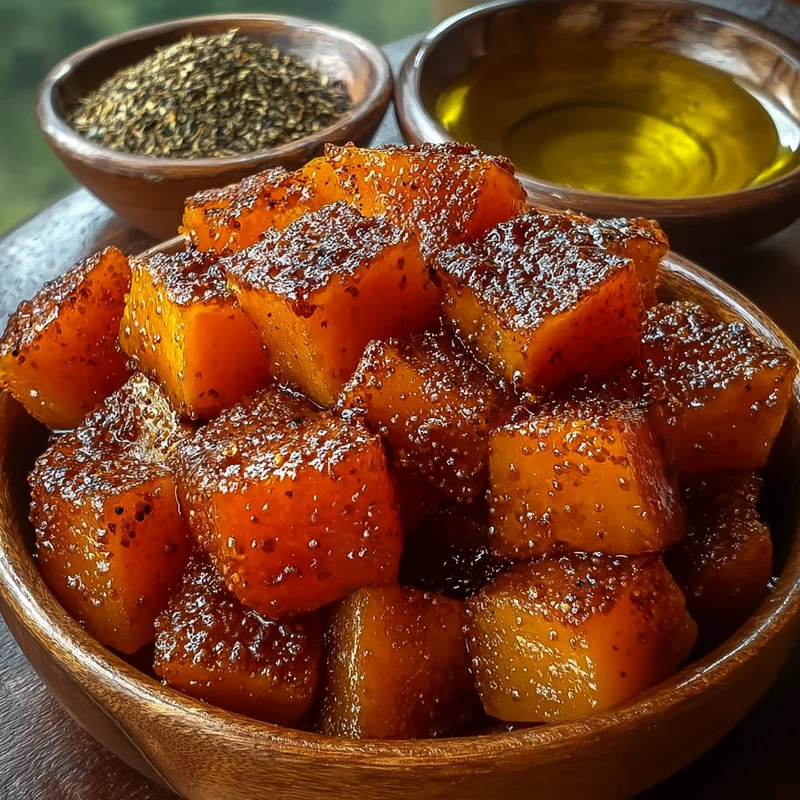
Ingredients
Gather ’round, friends, because this recipe calls for just a handful of simple, wholesome ingredients. You probably already have most of them in your pantry!
- 1 medium butternut squash: This is our star! Look for one that feels heavy for its size and has a smooth, deep tan skin.
- 2 tablespoons olive oil: Our binder and flavor enhancer. Extra virgin olive oil will give it a nice richness.
- 2 tablespoons brown sugar: This is where the magic happens! It caramelizes beautifully in the oven, creating that irresistible sweet crust.
- ½ teaspoon salt: Don’t skip this! Salt brings out all the natural sweetness of the squash.
- ¼ teaspoon black pepper: Just a little kick to balance the sweetness.
- ¼ teaspoon cinnamon: The quintessential fall spice that pairs perfectly with butternut squash.
How to Make It
Alright, apron on, let’s get cooking! This is so straightforward, you’ll be amazed at how delicious the result is.
- Preheat your oven: Get that oven nice and toasty to 400°F (200°C). It’s the perfect temperature for roasting.
- Prep your squash: This is the most “involved” step, but it’s a breeze! First, you’ll want to peel the butternut squash. I find a good vegetable peeler works best. Then, slice it in half lengthwise and scoop out all those seedy bits from the center. Finally, chop the squash into lovely 1-inch cubes. Try to keep them roughly the same size so they cook evenly.
- Get them seasoned: Grab a large bowl. Toss those beautiful squash cubes with the olive oil, brown sugar, salt, pepper, and cinnamon. Make sure every single piece is coated in this glorious mixture. This is where all that amazing flavor starts to develop!
- Spread them out: Line a baking sheet with parchment paper (for easy cleanup, trust me!). Then, spread your seasoned squash in a single layer on the baking sheet. This is important! Don’t overcrowd the pan, or your squash will steam instead of roast, and we want those lovely caramelized edges.
- Roast to perfection: Pop that baking sheet into your preheated oven. Roast for about 25-30 minutes. About halfway through, give those squash cubes a gentle flip. You’re looking for them to be fork-tender and have those beautiful, slightly browned, caramelized edges. Oh, the smell that will fill your kitchen will be heavenly!
Substitutions & Additions
While this recipe is fantastic as is, don’t be afraid to get creative! Here are a few ideas to jazz it up:
- Spice it up: Love a little heat? Add a pinch of cayenne pepper or a dash of smoked paprika.
- Herbal notes: Fresh herbs like rosemary or thyme are wonderful additions. Toss them in with the squash before roasting.
- Maple magic: Swap the brown sugar for maple syrup for a slightly different, but equally delicious, sweetness.
- Nutty crunch: Once roasted, toss with some toasted pecans or walnuts for added texture.
- Savory twist: If you’re leaning more savory, skip the brown sugar and cinnamon and go with garlic powder, onion powder, and your favorite herbs.
Tips for Success
Here are a few little secrets I’ve picked up along the way to make your roasted butternut squash absolutely perfect every time:
- Uniform cubes: As I mentioned, try to cut your squash into similar-sized pieces. This ensures everything cooks evenly. No one likes a mushy piece next to a rock-hard one!
- Don’t overcrowd the pan: I can’t stress this enough! Give your squash space to breathe and caramelize. If you have too much, use two baking sheets.
- Adjust roasting time: Ovens can be a little finicky! Keep an eye on your squash towards the end of the cooking time. It might be ready a little sooner or need a few extra minutes. A fork should easily pierce a cube when it’s done.
- Prep ahead: You can absolutely peel, seed, and cube your butternut squash a day in advance. Store the cubes in an airtight container in the refrigerator. Just toss them with the seasoning and roast when you’re ready to eat!
How to Store It
This roasted butternut squash is truly best enjoyed fresh out of the oven when it’s warm and caramelized. However, if you happen to have any leftovers (which is rare in my house!), here’s how to store them:
- Let the roasted squash cool completely.
- Transfer the cooled squash to an airtight container.
- Store in the refrigerator for up to 3-4 days.
- To reheat, you can gently warm it in a skillet over low heat, in a toaster oven, or in the microwave. It’s also delicious served cold or at room temperature in salads!
FAQs
Got a few lingering questions? Let’s tackle them!
Can I use a different type of squash?
Absolutely! Acorn squash or delicata squash would also work wonderfully. You might need to adjust the roasting time slightly depending on the thickness of the squash.
Why is my squash not caramelizing?
This usually happens when the squash is overcrowded on the baking sheet. Make sure there’s plenty of space between the pieces so the heat can circulate and caramelize the sugars.
Can I make this ahead of time and freeze it?
While you can technically freeze roasted squash, the texture can become a bit mushy upon thawing. It’s best enjoyed fresh or stored in the refrigerator for a few days.
Is this recipe good for meal prep?
Yes! Roasted butternut squash is fantastic for meal prep. Roast a big batch at the beginning of the week and add it to salads, grain bowls, or serve as a side dish throughout the week.
Brown Sugar Roasted Butternut Squash

A ridiculously easy, super quick, and comforting fall side dish that caramelizes beautifully in the oven, making it a crowd-pleasing favorite.
- Vegetable peeler
- Baking Sheet
- Large bowl
Main ingredients
- 1 medium butternut squash (peeled, halved lengthwise, seeds scooped out, and chopped into 1-inch cubes)
- 2 tablespoons olive oil (extra virgin recommended)
- 2 tablespoons brown sugar
- 0.5 teaspoon salt
- 0.25 teaspoon black pepper
- 0.25 teaspoon cinnamon
- Preheat your oven to 400°F (200°C).
- Peel the butternut squash, slice it in half lengthwise, scoop out the seeds, and chop into 1-inch cubes.
- In a large bowl, toss the squash cubes with olive oil, brown sugar, salt, pepper, and cinnamon until evenly coated.
- Line a baking sheet with parchment paper and spread the seasoned squash in a single layer, ensuring not to overcrowd the pan.
- Roast for 25-30 minutes, flipping the squash halfway through, until fork-tender and caramelized.
For easy cleanup, line your baking sheet with parchment paper. Ensure squash has space on the baking sheet to roast and caramelize instead of steam.