
Introduction
Hey there, friends! Are you ready to sink your teeth into something truly spectacular? We’re taking the classic comfort of a cheesesteak and giving it a fiery, tangy Buffalo chicken makeover. Seriously, this sandwich is a game-changer! It brings together all the things you love – spicy, savory chicken, melty cheese, and a creamy dressing finish – all tucked into a perfect roll.
This recipe is incredibly easy and surprisingly quick to whip up. It’s perfect for a busy weeknight when you crave something exciting, or as the star of the show for your next game day gathering. Trust me, once you make this Buffalo Chicken Cheesesteak, it’s going to become a regular in your rotation!
Why You’ll Love This Recipe
Here’s why this Buffalo Chicken Cheesesteak is about to become your new obsession:
- Fast: From skillet to sandwich in under 30 minutes! Perfect for those “what’s for dinner?!” moments.
- Easy: Simple steps, common ingredients. No fancy techniques required.
- Crowd-pleasing: Who can resist the combo of Buffalo flavor, chicken, and gooey cheese? It’s always a hit!
- Versatile: Easy to customize with your favorite cheese or veggies.

Ingredients
Gather your troops! Here’s what you’ll need to make this flavor-packed sandwich:
- 1 lb Boneless, skinless chicken breasts: The foundation of our sandwich! Slice these thinly or cut them into bite-sized pieces so they cook quickly and evenly.
- 3/8 cup Frank’s RedHot sauce: The essential ingredient for that classic Buffalo tang and heat. Feel free to use a little more if you love it extra saucy!
- 1/2 tsp Garlic powder, plus more for sprinkling: Adds that crucial savory depth. A little extra on the chicken never hurts!
- About 1/2 cup Pickled jalapeños, sliced: These add a fantastic vinegary kick and a pleasant warmth without being overpowering. Adjust the amount based on how much spice you like!
- 1/2 Yellow onion: Sliced thinly, this sweetens as it cooks and adds essential flavor to the mix.
- Ranch or blue cheese dressing: For drizzling, dipping, or both! Choose your favorite creamy partner – I’m usually team ranch for this one.
- 1/2 tsp Kosher salt: To season the chicken and bring out all the flavors.
- 4 Hoagie rolls: You need sturdy, delicious bread to hold all that goodness! Make sure they’re fresh.
- 3 tbsp Unsalted butter, plus more: For sautéing our veggies and getting our rolls perfectly golden and delicious.
- 4 slices Provolone cheese: The classic melting cheese for a cheesesteak. It gets wonderfully gooey! Feel free to add an extra slice per sandwich if you’re feeling extra cheesy.
How to Make It
Alright, let’s turn these simple ingredients into something magical! Follow these easy steps:
Step 1: Prep Your Ingredients. Slice your yellow onion thinly. If your chicken breasts are thick, slice them horizontally into thin cutlets, then cut those into strips or bite-sized pieces. Season the chicken lightly with a pinch of garlic powder and some kosher salt. Drain your pickled jalapeños.
Step 2: Sauté the Onions. Heat a large skillet or griddle over medium heat. Add about 1 tablespoon of the unsalted butter. Once melted, add the sliced onions and cook, stirring occasionally, until they are soft, translucent, and slightly golden – this usually takes about 5-7 minutes. Remove the onions from the pan and set them aside.
Step 3: Cook the Chicken. Add another tablespoon of butter to the same skillet. Increase the heat slightly if needed, but keep it around medium. Add the seasoned chicken pieces in a single layer if possible. Cook, stirring occasionally, until the chicken is cooked through and no longer pink. This should take about 5-8 minutes, depending on the size of your pieces.
Step 4: Bring on the Buffalo Flavor! Reduce the heat to low. Add the sautéed onions and the sliced pickled jalapeños back into the skillet with the cooked chicken. Pour in the 3/8 cup of Frank’s RedHot sauce and the remaining 1/2 tsp of kosher salt. Stir everything together gently until all the chicken and veggies are beautifully coated in the sauce. Let it simmer for just a minute or two to let the flavors meld and the sauce thicken slightly.
Step 5: Add the Cheese. Arrange the chicken and onion mixture into four even portions in the skillet (or just spread it out). Lay one slice of provolone cheese over each portion (or more!). You can cover the skillet with a lid for about 30 seconds to a minute, or just let the residual heat melt the cheese into gooey perfection.
Step 6: Prep and Toast the Rolls. While the cheese is melting, slice your hoagie rolls lengthwise, but don’t cut all the way through – you want them to open like a book. Spread the remaining unsalted butter (or more!) on the cut sides of the rolls. You can lightly toast the buttered sides in a separate pan or under the broiler for a minute or two until golden brown. This makes a huge difference in texture and flavor, and helps prevent a soggy sandwich!
Step 7: Assemble! Using a spatula, scoop the cheesy Buffalo chicken mixture from the skillet directly into the prepared hoagie rolls. Pile it high – you want a hearty sandwich!
Step 8: Drizzle and Serve. The finishing touch! Generously drizzle your chosen ranch or blue cheese dressing over the filling in each sandwich. Close the rolls and serve immediately. Prepare for happy moans!
Substitutions & Additions
Want to put your own spin on it? Go for it! This recipe is super flexible:
- Different Meat: Boneless, skinless chicken thighs work wonderfully here! They tend to stay even more moist and have a richer flavor.
- Cheese Swap: Not a provolone fan? Try Monterey Jack, sharp cheddar, pepper Jack for extra heat, or even classic Cheez Whiz for an authentic Philly vibe!
- Boost the Veggies: Sauté thinly sliced bell peppers (any color!) along with the onions for more color and flavor. Mushrooms are also a great addition.
- Extra Spice: If you want it hotter, add a pinch of cayenne pepper or a dash of a spicier hot sauce along with the Frank’s.
- Creamy Kick: Stir a tablespoon or two of ranch or blue cheese dressing directly into the chicken mixture right before adding the cheese for an extra creamy filling.
- Different Rolls: While hoagies are classic, any good sturdy sandwich roll or even crusty French bread can work.
Tips for Success
A few little pointers to make sure your Buffalo Chicken Cheesesteak is absolutely perfect:
- Slice the Chicken Thin: This ensures it cooks quickly and evenly, preventing dry chicken and creating a better texture for a cheesesteak.
- Cook Onions Properly: Don’t rush sautéing the onions. Cooking them until soft and slightly sweet adds significant depth to the sandwich.
- Toast Those Rolls!: I can’t stress this enough! A lightly toasted, buttered roll is key to a great cheesesteak experience. It adds flavor and helps the bread stand up to the juicy filling.
- Use a Large Skillet: Make sure your skillet is big enough to spread the chicken mixture out a bit, which helps with even cooking and cheese melting.
- Don’t Drown It (at first): Start with the specified amount of Frank’s. You can always add a little more at the end if you want it saucier, but too much initially can make it liquidy.
- Prep Ahead: You can cook the chicken and onions together ahead of time. Store them in the fridge, then reheat in the skillet and proceed with adding the Frank’s, jalapeños, cheese, and assembling.
How to Store It
If you’re lucky enough to have leftovers (which is a big ‘if’ in my house!):
The best way to store is to keep the Buffalo chicken and onion mixture separate from the rolls. Let the filling cool completely, then transfer it to an airtight container. It will last for about 3-4 days in the refrigerator.
To reheat, gently warm the filling in a skillet over medium-low heat until hot, then load it into fresh or re-toasted rolls. Assembled sandwiches can get a bit soggy if stored, so it’s always best to build them fresh.
FAQs
Got questions? I’ve got answers!
- Q: Is this recipe very spicy?
A: The primary heat comes from the Frank’s RedHot and the pickled jalapeños. Frank’s is generally considered a mild-medium heat. You can easily control the spice by adjusting the amount of jalapeños or choosing a different hot sauce. - Q: Can I use pre-cooked or rotisserie chicken?
A: Yes, absolutely! Shred or dice the cooked chicken and add it to the skillet with the sautéed onions and jalapeños. You’ll just need to heat it through before adding the Frank’s and cheese. - Q: What’s the best cheese for a cheesesteak?
A: Provolone is classic for its meltability and mild, slightly tangy flavor, perfect for a cheesesteak. However, feel free to use your favorite melty cheese like Monterey Jack or cheddar! - Q: Can I bake this in the oven instead of a skillet?
A: While you can cook the chicken and onions in the oven, a skillet on the stovetop is much faster and better for sautéing the veggies and melting the cheese directly onto the filling. Assembling in a roll and briefly broiling to melt the cheese is an option if you prefer, but the skillet method is truly the easiest for this recipe.
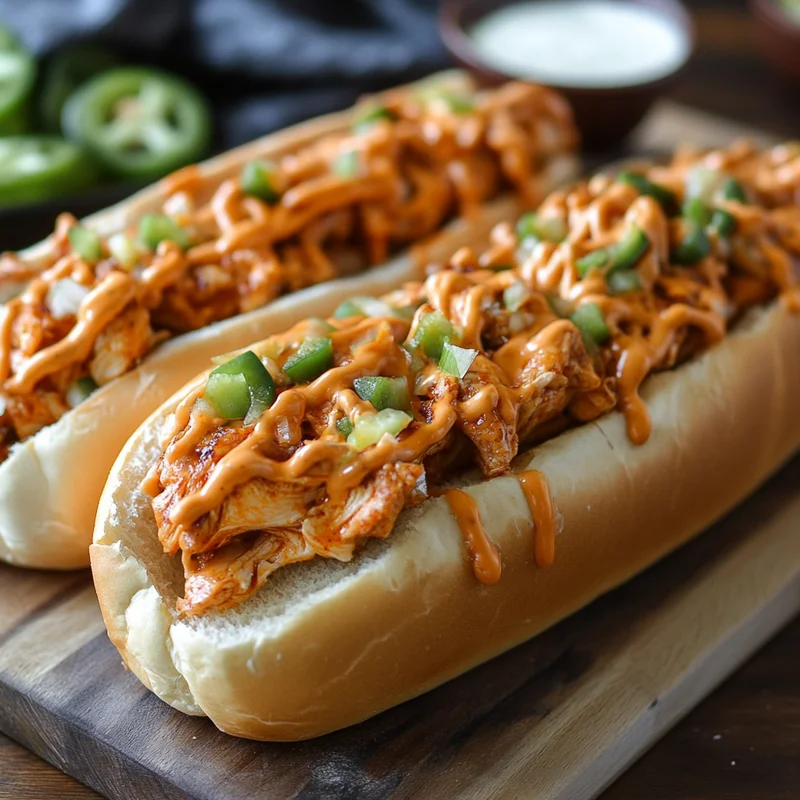
Easy & Cheesy Buffalo Chicken Cheesesteak

Take the classic comfort of a cheesesteak and give it a fiery, tangy Buffalo chicken makeover. This sandwich brings together spicy, savory chicken, melty cheese, and a creamy dressing finish, all tucked into a perfect roll. It’s incredibly easy and surprisingly quick, perfect for a busy weeknight or your next game day gathering.
- Large skillet
- Spatula
Main Ingredients
- 1 lb Boneless, skinless chicken breasts (Slice thinly or cut into bite-sized pieces)
- 0.375 cup Frank’s RedHot sauce (Use 3/8 cup; feel free to use a little more if you love it extra saucy!)
- 0.5 tsp Garlic powder (Plus more for sprinkling)
- 0.5 cup Pickled jalapeños (Sliced; adjust amount based on how much spice you like!)
- 0.5 Yellow onion (Sliced thinly)
- Ranch or blue cheese dressing (For drizzling, dipping, or both!)
- 0.5 tsp Kosher salt (To season the chicken; used in steps 1 and 4)
- 4 Hoagie rolls (Need sturdy, delicious bread; make sure they’re fresh)
- 3 tbsp Unsalted butter (Plus more; used for sautéing and rolls)
- 4 slices Provolone cheese (The classic melting cheese; feel free to add an extra slice per sandwich if you’re feeling extra cheesy.)
- Prep Your Ingredients. Slice your yellow onion thinly. If your chicken breasts are thick, slice them horizontally into thin cutlets, then cut those into strips or bite-sized pieces. Season the chicken lightly with a pinch of garlic powder and some kosher salt. Drain your pickled jalapeños.
- Sauté the Onions. Heat a large skillet or griddle over medium heat. Add about 1 tablespoon of the unsalted butter. Once melted, add the sliced onions and cook, stirring occasionally, until they are soft, translucent, and slightly golden – this usually takes about 5-7 minutes. Remove the onions from the pan and set them aside.
- Cook the Chicken. Add another tablespoon of butter to the same skillet. Increase the heat slightly if needed, but keep it around medium. Add the seasoned chicken pieces in a single layer if possible. Cook, stirring occasionally, until the chicken is cooked through and no longer pink. This should take about 5-8 minutes, depending on the size of your pieces.
- Bring on the Buffalo Flavor! Reduce the heat to low. Add the sautéed onions and the sliced pickled jalapeños back into the skillet with the cooked chicken. Pour in the 3/8 cup of Frank’s RedHot sauce and the remaining 1/2 tsp of kosher salt. Stir everything together gently until all the chicken and veggies are beautifully coated in the sauce. Let it simmer for just a minute or two to let the flavors meld and the sauce thicken slightly.
- Add the Cheese. Arrange the chicken and onion mixture into four even portions in the skillet (or just spread it out). Lay one slice of provolone cheese over each portion (or more!). You can cover the skillet with a lid for about 30 seconds to a minute, or just let the residual heat melt the cheese into gooey perfection.
- Prep and Toast the Rolls. While the cheese is melting, slice your hoagie rolls lengthwise, but don’t cut all the way through – you want them to open like a book. Spread the remaining unsalted butter (or more!) on the cut sides of the rolls. You can lightly toast the buttered sides in a separate pan or under the broiler for a minute or two until golden brown. This makes a huge difference in texture and flavor, and helps prevent a soggy sandwich!
- Assemble! Using a spatula, scoop the cheesy Buffalo chicken mixture from the skillet directly into the prepared hoagie rolls. Pile it high – you want a hearty sandwich!
- Drizzle and Serve. The finishing touch! Generously drizzle your chosen ranch or blue cheese dressing over the filling in each sandwich. Close the rolls and serve immediately. Prepare for happy moans!
Substitutions & Additions:
– Different Meat: Boneless, skinless chicken thighs work wonderfully.
– Cheese Swap: Try Monterey Jack, sharp cheddar, pepper Jack, or Cheez Whiz.
– Boost the Veggies: Sauté thinly sliced bell peppers or mushrooms along with the onions.
– Extra Spice: Add a pinch of cayenne pepper or a dash of a spicier hot sauce.
– Creamy Kick: Stir a tablespoon or two of ranch or blue cheese dressing directly into the chicken mixture.
– Different Rolls: Any good sturdy sandwich roll or crusty French bread can work.
Tips for Success:
– Slice the Chicken Thin: Ensures quick and even cooking.
– Cook Onions Properly: Don’t rush sautéing until soft and slightly sweet.
– Toast Those Rolls!: Key for texture, flavor, and preventing sogginess.
– Use a Large Skillet: Helps with even cooking and cheese melting.
– Don’t Drown It (at first): Add Frank’s amount specified, add more later if needed.
– Prep Ahead: Cook chicken and onions ahead; reheat to finish.
Storage:
Store the Buffalo chicken and onion mixture separately from the rolls. Let cool completely, transfer to an airtight container. Lasts 3-4 days in the refrigerator. To reheat, warm filling gently in a skillet.