Introduction
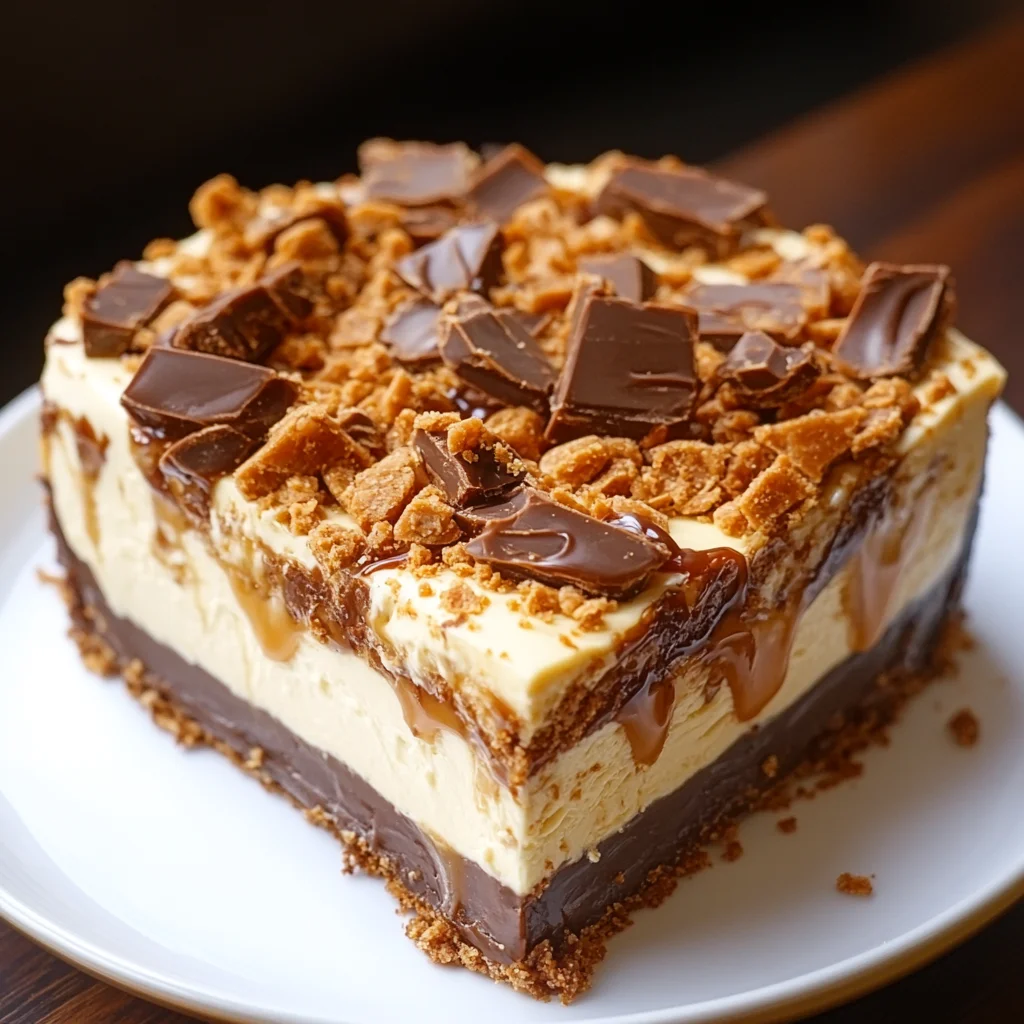
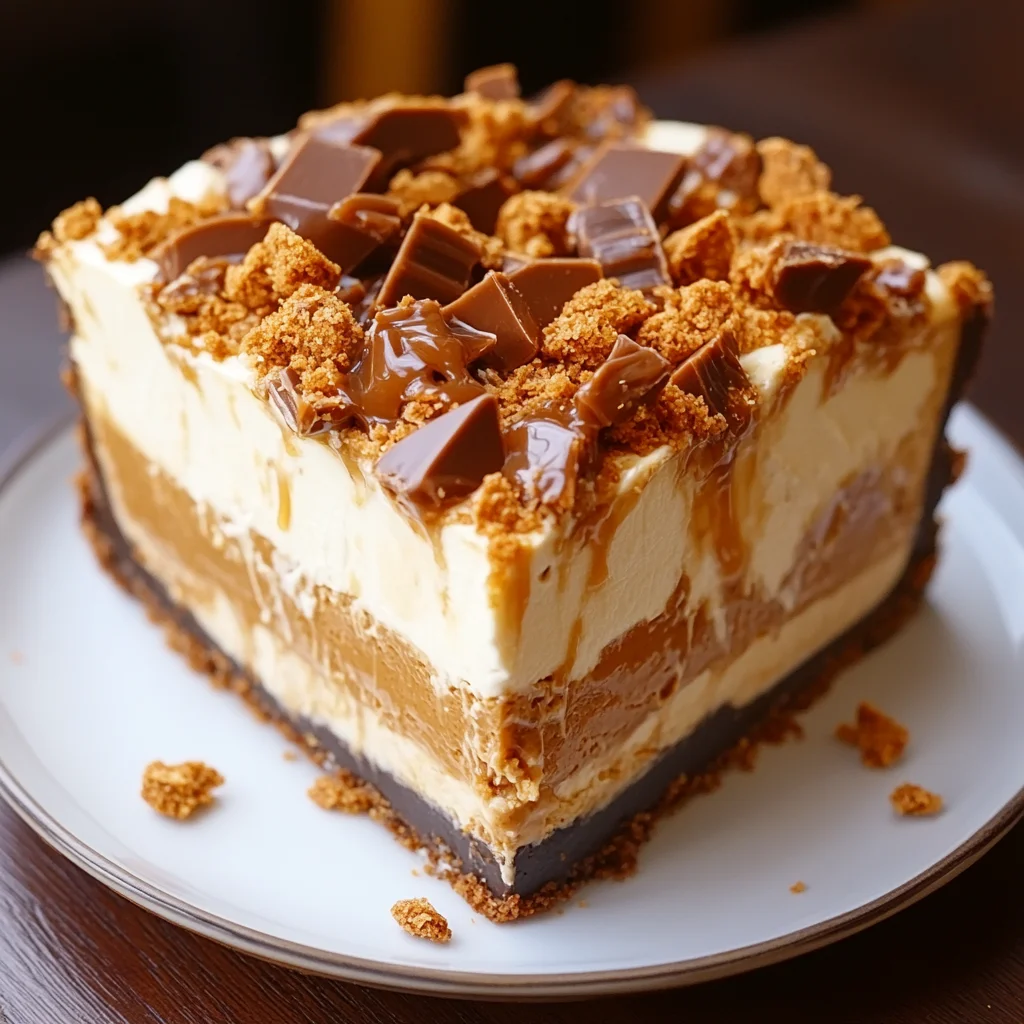
Hey there, sweet treat lover! Have you ever had one of those days where you just need a little bit of magic? Something crunchy, something creamy, something absolutely packed with flavor? Something that takes you right back to being a kid, but feels totally grown-up and indulgent? Well, pull up a chair, because this Butterfinger Caramel Crunch dessert is about to become your new best friend. It’s layers of pure joy – a buttery graham cracker crust, a dreamy peanut butter filling studded with crunchy Butterfinger bits, a luscious caramel drizzle, and a smooth chocolate topping. And the best part? It’s surprisingly easy! No complicated oven techniques needed for the filling here, making it perfect for pretty much anyone to whip up.
Why You’ll Love This Recipe
- Fast (mostly chilling time!)
- Easy (no fancy baking skills required for the layers)
- Giftable (makes a great edible present!)
- Crowd-pleasing (seriously, who can resist this combo?)
Ingredients
Gather ’round! Here’s what you’ll need to make this showstopper. Simple stuff, mostly available at your regular grocery store!
- Graham Cracker Crumbs: You can buy these pre-crushed or crush your own from full graham crackers. About 14-16 full sheets usually yields 2 cups of crumbs.
- Unsalted Butter: We’ll melt this down to bind the crust together. Unsalted lets you control the saltiness, especially with the caramel layer!
- Creamy Peanut Butter: The star of our filling! Make sure it’s creamy for that smooth texture.
- Powdered Sugar: This sweetens and thickens our peanut butter layer without making it grainy.
- Vanilla Extract: A splash adds warmth and depth to the peanut butter goodness.
- Crushed Butterfinger Candy Bars: The namesake crunch! You’ll need these for inside the filling and on top. Crushing them is part of the fun!
- Granulated Sugar: For making that beautiful, rich caramel sauce.
- Heavy Cream: This is essential for making the caramel smooth and pourable. Don’t substitute with milk!
- Sea Salt: A little salt in the caramel makes it taste even more amazing, balancing the sweetness perfectly.
- Semisweet Chocolate Chips: Our easy peasy topping!
- Vegetable Oil: Just a tiny bit helps the chocolate melt smoothly and gives it a nice shine.
How to Make It
Alright, let’s get cooking! Or rather, mixing and layering!
Step 1: Prep the Crust
First things first, let’s get that crunchy foundation ready. Preheat your oven to 350°F (175°C) if you plan to bake the crust (which I highly recommend for extra stability and flavor!). In a medium bowl, combine your graham cracker crumbs and the melted butter. Stir it all together until the crumbs are evenly moistened – it should look like wet sand. Press this mixture firmly into the bottom of a 9×13 inch baking dish. You can use the bottom of a glass or a flat measuring cup to get it really packed down. Bake for 8-10 minutes until it smells fragrant and looks slightly golden. Let it cool completely while you work on the filling.
Step 2: Make the Peanut Butter Filling
While the crust cools, whip up the peanut butter layer. In a large bowl, beat together the creamy peanut butter, powdered sugar, and vanilla extract until everything is well combined and smooth. Now, grab 1 ½ cups of your crushed Butterfinger pieces and gently fold them into the peanut butter mixture. Try not to overmix; you want those distinct crunchy bits!
Step 3: Layer the Filling
Once your crust is cool, carefully spoon the peanut butter filling over the top. Use an offset spatula or the back of a spoon to spread it out evenly from edge to edge. Pop the dish into the refrigerator while you make the caramel.
Step 4: Cook the Caramel Layer
This part requires a little focus, but it’s totally doable! In a medium saucepan over medium heat, add the granulated sugar. Let it melt slowly, stirring occasionally with a heat-safe spatula or wooden spoon. It will clump up at first, but keep stirring. The sugar will eventually melt into a liquid and start to turn amber. Once it’s a beautiful golden-brown color (don’t let it get too dark or it will taste burnt!), carefully and slowly pour in the heavy cream while stirring constantly. Be very careful as it will bubble up furiously! Keep stirring until it’s smooth. Remove from the heat and stir in the butter and sea salt until the butter is melted and the sauce is smooth. Let the caramel cool for about 10-15 minutes – it needs to be warm enough to pour but not so hot that it melts the peanut butter layer instantly.
Step 5: Add the Caramel and Chocolate
Once the caramel has cooled slightly, retrieve your dish from the fridge. Pour the warm caramel evenly over the peanut butter layer. Now, melt your chocolate topping. In a microwave-safe bowl, combine the semisweet chocolate chips and vegetable oil. Microwave in 30-second intervals, stirring well after each, until the chocolate is completely melted and smooth. Pour the melted chocolate over the caramel layer and spread it out evenly.
Step 6: Finish and Chill
Immediately sprinkle the remaining ½ cup of crushed Butterfinger candy bars over the melted chocolate topping before it sets. This is the final flourish! Now, the hardest part: you need to chill the dessert in the refrigerator for at least 4 hours, but ideally overnight, until everything is set and firm. This makes it much easier to cut into neat bars.
Substitutions & Additions
Want to switch things up? Go for it! This recipe is pretty forgiving.
- Crust: Not a graham cracker fan? Try crushed Oreos or shortbread cookies mixed with melted butter.
- Nut Butter: While peanut butter and Butterfinger are a classic, you could try almond butter or cashew butter for a different flavor profile.
- Chocolate: Dark chocolate or milk chocolate chips would work beautifully for the topping instead of semisweet.
- Caramel: If making caramel from scratch seems daunting, you could use a good quality store-bought caramel sauce, but the homemade is truly worth the extra few minutes!
- Add-ins: Fold some chopped roasted peanuts, pretzels pieces, or even mini chocolate chips into the peanut butter layer for extra crunch and flavor.
Tips for Success
Just a few little pointers to make sure your dessert turns out perfectly!
When crushing Butterfinger bars, don’t turn them to dust. You want varying sizes, from fine crumbs to small chunks, for maximum texture. A food processor works quickly, or you can put them in a zip-top bag and bash them with a rolling pin or meat mallet (a great stress reliever!). Make sure your crust is completely cool before adding the peanut butter layer; otherwise, the filling might melt and get oily. Be patient and careful when making the caramel – sugar burns easily and gets very hot! Stirring helps, but don’t leave it unattended once it starts melting. And the most important tip? Give it enough time to chill! Rushing the chilling process will result in a messy, unmanageable dessert. Patience is a virtue when it comes to layered chilled treats!
How to Store It
Once your amazing Butterfinger Caramel Crunch creation is set, keep it covered tightly with plastic wrap or in an airtight container in the refrigerator. It should stay fresh and delicious for 4-5 days. I honestly doubt it will last that long though!
FAQs
Got questions? I’ve got answers!
Q: Can I make this ahead of time?
A: Absolutely! This dessert is perfect for making ahead. Since it requires significant chilling time, preparing it the day before you plan to serve it is ideal.
Q: Is this a true no-bake cheesecake?
A: It’s a no-bake style layered dessert! The filling itself doesn’t involve baking, although I recommend baking the graham cracker crust briefly for a better texture. It uses a peanut butter base rather than cream cheese like a traditional cheesecake.
Q: Can I use a different candy bar?
A: You sure can! Any crunchy candy bar would be fun. Heath bars (toffee) or crushed pretzels would also be fantastic and provide a similar crunch factor.
Q: How do I get clean cuts?
A: Make sure the dessert is fully chilled. Dip a sharp knife in hot water, wipe it dry, and then make your cut. Repeat this process for each slice for nice, clean edges!

Easy No-Bake Butterfinger Caramel Crunch Dessert Bars
Equipment
- 9×13 inch baking dish
- Medium bowl
- Glass or flat measuring cup for pressing crust
- Large bowl
- Offset spatula or the back of a spoon
- Medium saucepan
- Heat-safe spatula or wooden spoon
- Microwave-safe bowl
- Sharp knife for cutting
Ingredients
For the Crust
- 2 cup Graham Cracker Crumbs About 14-16 full sheets yields 2 cups
- Unsalted Butter, melted
For the Peanut Butter Filling
- Creamy Peanut Butter
- Powdered Sugar
- Vanilla Extract
- 1.5 cup Crushed Butterfinger Candy Bars for filling
For the Caramel Layer
- Granulated Sugar
- Heavy Cream
- Unsalted Butter for caramel layer
- Sea Salt
For the Chocolate Topping
- Semisweet Chocolate Chips
- Vegetable Oil
For Finishing
- 0.5 cup Crushed Butterfinger Candy Bars for topping
Instructions
- Preheat oven to 350°F (175°C) if baking the crust. In a medium bowl, combine graham cracker crumbs and melted butter. Stir until crumbs are evenly moistened.
- Press the mixture firmly into the bottom of a 9×13 inch baking dish. Bake for 8-10 minutes until fragrant and slightly golden. Let cool completely.
- While crust cools, make the peanut butter layer. In a large bowl, beat together creamy peanut butter, powdered sugar, and vanilla extract until smooth.
- Gently fold 1 ½ cups of crushed Butterfinger pieces into the peanut butter mixture.
- Once crust is cool, carefully spoon and spread the peanut butter filling evenly over the crust. Refrigerate dish.
- Make the caramel layer. In a medium saucepan over medium heat, melt granulated sugar, stirring occasionally. It will clump, then melt into an amber liquid.
- Carefully and slowly pour in the heavy cream while stirring constantly. Stir until smooth. Remove from heat.
- Stir in the butter and sea salt until melted and smooth. Let caramel cool for about 10-15 minutes.
- Retrieve dish from fridge. Pour the warm caramel evenly over the peanut butter layer.
- Melt chocolate topping. In a microwave-safe bowl, combine semisweet chocolate chips and vegetable oil. Microwave in 30-second intervals, stirring until completely melted and smooth.
- Pour the melted chocolate over the caramel layer and spread it out evenly.
- Immediately sprinkle the remaining ½ cup of crushed Butterfinger candy bars over the melted chocolate.
- Chill the dessert in the refrigerator for at least 4 hours, ideally overnight, until set and firm.
- For clean cuts, make sure the dessert is fully chilled. Dip a sharp knife in hot water, wipe dry, and cut. Repeat for each slice.