
Introduction
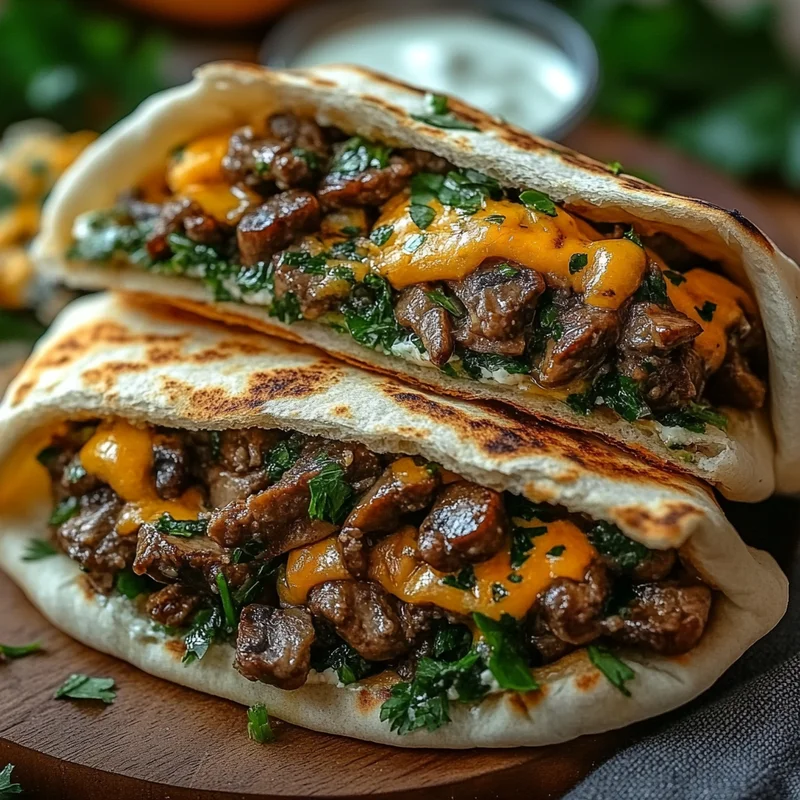
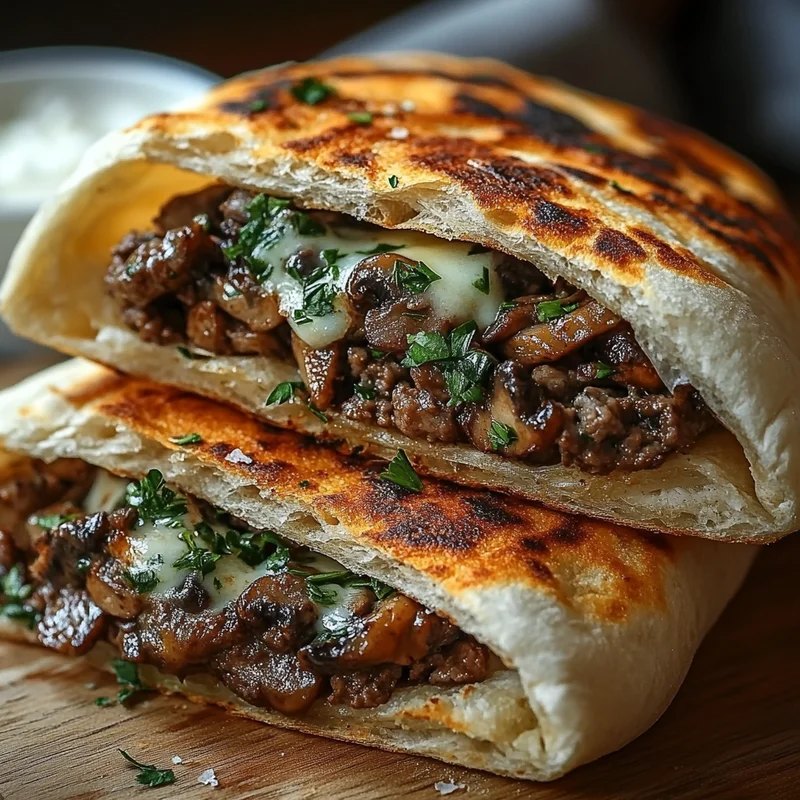
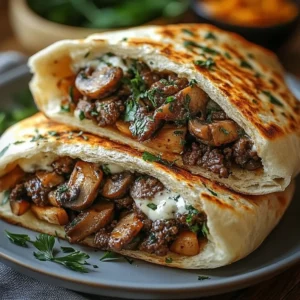
Okay, let’s talk comfort food that doesn’t require a ton of time or effort. You know those nights when you just want something warm, satisfying, and incredibly easy? This Cheesy Beef and Mushroom Pita Pocket recipe is exactly that. It’s like a hug in a pita! I remember making something similar back in college when money and time were tight, and it was always a hit. This updated version is even better, packed with savory beef, earthy mushrooms, and plenty of melty cheese, all tucked into a warm, soft pita. It’s the kind of meal that makes everyone happy without you breaking a sweat.
Get ready to fall in love with how simple and delicious this is!
Why You’ll Love This Recipe
Seriously, what’s not to love? These pita pockets tick all the boxes:
- Fast: On the table in about 30 minutes!
- Easy: Simple steps, no fancy techniques needed.
- Giftable: While maybe not literally a gift, it’s a gift to your future self on a busy night!
- Crowd-pleasing: Kids and adults alike devour these.
Ingredients
Here’s what you’ll need to whip up these amazing pita pockets. Most of these are probably already in your pantry or fridge!
- 1 pound ground beef: Use whatever kind you like – lean or regular, it all works!
- 1 tablespoon olive oil: Just a little bit to get things started.
- 1 medium onion, chopped: Adds so much flavor.
- 8 ounces mushrooms, sliced: Earthy and delicious. Any kind you love is fine!
- 2 cloves garlic, minced: Because everything is better with garlic, right?
- Salt and freshly ground black pepper to taste: To bring out all those lovely flavors.
- 1/2 cup beef broth (optional): This adds extra moisture and deepens the flavor, but you can skip it if you’re in a hurry.
- 1 cup shredded cheddar cheese (or cheese of choice): The star of the show! Use sharp cheddar, mild, Monterey Jack, or a blend – whatever melts well and makes your heart sing.
- 4-6 pita pockets: You can find these in the bread aisle. Make sure they are soft and pliable.
How to Make It
Let’s get cooking! Follow these simple steps and you’ll be eating in no time.
- First things first, get your skillet heating up! Add that tablespoon of olive oil to a large skillet over medium-high heat. Once it’s warm, toss in your ground beef. Break it up with a spoon as it cooks until it’s nicely browned. Don’t forget to drain off any excess fat – nobody wants greasy pita pockets!
- Now, add your chopped onion to the skillet with the browned beef. Give it a good stir and cook until the onion softens up and turns a little translucent, which should take about 5 minutes.
- Time for the mushrooms! Stir in your sliced mushrooms. Let them cook down, stirring occasionally, until they release their liquid and start to get a nice brown color. This usually takes about 7-10 minutes. Patience here pays off for flavorful mushrooms!
- Add that wonderful minced garlic to the mix. Cook for just about 1 minute more, stirring constantly, until you can really smell that amazing garlic aroma. Be careful not to burn it!
- Season your beef and veggie mixture generously with salt and pepper. Taste it and add more if you think it needs it. If you’re using the beef broth for extra flavor and moisture, pour it in now and let it simmer for a few minutes until it thickens slightly.
- Remove the skillet from the heat. This is important! Now, stir in that shredded cheese. Stir, stir, stir until it’s all melted and beautifully combined with the savory mixture. It should be warm and gooey!
- While you were making the filling, hopefully, you warmed your pita pockets! Follow the package directions – usually, a quick zap in the microwave or warm-up in the oven or on the stovetop works perfectly to make them pliable and easy to open.
- Carefully open each pita pocket. You can usually cut a slit along one edge or gently pull it apart to create a pocket. Be gentle so they don’t tear!
- Now for the best part! Generously fill each warm pita pocket with that delicious, cheesy beef and mushroom filling. Don’t be shy!
- Serve them up immediately while they’re warm and the cheese is still melty. Enjoy every bite!
Substitutions & Additions
This recipe is super flexible! Here are some ideas to switch things up:
- Cheese Swap: Mozzarella, provolone, Monterey Jack, or a Pepper Jack for a little kick work great instead of cheddar.
- Add Veggies: Stir in some chopped bell peppers with the onion, or wilt in some spinach after the beef is browned.
- Spice It Up: Add a pinch of red pepper flakes when you add the garlic, or drizzle with hot sauce before serving.
- Extra Flavor: A splash of Worcestershire sauce or a teaspoon of dried Italian herbs added with the garlic can enhance the taste.
- Different Meat: Ground turkey or chicken could work, though the flavor profile will be a bit different.
Tips for Success
Here are a few little pointers to make sure your pita pockets turn out perfect every time:
- Drain Well: Don’t skip draining the fat from the ground beef after browning. This keeps the filling from being greasy.
- Cook Mushrooms Properly: Make sure your mushrooms really cook down and release their liquid. This concentrates their flavor.
- Don’t Overheat Cheese: Remove the pan from the heat before stirring in the cheese. This prevents the cheese from getting oily or stringy.
- Warm Your Pitas: Warm pita pockets are much easier to open without tearing than cold ones.
- Prep Ahead: You can make the beef and mushroom filling a day or two ahead of time and store it in the fridge. Just reheat gently before stirring in the cheese and filling the pitas.
How to Store It
If you happen to have any leftovers (a rare occurrence in my house!), you can store the filling separately from the pita pockets. Keep the filling in an airtight container in the refrigerator for 3-4 days. Reheat the filling gently on the stovetop or in the microwave before warming the pitas and filling them.
FAQs
- Can I make the filling ahead of time? Absolutely! Cook the filling all the way through step 5, let it cool, and store it. Reheat, add cheese, and fill your warm pitas when you’re ready.
- What should I serve with these pita pockets? They are great on their own, but a simple side salad, some potato chips, or roasted vegetables make a lovely meal.
- Can I use whole wheat pita? Yes, definitely! Use any type of pita bread you prefer.
- Is this recipe freezer-friendly? The cooked filling can be frozen! Thaw it in the fridge overnight, then reheat, add cheese, and fill fresh pitas.
Cozy Cheesy Beef and Mushroom Pita Pockets
Equipment
- Large skillet
Ingredients
Ingredients
- 1 pound ground beef Use whatever kind you like – lean or regular, it all works!
- 1 tablespoon olive oil Just a little bit to get things started.
- 1 medium onion chopped
- 8 ounces mushrooms sliced. Any kind you love is fine!
- 2 cloves garlic minced
- Salt and freshly ground black pepper to taste
- 0.5 cup beef broth (optional)
- 1 cup shredded cheddar cheese (or cheese of choice) Use sharp cheddar, mild, Monterey Jack, or a blend – whatever melts well and makes your heart sing.
- 4 pita pockets You can find these in the bread aisle. Make sure they are soft and pliable.
Instructions
- First things first, get your skillet heating up! Add that tablespoon of olive oil to a large skillet over medium-high heat. Once it's warm, toss in your ground beef. Break it up with a spoon as it cooks until it's nicely browned. Don't forget to drain off any excess fat – nobody wants greasy pita pockets!
- Now, add your chopped onion to the skillet with the browned beef. Give it a good stir and cook until the onion softens up and turns a little translucent, which should take about 5 minutes.
- Time for the mushrooms! Stir in your sliced mushrooms. Let them cook down, stirring occasionally, until they release their liquid and start to get a nice brown color. This usually takes about 7-10 minutes.
- Add that wonderful minced garlic to the mix. Cook for just about 1 minute more, stirring constantly, until you can really smell that amazing garlic aroma. Be careful not to burn it!
- Season your beef and veggie mixture generously with salt and pepper. Taste it and add more if you think it needs it. If you're using the beef broth for extra flavor and moisture, pour it in now and let it simmer for a few minutes until it thickens slightly.
- Remove the skillet from the heat. This is important! Now, stir in that shredded cheese. Stir, stir, stir until it's all melted and beautifully combined with the savory mixture. It should be warm and gooey!
- While you were making the filling, hopefully, you warmed your pita pockets! Follow the package directions – usually, a quick zap in the microwave or warm-up in the oven or on the stovetop works perfectly to make them pliable and easy to open.
- Carefully open each pita pocket. You can usually cut a slit along one edge or gently pull it apart to create a pocket. Be gentle so they don't tear!
- Now for the best part! Generously fill each warm pita pocket with that delicious, cheesy beef and mushroom filling. Don's be shy!
- Serve them up immediately while they're warm and the cheese is still melty. Enjoy every bite!
Notes
- Drain fat from ground beef after browning.
- Cook mushrooms thoroughly to release liquid and concentrate flavor.
- Remove pan from heat before stirring in cheese to prevent oiliness.
- Warm pita pockets for easier opening.
Make Ahead & Storage:
- Filling can be made 1-2 days ahead and stored separately in the fridge. Reheat gently before adding cheese.
- Cooked filling can be frozen. Thaw, reheat, add cheese, and fill fresh pitas.
- Store leftover filling separately from pita pockets in the fridge for 3-4 days.