Introduction
Oh, the holidays! Does anything bring back those warm, fuzzy memories quite like the scent of freshly baked cookies wafting through your home? I’m talking about those moments when you’d sneak into the kitchen, hoping for a little taste of something magical. Well, get ready to recreate that magic with these incredible Christmas Kitchen Sink Cookies! They’re an absolute breeze to whip up, making them perfect for those busy festive days, and trust me, they’re so good, they’ll become a treasured part of your holiday traditions.
Why You’ll Love This Recipe
- Fast: You can have these cookies ready to bake in under 20 minutes!
- Easy: Seriously, if you can stir ingredients together, you can make these. No fancy techniques needed.
- Giftable: Package them up in cute tins or bags, and you’ve got the most thoughtful homemade gifts.
- Crowd-pleasing: With all those amazing mix-ins, there’s truly something for everyone to adore.
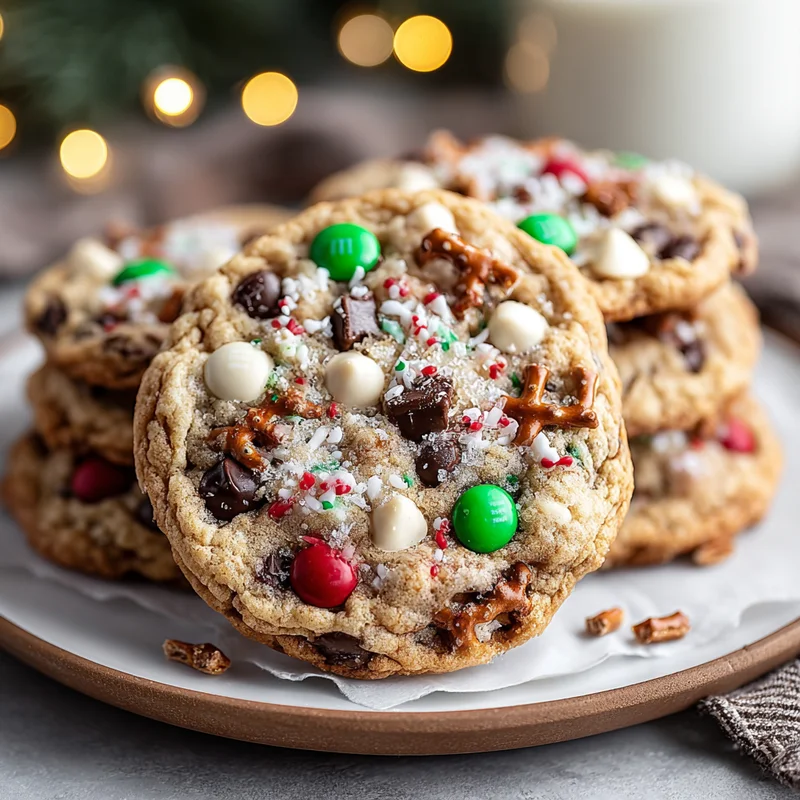
Ingredients
Gathering your goodies is half the fun! Here’s what you’ll need to create this symphony of holiday flavors:
- 1 cup (2 sticks) unsalted butter, softened: Make sure it’s nice and soft so it creams beautifully with the sugars.
- 1 cup packed light brown sugar: This gives our cookies that lovely chewy texture and caramel-y goodness.
- 1/2 cup granulated sugar: The classic sugar for that perfect cookie structure.
- 2 large eggs: The binder that holds all this deliciousness together.
- 1 teaspoon vanilla extract: The quintessential flavor enhancer for all baked goods!
- 2 cups all-purpose flour: Our sturdy foundation for the cookie base.
- 1 teaspoon baking soda: This is what gives our cookies a little lift.
- 1/2 teaspoon salt: Balances out the sweetness and brings out all the other flavors.
- 1 cup semisweet chocolate chips: A classic for a reason!
- 1 cup white chocolate chips: For a creamy, sweet contrast.
- 1/2 cup crushed pretzels: This is where the “kitchen sink” magic starts! They add a delightful salty crunch.
- 1/2 cup toffee bits: Because who doesn’t love a little buttery crunch and caramel flavor?
- 1/2 cup red and green M&Ms: These are for pure holiday cheer and a fun pop of color and chewiness!
How to Make It
Alright, let’s get baking! This is where the real fun begins.
- Preheat & Prep: First things first, let’s get your oven all warmed up to 350°F (175°C). While that’s happening, line a couple of baking sheets with parchment paper. This makes cleanup a breeze and ensures your cookies don’t stick.
- Cream It Up: Grab a big bowl. Toss in your softened butter, the packed brown sugar, and the granulated sugar. Now, with your mixer (or a good old-fashioned whisk and some elbow grease!), cream them together until the mixture is light and fluffy. It should look pale and airy.
- Eggs & Vanilla: Time to add the eggs. Beat them in one at a time, making sure each one is well incorporated before you add the next. Then, stir in that lovely vanilla extract.
- Dry Ingredients Ready: In a separate, medium-sized bowl, whisk together your all-purpose flour, baking soda, and salt. Giving them a little whisk ensures everything is evenly distributed.
- Combine Wet & Dry: Now, gradually add the dry ingredients into your wet ingredients. Mix them together until they’re just combined. My biggest tip here is to not overmix. Overmixing can lead to tough cookies, and we want tender, chewy delights!
- The Kitchen Sink Magic: This is the star moment! Gently stir in your semisweet chocolate chips, white chocolate chips, crushed pretzels, toffee bits, and those festive red and green M&Ms. Make sure everything is spread out evenly throughout the dough.
- Scoop & Space: Using a rounded tablespoon, drop mounds of dough onto your prepared baking sheets. Give them about 2 inches of space between each cookie because they will spread out a bit as they bake.
- Bake to Perfection: Pop those baking sheets into your preheated oven. Bake for about 9-11 minutes. You’re looking for the edges to be a beautiful golden brown, but the centers should still look just a tiny bit soft. They’ll continue to set up as they cool.
- Cool Down: Once they’re out of the oven, let the cookies cool on the baking sheets for a few minutes. This helps them firm up a bit. Then, carefully transfer them to a wire rack to cool completely. Patience is a virtue, especially when it comes to warm, gooey cookies!
Substitutions & Additions
These cookies are already amazing, but you can totally make them your own! Here are some ideas:
- Chocolate Lovers: Swap out one of the chocolate chip types for dark chocolate chips or mini chocolate chips.
- Nutty Goodness: If you’re not dealing with allergies, a handful of chopped pecans or walnuts would be delicious.
- Caramel Craze: Add some caramel bits for an extra layer of gooey caramel flavor.
- Gluten-Free? You can try using a good quality gluten-free all-purpose flour blend in place of the wheat flour. Results might vary slightly, but it’s definitely worth a shot!
- More Crunch: Feel free to add some crispy rice cereal for an extra pop.
Tips for Success
A few little tricks to ensure your cookies turn out absolutely spectacular every single time:
- Butter Temperature is Key: Make sure your butter is truly softened, not melted. This is crucial for getting that light and fluffy texture when creaming with the sugars.
- Don’t Overmix the Flour: Seriously, I can’t stress this enough! Mix until you just don’t see streaks of flour anymore.
- Uniform Size Matters: Try to scoop your cookies to a similar size so they bake evenly. A cookie scoop is your best friend here!
- Prep Ahead: You can totally make the dough a day in advance! Cover it tightly and refrigerate. Just let it sit at room temperature for about 15-20 minutes before scooping, as chilled dough will be firmer.
- Baking Sheet Rotation: If you’re baking multiple batches, rotate your baking sheets halfway through baking (top to bottom, front to back) to ensure even cooking, especially if your oven has hot spots.
How to Store It
Keeping these beauties fresh is easy peasy:
Once your cookies have cooled completely, store them in an airtight container at room temperature. They’ll stay delicious for up to 3-4 days. If you want to keep them longer, you can stack them with parchment paper in between in freezer-safe bags or containers and freeze them for up to 3 months. Just thaw them at room temperature when you’re ready for a cookie fix!
FAQs
Q: Can I make these cookies without M&Ms?
A: Absolutely! If you don’t have M&Ms or prefer not to use them, you can simply add another 1/2 cup of your favorite chocolate chips or even some chopped nuts. They’ll still be wonderfully delicious!
Q: My cookies spread too much, what did I do wrong?
A: Usually, this happens if your butter was too soft or melted, or if your oven wasn’t hot enough. Make sure your butter is softened but not greasy, and always double-check your oven temperature with an oven thermometer if you suspect it’s off.
Q: Can I freeze the cookie dough before baking?
A: Yes, you can! Scoop your dough onto a parchment-lined baking sheet and freeze until firm. Then, transfer the dough balls to a freezer-safe bag or container. You can bake them directly from frozen, just add a minute or two to the baking time.

Christmas Kitchen Sink Cookies
Equipment
- Mixer or whisk
- Baking sheets
- Parchment paper
- Medium-sized bowl
- Wire rack
- Cookie scoop
Ingredients
Wet Ingredients
- 1 cup unsalted butter softened
- 1 cup light brown sugar packed
- 0.5 cup granulated sugar
- 2 large eggs
- 1 teaspoon vanilla extract
Dry Ingredients
- 2 cups all-purpose flour
- 1 teaspoon baking soda
- 0.5 teaspoon salt
Mix-ins
- 1 cup semisweet chocolate chips
- 1 cup white chocolate chips
- 0.5 cup crushed pretzels
- 0.5 cup toffee bits
- 0.5 cup red and green M&Ms
Instructions
- First things first, let's get your oven all warmed up to 350°F (175°C). While that's happening, line a couple of baking sheets with parchment paper. This makes cleanup a breeze and ensures your cookies don't stick.
- Grab a big bowl. Toss in your softened butter, the packed brown sugar, and the granulated sugar. Now, with your mixer (or a good old-fashioned whisk and some elbow grease!), cream them together until the mixture is light and fluffy. It should look pale and airy.1 cup unsalted butter
- Time to add the eggs. Beat them in one at a time, making sure each one is well incorporated before you add the next. Then, stir in that lovely vanilla extract.1 cup unsalted butter
- In a separate, medium-sized bowl, whisk together your all-purpose flour, baking soda, and salt. Giving them a little whisk ensures everything is evenly distributed.1 cup unsalted butter
- Now, gradually add the dry ingredients into your wet ingredients. Mix them together until they're just combined. My biggest tip here is to not overmix. Overmixing can lead to tough cookies, and we want tender, chewy delights!
- This is the star moment! Gently stir in your semisweet chocolate chips, white chocolate chips, crushed pretzels, toffee bits, and those festive red and green M&Ms. Make sure everything is spread out evenly throughout the dough.1 cup unsalted butter
- Using a rounded tablespoon, drop mounds of dough onto your prepared baking sheets. Give them about 2 inches of space between each cookie because they will spread out a bit as they bake.
- Pop those baking sheets into your preheated oven. Bake for about 9-11 minutes. You're looking for the edges to be a beautiful golden brown, but the centers should still look just a tiny bit soft. They'll continue to set up as they cool.
- Once they’re out of the oven, let the cookies cool on the baking sheets for a few minutes. This helps them firm up a bit. Then, carefully transfer them to a wire rack to cool completely. Patience is a virtue, especially when it comes to warm, gooey cookies!