Introduction
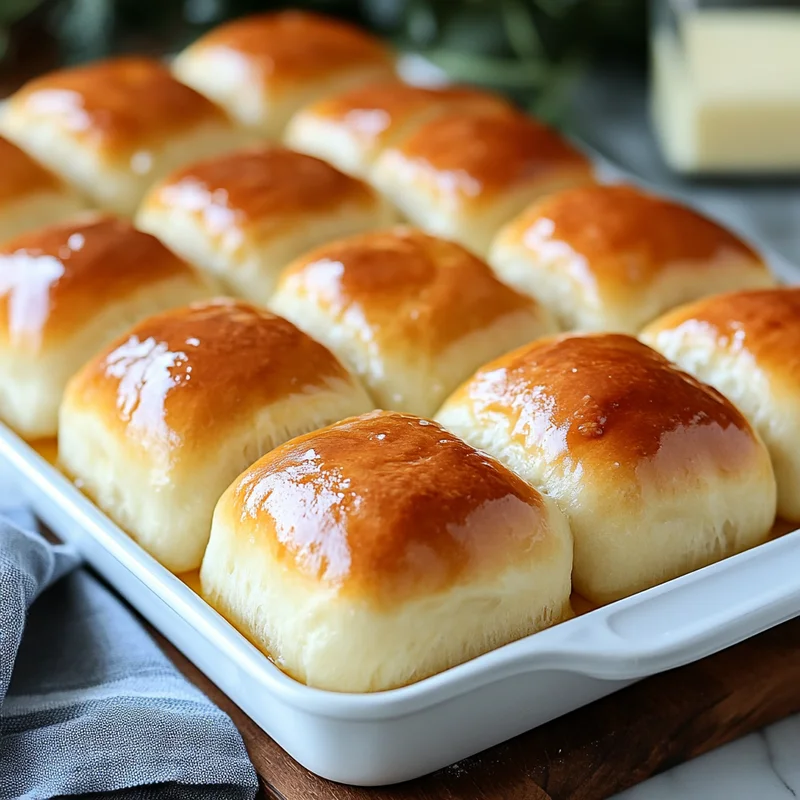
Hey there, baking buddies! Ever walked into a cozy kitchen and been greeted by the irresistible aroma of freshly baked dinner rolls? For me, that smell is pure comfort. It conjures up memories of bustling holiday tables, quiet Sunday suppers, and the simple joy of tearing into a warm, soft roll slathered with butter. While those store-bought tubes of dough might be convenient, let me tell you, there is NOTHING like a homemade Parker House Roll. And guess what? They aren’t nearly as intimidating as you might think. This recipe is my absolute favorite – it delivers rolls that are impossibly light, fluffy, and have that perfect buttery tenderness. Trust me, once you make these, you’ll never go back!
This recipe is designed to be straightforward, giving you gorgeous, crowd-pleasing rolls that disappear faster than you can say “seconds!”
Why You’ll Love This Recipe
- Fast(ish): Okay, ‘fast’ for yeast rolls means there’s some waiting time for rising, but the active work is surprisingly quick!
- Easy: No fancy techniques needed, just simple mixing, kneading (or letting a mixer do the work!), and shaping.
- Giftable: Bring a basket of these warm rolls to any gathering and you’ll be the absolute hero.
- Crowd-pleasing: Seriously, who doesn’t love a warm, buttery roll? These are guaranteed to get rave reviews.

Ingredients
Gather your ingredients! Good quality ingredients make a difference, but the magic is mostly in the simple combination.
- 1 ¼ cup whole milk, 110°F: Make sure it’s not too hot (which can kill the yeast) or too cold (which won’t activate it). Think warm bathwater!
- 3 teaspoons active dry yeast: Check the expiration date! Happy yeast means fluffy rolls.
- 6 tablespoons unsalted butter, softened: Needs to be soft enough to easily cream or mix into the dough. Leave it out on the counter for an hour or two, or give it a quick zap (like 10 seconds) in the microwave.
- 4 tablespoons granulated sugar, divided: A little sweetness for flavor, and it also helps feed the yeast.
- 1 ½ teaspoons fine sea salt: Enhances flavor and controls the yeast activity.
- 1 large egg plus 1 egg yolk, room temperature: Using both adds richness and tenderness. Room temperature eggs incorporate better into the dough.
- 3 ½ to 4 ¼ cups all purpose flour: Start with the lower amount and add more only as needed until the dough pulls away from the sides of the bowl but is still slightly sticky.
- 5 tablespoons unsalted butter, softened, for brushing on dough, divided: This is key to that classic buttery Parker House flavor and texture! You’ll use some during shaping and some right after baking.
How to Make It
Let’s get baking! Follow these steps and you’ll have heavenly rolls in no time.
Okay, first things first, get your milk warmed up to about 110°F. Pour it into a large mixing bowl (or the bowl of your stand mixer if you’re using one). Sprinkle the active dry yeast over the warm milk, add a pinch of sugar (I usually grab about a teaspoon from the total), and give it a gentle stir. Let it sit for 5-10 minutes. You should see it get foamy and bubbly on top – that means your yeast is alive and ready to work! If it doesn’t foam up, your yeast might be expired or the milk wasn’t the right temp, and you’ll need to start over.
While the yeast is doing its thing, in a separate bowl (or directly into the yeast mixture bowl if using a stand mixer), cream together the 6 tablespoons of softened butter with the remaining granulated sugar and the fine sea salt. Mix until it’s light and fluffy.
Add the room temperature egg and egg yolk to the butter mixture and beat until well combined. It might look a little separated at first, but just keep mixing.
Now, add the activated yeast mixture to the butter-egg mixture and give it a gentle whisk to combine.
Gradually add the all-purpose flour, about a cup at a time, mixing until just combined after each addition. Once you’ve added about 3 ½ cups, the dough should be shaggy and starting to come together. If you’re using a stand mixer with a dough hook, let it knead on low speed. If mixing by hand, turn the dough out onto a lightly floured surface.
Knead the dough for 6-8 minutes (by hand or mixer) until it’s smooth, elastic, and pulls away from the sides of the bowl (though it might still be slightly sticky to the touch). Add flour very sparingly if needed, only a tablespoon at a time, to prevent it from sticking excessively. You want a soft, supple dough, not a stiff one!
Lightly grease a large bowl with oil or cooking spray. Shape the dough into a ball and place it in the greased bowl, turning to coat all sides. Cover the bowl tightly with plastic wrap or a clean kitchen towel.
Let the dough rise in a warm place for 1 to 1 ½ hours, or until it has doubled in size. A turned-off oven with the light on is a great spot!
Once doubled, punch the dough down gently to release the air. Turn it out onto a lightly floured surface and gently shape it into a rectangle.
Roll the dough out to about ½ inch thickness. Using a biscuit cutter (around 2 ½ – 3 inches) or a knife, cut out circles or rectangles. You can gently re-roll the scraps once.
Now for the classic Parker House shape! Take about 2 tablespoons of the remaining softened butter and melt it gently. Brush one half of each cut-out circle or rectangle with the melted butter. Fold the unbuttered half over the buttered half, creating a half-circle or rectangle shape. Press down gently on the fold to seal slightly.
Arrange the folded rolls in a greased baking dish (a 9×13 inch pan works well, you can place them close together so they bake into each other). Leave a little space between them as they’ll puff up.
Cover the pan loosely with plastic wrap or a towel and let the rolls rise again in a warm place for 30-45 minutes, or until they look puffy and nearly doubled in size.
Preheat your oven to 375°F (190°C).
Bake the rolls for 15-20 minutes, or until they are golden brown on top and baked through. They should sound hollow when lightly tapped on the bottom (careful, they’re hot!).
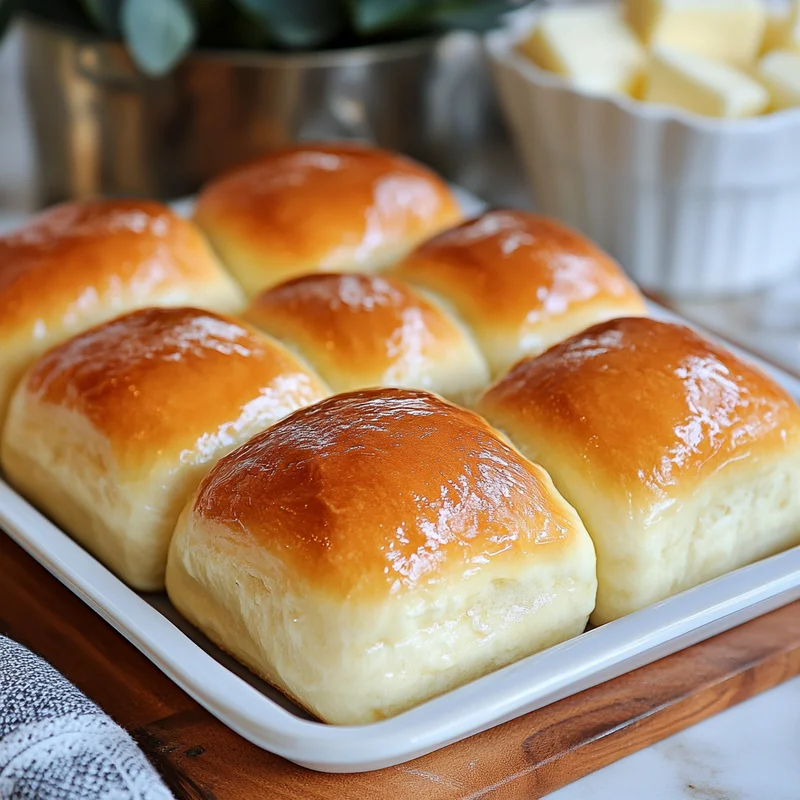
While the rolls are hot out of the oven, brush generously with the remaining softened butter (about 3 tablespoons). This gives them that beautiful sheen and extra buttery flavor.
Serve them warm and watch them disappear!
Substitutions & Additions
Want to play around? Here are a few ideas:
- Garlic Herb Butter: Mix minced garlic, chopped fresh parsley or chives, and a pinch of salt into the butter you brush on after baking. Game changer!
- Sweet Rolls: Increase the sugar slightly in the dough and fill them with a cinnamon-sugar mixture before folding for a sweeter treat.
- Whole Wheat: You can substitute up to half of the all-purpose flour with white whole wheat flour, though they might be slightly less soft.
- Different Fat: While butter is classic, you could potentially use margarine or a plant-based butter alternative, though the flavor might differ slightly.
Tips for Success
- Check Your Yeast: Always proof your active dry yeast in warm milk first to ensure it’s alive.
- Don’t Add Too Much Flour: A slightly sticky dough is good! Adding too much flour results in dry, dense rolls. The dough should clear the sides of the bowl but stick a little to the bottom.
- Room Temperature Ingredients: Eggs and butter at room temp mix into the dough much more smoothly, resulting in a better texture.
- Proper Kneading: Kneading develops the gluten, which gives the rolls structure and helps them rise. Don’t shortcut this step.
- Warm Rising Spot: Yeast loves warmth. A warm spot helps the dough rise efficiently.
- Making Ahead: You can make the dough, do the first rise, punch down, shape the rolls, and then place them in the baking dish. Cover tightly and refrigerate overnight (up to 18 hours). Let them sit at room temperature for 30-45 minutes while the oven preheats before baking as directed.
How to Store It
Honestly, these are best enjoyed fresh and warm right out of the oven! But if you happen to have leftovers (a rare occurrence in my house!):
- Room Temperature: Store cooled rolls in an airtight container or zip-top bag at room temperature for 2-3 days.
- Refrigerator: For slightly longer storage, keep them in the fridge for up to 5 days.
- Freezer: Cooled rolls can be frozen in a freezer-safe bag for up to 2-3 months. Thaw at room temperature and reheat gently.
- Reheating: The best way to reheat is to wrap them loosely in foil and warm them in a 300°F oven for about 10-15 minutes until heated through. You can also microwave them quickly, but they won’t be quite as soft.
FAQs
Got questions? Let’s tackle a few common ones!
Q: Can I use instant yeast instead of active dry yeast?
A: Yes! You can usually use the same amount. Instant yeast can often be mixed directly into the dry ingredients without proofing in milk first, but for this recipe, I still recommend proofing it in the warm milk to ensure it’s active before you commit the rest of your ingredients.
Q: Why are my rolls dense?
A: This is usually due to adding too much flour, not kneading enough, or the yeast not being active (check the expiration date and milk temperature!). Ensure you let the dough rise fully in both stages.
Q: Can I make the dough in a bread machine?
A: Yes, you can often use the dough cycle on your bread machine. Just add the liquids first, then the dry ingredients, and yeast last, according to your machine’s instructions. Let it complete the dough cycle, then remove and proceed with shaping and the second rise as directed in the recipe.
Q: Why are they called Parker House Rolls?
A: They are named after the Omni Parker House Hotel in Boston, where they were supposedly created in the 1870s. The story goes a baker angrily shoved some dough into the oven in sheets, and when they baked, they took on the folded shape!

Seriously Fluffy Classic Parker House Rolls
Equipment
- Large mixing bowl
- Stand Mixer Optional, with dough hook
- biscuit cutter Around 2 ½ - 3 inches, optional
- Knife Optional, for cutting dough
- Greased bowl
- Plastic wrap Or clean kitchen towel
- Greased baking dish A 9x13 inch pan works well
- Oven
Ingredients
Main Ingredients
- 1.25 cup whole milk 110°F
- 3 teaspoons active dry yeast Check expiration date!
- 6 tablespoons unsalted butter softened
- 4 tablespoons granulated sugar divided
- 1.5 teaspoons fine sea salt
- 1 large egg plus 1 egg yolk, room temperature
- 3.5 cups all purpose flour 3 ½ to 4 ¼ cups, add as needed
- 5 tablespoons unsalted butter softened, for brushing on dough, divided
Instructions
- Get your milk warmed up to about 110°F. Pour it into a large mixing bowl (or the bowl of your stand mixer if you're using one).
- Sprinkle the active dry yeast over the warm milk, add a pinch of sugar (about a teaspoon from the total), and give it a gentle stir. Let it sit for 5-10 minutes. You should see it get foamy and bubbly on top – that means your yeast is alive and ready to work! If it doesn't foam up, your yeast might be expired or the milk wasn't the right temp, and you'll need to start over.
- While the yeast is doing its thing, in a separate bowl (or directly into the yeast mixture bowl if using a stand mixer), cream together the 6 tablespoons of softened butter with the remaining granulated sugar and the fine sea salt. Mix until it's light and fluffy.
- Add the room temperature egg and egg yolk to the butter mixture and beat until well combined. It might look a little separated at first, but just keep mixing.
- Now, add the activated yeast mixture to the butter-egg mixture and give it a gentle whisk to combine.
- Gradually add the all-purpose flour, about a cup at a time, mixing until just combined after each addition. Once you've added about 3 ½ cups, the dough should be shaggy and starting to come together. If you're using a stand mixer with a dough hook, let it knead on low speed. If mixing by hand, turn the dough out onto a lightly floured surface.
- Knead the dough for 6-8 minutes (by hand or mixer) until it's smooth, elastic, and pulls away from the sides of the bowl (though it might still be slightly sticky to the touch). Add flour very sparingly if needed, only a tablespoon at a time, to prevent it from sticking excessively. You want a soft, supple dough, not a stiff one!
- Lightly grease a large bowl with oil or cooking spray. Shape the dough into a ball and place it in the greased bowl, turning to coat all sides. Cover the bowl tightly with plastic wrap or a clean kitchen towel.
- Let the dough rise in a warm place for 1 to 1 ½ hours, or until it has doubled in size. A turned-off oven with the light on is a great spot!
- Once doubled, punch the dough down gently to release the air. Turn it out onto a lightly floured surface and gently shape it into a rectangle.
- Roll the dough out to about ½ inch thickness. Using a biscuit cutter (around 2 ½ - 3 inches) or a knife, cut out circles or rectangles. You can gently re-roll the scraps once.
- Take about 2 tablespoons of the remaining softened butter (from the 5 tablespoons amount) and melt it gently. Brush one half of each cut-out circle or rectangle with the melted butter. Fold the unbuttered half over the buttered half, creating a half-circle or rectangle shape. Press down gently on the fold to seal slightly.
- Arrange the folded rolls in a greased baking dish (a 9x13 inch pan works well, you can place them close together so they bake into each other). Leave a little space between them as they'll puff up.
- Cover the pan loosely with plastic wrap or a towel and let the rolls rise again in a warm place for 30-45 minutes, or until they look puffy and nearly doubled in size.
- Preheat your oven to 375°F (190°C).
- Bake the rolls for 15-20 minutes, or until they are golden brown on top and baked through. They should sound hollow when lightly tapped on the bottom (careful, they're hot!).
- While the rolls are hot out of the oven, brush generously with the remaining softened butter (about 3 tablespoons from the 5 tablespoons amount). This gives them that beautiful sheen and extra buttery flavor.
- Serve them warm and watch them disappear!
Notes
- **Garlic Herb Butter:** Mix minced garlic, chopped fresh parsley or chives, and a pinch of salt into the butter you brush on after baking.
- **Sweet Rolls:** Increase the sugar slightly in the dough and fill them with a cinnamon-sugar mixture before folding for a sweeter treat.
- **Whole Wheat:** You can substitute up to half of the all-purpose flour with white whole wheat flour, though they might be slightly less soft.
- **Different Fat:** While butter is classic, you could potentially use margarine or a plant-based butter alternative, though the flavor might differ slightly.
- **Tips for Success:**
- **Check Your Yeast:** Always proof your active dry yeast in warm milk first to ensure it's alive.
- **Don't Add Too Much Flour:** A slightly sticky dough is good! Adding too much flour results in dry, dense rolls. The dough should clear the sides of the bowl but stick a little to the bottom.
- **Room Temperature Ingredients:** Eggs and butter at room temp mix into the dough much more smoothly, resulting in a better texture.
- **Proper Kneading:** Kneading develops the gluten, which gives the rolls structure and helps them rise. Don't shortcut this step.
- **Warm Rising Spot:** Yeast loves warmth. A warm spot helps the dough rise efficiently.
- **Making Ahead:** You can make the dough, do the first rise, punch down, shape the rolls, and then place them in the baking dish. Cover tightly and refrigerate overnight (up to 18 hours). Let them sit at room temperature for 30-45 minutes while the oven preheats before baking as directed.
- **How to Store It:**
- **Room Temperature:** Store cooled rolls in an airtight container or zip-top bag at room temperature for 2-3 days.
- **Refrigerator:** For slightly longer storage, keep them in the fridge for up to 5 days.
- **Freezer:** Cooled rolls can be frozen in a freezer-safe bag for up to 2-3 months. Thaw at room temperature and reheat gently.
- **Reheating:** The best way to reheat is to wrap them loosely in foil and warm them in a 300°F oven for about 10-15 minutes until heated through. You can also microwave them quickly, but they won't be quite as soft.
- **FAQs:**
- **Can I use instant yeast instead of active dry yeast?** Yes! You can usually use the same amount. Instant yeast can often be mixed directly into the dry ingredients without proofing in milk first, but for this recipe, proofing in warm milk is still recommended to ensure it's active.
- **Why are my rolls dense?** This is usually due to adding too much flour, not kneading enough, or the yeast not being active (check the expiration date and milk temperature!). Ensure you let the dough rise fully in both stages.
- **Can I make the dough in a bread machine?** Yes, you can often use the dough cycle on your bread machine. Add liquids first, then dry ingredients, and yeast last, according to your machine's instructions. Let it complete the dough cycle, then remove and proceed with shaping and the second rise as directed.