Introduction
Hey there, fellow snack lovers! Are you head-over-heels for that distinct, tangy, crunchy goodness that only a dill pickle can deliver? Me too! There’s just something about that briny bite that hits the spot, especially when you’re craving something satisfyingly crunchy. But let’s be real, sometimes you want that intense pickle flavor without the juice running down your arm. Enter: Dehydrated Pickle Chips! These little guys are a total game-changer. They pack all that amazing dill pickle punch into a crispy, chip-like package. Seriously, once you try these, you’ll wonder where they’ve been all your life. And the best part? They are SO incredibly simple to make right in your own kitchen. Get ready to be obsessed!
Why You’ll Love This Recipe
Alright, let’s break down why these crispy pickle chips are about to become your go-to snack:
- Fast (Well, the prep is!) – You’ll have them ready for the dehydrator in minutes.
- Easy – Seriously, if you can slice a pickle, you can make these.
- Giftable – Package these up in a cute jar, and you’ve got a unique, delicious gift for any pickle enthusiast in your life.
- Crowd-pleasing – Put a bowl of these out, and watch them disappear! They’re a fun, unexpected alternative to potato chips.
Ingredients
This is where things get almost ridiculously simple. You only need one main ingredient!
- 12 jumbo dill pickles: Go for your favorite brand of crunchy dill pickles. I find larger pickles work best because they give you bigger “chips,” but any size will do. Just make sure they are dill pickles for that classic flavor!
- Mesh dehydrator tray liners (optional but highly recommended): These little helpers prevent your pickles from sticking to the trays as they shrink and dry. If your dehydrator came with them, awesome! If not, parchment paper cut to size with holes poked in it can work in a pinch, but the mesh liners really are the easiest.
How to Make It
Okay, grab your pickles and let’s do this! It’s really just a few simple steps.
First things first, you need to drain your pickles really well. I usually just open the jar and let the brine pour out, or take them out and lay them on a wire rack over the sink for a few minutes.
Next, and this is a crucial step for crispiness, you need to pat those pickles dry! Use paper towels or a clean kitchen towel and blot away as much surface moisture as you can. The drier they are going into the dehydrator, the faster and crispier they’ll get.
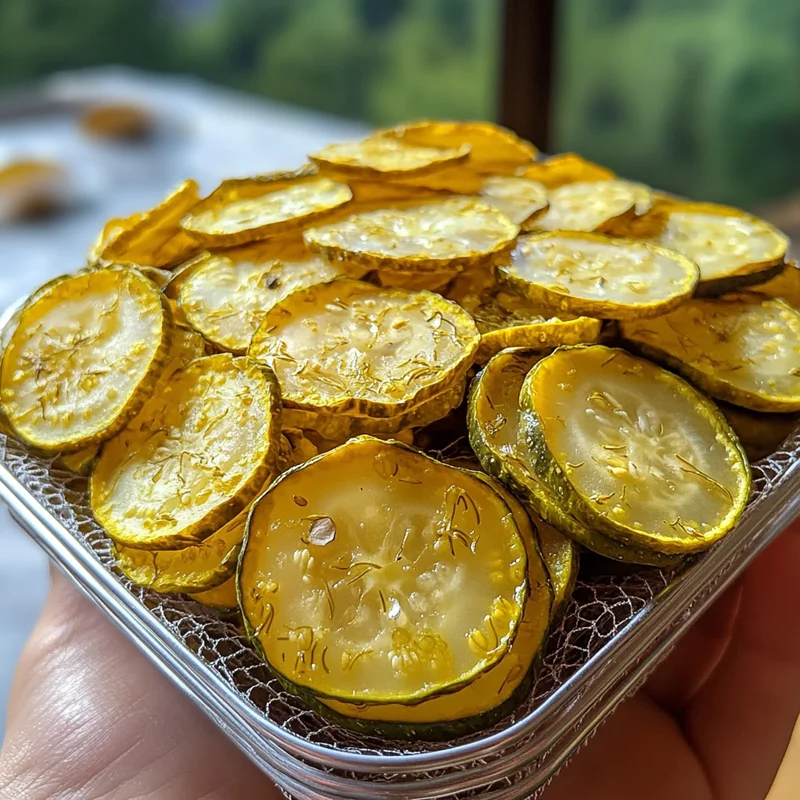
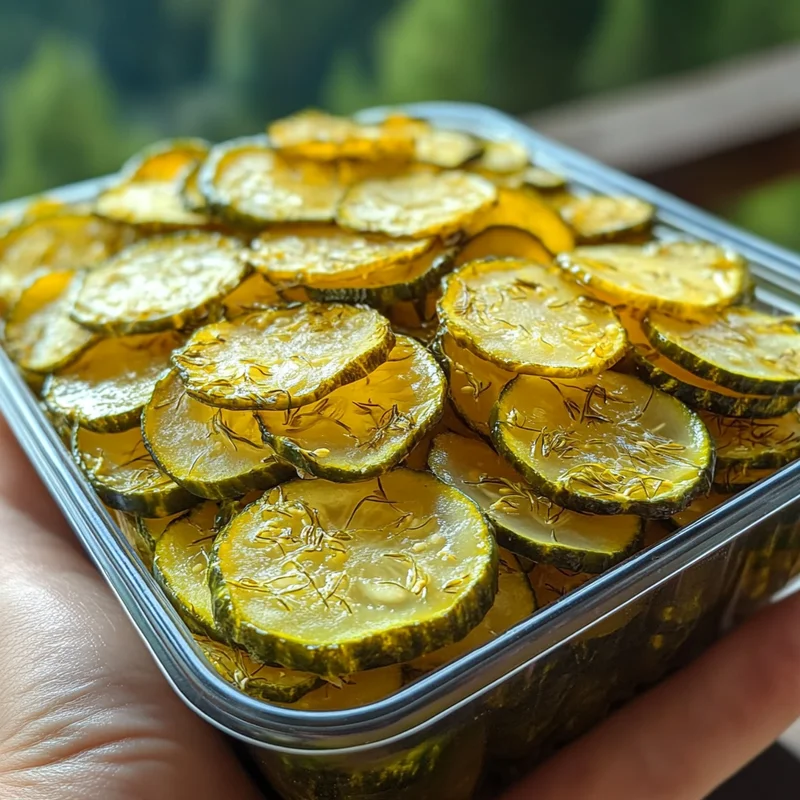
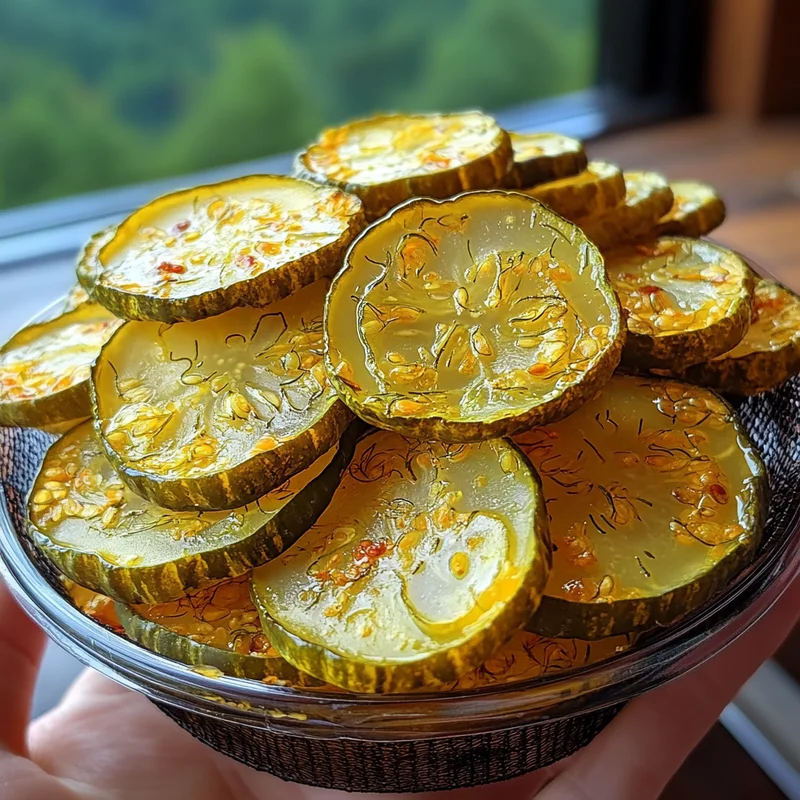
Now, slice those pickles! You’re aiming for consistent, thin slices, about 1/8 inch thick. This is where a mandoline slicer can be your best friend if you have one – it makes quick work of slicing and ensures all your chips are the same thickness, which helps them dry evenly. If you’re using a knife, just take your time and try to keep the slices uniform.
Once sliced, arrange the pickle rounds on your dehydrator trays. If you’re using mesh liners, lay those down first. Make sure the slices aren’t overlapping – you want air to circulate around each one so they can dry properly.
Load the trays into your dehydrator. I like to set my dehydrator to somewhere between 125°F and 135°F (52°C to 57°C). This lower temperature helps preserve the flavor and nutrients better than higher heat.
Now comes the waiting game! Dehydrating time can vary a lot depending on your dehydrator model, the thickness of your slices, and even the humidity in your house. It typically takes anywhere from 8 to 12 hours, sometimes even longer. Check on them periodically. You’ll know they’re done when they are completely dry, firm, and snap easily when you try to bend them. There should be absolutely no moisture or bendiness left.
Once they are perfectly crispy, turn off the dehydrator and let the chips cool completely on the trays before you store them. This helps prevent condensation.
Substitutions & Additions
This recipe is super simple, but you can definitely play around with it! While you can’t really substitute a pickle, you can try different types of pickles! Spicy dill pickles would make spicy pickle chips, or maybe even bread and butter pickles for a sweet and tangy version (though I haven’t tried that myself!).
The easiest way to customize these is with additions before you dehydrate them. Once you’ve sliced and patted them dry, you can sprinkle them with things like:
- Extra dill weed
- Garlic powder
- Onion powder
- A pinch of cayenne pepper or chili powder for heat
- Ranch seasoning mix (yes, pickle ranch chips are a thing!)
- Smoked paprika
Just a light sprinkle is all you need! The flavor concentrates as they dry, so a little goes a long way.
Tips for Success
Making dehydrated pickle chips is easy, but a few little tricks will ensure you get perfectly crispy results every time:
- Slice Thin & Evenly: This is probably the most important tip! Thinner slices dry faster and get crispier. Consistent slices mean they’ll all be done around the same time. A mandoline is a huge help here.
- Pat Dry Vigorously: Don’t skip the drying step! Removing as much surface moisture as possible upfront speeds up the dehydrating process.
- Don’t Overcrowd: Give your pickle slices space on the trays. Good air circulation is key to efficient drying.
- Check for Crispness: Drying times are just estimates. Your chips are done when they snap easily and have no residual moisture. Check a few different thicknesses if your slices weren’t perfectly uniform.
- Cool Completely: Letting them cool on the trays before storing helps ensure they stay crispy and prevents condensation buildup in the container.
How to Store It
Once your dehydrated pickle chips are completely cool, transfer them to an airtight container. A glass jar or a container with a tight-fitting lid works great. If you live in a humid climate, you might consider adding a food-safe desiccant packet (those little “do not eat” packets) to the container to absorb any lingering moisture and keep them extra crisp. Stored properly, they should last for several months, though I bet they’ll disappear much faster than that!
FAQs
How long do dehydrated pickle chips take to make?
The dehydrating time is the longest part, usually taking between 8 to 12 hours, sometimes longer. Prep time is only about 10-15 minutes!
Can I make these in the oven?
Yes, you can! Preheat your oven to its lowest possible temperature (ideally 150°F or below). Arrange the slices on baking sheets lined with parchment paper and prop the oven door open slightly with a wooden spoon to allow moisture to escape. This will likely take several hours, similar to dehydrating, so keep a close eye on them.
Why are my dehydrated pickle chips not crispy?
The most common reasons are slicing them too thick, not drying them long enough, or overcrowding the trays. Ensure your slices are thin and uniform, and keep drying them until they are completely brittle and snap when bent.
What do dehydrated pickle chips taste like?
They taste like a super-concentrated, intensely flavored dill pickle in a crispy, chip-like texture. All that tangy, salty, dilly goodness is packed into each bite!

Crispy Dehydrated Pickle Chips
Equipment
- Dehydrator
- Mesh dehydrator tray liners Optional but highly recommended. Parchment paper with holes can be used in a pinch.
- Mandoline slicer Optional, but helpful for thin, consistent slices.
- Paper towels or clean kitchen towel For patting pickles dry.
- Wire rack Optional, for initial draining.
- Airtight container For storage.
Ingredients
Hauptzutaten
- 12 jumbo dill pickles Go for your favorite brand of crunchy dill pickles. Larger pickles work best.
Instructions
- First things first, you need to drain your pickles really well. I usually just open the jar and let the brine pour out, or take them out and lay them on a wire rack over the sink for a few minutes.
- Next, and this is a crucial step for crispiness, you need to pat those pickles dry! Use paper towels or a clean kitchen towel and blot away as much surface moisture as you can. The drier they are going into the dehydrator, the faster and crispier they'll get.
- Now, slice those pickles! You're aiming for consistent, thin slices, about 1/8 inch thick. This is where a mandoline slicer can be your best friend if you have one – it makes quick work of slicing and ensures all your chips are the same thickness, which helps them dry evenly. If you're using a knife, just take your time and try to keep the slices uniform.
- Once sliced, arrange the pickle rounds on your dehydrator trays. If you're using mesh liners, lay those down first. Make sure the slices aren't overlapping – you want air to circulate around each one so they can dry properly.
- Load the trays into your dehydrator. I like to set my dehydrator to somewhere between 125°F and 135°F (52°C to 57°C). This lower temperature helps preserve the flavor and nutrients better than higher heat.
- Now comes the waiting game! Dehydrating time can vary a lot depending on your dehydrator model, the thickness of your slices, and even the humidity in your house. It typically takes anywhere from 8 to 12 hours, sometimes even longer. Check on them periodically. You'll know they're done when they are completely dry, firm, and snap easily when you try to bend them. There should be absolutely no moisture or bendiness left.
- Once they are perfectly crispy, turn off the dehydrator and let the chips cool completely on the trays before you store them. This helps prevent condensation.
- Once your dehydrated pickle chips are completely cool, transfer them to an airtight container. A glass jar or a container with a tight-fitting lid works great. If you live in a humid climate, you might consider adding a food-safe desiccant packet (those little "do not eat" packets) to the container to absorb any lingering moisture and keep them extra crisp. Stored properly, they should last for several months, though I bet they'll disappear much faster than that!
Notes
- Slice Thin & Evenly: Aim for about 1/8 inch thick slices for faster drying and crispier results. A mandoline helps.
- Pat Dry Vigorously: Remove as much surface moisture as possible before dehydrating.
- Don't Overcrowd: Give slices space on trays for good air circulation.
- Check for Crispness: Chips are done when they snap easily with no moisture or bendiness.
- Cool Completely: Let them cool fully on trays before storing to prevent condensation. Substitutions & Additions:
- Try different types of pickles like spicy dill or possibly bread and butter pickles.
- Before dehydrating, sprinkle dried slices with optional seasonings: extra dill weed, garlic powder, onion powder, cayenne pepper/chili powder, ranch seasoning mix, or smoked paprika. A light sprinkle is enough as flavor concentrates. Oven Method:
- Preheat oven to its lowest setting (ideally 150°F or below).
- Arrange slices on baking sheets lined with parchment paper.
- Prop oven door open slightly with a wooden spoon to allow moisture to escape.
- This will take several hours; check periodically until crispy.