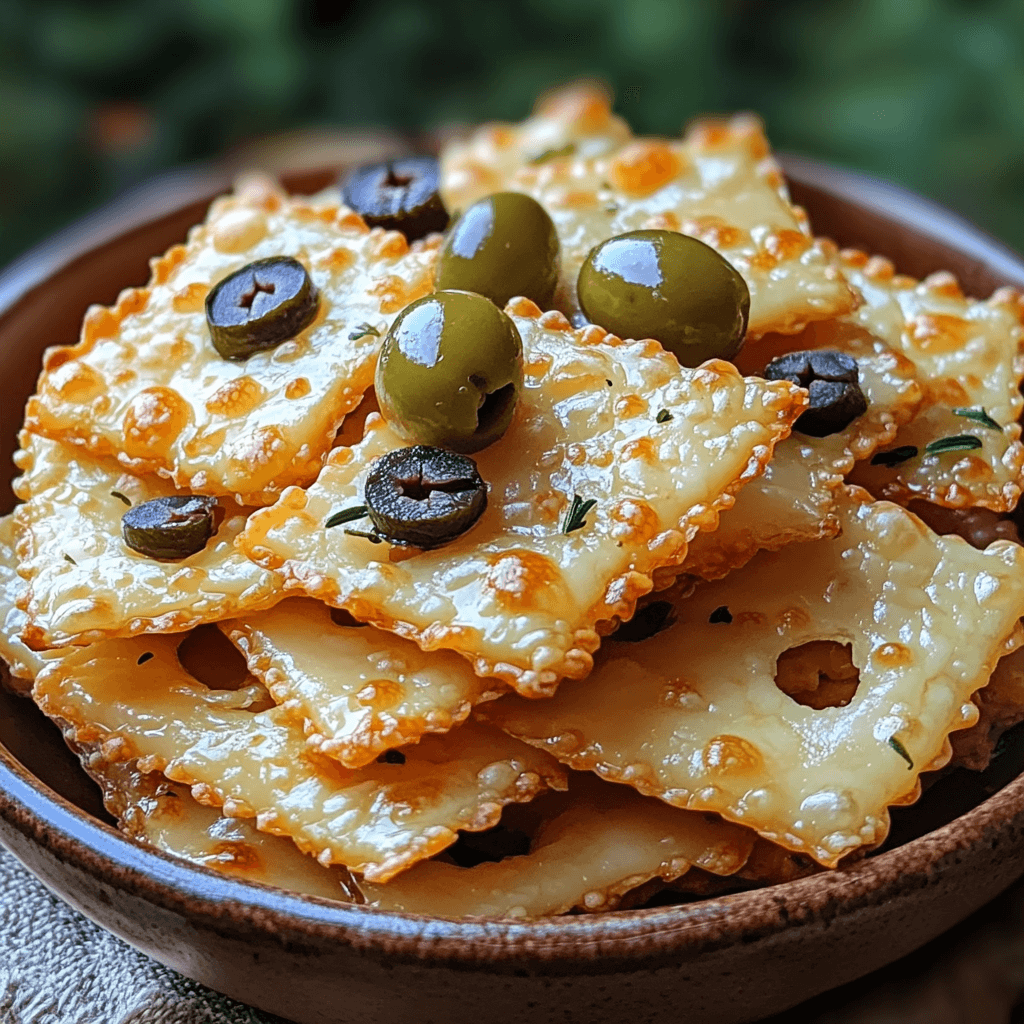
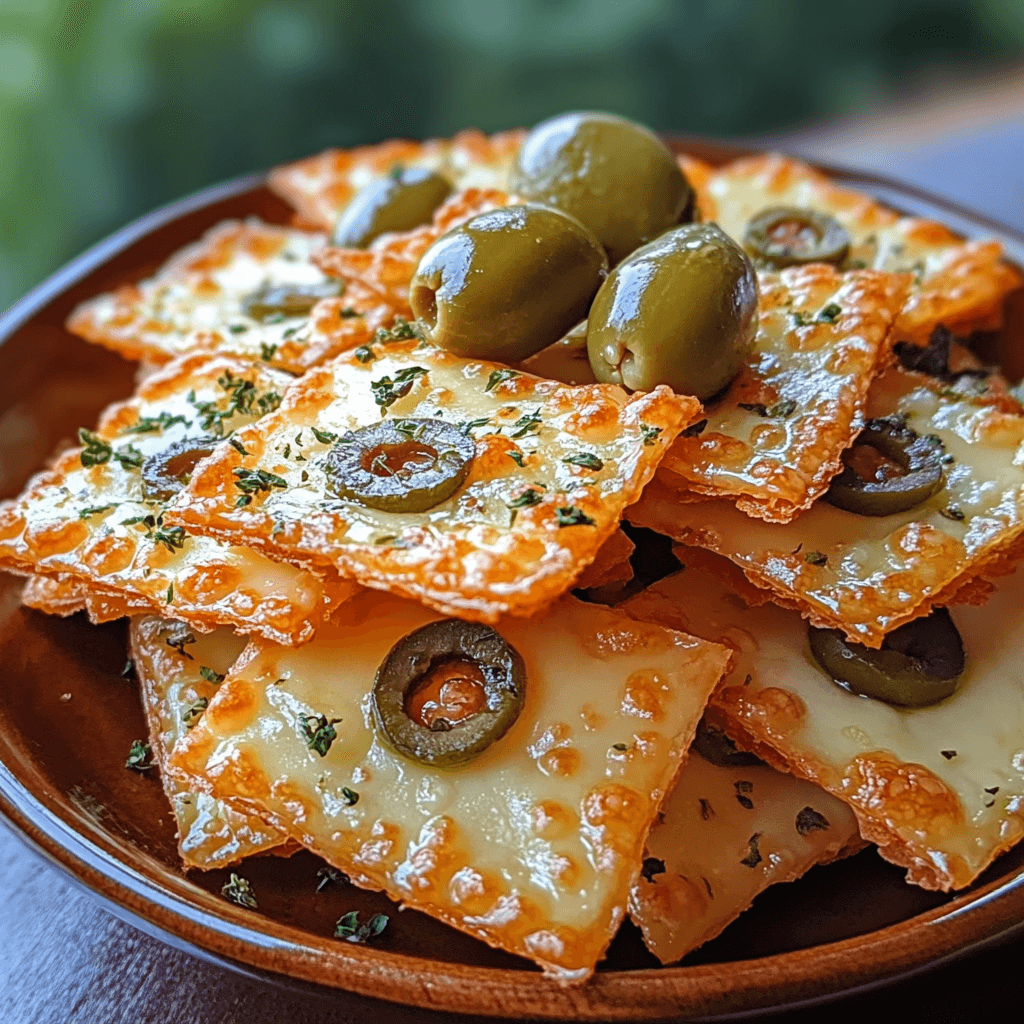
Hey there, fellow keto enthusiasts! Are you craving a crunchy, cheesy snack that won’t derail your macros? Look no further! These oven-baked keto cheese crisps are the perfect solution. Imagine this: a delicate, shatteringly crisp cheese base, studded with the briny tang of pickles and the salty pop of olives. It’s the ultimate combination of textures and flavors, all packed into a bite-sized keto dream.
What makes these crisps so special? They’re unbelievably easy to make – seriously, you’ll be surprised how simple it is! They’re ready in minutes and require minimal cleanup. They offer a satisfying crunch that’s perfect for satisfying those salty cravings, without the guilt. The addition of pickles and olives brings a delightful complexity, preventing any cheese-induced monotony. And because they’re keto-friendly, you can indulge without worrying about spiking your blood sugar. Trust me, you’ll find yourself reaching for these addictive little snacks again and again.
Their versatility also allows you to customize them, catering to your specific taste preferences! Prepare to be amazed by how satisfying this simple recipe can be! This recipe is perfect for a quick snack, party appetizers, or even a fun addition to a larger keto meal.

What You’ll Need
This recipe is remarkably simple, requiring only a few key ingredients:
6 slices cheese (Gouda recommended): Gouda’s nutty and slightly sweet flavor profile pairs beautifully with the pickles and olives, but feel free to experiment with other hard cheeses like cheddar, parmesan, or even a sharp provolone. The key is to choose a cheese that melts well and holds its shape.
2 pickles, thinly sliced: Dill pickles offer a classic tangy complement to the cheese, but bread and butter pickles or even spicy giardiniera would also be delicious choices. The thinner the slices, the better they’ll integrate into the crisps.
5 olives, thinly sliced: Kalamata olives are recommended for their intense briny flavor, but Castelvetrano or any other olive you prefer will work wonders. Similar to the pickles, thinly sliced olives will melt into the cheese more effectively.
Parchment paper: This is essential for preventing the cheese crisps from sticking to the baking sheet and for easy cleanup.
That’s it! Minimal ingredients, maximum flavor.
Step-by-Step Instructions
Preheat your oven to 350°F (175°C). Line a baking sheet with parchment paper. This is crucial – trust me on this one! It prevents sticking and makes cleaning up a breeze.
Next, take your cheese slices and arrange them on the prepared baking sheet, ensuring they’re not overlapping. If you’re using larger cheese slices, you might need to cut them in half to fit them better onto the baking sheet and achieve more even cooking.
Now comes the fun part: arranging your toppings! Evenly distribute the thinly sliced pickles and olives over the cheese slices. A little artful arrangement can make your crisps look even more appealing. Don’t overcrowd, spacing out the pickles and olives to ensure they get baked properly.
Carefully place the baking sheet in the preheated oven. Baking time will depend on your oven and the thickness of your cheese slices, but generally, you should bake for 8-12 minutes, or until the cheese is melted, bubbly, and golden brown around the edges. Keep a close eye on them to prevent burning.
Once the cheese crisps are golden brown and crispy, carefully remove the baking sheet from the oven. Let them cool slightly on the baking sheet before carefully transferring them to a wire rack to cool completely. This helps prevent them from getting soggy.
Once cool, carefully peel the crisps from the parchment paper. They should be crispy and easily removable. If you encounter any sticking, gently loosen them with a spatula.
And there you have it! Your crispy keto cheese crisps are ready to enjoy!
Tips for Success
Thinly slice your pickles and olives: This ensures they bake evenly and integrate well with the cheese. Think delicate and even!
Don’t overcrowd the baking sheet: Give each cheese slice enough space to melt and crisp properly. Overcrowding can lead to uneven cooking and soggy crisps.
Watch your oven closely: Ovens vary, so keep an eye on your cheese crisps to prevent burning. Start checking around the 8-minute mark.
Use parchment paper: This is not optional! It’s your best friend for easy cleanup and preventing sticking.
Let them cool completely: This step is crucial for maintaining the crisp texture. Patience is key!
Variations to Try
Feeling adventurous? Here are some variations to elevate your keto cheese crisps:
Spice it up: Add a pinch of red pepper flakes to the cheese before baking for a spicy kick.
Herby delight: Sprinkle fresh or dried herbs like oregano, thyme, or rosemary on top of the cheese for an aromatic twist.
Garlic goodness: Add a sprinkle of garlic powder or minced garlic before baking for a savory boost.
Nutty crunch: Add some chopped nuts, like pecans or walnuts, for extra crunch and flavor.
Different cheeses: Experiment with different types of hard cheeses to find your favorite flavor combination.
Storing and Reheating
Store leftover keto cheese crisps in an airtight container at room temperature for up to 3 days. For longer storage, you can freeze them. To freeze, place the cooled crisps in a freezer-safe bag or container. They’ll keep for up to 2 months.
To reheat, simply place them on a baking sheet and bake in a preheated oven at 350°F (175°C) for 2-3 minutes, or until warmed through. Avoid over-reheating, as this can make them less crispy.
Frequently Asked Questions
Q: Can I use a different type of cheese?
A: Absolutely! Experiment with various hard cheeses like cheddar, parmesan, or provolone. Just ensure the cheese melts well and holds its shape.
Q: How long do the cheese crisps keep?
A: Stored properly in an airtight container at room temperature, they’ll last for up to 3 days. Frozen, they’ll keep for up to 2 months.
Q: Can I make these ahead of time?
A: Yes! You can bake the cheese crisps ahead of time and store them as described above. They’re perfect for meal prepping or preparing for a party.
Q: What if my cheese crisps are not crispy enough?
A: Ensure your oven is preheated to the correct temperature and that you’re not overcrowding the baking sheet. You might also need to increase the baking time slightly, but keep a close eye to prevent burning.
Q: Are these crisps suitable for vegetarians?
A: Yes, these cheese crisps are naturally vegetarian, provided you use vegetarian-friendly olives (many are already).
The Final Word
These crispy keto cheese crisps are a game-changer for anyone looking for a quick, easy, and satisfying keto-friendly snack. The combination of crispy cheese, tangy pickles, and salty olives is simply irresistible. Their versatility also allows for endless customization, catering to various flavor preferences. So, what are you waiting for? Give this recipe a try and let me know what you think in the comments below! Don’t forget to rate the recipe and share your photos on social media! Happy snacking!
Oven-Baked Keto Cheese Crisps 🧀🔥

Crispy cheese snacks perfect for a keto diet.
- Baking Sheet
- Oven
Cheese & toppings
- 6 slices Cheese (Gouda recommended)
- 2 Pickles (thinly sliced)
- 5 Olives (thinly sliced)
Optional additions
- 1 tsp Garlic powder (optional)
- 0.5 tsp Italian seasoning (optional)
- Preheat oven to 350°F (175°C). Line a baking sheet with parchment paper.
- Place cheese slices on the prepared baking sheet.
- Arrange pickle and olive slices on top of the cheese.
- If using, sprinkle garlic powder and Italian seasoning over the cheese and toppings.
- Bake for 8-10 minutes, or until the cheese is melted and bubbly and the edges are golden brown.
- Remove from oven and let cool slightly before serving. The crisps will continue to crisp as they cool.
- Carefully lift the crisps from the baking sheet using a spatula.
- Serve immediately and enjoy!
For extra crispiness, use a lower oven temperature and bake for a longer time.