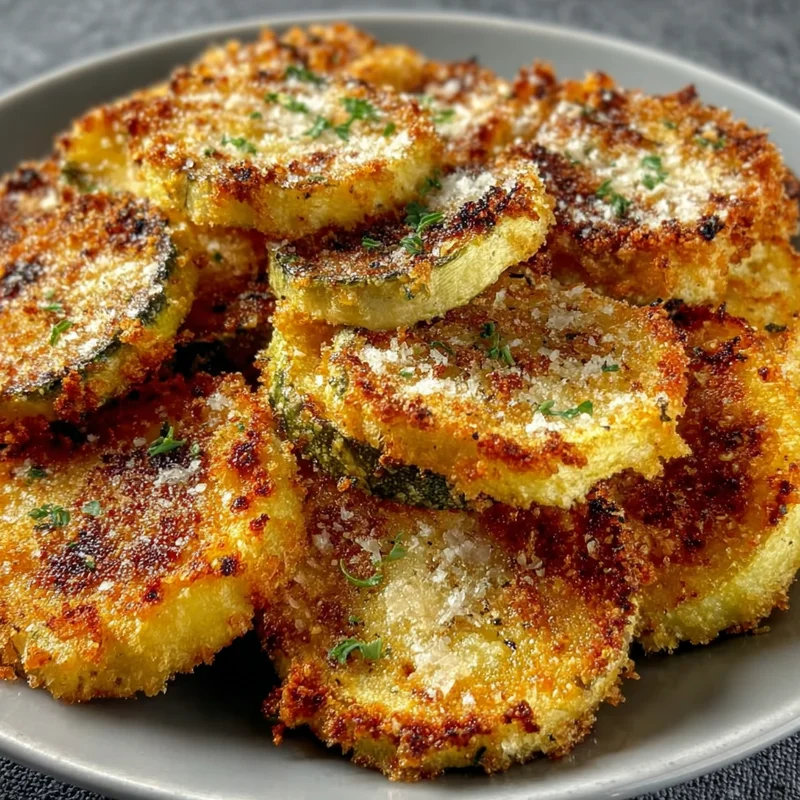
A Taste of Nostalgia, Made Easy!
Oh, hello there, friend! Do you ever get that craving for something crispy and satisfying, but also packed with good-for-you veggies? Me too! Today, we’re diving into a recipe that brings back all those warm, fuzzy feelings of childhood favorites, but with a healthy twist. Forget greasy frying – we’re talking about perfectly golden, oven-fried squash that’s so easy, you’ll want to make it every week. It’s like a hug in bite-sized form, and honestly, it’s a lifesaver on those busy weeknights when you need something quick and crowd-pleasing.
Why You’ll Love This Oven-Fried Squash
- Fast: Seriously, from start to finish, this takes less time than ordering takeout!
- Easy: No fancy techniques required. If you can slice and dip, you can make this.
- Giftable: Okay, maybe not “giftable” in the traditional sense, but it’s such a hit, you might find yourself wanting to share!
- Crowd-Pleasing: Even the pickiest eaters will reach for these crispy delights. It’s a fantastic way to sneak in some veggies!

Gather Your Veggie Goodies: The Ingredients
Here’s what you’ll need to make these delightful bites. It’s a pretty simple list, and I bet you already have most of it in your pantry!
- 2 medium yellow squash or zucchini: Choose ones that feel firm and have smooth skin. Slicing them into ¼-inch rounds is key for that perfect bite.
- ½ cup buttermilk: This is our secret weapon for helping the coating stick and adding a subtle tang. Don’t have buttermilk? No worries! Just use milk and stir in 1 teaspoon of lemon juice or white vinegar. Let it sit for a few minutes to work its magic.
- ½ cup cornmeal: This gives our squash that fantastic, slightly gritty crunch that we all love in fried favorites.
- ½ cup panko breadcrumbs: Panko is my go-to for extra crispiness! If you only have regular breadcrumbs, that’s totally fine too.
- ¼ cup grated Parmesan cheese (optional): A little sprinkle of Parm adds a wonderful savory, cheesy flavor that’s irresistible.
- ½ teaspoon garlic powder: Because garlic makes everything better, right?
- ½ teaspoon paprika: For a touch of color and a hint of smoky warmth.
- Salt and black pepper, to taste: The classics, always essential.
- Olive oil spray or nonstick cooking spray: Just a light mist to help everything get perfectly golden and prevent sticking.
Let’s Get Cooking: How to Make It
Alright, apron on! This is where the fun begins. It’s so straightforward, you’ll be amazed at how simple it is.
- Preheat and Prep: First things first, get your oven preheated to a nice and toasty 400°F (200°C). While it’s heating up, grab a baking sheet and line it with parchment paper. This makes for super easy cleanup! Alternatively, you can just give it a light spray with your cooking spray.
- The Buttermilk Bath: Take your sliced squash and pop them into a shallow dish. Pour that lovely buttermilk over them, giving them a gentle toss to make sure every single slice gets a good coating. Let them soak for about 5-10 minutes. This is when the magic starts happening, softening them up just a bit.
- Create the Crispy Coating: In a separate shallow dish, it’s time to mix our crunchy goodness. Combine the cornmeal, panko breadcrumbs, Parmesan cheese (if you’re using it – I highly recommend it!), garlic powder, paprika, a generous pinch of salt, and some black pepper. Give it all a good whisk with a fork until everything is nicely blended.
- Get Coated: Now, take your squash slices out of the buttermilk bath, letting any excess drip back into the dish. Then, it’s time to dredge! Place a few slices into the cornmeal mixture, pressing down gently to make sure they’re well-coated on both sides. You want a nice, even layer of that delicious crumb mixture.
- Arrange for Baking: Lay your coated squash slices in a single layer on your prepared baking sheet. Make sure they aren’t overlapping too much, as this will help them get nice and crispy all around.
- A Little Spray Love: Give the tops of your coated squash slices a light, even mist of olive oil or cooking spray. This little step really helps them achieve that gorgeous golden-brown color and extra crispiness.
- Bake to Perfection: Pop that baking sheet into your preheated oven. Bake for about 20-25 minutes. About halfway through, I like to flip them over so they get beautifully browned on both sides. You’re looking for that lovely golden hue and a tender, but not mushy, texture.
Spice Things Up: Substitutions & Additions
While this recipe is fantastic as is, sometimes it’s fun to play around! Here are a few ideas:
- Herbaciousness: Add a tablespoon of finely chopped fresh herbs like parsley, chives, or even a little dill to the breadcrumb mixture.
- Spicy Kick: A pinch of cayenne pepper or a dash of your favorite hot sauce mixed into the buttermilk can add a lovely warmth.
- Different Veggies: This coating works wonders on other vegetables too! Try it on thinly sliced eggplant, sweet potato rounds, or even thick-cut onion rings. Just adjust baking time as needed.
- Gluten-Free: For a gluten-free version, swap the panko and cornmeal for a gluten-free breadcrumb mix or almond flour.

Keys to Crispy Success
A few little tricks can make these oven-fried squash even better:
- Don’t Overcrowd: Giving the squash slices space on the baking sheet is crucial for crisping.
- Even Slices: Try to keep your squash slices as uniform in thickness as possible for even cooking. A mandoline slicer can be a lifesaver here if you have one!
- Prep Ahead: You can slice the squash and prepare the breadcrumb mixture a day in advance. Just keep them in separate airtight containers in the fridge until you’re ready to coat and bake.
- The Buttermilk Dip: Make sure the squash isn’t dripping excessively when you dredge it. A good coating is what we want, but not so much liquid that the crumbs get soggy.
Storing Your Crispy Treasures
These are best enjoyed fresh from the oven when they’re at their most crispy! However, if you have leftovers:
- Cool Completely: Let them cool down entirely before storing to prevent sogginess.
- Airtight Container: Store them in an airtight container in the refrigerator.
- Reheating: To bring back some of that crispiness, I recommend reheating them in a toaster oven or a regular oven at around 350°F (175°C) for a few minutes. Microwaving will likely make them soft again.
- Shelf Life: They’ll typically last in the fridge for about 2-3 days.
Frequently Asked Questions
- Can I use regular milk instead of buttermilk? Absolutely! As mentioned in the ingredients, mix ½ cup of regular milk with 1 teaspoon of lemon juice or white vinegar and let it sit for 5 minutes. It works almost as well!
- Why aren’t my squash slices crispy? This could be due to a few reasons: overcrowding the baking sheet, not spraying with enough oil before baking, or not baking them long enough. Ensure they have space and get that final spray of oil!
- Can I bake these without parchment paper? Yes, you can! Just make sure to lightly grease your baking sheet with cooking spray or a thin layer of oil to prevent sticking. Parchment paper just makes cleanup a breeze!
Give this Oven-Fried Squash recipe a try and let me know what you think in the comments below! I’m always curious to hear how your kitchen creations turn out. Happy cooking!

Crispy Oven-Fried Squash
Equipment
- Baking Sheet Lined with parchment paper or lightly greased
- Shallow dish For buttermilk bath
- Shallow dish For breading mixture
- Fork For whisking breading mixture
- Mandoline slicer Optional, for uniform slices
- Toaster oven Optional, for reheating leftovers
Ingredients
Hauptzutaten
- 2 medium yellow squash or zucchini sliced into ¼-inch rounds
- 0.5 cup buttermilk or milk with 1 tsp lemon juice/vinegar, let sit for 5 min
- 0.5 cup cornmeal
- 0.5 cup panko breadcrumbs or regular breadcrumbs
- 0.25 cup grated Parmesan cheese optional
- 0.5 teaspoon garlic powder
- 0.5 teaspoon paprika
- to taste salt
- to taste black pepper
- light mist olive oil spray or nonstick cooking spray
Instructions
- First things first, get your oven preheated to a nice and toasty 400°F (200°C). While it’s heating up, grab a baking sheet and line it with parchment paper. This makes for super easy cleanup! Alternatively, you can just give it a light spray with your cooking spray.
- Take your sliced squash and pop them into a shallow dish. Pour that lovely buttermilk over them, giving them a gentle toss to make sure every single slice gets a good coating. Let them soak for about 5-10 minutes. This is when the magic starts happening, softening them up just a bit.2 medium yellow squash or zucchini
- In a separate shallow dish, it’s time to mix our crunchy goodness. Combine the cornmeal, panko breadcrumbs, Parmesan cheese (if you’re using it – I highly recommend it!), garlic powder, paprika, a generous pinch of salt, and some black pepper. Give it all a good whisk with a fork until everything is nicely blended.2 medium yellow squash or zucchini
- Now, take your squash slices out of the buttermilk bath, letting any excess drip back into the dish. Then, it’s time to dredge! Place a few slices into the cornmeal mixture, pressing down gently to make sure they’re well-coated on both sides. You want a nice, even layer of that delicious crumb mixture.2 medium yellow squash or zucchini
- Lay your coated squash slices in a single layer on your prepared baking sheet. Make sure they aren't overlapping too much, as this will help them get nice and crispy all around.
- Give the tops of your coated squash slices a light, even mist of olive oil or cooking spray. This little step really helps them achieve that gorgeous golden-brown color and extra crispiness.2 medium yellow squash or zucchini
- Pop that baking sheet into your preheated oven. Bake for about 20-25 minutes. About halfway through, I like to flip them over so they get beautifully browned on both sides. You’re looking for that lovely golden hue and a tender, but not mushy, texture.

