Introduction
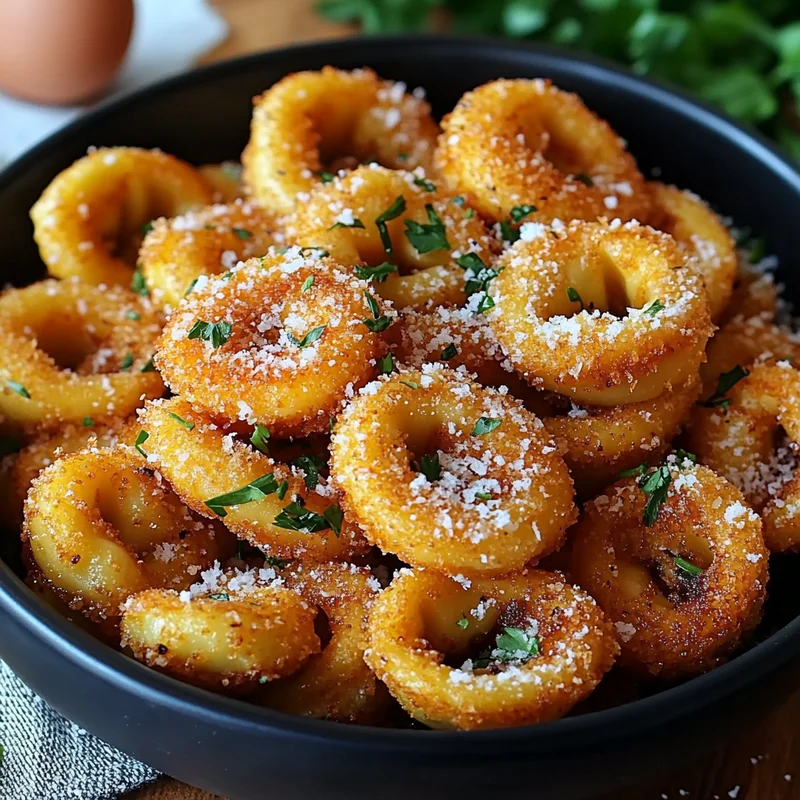
Hey there, friend! Remember those moments when you just needed a little something special, something comforting yet exciting? Maybe you had friends coming over last minute, or you were just craving a fun snack that felt a little indulgent but was secretly super easy to pull off? That’s exactly where this Crispy Parmesan Fried Tortellini recipe comes in!
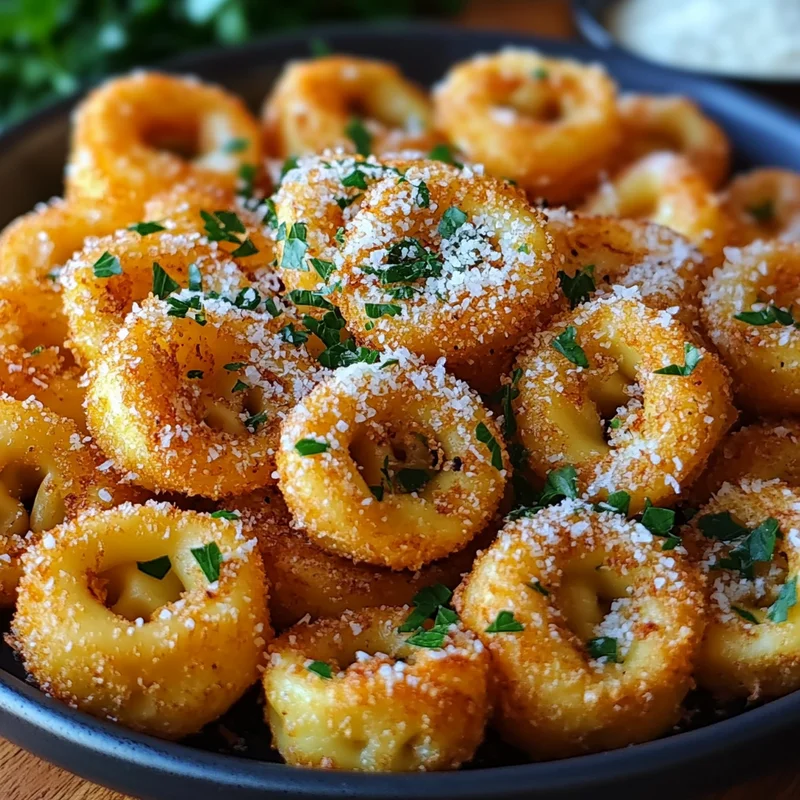
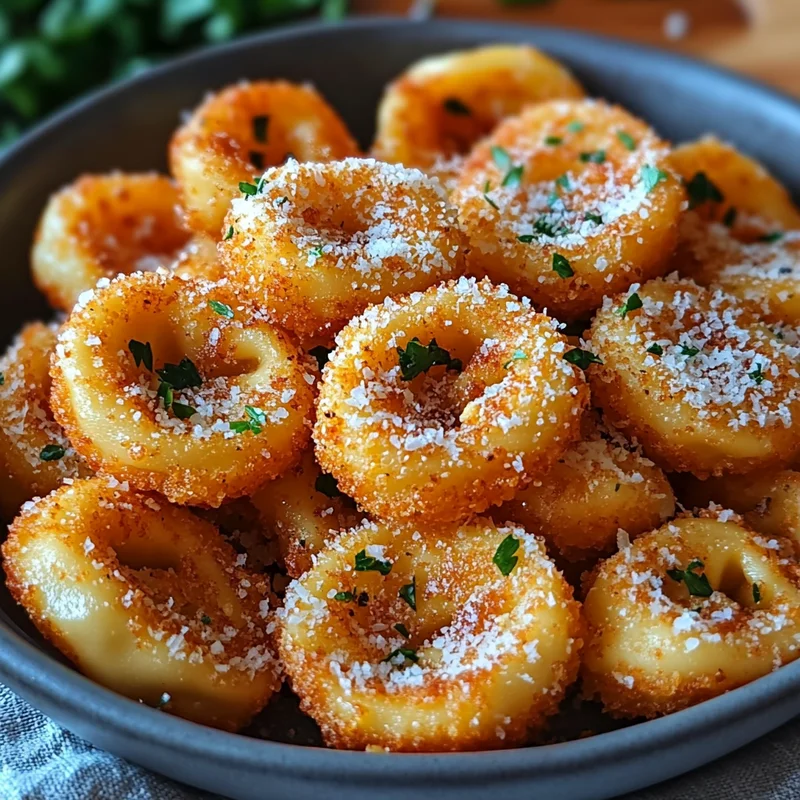
Seriously, this isn’t just a recipe; it’s a little bite of happiness. Taking simple refrigerated tortellini and turning it into golden, crispy, cheesy perfection? It’s pure magic, and it’s way easier than you might think. Get ready to wow yourself (and anyone lucky enough to be sharing with you!) with this absolutely addictive snack.
Why You’ll Love This Recipe
- Fast: From pantry to plate in under 30 minutes!
- Easy: Simple steps, no fancy equipment required.
- Giftable: (Okay, maybe not giftable in a box, but you’ll want to share them!) Perfect for bringing to parties or potlucks.
- Crowd-pleasing: Who can resist crispy, cheesy, fried pasta? Nobody, that’s who.

Ingredients
Gather ’round, let’s talk about the simple heroes of this dish. You probably have most of these hanging out in your kitchen already!
- 1 package refrigerated tortellini (about 9 oz): Any filling works here – cheese, spinach, meat! Just grab your favorite.
- 1 cup panko breadcrumbs: These give you that extra-special, super crispy crunch. Don’t skip the panko if you can help it!
- 1/2 cup grated Parmesan cheese: The salty, nutty backbone of our flavor. Freshly grated is lovely, but pre-grated works just fine too.
- 1/2 teaspoon garlic powder: Adds a little savory depth without the fuss of fresh garlic.
- 1/4 teaspoon black pepper: A little sprinkle to wake everything up.
- 2 large eggs: Our binding agent to help that delicious coating stick.
- 1/4 cup all-purpose flour: The first step in our breading station for maximum crunch.
- Olive oil, for frying: We need enough to get about 1/2 inch depth in your pan. Vegetable or canola oil works too!
- Salt, to taste: Crucial for seasoning right when they come out of the oil.
- Fresh parsley, chopped, for garnish: A little pop of green and freshness at the end. Totally optional, but I think it makes them look extra inviting!
How to Make It
Alright, apron on? Let’s get frying! It’s much simpler than it sounds, I promise.
- First things first, let’s cook that tortellini. Follow the package directions, but lean towards the shorter end of the cooking time – we want them al dente because they’re going to get cooked again. Once they’re done, drain them well and let them cool off for just a few minutes. You don’t want to handle hot pasta, and letting them cool slightly helps the coating stick better.
- Now, set up your breading assembly line! Grab three shallow dishes or pie plates. In the first one, put the flour. In the second, crack and beat those eggs until they’re well mixed. In the third dish, combine the panko breadcrumbs, grated Parmesan cheese, garlic powder, and black pepper. Give the breadcrumb mixture a little stir to make sure everything is evenly distributed.
- Time to coat! Take each cooled tortellini and first dredge it lightly in the flour, shaking off any extra. You just want a thin layer. Then, dip it into the beaten egg, letting any extra egg drip back into the dish. Finally, roll and press the tortellini gently into the panko-Parmesan mixture, making sure it’s completely coated on all sides. As I do this, I like to give them a little pat to really make sure that crunchy coating is secure.
- Get your oil ready. Pour about 1/2 inch of olive oil (or your preferred frying oil) into a large skillet. Place it over medium heat. You want the oil to be shimmering, but not smoking. If you have a thermometer, aim for around 350-375°F (175-190°C). This is key for getting them crispy without being greasy.
- Carefully add the breaded tortellini to the hot oil. Do this in batches! Seriously, overcrowding the pan will drop the oil temperature and you’ll end up with soggy tortellini instead of crispy goodness. Give them some space.
- Let them fry for about 2-4 minutes on each side. Keep an eye on them – you’re looking for a beautiful golden brown color and a seriously crispy-looking coating. Use tongs or a slotted spoon to gently flip them.
- Once they’re golden and crispy, use a slotted spoon to lift them out of the oil. Transfer them to a plate that you’ve lined with paper towels. This helps drain off any excess oil, keeping them nice and crisp.
- Immediately after they come out of the oil and onto the paper towels, sprinkle them with salt to taste. Don’t wait! Seasoning hot food is the best way to get the salt to adhere and really enhance the flavor.
- Serve them up hot! Pile them on a platter and, if you’re feeling fancy, sprinkle with some fresh chopped parsley. They’re absolutely delicious dipped in marinara sauce!
Substitutions & Additions
Feeling creative? This recipe is super flexible! Here are a few ideas:
- Cheese Swap: Try substituting or mixing the Parmesan with Pecorino Romano for a sharper flavor, or even a little bit of finely grated Asiago.
- Spice It Up: Add a pinch of red pepper flakes to the panko mixture for a little kick.
- Herb Power: Mix in dried Italian herbs like oregano or basil into the breadcrumbs along with the garlic powder.
- Different Breadcrumbs: If you don’t have panko, regular breadcrumbs will work, but the texture won’t be quite as light and crispy.
- Dipping Sauces: Marinara is classic, but they’re also great with pesto aioli, ranch dressing, or even a simple balsamic glaze.

Tips for Success
Just a few little pointers to make sure your fried tortellini turns out perfectly crispy every time:
- Don’t Overcook the Tortellini: Remember, they cook again in the oil. Al dente is key to them holding their shape and not becoming mushy.
- Drain and Cool: Let the cooked tortellini cool slightly and drain really well. Excess moisture is the enemy of crispiness.
- Breading Station Setup: Make sure your three dishes are set up in a line (flour, egg, breadcrumbs) to make the process smooth and less messy.
- Oil Temperature is Crucial: If the oil isn’t hot enough, the tortellini will absorb too much oil and be greasy. If it’s too hot, the coating will burn before the inside is heated through. Medium heat is usually just right – watch for that shimmer!
- Don’t Crowd the Pan: Frying in batches ensures the oil temperature stays consistent and gives each tortellini room to get evenly golden and crispy.
- Season Immediately: Salt sticks best to hot food!
- Prep Ahead? You can bread the tortellini ahead of time and keep them on a baking sheet in the fridge for an hour or two before frying. However, I find frying them right after breading gives the absolute best results.
How to Store It
Okay, let’s be real, there likely won’t be many leftovers! But if you do end up with a few of these crispy bites, you can store them in an airtight container in the refrigerator for 2-3 days. To reheat them and bring back some of that crispiness, pop them in a toaster oven or air fryer at around 350°F (175°C) for a few minutes until heated through and crispy again. Microwaving will make them soft.
FAQs
Got questions? I’ve got (quick) answers!
- Can I bake these instead of frying? Yes, you can! Place the breaded tortellini on a greased baking sheet and bake at 375°F (190°C) for about 15-20 minutes, flipping halfway, until golden brown and crispy. Frying gives a superior crispness, though!
- What kind of tortellini works best? Any refrigerated tortellini filling you love will be delicious! Cheese is a classic choice.
- Can I use dried tortellini? I highly recommend sticking to refrigerated tortellini for this recipe. Dried tortellini needs longer boiling time and has a different texture that doesn’t fry up quite the same way.
- What should I serve with these? They’re fantastic on their own as a snack or appetizer, especially with marinara for dipping. You could also serve them as a fun side dish!

Crispy Parmesan Fried Tortellini
Equipment
- Large skillet
- Tongs or slotted spoon
- Shallow dishes or pie plates (3 needed for breading station)
- paper towels for draining
- Thermometer optional, for oil temperature
Ingredients
Main Ingredients
- 1 package Refrigerated tortellini about 9 oz, any filling works here – cheese, spinach, meat!
- 1 cup Panko breadcrumbs These give you that extra-special, super crispy crunch.
- 0.5 cup Grated Parmesan cheese The salty, nutty backbone of our flavor. Freshly grated is lovely, but pre-grated works just fine too.
- 0.5 teaspoon Garlic powder Adds a little savory depth without the fuss of fresh garlic.
- 0.25 teaspoon Black pepper A little sprinkle to wake everything up.
- 2 Large eggs Our binding agent to help that delicious coating stick.
- 0.25 cup All-purpose flour The first step in our breading station for maximum crunch.
- Olive oil for frying; We need enough to get about 1/2 inch depth in your pan. Vegetable or canola oil works too!
- Salt to taste; Crucial for seasoning right when they come out of the oil.
- Fresh parsley chopped, for garnish (Totally optional, but makes them look extra inviting!)
- Marinara sauce for dipping (optional, but absolutely delicious)
Instructions
- Cook the tortellini following package directions, but lean towards the shorter end of the cooking time for al dente. Once they're done, drain them well and let them cool off for just a few minutes. Letting them cool slightly helps the coating stick better.
- Set up your breading assembly line! Grab three shallow dishes or pie plates. In the first one, put the flour. In the second, crack and beat those eggs until they're well mixed. In the third dish, combine the panko breadcrumbs, grated Parmesan cheese, garlic powder, and black pepper. Give the breadcrumb mixture a little stir to make sure everything is evenly distributed.
- Time to coat! Take each cooled tortellini and first dredge it lightly in the flour, shaking off any extra. You just want a thin layer. Then, dip it into the beaten egg, letting any extra egg drip back into the dish. Finally, roll and press the tortellini gently into the panko-Parmesan mixture, making sure it's completely coated on all sides. You can give them a little pat to really make sure that crunchy coating is secure.
- Get your oil ready. Pour about 1/2 inch of olive oil (or your preferred frying oil) into a large skillet. Place it over medium heat. You want the oil to be shimmering, but not smoking. If you have a thermometer, aim for around 350-375°F (175-190°C). This is key for getting them crispy without being greasy.
- Carefully add the breaded tortellini to the hot oil. Do this in batches! Seriously, overcrowding the pan will drop the oil temperature and you'll end up with soggy tortellini instead of crispy goodness. Give them some space.
- Let them fry for about 2-4 minutes on each side. Keep an eye on them – you're looking for a beautiful golden brown color and a seriously crispy-looking coating. Use tongs or a slotted spoon to gently flip them.
- Once they're golden and crispy, use a slotted spoon to lift them out of the oil. Transfer them to a plate that you've lined with paper towels. This helps drain off any excess oil, keeping them nice and crisp.
- Immediately after they come out of the oil and onto the paper towels, sprinkle them with salt to taste. Don't wait! Seasoning hot food is the best way to get the salt to adhere and really enhance the flavor.
- Serve them up hot! Pile them on a platter and, if you're feeling fancy, sprinkle with some fresh chopped parsley. They're absolutely delicious dipped in marinara sauce!
Notes
- Don't overcook the tortellini initially; aim for al dente.
- Drain and cool tortellini well before breading to ensure crispiness. Excess moisture is the enemy of crispiness.
- Set up your three dishes for the breading station in a line (flour, egg, breadcrumbs) to make the process smooth and less messy.
- Oil temperature is crucial: If the oil isn't hot enough, the tortellini will absorb too much oil and be greasy. If it's too hot, the coating will burn before the inside is heated through. Medium heat is usually just right – watch for that shimmer!
- Don't crowd the pan: Frying in batches ensures the oil temperature stays consistent and gives each tortellini room to get evenly golden and crispy.
- Season Immediately: Salt sticks best to hot food!
- Prep Ahead? You can bread the tortellini ahead of time and keep them on a baking sheet in the fridge for an hour or two before frying. However, frying them right after breading gives the absolute best results. Storage:
- Store leftovers in an airtight container in the refrigerator for 2-3 days.
- To reheat them and bring back some of that crispiness, pop them in a toaster oven or air fryer at around 350°F (175°C) for a few minutes until heated through and crispy again. Microwaving will make them soft. FAQs:
- Can I bake these instead of frying? Yes, you can! Place the breaded tortellini on a greased baking sheet and bake at 375°F (190°C) for about 15-20 minutes, flipping halfway, until golden brown and crispy. Frying gives a superior crispness, though!
- What kind of tortellini works best? Any refrigerated tortellini filling you love will be delicious! Cheese is a classic choice.
- Can I use dried tortellini? Recommended to stick to refrigerated tortellini for this recipe. Dried tortellini needs longer boiling time and has a different texture that doesn't fry up quite the same way.
- What should I serve with these? They're fantastic on their own as a snack or appetizer, especially with marinara for dipping. You could also serve them as a fun side dish!

