Introduction
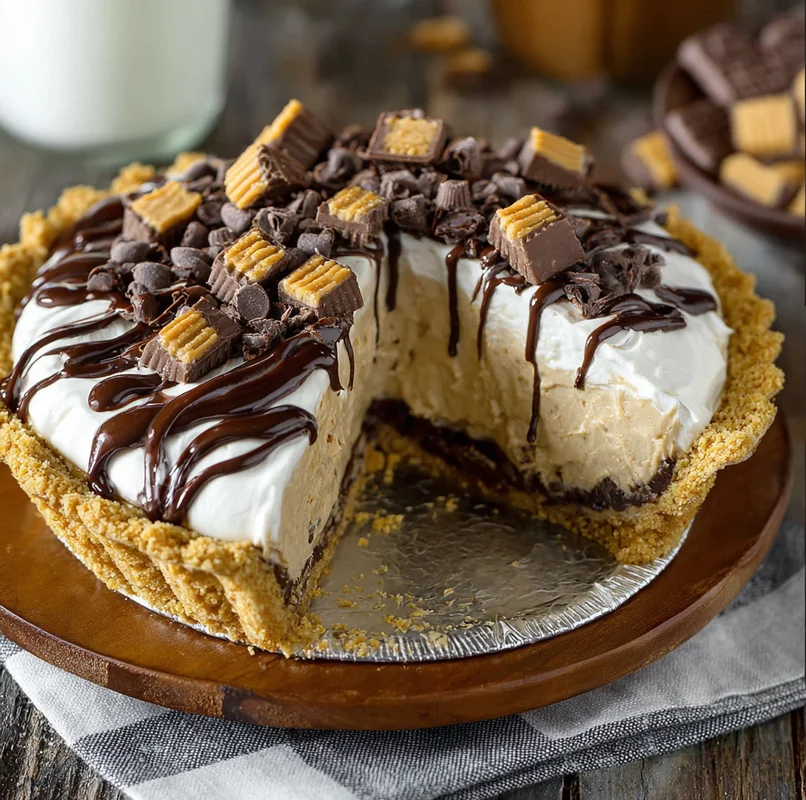
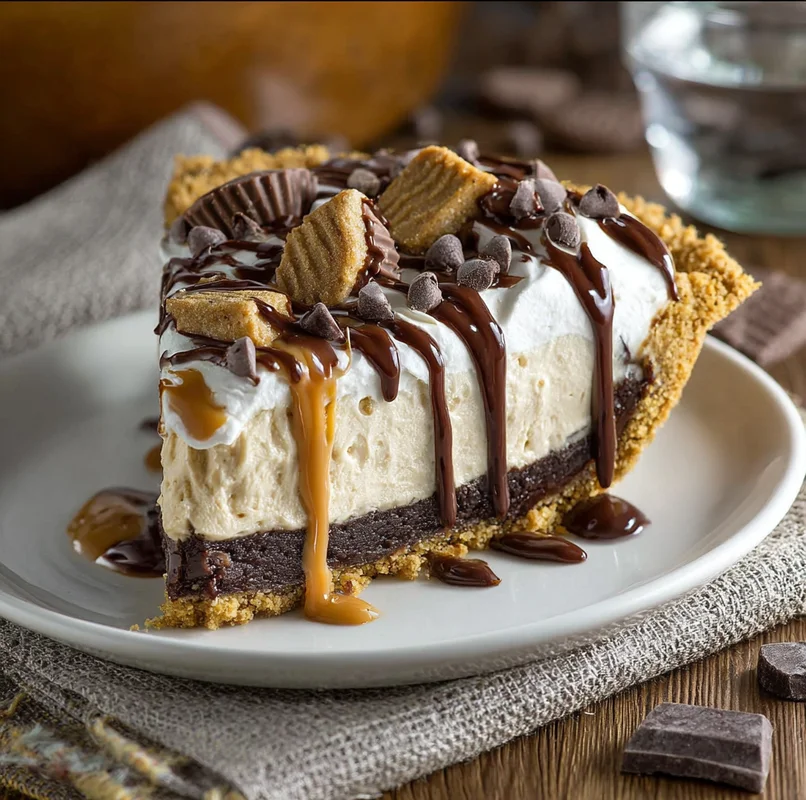
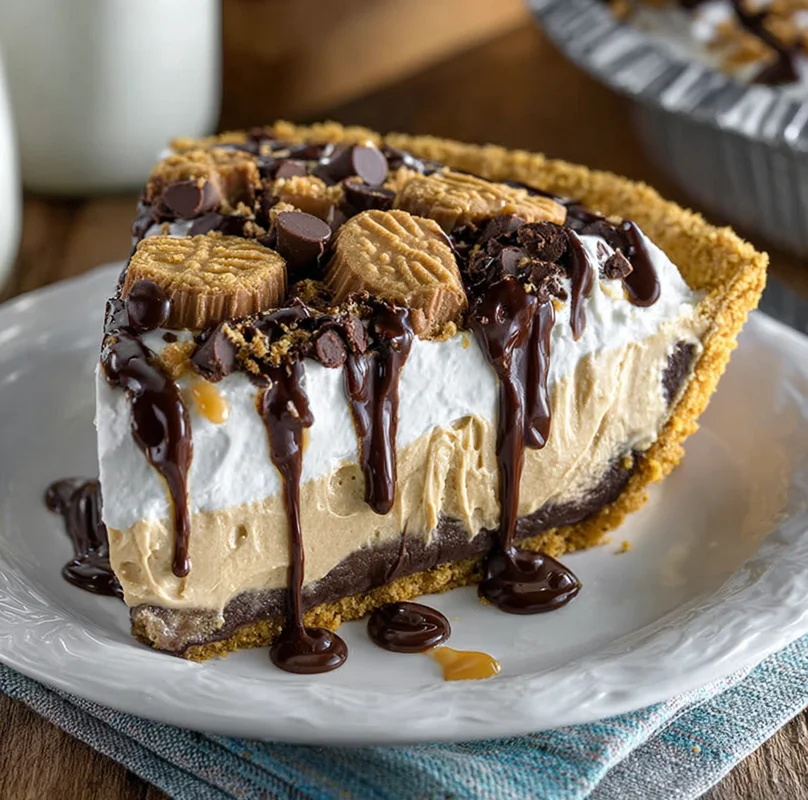
Oh, hey there! Are you ready to whip up something truly special, something that feels like a hug in dessert form? I’m talking about a Chocolate Bottomed Peanut Butter Pie that’s so ridiculously good, it’ll have everyone asking for seconds (and maybe even the recipe!). This isn’t just any pie; it’s a little slice of heaven with a rich chocolate base and a dreamy, creamy peanut butter filling. And the best part? It’s a no-bake wonder, meaning you can have this crowd-pleaser ready without even turning on the oven. Perfect for those hot summer days or when you just need a quick, comforting treat!
Why You’ll Love This Recipe
- Fast: Most of the magic happens in the fridge, so you don’t spend hours baking.
- Easy: Seriously, if you can stir and fold, you can make this pie!
- Giftable: Wrap it up nicely and you’ve got an amazing homemade gift.
- Crowd-pleasing: Who doesn’t love chocolate and peanut butter together? It’s a classic for a reason!
Ingredients
Let’s gather our delicious goodies. This recipe is pretty straightforward, and the ingredients are easy to find at any grocery store.
- 1 (9-inch) pre-baked pie crust: The foundation of our masterpiece! You can buy these ready-made, saving you tons of time.
- 1 2/3 cups semi-sweet chocolate chips: Our decadent base layer. Any good quality chocolate chips will do.
- 2/3 cup heavy cream: This makes our chocolate ganache wonderfully smooth and rich.
- 2 tablespoons corn syrup or honey: A little secret ingredient to give our chocolate a beautiful sheen and prevent crystallization.
- 1 teaspoon vanilla extract: Because vanilla just makes everything taste better, right?
- 3.4 oz instant vanilla pudding mix: This is the magic maker for our super-creamy filling. Make sure it’s instant!
- 1 cup cold milk: Essential for getting that pudding mix to thicken up perfectly.
- 1/2 cup peanut butter: Creamy or crunchy, your choice! I usually go for creamy for the smoothest texture.
- 8 oz. thawed Cool Whip: This lightens up the peanut butter mixture and makes it oh-so-fluffy.
Optional Toppings
Ready to take it over the top? These are totally optional, but highly recommended!
- 8-10 chopped Reese’s mini cups: Because more peanut butter cups can never be a bad thing.
- 2 tablespoons melted chocolate for drizzling: For that extra fancy, bakery-worthy finish.
How to Make It
Alright, let’s get our hands a little messy (in the best way possible!). It’s so easy, you’ll be amazed you made this yourself.
For the Chocolate Layer:
- First things first, grab a medium microwave-safe bowl. Toss in your chocolate chips, heavy cream, and corn syrup (or honey).
- Pop that bowl into the microwave. Heat it on high for 30 seconds at a time, giving it a good stir after each interval. You want to keep going until your chocolate is completely melted and beautifully smooth. No lumps allowed!
- Now, stir in the vanilla extract. This adds that little something extra.
- Carefully pour this gorgeous melted chocolate mixture into your pre-baked pie crust. Use a spatula to spread it out evenly, making sure it covers the bottom all the way to the edges.
- Pop the pie into the refrigerator. We want that chocolate layer to set up nicely, so let it chill for about 15-20 minutes.
For the Peanut Butter Mousse:
- While the chocolate is chilling, let’s make the star of the show! In a large bowl, combine the instant vanilla pudding mix and cold milk. Whisk it all together until it’s nicely combined and starting to thicken up. It’ll get thicker as it sits, so don’t worry if it’s not stiff yet.
- Now, spoon in that delicious peanut butter. Whisk it into the pudding mixture until it’s smooth as silk and completely incorporated. You don’t want any pockets of plain peanut butter or pudding!
- Gently, oh so gently, fold in the thawed Cool Whip. You want to do this until there are no white streaks left. This step makes the filling super light and airy.
- Once your chocolate layer is set, spoon this dreamy peanut butter mousse evenly over the top. Try to get it as smooth as you can, but don’t stress about perfection!
- Now for the hardest part: waiting! Chill the pie in the refrigerator for at least 2-4 hours, or until the mousse is nice and firm. Patience is a virtue, especially when dessert is involved!
To Serve:
- Once your pie is perfectly chilled and firm, it’s time to make it pretty! If you’re feeling fancy, sprinkle those chopped Reese’s mini cups over the top.
- For that extra special touch, melt a little more chocolate and drizzle it artfully over the pie. It looks amazing and tastes even better!
Substitutions & Additions
This recipe is fantastic as is, but it’s also a great canvas for your own creativity! Here are a few ideas:
- Peanut Butter: If you’re not a huge peanut butter fan, you could try almond butter or even a swirl of Nutella for a different flavor profile.
- Chocolate Chips: Dark chocolate or milk chocolate chips can be used instead of semi-sweet for a richer or sweeter taste.
- Crust: Don’t have a pre-baked crust? You can easily make your own with crushed Oreos and melted butter, or even a graham cracker crust!
- Toppings: Get creative with your toppings! Consider chopped peanuts, a sprinkle of sea salt, chocolate shavings, or even whipped cream dollops.
Tips for Success
A few little secrets to make your pie absolutely perfect every time:
- Don’t Overheat the Chocolate: Be mindful when microwaving the chocolate. Overheating can make it seize up and become clumpy. Stirring frequently is key!
- Smooth Mousse: Make sure your peanut butter is fully incorporated into the pudding mix before folding in the Cool Whip. This ensures a consistent, smooth texture throughout the filling.
- Prep Ahead: This pie is a dream for making ahead! You can assemble the whole thing a day in advance. Just add the toppings right before serving to keep them looking their best.
- Chill Time is Crucial: Don’t skimp on the chilling time! It’s essential for the pie to set properly so you can slice it cleanly.
How to Store It
Got leftovers? Lucky you! Cover the pie tightly with plastic wrap or foil and store it in the refrigerator. It should stay delicious for about 3-4 days. If you’ve added fresh toppings like whipped cream, it’s best to store those separately and add them just before serving to prevent sogginess.
FAQs
- Can I use a homemade pie crust?
- Absolutely! Just make sure it’s fully baked and cooled before you start assembling the pie.
- How long does it take to set?
- The chocolate layer needs about 15-20 minutes in the fridge. The whole pie needs at least 2-4 hours to fully set in the refrigerator.
- Can I make this dairy-free?
- This is trickier, as dairy is key to the texture. You’d likely need dairy-free chocolate chips, a dairy-free heavy cream alternative (like coconut cream), and a dairy-free pudding mix and whipped topping. It would be an experiment, but potentially delicious!
- Can I freeze this pie?
- While you can freeze it, the texture of the mousse might change slightly upon thawing. If you do freeze it, thaw it in the refrigerator overnight.

Decadent Chocolate Bottomed Peanut Butter Pie
Equipment
- Microwave-safe bowl
- Spatula
- Whisk
- Large bowl
Ingredients
Chocolate Layer
- 1 (9-inch) pre-baked pie crust The foundation of our masterpiece! You can buy these ready-made, saving you tons of time.
- 1.67 cups semi-sweet chocolate chips Our decadent base layer. Any good quality chocolate chips will do.
- 0.67 cup heavy cream This makes our chocolate ganache wonderfully smooth and rich.
- 2 tablespoons corn syrup or honey A little secret ingredient to give our chocolate a beautiful sheen and prevent crystallization.
- 1 teaspoon vanilla extract Because vanilla just makes everything taste better, right?
Peanut Butter Mousse
- 3.4 oz instant vanilla pudding mix This is the magic maker for our super-creamy filling. Make sure it's instant!
- 1 cup cold milk Essential for getting that pudding mix to thicken up perfectly.
- 0.5 cup peanut butter Creamy or crunchy, your choice! I usually go for creamy for the smoothest texture.
- 8 oz thawed Cool Whip This lightens up the peanut butter mixture and makes it oh-so-fluffy.
Optional Toppings
- 8 10 chopped Reese's mini cups Because more peanut butter cups can never be a bad thing.
- 2 tablespoons melted chocolate for drizzling For that extra fancy, bakery-worthy finish.
Instructions
- First things first, grab a medium microwave-safe bowl. Toss in your chocolate chips, heavy cream, and corn syrup (or honey).1 (9-inch) pre-baked pie crust
- Pop that bowl into the microwave. Heat it on high for 30 seconds at a time, giving it a good stir after each interval. You want to keep going until your chocolate is completely melted and beautifully smooth. No lumps allowed!
- Now, stir in the vanilla extract. This adds that little something extra.1 (9-inch) pre-baked pie crust
- Carefully pour this gorgeous melted chocolate mixture into your pre-baked pie crust. Use a spatula to spread it out evenly, making sure it covers the bottom all the way to the edges.1 (9-inch) pre-baked pie crust
- Pop the pie into the refrigerator. We want that chocolate layer to set up nicely, so let it chill for about 15-20 minutes.
- While the chocolate is chilling, let's make the star of the show! In a large bowl, combine the instant vanilla pudding mix and cold milk. Whisk it all together until it's nicely combined and starting to thicken up. It’ll get thicker as it sits, so don't worry if it’s not stiff yet.1 (9-inch) pre-baked pie crust
- Now, spoon in that delicious peanut butter. Whisk it into the pudding mixture until it's smooth as silk and completely incorporated. You don't want any pockets of plain peanut butter or pudding!1 (9-inch) pre-baked pie crust
- Gently, oh so gently, fold in the thawed Cool Whip. You want to do this until there are no white streaks left. This step makes the filling super light and airy.1 (9-inch) pre-baked pie crust
- Once your chocolate layer is set, spoon this dreamy peanut butter mousse evenly over the top. Try to get it as smooth as you can, but don’t stress about perfection!
- Now for the hardest part: waiting! Chill the pie in the refrigerator for at least 2-4 hours, or until the mousse is nice and firm. Patience is a virtue, especially when dessert is involved!
- Once your pie is perfectly chilled and firm, it's time to make it pretty! If you're feeling fancy, sprinkle those chopped Reese's mini cups over the top.1 (9-inch) pre-baked pie crust
- For that extra special touch, melt a little more chocolate and drizzle it artfully over the pie. It looks amazing and tastes even better!1 (9-inch) pre-baked pie crust
Notes
Smooth Mousse: Make sure your peanut butter is fully incorporated into the pudding mix before folding in the Cool Whip. This ensures a consistent, smooth texture throughout the filling.
Prep Ahead: This pie is a dream for making ahead! You can assemble the whole thing a day in advance. Just add the toppings right before serving to keep them looking their best.
Chill Time is Crucial: Don't skimp on the chilling time! It's essential for the pie to set properly so you can slice it cleanly.