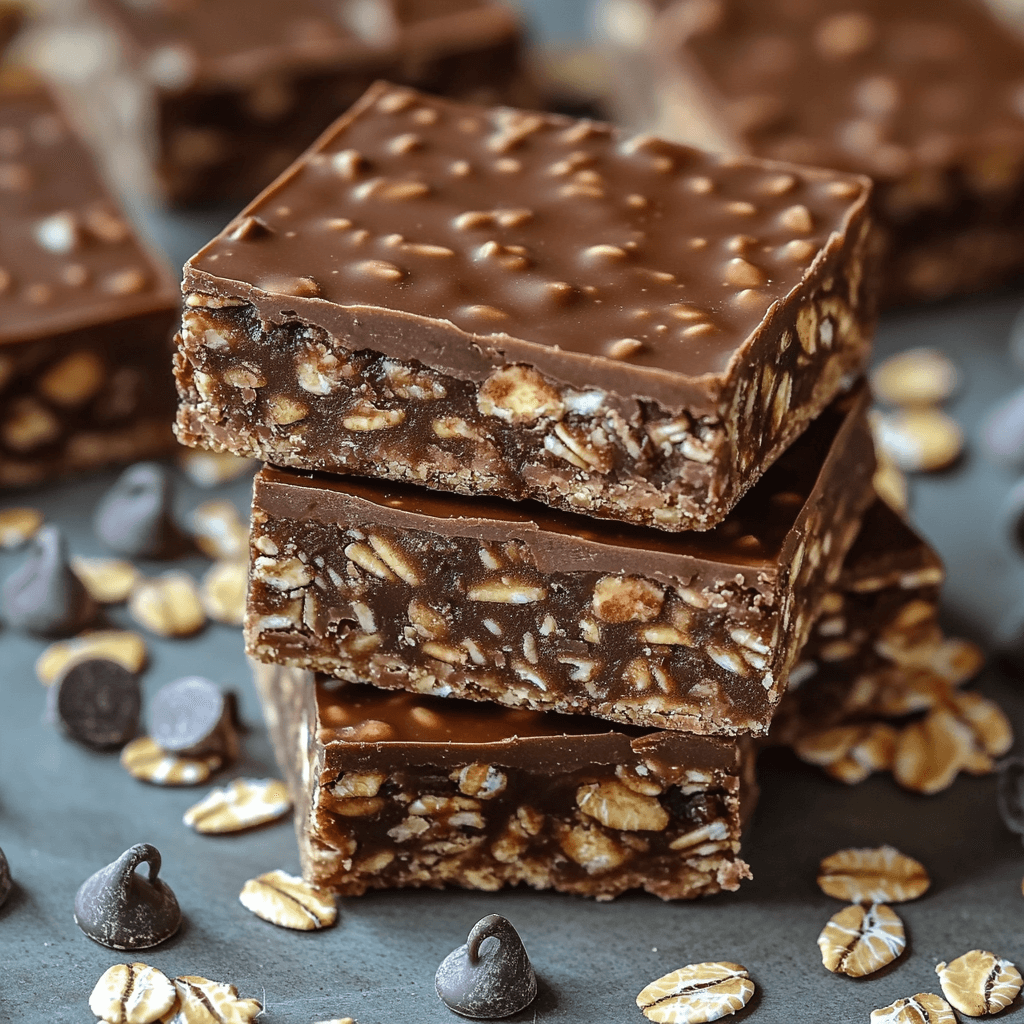
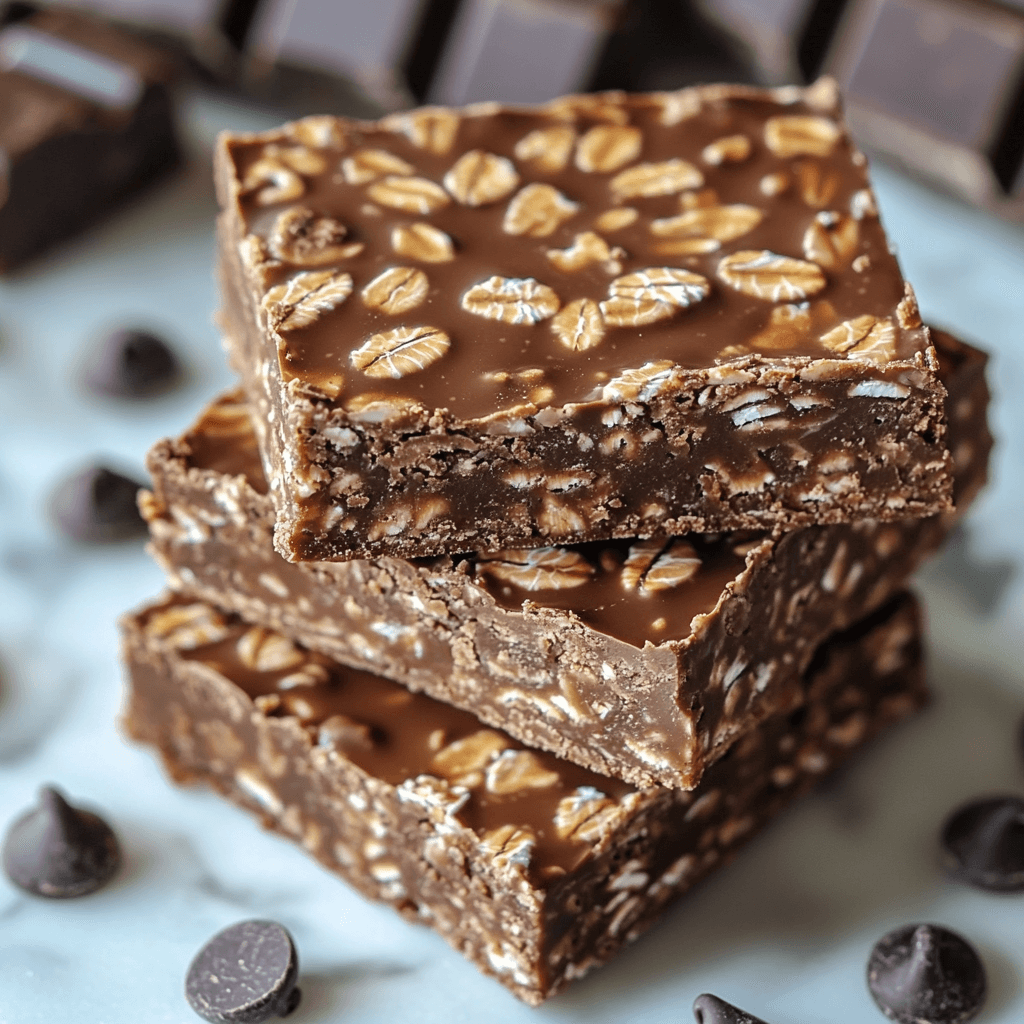
Why You’ll Love This Decadent No-Bake Chocolate Oat Bars
Hey there, fellow dessert lovers! Are you craving a delicious treat that’s also incredibly easy to make? Then look no further than these decadent no-bake chocolate oat bars! These bars are seriously addictive – the perfect blend of chewy oats, creamy peanut butter, and rich chocolate will have you reaching for another bite before you know it. I’m talking a delightful textural experience; the soft, slightly crumbly oat base gives way to a deep chocolatey flavor that’s both satisfying and not overly sweet.
What makes these bars truly special is their simplicity. Forget fiddly baking times and complicated instructions – these come together in a flash, requiring no oven whatsoever! This recipe is your perfect go-to for those busy weeknights when you still want a delicious dessert that feels special. It’s the ultimate comfort food, evoking feelings of warmth and nostalgia. The rich chocolate and peanut butter create a comforting, almost nostalgic flavor profile that’s perfect for a cozy night in, a casual get-together, or even just a little self-care moment. You deserve it! Trust me, the taste and texture alone are worth the effort (or rather, the lack thereof!). Prepare to be amazed by how quickly you can whip up this amazing dessert.
What You’ll Need
This recipe is remarkably straightforward, using pantry staples you probably already have. Let’s take a closer look at the ingredients:
- Rolled Oats (1 ½ cups): The foundation of our bars! Choose old-fashioned rolled oats for the best texture.
- Peanut Butter (½ cup): Smooth or crunchy – your choice! Adds creaminess and that signature peanut butter flavor. Natural peanut butter works wonderfully.
- Honey or Maple Syrup (¼ cup): Provides the necessary sweetness and helps bind the ingredients together. Honey adds a richer flavor.
- Cocoa Powder (2 tablespoons): Unsweetened cocoa powder is key for that intense chocolate flavor. Don’t skimp here!
- Vanilla Extract (1 teaspoon): Enhances the overall flavor profile and adds a touch of warmth.
- Salt (Pinch): A tiny pinch balances the sweetness and brings out the flavors of the other ingredients.
- Chocolate Chips (¼ cup, optional): For extra chocolatey goodness! Semi-sweet or dark chocolate chips are both delicious choices.
Step-by-Step Instructions
Let’s get baking (or rather, not baking!)! This recipe is so easy, even the most novice bakers can master it.
- Prepare Your Ingredients: Gather all your ingredients and measure them out. This makes the process much smoother. Having everything ready to go will prevent any unnecessary delays.
- Combine Dry Ingredients: In a large bowl, combine the rolled oats and cocoa powder. Whisk them together to ensure the cocoa powder is evenly distributed. This prevents pockets of intense chocolate flavor.
- Add Wet Ingredients: Add the peanut butter, honey (or maple syrup), and vanilla extract to the bowl. Mix thoroughly until everything is well combined. You may need to use your hands to fully incorporate all ingredients.
- Stir in Salt and Chocolate Chips (optional): Add a pinch of salt and the chocolate chips (if using) and stir gently to combine. The salt is crucial, enhancing the overall flavor profile. Be careful not to overmix; a few streaks of chocolate are perfectly fine.
- Press into a Pan: Line an 8×8 inch baking pan with parchment paper, leaving an overhang on the sides. This will make it easier to lift the bars out later. Press the oat mixture firmly and evenly into the prepared pan. Use the back of a spoon or your hands to create a compact layer.
- Chill and Set: Refrigerate the bars for at least 2 hours, or preferably overnight, to allow them to firm up. This chilling time is essential to create the perfect texture.
- Cut and Serve: Once chilled, lift the bars out of the pan using the parchment paper overhang. Cut into squares and enjoy! Store leftover bars in an airtight container in the refrigerator.
Tips for Success
To ensure your no-bake chocolate oat bars are perfectly delicious, keep these helpful tips in mind:
- Don’t Overmix: Overmixing can lead to tough bars. Once the ingredients are combined, stop mixing!
- Press Firmly: Ensure the oat mixture is pressed firmly into the pan to create dense, cohesive bars. This prevents them from crumbling.
- Chill Thoroughly: Allowing the bars to chill completely is crucial for achieving the desired texture. Patience is key here!
- Use Quality Ingredients: Using good quality ingredients will significantly improve the overall flavor and taste of your bars.
Variations to Try
Feel free to experiment with different flavor combinations! Here are a few ideas:
- Add Nuts: Chopped pecans, walnuts, or almonds would be a delicious addition.
- Spice it Up: A dash of cinnamon or nutmeg would add warmth and complexity.
- Different Sweetener: Try using agave nectar or coconut sugar instead of honey or maple syrup.
- Gluten-Free Option: Use certified gluten-free rolled oats to make these bars suitable for those with gluten sensitivities.
- Peanut Butter Alternative: Substitute almond butter or sunflower seed butter for a different nut butter flavor.

Storing and Reheating
Proper storage is key to maintaining the deliciousness of your no-bake chocolate oat bars. Store them in an airtight container in the refrigerator for up to a week. For longer storage, you can freeze them for up to 3 months. To reheat, simply let them sit at room temperature for a bit, or gently microwave for a few seconds at a time.
Frequently Asked Questions
- Q: Can I use different types of oats? A: While rolled oats are best for texture, quick oats might work, but they will result in a slightly less chewy bar. Avoid steel-cut oats.
- Q: How long do the bars keep? A: Stored in an airtight container in the refrigerator, they’ll last for about a week. Frozen bars will keep for up to three months.
- Q: Can I make these bars ahead of time? A: Absolutely! In fact, chilling them overnight enhances their texture and flavor. Make them a day or two before you need them.
- Q: What if I don’t have honey or maple syrup? A: You could try using another liquid sweetener like agave nectar or even a small amount of molasses, but adjust to your taste.
- Q: Are these bars suitable for vegetarians? A: Yes, these bars are naturally vegetarian. Make sure to check the labels of your ingredients to ensure they are also vegetarian-friendly.
The Final Word
These decadent no-bake chocolate oat bars are the perfect combination of simple, delicious, and satisfying. The ease of preparation makes them ideal for busy weeknights or spontaneous dessert cravings. The rich chocolate and peanut butter flavor combination is a classic for a reason, and the chewy texture is simply irresistible. So, what are you waiting for? Give this recipe a try and let me know what you think in the comments below! Don’t forget to rate the recipe and share your delicious creations with your friends and family. Happy baking (or rather, no-baking!)

No Bake Chocolate Oat Bars
Equipment
- Mixing bowls At least two bowls for mixing wet and dry ingredients.
- 8×8 inch baking dish Or similar sized dish for setting the bars.
Ingredients
Dry Ingredients
- 1.5 cups Rolled oats
- 2 tablespoons Cocoa powder
- 1 pinch Salt
Wet Ingredients
- 0.5 cups Peanut butter Smooth or crunchy
- 0.25 cups Honey or maple syrup
- 1 teaspoon Vanilla extract
- 0.25 cups Chocolate chips Optional
Instructions
- Combine rolled oats, cocoa powder, and salt in a large bowl.
- In a separate bowl, combine peanut butter, honey (or maple syrup), and vanilla extract.
- Pour the wet ingredients into the dry ingredients and mix thoroughly until well combined.
- Stir in chocolate chips (if using).
- Press the mixture firmly into an 8×8 inch baking dish.
- Refrigerate for at least 2 hours, or until firm.
- Cut into bars and serve.