
Introduction
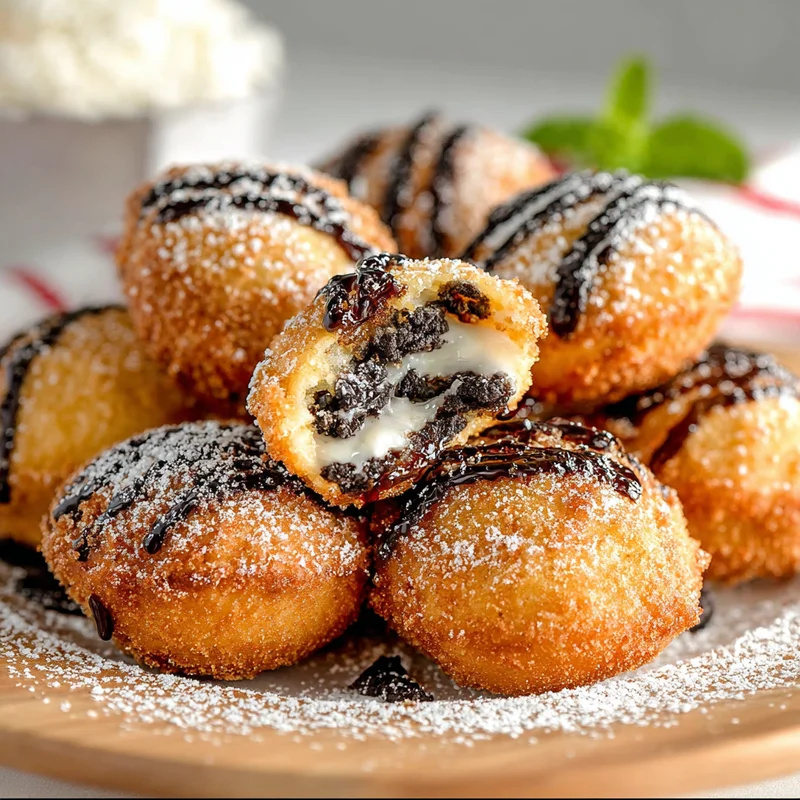
Oh, remember those summer days at the fair? The smell of popcorn, the thrill of the rides, and the absolute joy of biting into something decadent and utterly delicious? For me, one of the standout treats was always the deep-fried Oreo. That magical combination of a warm, gooey, chocolatey cookie encased in a crispy, golden batter – it’s pure bliss! And guess what? You don’t need a carnival ticket to enjoy this dreamy dessert. Today, we’re diving into how you can recreate this iconic fair food right in your own kitchen. Get ready for some serious nostalgia and even more serious deliciousness!
Why You’ll Love This Recipe
- Fast & Easy: Seriously, this comes together in a flash, perfect for a spontaneous sweet craving.
- Giftable (Sort Of!): While they’re best served warm, a nicely boxed batch is a fun surprise for friends.
- Crowd-Pleasing Perfection: Who can resist a deep-fried Oreo? They’re a guaranteed hit at parties or family gatherings.
- Pure Indulgence: It’s a simple pleasure that feels incredibly special and oh-so-satisfying.

Ingredients
Alright, let’s gather our goodies. You’ll be surprised how few ingredients you need for this showstopper:
- 1 quart Vegetable Oil: This is for our frying adventure! Any neutral oil like canola or peanut oil will work beautifully.
- 1 package Double Stuffed Oreos: Because… more cream filling equals more happiness, right? Feel free to use regular Oreos if that’s what you have on hand.
- 1½ cups Bisquick: This is our secret weapon for a perfectly fluffy and crispy batter. It’s a fantastic shortcut!
- 1 large egg, beaten: To bind all our batter ingredients together.
- 1 cup whole milk: For that smooth, dippable batter consistency.
- ½ teaspoon vanilla extract: Just a little splash to enhance all those yummy flavors.
- Powdered Sugar, for dusting: The final, snowy touch that makes them look as good as they taste.
How to Make It
Ready to get your fry on? It’s easier than you think!
- Prep Your Oil: Pour your vegetable oil into a deep skillet or a Dutch oven. You want at least 2 inches of oil. Heat it up over medium-high heat until it reaches 375°F (190°C). A thermometer is your best friend here, but if you don’t have one, a tiny drop of batter should sizzle immediately and float to the top.
- Whip Up the Batter: In a medium bowl, whisk together the Bisquick, beaten egg, whole milk, and vanilla extract. Keep whisking until you have a smooth batter. It should be thick enough to coat the Oreos nicely, but not so thick that it’s gloopy – just a little bit drippy is perfect.
- Batter Up!: Now for the fun part! Take each Double Stuffed Oreo and dip it into your batter. Make sure it’s completely covered. Let any extra batter drip back into the bowl. This helps prevent too much batter from falling off in the hot oil.
- Into the Hot Tub!: Carefully, and I mean carefully, place the battered Oreos into the hot oil. Do this a few at a time. Don’t crowd the pan – giving them some space helps them fry evenly and prevents the oil temperature from dropping too much.
- Fry to Golden Perfection: Let them fry for about 2-3 minutes on each side. You’re looking for a beautiful, golden brown and puffed-up coating. They cook really fast, so keep an eye on them!
- Drain the Goodness: Once they’re perfectly golden, use a slotted spoon or a spider strainer to lift them out of the oil. Place them on a wire rack that’s set over paper towels. This allows any excess oil to drip away, keeping your treats nice and crisp.
- The Grand Finale: While they’re still warm (oh, the smell!), generously dust them with powdered sugar. This is the moment of truth!
Substitutions & Additions
Want to jazz things up a bit? I love playing with recipes, and these fried Oreos are no exception!
- Different Cookies: Don’t have Oreos? Try this batter with other sandwich cookies, or even chocolate chip cookies for a different flavor profile.
- Batter Boost: A pinch of cinnamon or a dash of nutmeg in the batter can add a lovely warmth.
- Toppings Galore: Beyond powdered sugar, try a drizzle of chocolate sauce, caramel, or even a sprinkle of rainbow jimmies for extra festive flair.
- Gluten-Free Option: You can try using a gluten-free biscuit mix for the batter, though the texture might vary slightly.
Tips for Success
A few little tricks can make your deep-fried Oreo journey even smoother:
- Oil Temperature is Key: Too cool, and they’ll be greasy. Too hot, and they’ll burn before the batter cooks. Stick to that 375°F (190°C)!
- Don’t Overcrowd: I know I said it before, but it’s worth repeating! Fry in small batches for the best results.
- Batter Consistency Check: If your batter seems too thick, add a tablespoon of milk at a time until it’s right. If it’s too thin, add a tablespoon of Bisquick.
- Prep Ahead: You can make the batter just before you start frying, but don’t let it sit too long as Bisquick can sometimes get a bit gummy.
How to Store It
These are truly best enjoyed immediately, when they’re warm and the batter is at its crispiest. However, if you happen to have any (which I doubt!), you can store them in an airtight container at room temperature for a day. To reheat, a few minutes in a toaster oven or air fryer will help them regain some of their crispness. They won’t be quite as perfect as fresh, but still wonderfully tasty!
FAQs
- Q: Can I make this in an air fryer or oven?
A: While the classic fairground taste comes from deep frying, you can experiment with an air fryer at around 370°F (185°C) for 5-7 minutes, flipping halfway. Oven baking isn’t recommended as you won’t get that signature crispy, fried texture. - Q: My batter is too thick, what should I do?
A: Just add a tablespoon of milk at a time and whisk until you reach the desired consistency – thick enough to coat but still a bit runny. - Q: How do I know when the oil is hot enough?
A: The best way is to use an instant-read thermometer to reach 375°F (190°C). If you don’t have one, drop a tiny bit of batter into the oil. If it sizzles and floats immediately, your oil is ready!
So there you have it! Your very own batch of deep-fried Oreos, ready to transport you back to the fairgrounds with every single bite. Give it a try and let me know how it turns out – I can’t wait to hear about your creations!

Deep-Fried Oreos
Equipment
- Deep skillet or Dutch oven For frying
- Medium bowl For mixing batter
- Whisk
- Slotted spoon or spider strainer For removing fried Oreos from oil
- Wire rack Set over paper towels for draining
- Thermometer Optional, for checking oil temperature
Ingredients
For Frying
- 1 quart Vegetable Oil Or canola or peanut oil
For the Batter
- 1 package Double Stuffed Oreos Or regular Oreos
- 1.5 cups Bisquick
- 1 large egg beaten
- 1 cup whole milk
- 0.5 teaspoon vanilla extract
For Garnish
- Powdered Sugar for dusting
Instructions
- Pour vegetable oil into a deep skillet or Dutch oven, ensuring at least 2 inches of oil. Heat over medium-high heat until it reaches 375°F (190°C). Use a thermometer or test with a drop of batter; it should sizzle immediately and float.1 quart Vegetable Oil
- In a medium bowl, whisk together Bisquick, beaten egg, whole milk, and vanilla extract until smooth and slightly drippy.1 quart Vegetable Oil
- Dip each Oreo into the batter, ensuring it is fully coated. Let excess batter drip back into the bowl.1 quart Vegetable Oil
- Carefully place battered Oreos into the hot oil, a few at a time, without overcrowding the pan.
- Fry for about 2-3 minutes on each side, until golden brown and puffed up.
- Remove fried Oreos with a slotted spoon or spider strainer and place them on a wire rack set over paper towels to drain.
- While still warm, generously dust with powdered sugar.1 quart Vegetable Oil