Introduction
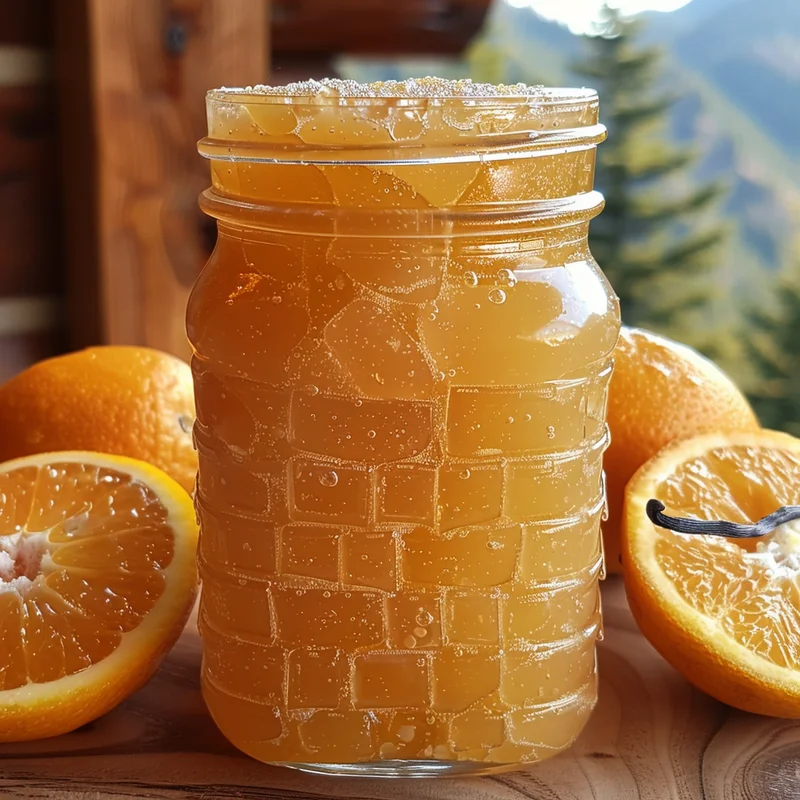
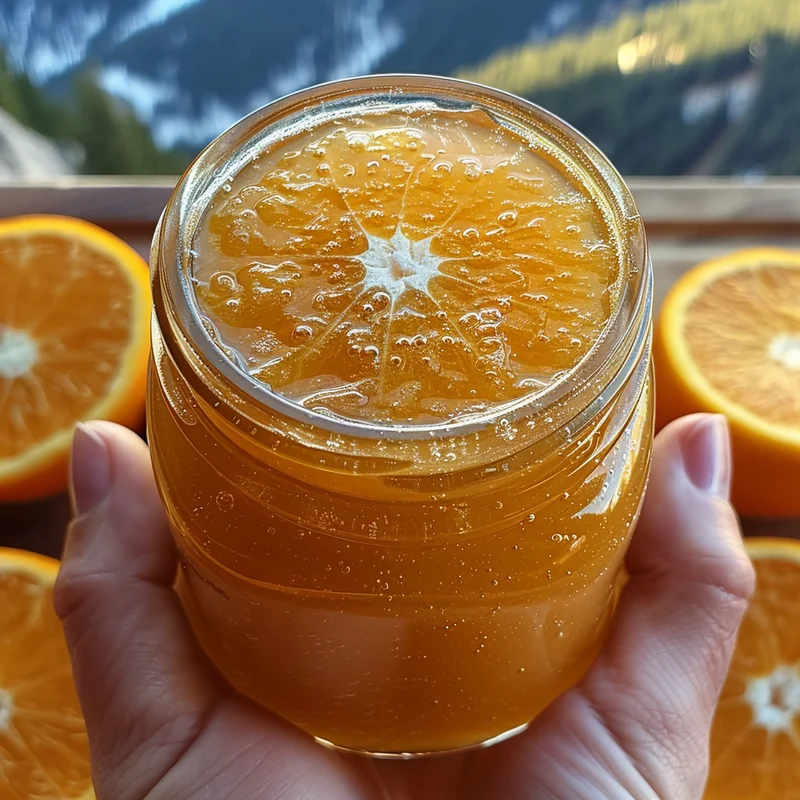
Remember those magical summer days, the ones filled with laughter, sunshine, and that iconic orange and vanilla swirl? We’re talking about Dreamsicles! That creamy, dreamy flavor is pure nostalgia for so many of us. Well, guess what? You can capture that sweet, citrusy magic in a jar with this incredibly simple Dreamsicle Jelly recipe. It’s so easy, you’ll be spreading sunshine on your toast in no time. This jelly is a delightful way to bring a burst of happy memories to your breakfast table, or even better, to share a bit of that sunshine with friends and family.
Why You’ll Love This Recipe
- Fast: You can whip up a batch of this delightful jelly surprisingly quickly.
- Easy: Seriously, if you can stir, you can make this jelly. No fancy equipment needed!
- Giftable: Imagine gifting a jar of pure sunshine! It’s a perfect homemade present for any occasion.
- Crowd-pleasing: Who can resist the classic, comforting flavor of orange and vanilla? Everyone will love it!

Ingredients
Gathering your ingredients is half the fun! Here’s what you’ll need to create this little jar of happiness:
- 4 cups freshly squeezed orange juice: This is the heart of our Dreamsicle flavor! Use good quality oranges for the best taste. Freshly squeezed is key here, it really makes a difference.
- 4 cups sugar: Our sweetness enhancer, bringing that classic jelly texture.
- 2 vanilla beans, split and scraped: This is where the “Dreamsicle” magic truly happens! The seeds from the vanilla bean will infuse the jelly with that unmistakable creamy, dreamy aroma and flavor.
- 1 tablespoon butter: A little bit of butter helps prevent excessive foaming, keeping your jelly clear and lovely.
- 1 box pectin (optional): Pectin helps ensure a good set for your jelly, especially if your oranges aren’t super juicy or if you want a firmer texture. If you’re aiming for a softer, more syrup-like consistency, you can skip it!
How to Make It
Alright, let’s get our hands a little sticky and create some magic! It’s a simple process, and I’ll walk you through every step.
- Get your pot ready: In a large, sturdy pot (seriously, use a big one, as the mixture can foam up!), combine your freshly squeezed orange juice, sugar, and those precious vanilla bean seeds along with the split vanilla bean pods. Don’t forget to add that tablespoon of butter!
- Pectin power (if using): If you decided to go with pectin for a perfect set, now’s the time to stir it right into the juice mixture. Give it a good whisk so it’s all incorporated.
- Bring on the heat: Place your pot over high heat. Stir constantly, making sure everything is mixing well as it heats up. We’re aiming for a vigorous, rolling boil – the kind that bubbles up enthusiastically.
- The crucial boil: Once you hit that rolling boil, let it boil for exactly 1 minute, stirring the entire time. This is what activates the pectin (if you used it) and helps the jelly set beautifully.
- Remove the pods: Carefully fish out those vanilla bean pods. You can rinse them, dry them, and pop them into a jar of sugar to make vanilla-infused sugar – talk about zero waste!
- Skim the foam: You might see a little foam or scum on the surface. Just give it a gentle skim with a spoon to remove it. This will give you a clearer, prettier jelly.
- Jar it up: Now, carefully ladle the hot jelly into your sterilized jars. Leave about 1/4 inch of space at the top, which we call headspace.
- Seal the deal: Wipe the rims of the jars clean with a damp cloth to ensure a good seal. Then, screw on the lids tightly.
- Water bath beauty: Carefully place your filled jars into a boiling water bath canner. Make sure the water covers the jars by at least an inch. Process them in the boiling water for 10 minutes.
- Cool and admire: Once the processing time is up, turn off the heat, remove the canner lid, and let the jars sit in the hot water for another 5 minutes. Then, carefully remove them with a jar lifter and place them on a wire rack to cool completely. Listen for that satisfying “pop” sound as the lids seal!
Substitutions & Additions
This Dreamsicle Jelly is fantastic as is, but we love a good kitchen adventure! Here are a few ideas to jazz it up:
- Citrus Swap: While orange is classic, you could try a blend of orange and grapefruit juice for a slightly tarter kick.
- Spice it Up: A tiny pinch of ground ginger or cinnamon added with the sugar can give it a warm, cozy twist.
- Zest for Life: For an extra burst of orange flavor, add the zest of one or two oranges along with the juice. Just be sure to use an organic orange if you do this!
- Boozy Kick: For an adult-only version, a splash of orange liqueur like Grand Marnier or Cointreau added right at the end (after removing from heat, before jarring) would be divine.
Tips for Success
A few little tricks to make sure your Dreamsicle Jelly is absolutely perfect:
- Use good quality oranges: The better the oranges, the better the juice, and the better the jelly!
- Sterilize your jars properly: This is crucial for safe canning. You can wash them in hot, soapy water and then place them in a preheated oven (around 225°F or 107°C) for at least 10 minutes, or boil them in water.
- Don’t over-boil: Following the 1-minute boiling time is important, especially if you’re using pectin. Over-boiling can result in a tough or overly syrupy jelly.
- Prep ahead: Squeeze your orange juice and measure out your sugar the day before to make the actual jelly-making process even quicker.
- Test for set: If you’re not using pectin, you can test for a set by placing a small plate in the freezer before you start. After boiling, spoon a little jelly onto the cold plate. If it wrinkles when you push it with your finger, it’s ready!
How to Store It
Once your jars have cooled and you’ve confirmed they’re sealed (the lid should be concave and not flex when pressed), you can store them in a cool, dark place like your pantry or basement. Properly processed and sealed jars will last for about a year. Once opened, always store your Dreamsicle Jelly in the refrigerator and enjoy it within 3-4 weeks. If you decide not to can it, just keep it in the fridge and it will be good for a few weeks.
FAQs
Can I make this jelly without pectin?
Yes, you can! However, without pectin, the jelly might be a bit softer and more like a syrup. It will still be delicious, but you might not get the firm, spreadable texture that pectin provides. If you skip the pectin, make sure you boil it for a good 5-8 minutes, or until it reaches the setting point (test on a cold plate).
Is it safe to can homemade jelly?
Yes, absolutely! By following proper canning procedures, like using sterilized jars and the water bath method, you can safely preserve your homemade jelly for up to a year. It’s a wonderful way to enjoy your creations long after the oranges are out of season.
What if my jelly didn’t set?
Don’t worry, it happens! If your jelly didn’t set properly, you can re-boil it. Add a bit more pectin according to the package directions, and re-boil for the recommended time. You can also just enjoy it as a delicious orange-vanilla syrup over ice cream or pancakes!

Dreamsicle Jelly
Equipment
- Large pot Sturdy pot, as the mixture can foam up.
- Whisk
- Spoon For skimming foam.
- Sterilized jars
- boiling water bath canner
- Jar lifter
- Wire rack
- small plate For testing set if not using pectin.
Ingredients
Main ingredients
- 4 cups freshly squeezed orange juice Use good quality oranges for the best taste.
- 4 cups sugar
- 2 beans vanilla beans Split and scraped.
- 1 tablespoon butter Helps prevent excessive foaming.
- 1 box pectin Optional; for a firmer set.
Instructions
- In a large, sturdy pot, combine your freshly squeezed orange juice, sugar, and those precious vanilla bean seeds along with the split vanilla bean pods. Don't forget to add that tablespoon of butter!
- If you decided to go with pectin for a perfect set, now’s the time to stir it right into the juice mixture. Give it a good whisk so it’s all incorporated.
- Place your pot over high heat. Stir constantly, making sure everything is mixing well as it heats up. We’re aiming for a vigorous, rolling boil – the kind that bubbles up enthusiastically.
- Once you hit that rolling boil, let it boil for exactly 1 minute, stirring the entire time. This is what activates the pectin (if you used it) and helps the jelly set beautifully.
- Carefully fish out those vanilla bean pods. You can rinse them, dry them, and pop them into a jar of sugar to make vanilla-infused sugar – talk about zero waste!
- You might see a little foam or scum on the surface. Just give it a gentle skim with a spoon to remove it. This will give you a clearer, prettier jelly.
- Now, carefully ladle the hot jelly into your sterilized jars. Leave about 1/4 inch of space at the top, which we call headspace.
- Wipe the rims of the jars clean with a damp cloth to ensure a good seal. Then, screw on the lids tightly.
- Carefully place your filled jars into a boiling water bath canner. Make sure the water covers the jars by at least an inch. Process them in the boiling water for 10 minutes.
- Once the processing time is up, turn off the heat, remove the canner lid, and let the jars sit in the hot water for another 5 minutes. Then, carefully remove them with a jar lifter and place them on a wire rack to cool completely. Listen for that satisfying "pop" sound as the lids seal!