Introduction
Oh, the sweet smell of home! There’s something so comforting about a batch of homemade cookies, isn’t there? For me, it always brings back memories of cozy afternoons in my grandma’s kitchen. And if you’re looking for a cookie that’s pure, simple bliss with a touch of decadence, you’ve landed in the right spot. These Chocolate-Dipped Shortbread Cookies are ridiculously easy to make, and they taste like a little piece of heaven. Seriously, they’re so straightforward, you’ll be whipping them up on a whim!
Why You’ll Love This Recipe
- Fast: From start to finish, these cookies come together quicker than you might think.
- Easy: No fancy techniques here! If you can mix ingredients, you can make these.
- Giftable: Package them up in a cute tin or cellophane bag, and you’ve got the perfect homemade present.
- Crowd-pleasing: Who doesn’t love buttery shortbread with a chocolatey kiss? They’re a guaranteed hit for any occasion.
Ingredients
Gathering your ingredients is half the fun, right? For these delightful shortbread cookies, you only need a few pantry staples. Let’s see what we’ve got:
- 1 cup unsalted butter, softened: This is the heart and soul of shortbread! Make sure it’s nice and soft so it creams beautifully with the sugar.
- 1/2 cup powdered sugar: Also known as confectioners’ sugar or icing sugar. It gives our shortbread a tender texture and a subtle sweetness.
- 2 cups all-purpose flour: The trusty all-rounder! It gives our cookies their structure.
- 1/4 teaspoon salt: Don’t skip this! A little salt is key to balancing out the sweetness and really making the butter flavor shine.
- 1 cup dark chocolate chips: Your favorite dark chocolate will do! This is for that irresistible chocolatey dip.
How to Make It
Alright, apron on, let’s get baking! Follow these simple steps, and you’ll have a batch of delicious shortbread in no time.
- First things first, let’s get that oven nice and warm. Preheat your oven to 350°F (175°C). While it’s heating up, line your baking sheets with parchment paper. This is my little secret to easy cleanup and cookies that don’t stick!
- In a medium bowl, grab your softened butter and powdered sugar. Cream them together using an electric mixer (or a whisk and some good old-fashioned elbow grease!) until the mixture is light, fluffy, and pale yellow. It should look like a lovely cloud.
- In a separate bowl, give your all-purpose flour and salt a good whisk. This just ensures everything is evenly distributed before we add it to the butter mixture.
- Now, gradually add the dry ingredients to your butter and sugar mixture. Mix them together until they are just combined. Be careful not to overmix! We want tender shortbread, not tough cookies.
- Turn the dough out onto a lightly floured surface. It might be a bit crumbly, but that’s okay. Gently shape the dough into a rectangular log, about 1.5 inches in diameter. Think of it like making playdough!
- Using a sharp knife, cut the log into 1/2-inch thick rounds. These will be our beautiful shortbread cookies.
- Carefully place these rounds onto your prepared baking sheets. Give them a little space, about 1 inch apart, as they don’t spread too much but like their own little spot.
- Pop those baking sheets into your preheated oven and bake for 15-18 minutes. You’re looking for the edges to be just lightly golden. They won’t get super brown, and that’s exactly what we want for perfect shortbread.
- Once they’re out of the oven, let the cookies cool on the baking sheets for about 5 minutes. This helps them firm up a bit. Then, carefully transfer them to a wire rack to cool completely. Patience is key here – we want them totally cool before we dip them in chocolate!
- While your cookies are cooling, let’s get that chocolate ready. Melt your dark chocolate chips in a microwave-safe bowl. I like to do this at 30-second intervals, stirring between each time. This prevents the chocolate from scorching and ensures a perfectly smooth, melty dip.
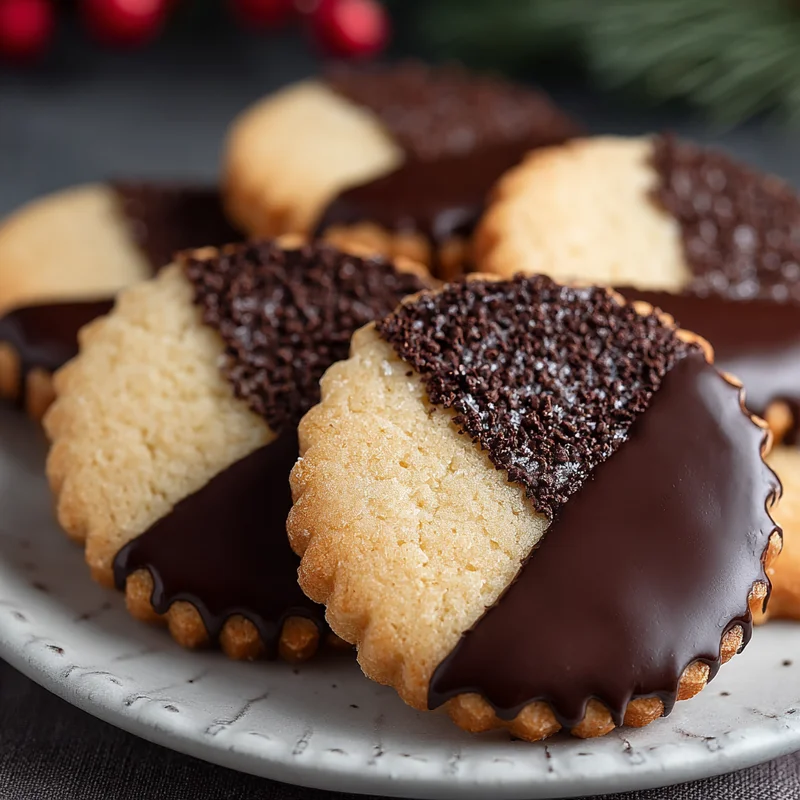
- Once the chocolate is smooth and luscious, it’s dipping time! Take one cooled shortbread cookie and dip one end into the melted chocolate, letting any excess drip back into the bowl.
- Finally, place your beautifully dipped cookies on a wire rack (with parchment paper underneath to catch any drips) or back onto a clean piece of parchment paper. Let the chocolate set completely. You can pop them in the fridge for a few minutes if you’re in a hurry, but they’ll set up nicely at room temperature too.
Substitutions & Additions
These cookies are wonderful just as they are, but sometimes a little twist makes them even more special! Here are a few ideas:
- Chocolate Choice: If dark chocolate isn’t your favorite, feel free to use milk chocolate or even white chocolate for dipping.
- Add-ins: Before shaping the log, you could gently fold in some mini chocolate chips, finely chopped nuts (like almonds or pistachios), or even a sprinkle of dried fruit into the dough.
- Citrus Zest: A little bit of lemon or orange zest mixed into the dough can add a lovely bright note.
- Sprinkles: For a festive touch, sprinkle some colorful nonpareils or edible glitter onto the chocolate while it’s still wet.
Tips for Success
We all have those moments in the kitchen, but with these tips, you’ll be a shortbread pro in no time!
- Butter Temperature is Key: Make sure your butter is truly softened, not melted. It should give slightly when you press it. Too cold and it won’t cream well, too warm and your dough can get greasy.
- Don’t Overwork the Dough: Seriously, this is the golden rule for tender shortbread. Mix until just combined, and handle the dough gently.
- Consistent Slices: For even baking, try to cut your cookie log into uniform thicknesses.
- Cool Completely: Resist the urge to dip warm cookies! The chocolate will melt off and make a mess. Patience, my friends!
- Prep Ahead: You can make the shortbread dough and shape it into a log a day or two in advance. Wrap it tightly in plastic wrap and store it in the refrigerator. Just let it sit at room temperature for about 15-20 minutes before slicing if it’s too firm.
How to Store It
Once your delicious chocolate-dipped shortbread cookies have fully set, you’ll want to store them properly to keep them fresh and delightful.
- Store them in an airtight container at room temperature.
- They’ll stay fresh and tasty for about 5-7 days.
- If you live in a very warm climate or your kitchen gets hot, you might consider storing them in the refrigerator, although this can sometimes make them a bit firmer.
FAQs
Q: Can I make these cookies ahead of time?
Absolutely! The shortbread dough can be made and shaped into a log up to 2 days in advance and kept in the fridge. You can also bake the shortbread cookies and store them at room temperature (un-dipped) for a couple of days before dipping them in chocolate.
Q: My chocolate isn’t melting smoothly. What am I doing wrong?
The most common culprit is overheating the chocolate. Always use short bursts of microwave time (30 seconds) and stir thoroughly between each interval. Also, ensure your bowl and utensils are completely dry, as water can make chocolate seize.
Q: Can I use a gluten-free flour blend for this recipe?
While I haven’t personally tested it with a gluten-free blend, many readers have had success. Look for a good quality all-purpose gluten-free flour blend that contains xanthan gum. You might need to adjust the liquid slightly, but it’s worth a try!
Q: My cookies are a bit crumbly after baking. Is that normal?
A little crumbliness is characteristic of shortbread, as it’s meant to be tender and buttery! If they are excessively crumbly to the point of falling apart, you might have either over-baked them slightly or not creamed the butter and sugar enough. However, a slight crumble is perfectly fine and part of their charm!

Chocolate-Dipped Shortbread Cookies
Equipment
- Electric mixer or whisk
- Baking sheets
- Parchment paper
- Medium bowl
- Separate bowl
- Sharp knife
- Wire rack
- Microwave-safe bowl
Ingredients
Main ingredients
- 1 cup unsalted butter, softened
- 0.5 cup powdered sugar also known as confectioners' sugar or icing sugar
- 2 cups all-purpose flour
- 0.25 teaspoon salt
- 1 cup dark chocolate chips your favorite dark chocolate
Instructions
- Preheat your oven to 350°F (175°C) and line baking sheets with parchment paper.
- In a medium bowl, cream together softened butter and powdered sugar until light, fluffy, and pale yellow.
- In a separate bowl, whisk together all-purpose flour and salt.
- Gradually add the dry ingredients to the butter and sugar mixture. Mix until just combined. Do not overmix.
- Turn the dough out onto a lightly floured surface. Gently shape it into a rectangular log, about 1.5 inches in diameter.
- Using a sharp knife, cut the log into 1/2-inch thick rounds.
- Place the rounds onto prepared baking sheets, about 1 inch apart.
- Bake for 15-18 minutes, or until the edges are lightly golden.
- Let the cookies cool on the baking sheets for 5 minutes, then transfer to a wire rack to cool completely.
- Melt the dark chocolate chips in a microwave-safe bowl, using 30-second intervals and stirring between each.
- Dip one end of each cooled cookie into the melted chocolate, letting excess drip back.
- Place the dipped cookies on a wire rack or parchment paper to let the chocolate set completely.

