
Introduction
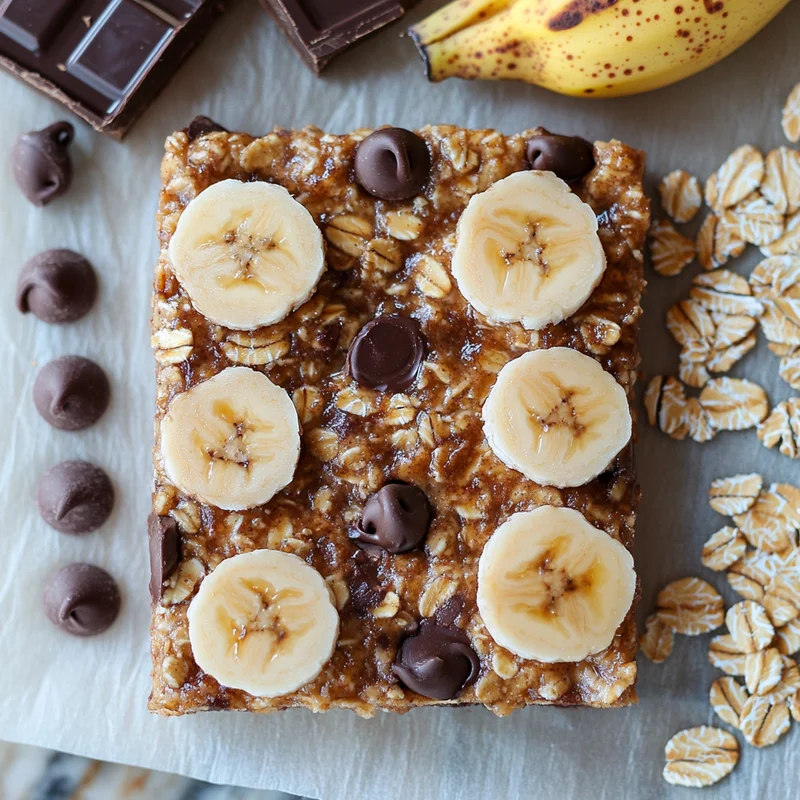
Oh, friends, let me tell you about a little recipe that feels like a warm hug in a bite. You know those moments when you have a few spotty bananas sitting on the counter, looking for a purpose beyond banana bread? And you just crave something simple, something sweet but not too sweet, something that comes together like magic? That’s exactly where these super easy Banana Oatmeal Bars come in.
This recipe is a keeper, the kind you’ll find yourself whipping up on a lazy Sunday morning, a busy weeknight when you need a quick treat, or honestly, any time you just want something comforting and delicious. They require minimal effort, minimal ingredients, and give you maximum cozy satisfaction. Trust me, your kitchen is about to smell amazing, and your taste buds are going to thank you!
Why You’ll Love This Recipe
Seriously, what’s not to love? These bars check all the boxes!
- Fast: From mixing bowl to oven in under 10 minutes. Yep, you read that right!
- Easy: No fancy equipment needed, just a bowl, a fork (or masher), and a spatula. It’s practically foolproof.
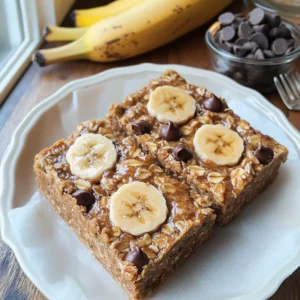
- Giftable: Bake a batch and share the love! They pack beautifully and make a lovely homemade gift.
- Crowd-Pleasing: Kids and adults alike devour these. They’re great for snacks, breakfast on the go, or a simple dessert.
- Healthy-ish: Made with simple, wholesome ingredients you likely have on hand.
Ingredients
Gather ’round, friends! Here’s what you’ll need to make these little slices of heaven. The beauty is in the simplicity!
- 1 1/2 cups Ripe Bananas: The spottier, the better! You’ll want to mash these up really well. They provide sweetness, moisture, and that lovely banana flavor.
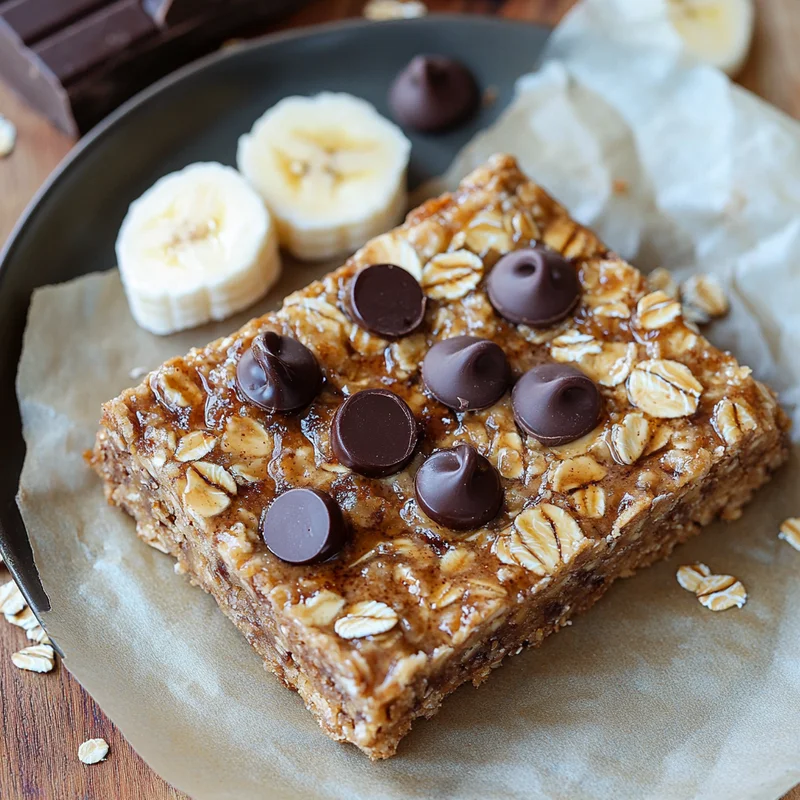
- 2 cups Rolled Oats: Old-fashioned oats work best here. They give the bars their structure and chewy texture. Avoid instant oats – they’ll make the bars mushy.
- 3 tbsp Maple Syrup: Our touch of natural sweetness. You can adjust this slightly based on how sweet your bananas are and your personal preference.
- 1/2 cup Nut Butter: Peanut butter, almond butter, cashew butter… choose your favorite! This binds everything together and adds richness and flavor. Make sure it’s a creamy, natural-style nut butter if possible.
- 1 cup Chocolate Chips: Because, well, chocolate chips! Use semi-sweet, dark, or even white chocolate chips. Or leave them out if you prefer!
- 1 tsp Cinnamon: Just a touch to warm things up and complement the banana and oats. Don’t skip it!
- 1/2 tsp Salt: A little pinch to balance the sweetness and enhance all the flavors.
- 1 tsp Vanilla Extract: Adds another layer of comforting flavor.
How to Make It
Okay, let’s get baking! This is so simple, you’ll barely believe it.
Step 1: Preheat your oven to 350°F (175°C) and line an 8×8 inch square baking pan with parchment paper, leaving some overhang on the sides. This makes lifting the bars out later a breeze!
Step 2: In a medium to large bowl, mash your ripe bananas really, really well with a fork or potato masher. You want it to be pretty smooth with just a few small lumps maybe.
Step 3: Add the maple syrup, nut butter, cinnamon, salt, and vanilla extract to the mashed bananas. Stir everything together until it’s well combined and looks smooth and creamy.
Step 4: Now, pour in the rolled oats and chocolate chips. Use a spatula or a sturdy spoon to mix everything together. Keep stirring until the oats and chocolate chips are evenly distributed throughout the banana mixture. It might seem a little thick and sticky, and that’s exactly what you want!
Step 5: Spoon the mixture into your prepared 8×8 inch pan. Use your spatula or the back of a spoon to spread it out evenly and press it down firmly into the pan. You want a nice, compact layer.
Step 6: Pop the pan into your preheated oven and bake for 20-25 minutes, or until the edges look golden brown and the center is set. They shouldn’t be super jiggly in the middle.
Step 7: Take the pan out of the oven and let the bars cool completely in the pan on a wire rack. This is crucial! Letting them cool helps them firm up properly for cutting. I know it’s hard to wait, but it’s worth it!
Step 8: Once they’re completely cool, use the parchment paper overhang to lift the entire slab out of the pan. Place it on a cutting board and slice into squares or bars. Enjoy!
Substitutions & Additions
Want to get creative? These bars are super flexible! Here are a few ideas:
- Nut Butter Swaps: No peanut butter? Use almond, cashew, sunflower seed butter (for nut allergies!), or even tahini for a slightly different flavor profile.
- Sweetener Options: Agave or honey (if you don’t need it vegan) can work instead of maple syrup, though they might change the texture slightly. Start with the same amount and adjust.
- Mix-Ins: Swap chocolate chips for dried cranberries, raisins, chopped nuts (walnuts, pecans!), seeds (chia, flax, pumpkin), or a mix! Coconut flakes are also a delicious addition.
- Spice It Up: Add a pinch of nutmeg or ground ginger along with the cinnamon for extra warmth.
- Make it Nut-Free: Use sunflower seed butter instead of nut butter and omit any added nuts. Double-check your oats are certified gluten-free if needed for allergies.
Tips for Success
Here are a few little tricks to make sure your bars turn out perfectly every time:
- Use Ripe Bananas: This is key! Underripe bananas won’t mash well and won’t provide enough natural sweetness or moisture. Look for those brown spots!
- Don’t Use Instant Oats: Stick to old-fashioned rolled oats. Instant oats can result in a mushy texture after baking.
- Mash Bananas Well: Get them as smooth as possible before adding other ingredients.
- Press Firmly: Make sure you press the mixture down firmly into the pan. This helps the bars hold together once baked and cut.
- Cool COMPLETELY: I know I mentioned it, but it’s so important! Warm bars will crumble when you try to cut them. Patience, friend!
- Parchment Paper is Your Friend: Don’t skip lining the pan! It makes removing the bars effortless.
How to Store It
These bars keep wonderfully, which is great news if they last longer than a day in your house!
- Countertop: Store cooled bars in an airtight container at room temperature for up to 2-3 days.
- Refrigerator: For longer storage, keep them in an airtight container in the fridge for up to a week. The texture might firm up a bit when chilled.
- Freezer: These freeze beautifully! Place cooled bars in a single layer on a baking sheet to freeze, then transfer to a freezer-safe bag or container. They’ll keep for up to 3 months. Thaw at room temperature or warm gently.
FAQs
Got questions? I’ve got answers!
Q: Can I use quick oats instead of rolled oats?
A: While you can, I really recommend using rolled oats for the best texture. Quick oats tend to make the bars softer and potentially mushier.
Q: Can I leave out the chocolate chips?
A: Absolutely! The bars are still delicious without them, especially if you add other mix-ins like nuts or dried fruit.
Q: Are these bars healthy?
A: They’re made with whole, unprocessed ingredients like oats and bananas, making them a more wholesome option than many store-bought bars or baked goods. They contain natural sugars and fats from the fruit, oats, and nut butter. They’re a great “healthy-ish” snack or treat!
Q: How ripe do the bananas need to be?
A: The riper, the better! Look for bananas with lots of brown spots. They are sweeter and mash more easily, providing the perfect consistency for the batter.
Easy 5-Ingredient Banana Oatmeal Bars
Equipment
- bowl medium to large
- Fork or potato masher
- Spatula
- Baking pan 8x8 inch square
- Parchment paper
- Wire rack
- Cutting board
Ingredients
Ingredients
- 1.5 cups Ripe Bananas mashed well
- 2 cups Rolled Oats old-fashioned
- 3 tbsp Maple Syrup
- 0.5 cup Nut Butter creamy, natural-style
- 1 cup Chocolate Chips optional
- 1 tsp Cinnamon
- 0.5 tsp Salt
- 1 tsp Vanilla Extract
Instructions
- Preheat your oven to 350°F (175°C) and line an 8x8 inch square baking pan with parchment paper, leaving some overhang on the sides.
- In a medium to large bowl, mash your ripe bananas really, really well with a fork or potato masher.
- Add the maple syrup, nut butter, cinnamon, salt, and vanilla extract to the mashed bananas. Stir everything together until it's well combined and looks smooth and creamy.
- Now, pour in the rolled oats and chocolate chips. Use a spatula or a sturdy spoon to mix everything together. Keep stirring until the oats and chocolate chips are evenly distributed throughout the banana mixture.
- Spoon the mixture into your prepared 8x8 inch pan. Use your spatula or the back of a spoon to spread it out evenly and press it down firmly into the pan.
- Pop the pan into your preheated oven and bake for 20-25 minutes, or until the edges look golden brown and the center is set.
- Take the pan out of the oven and let the bars cool completely in the pan on a wire rack. This is crucial! Letting them cool helps them firm up properly for cutting.
- Once they're completely cool, use the parchment paper overhang to lift the entire slab out of the pan. Place it on a cutting board and slice into squares or bars. Enjoy!
Notes
- Nut Butter Swaps: Use almond, cashew, sunflower seed butter (for nut allergies!), or tahini.
- Sweetener Options: Agave or honey can work instead of maple syrup.
- Mix-Ins: Swap chocolate chips for dried cranberries, raisins, chopped nuts, seeds (chia, flax, pumpkin), or coconut flakes.
- Spice It Up: Add a pinch of nutmeg or ground ginger.
- Make it Nut-Free: Use sunflower seed butter and omit added nuts. Use certified gluten-free oats if needed.
Tips for Success:
- Use Ripe Bananas: Look for brown spots for sweetness and moisture.
- Don't Use Instant Oats: Stick to old-fashioned rolled oats.
- Mash Bananas Well: Get them as smooth as possible.
- Press Firmly: Press the mixture down firmly into the pan to help bars hold together.
- Cool COMPLETELY: Warm bars will crumble when cut.
- Parchment Paper is Your Friend: Makes removal effortless.
Storage:
- Countertop: Store in an airtight container for up to 2-3 days.
- Refrigerator: Store in an airtight container for up to a week. Texture might firm up.
- Freezer: Freeze cooled bars in a single layer on a baking sheet, then transfer to a freezer-safe container for up to 3 months. Thaw at room temp or warm gently.