
Introduction
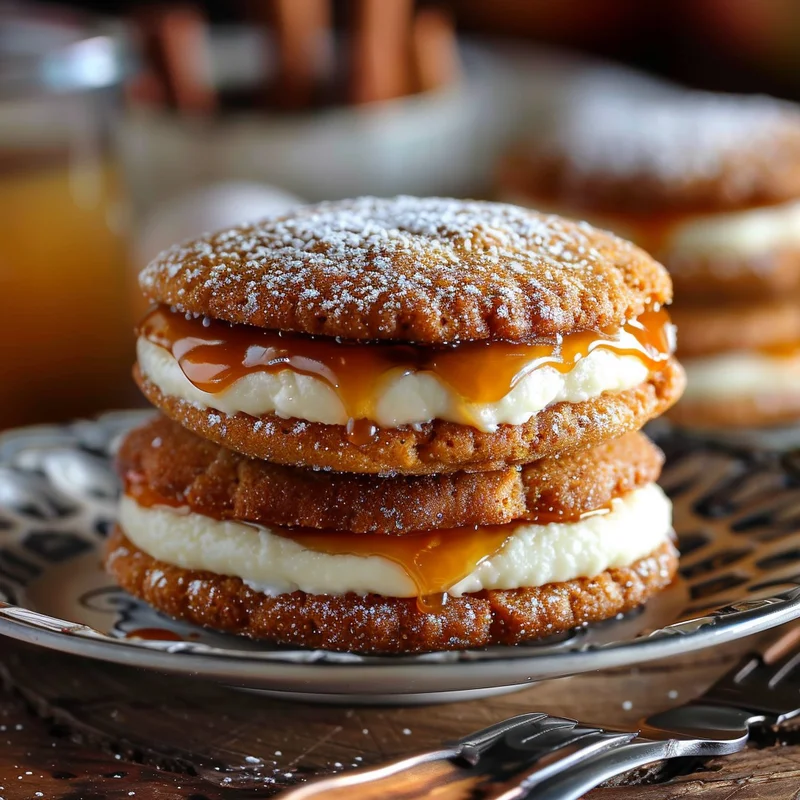
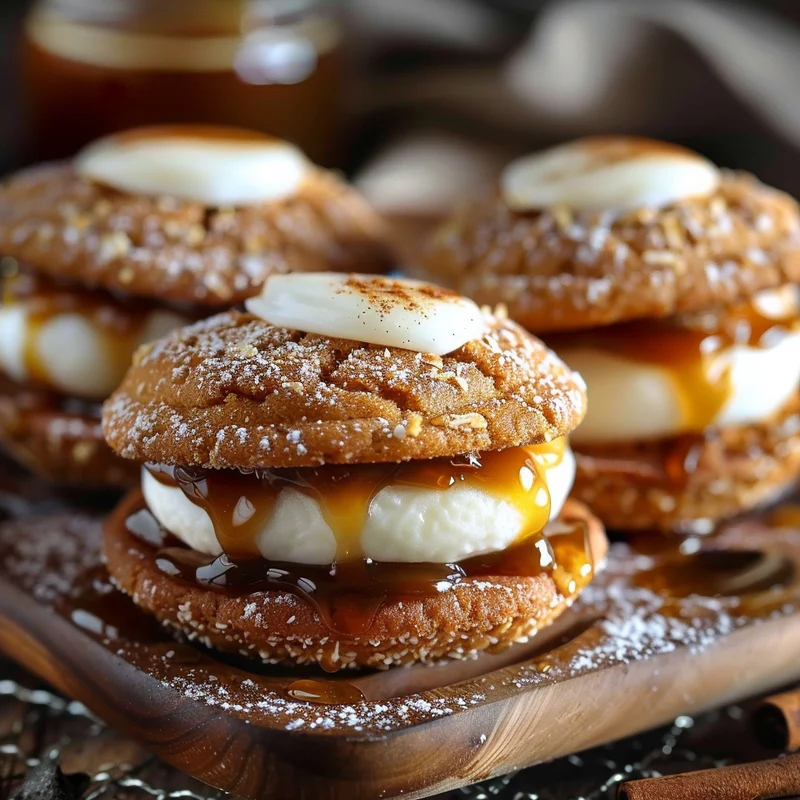
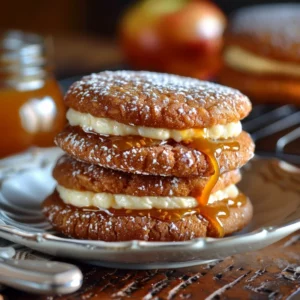
Oh, hello there, friend! Can you smell that? That sweet, spicy aroma of autumn is just in the air, isn’t it? It always brings me back to those crisp Saturday mornings, apple picking with the family, and the warm hug of a freshly baked treat. Today, I want to share a recipe that captures all of that cozy goodness in every single bite: Apple Cider Whoopie Pies with a luscious Caramel Drizzle. Seriously, these are a game-changer, and the best part? They’re incredibly easy to whip up, making them perfect for those spontaneous baking urges or when you need a little something special to brighten your day. Get ready to fall in love!
Why You’ll Love This Recipe
- Speedy Sweetness: You can have these delicious whoopie pies ready in under an hour, from mixing bowl to cooling rack.
- Effortlessly Delicious: No fancy techniques required! If you can mix ingredients, you can make these.
- Perfect for Gifting: Pack them up in a cute tin or box, and you’ve got an instant, heartfelt gift for friends, neighbors, or teachers.
- Guaranteed Crowd-Pleaser: From little hands to grown-up palates, everyone adores the classic combination of apple cider and sweet, creamy frosting.
Ingredients
Gather your goodies! You probably have most of these in your pantry already. Here’s what you’ll need to create these delightful Apple Cider Whoopie Pies:
- 2 large eggs: The binder that brings all our flavors together.
- 2 cups all-purpose flour: Our sturdy foundation for the soft cakes.
- 1 teaspoon baking soda: This is what gives our whoopie pies their lovely lift.
- 2 cups packed brown sugar: For that irresistible sweetness and a hint of caramel flavor.
- 1 teaspoon ground cinnamon: The quintessential autumn spice!
- 1/2 teaspoon ground nutmeg: Adds a warm, cozy depth to the spice blend.
- 1/4 teaspoon salt: Balances the sweetness and enhances all the flavors.
- 2 teaspoons vanilla extract: A little touch of pure magic.
- 1 cup apple cider: The star of the show! Use good quality cider for the best flavor.
- 1 cup unsalted butter, softened: Crucial for a tender cake and creamy frosting. Make sure it’s truly soft, not melted.
- 1/4 cup heavy cream: For that extra richness in our frosting.
How to Make It
Alright, let’s get baking! It’s simpler than you think.
For the Apple Cider Cake Rounds:
- Preheat & Prep: First things first, preheat your oven to 350°F (175°C). Grab your baking sheets and line them with parchment paper or silicone baking mats. This prevents sticking and makes cleanup a breeze!
- Dry Mix Magic: In a medium bowl, whisk together the all-purpose flour, baking soda, cinnamon, nutmeg, and salt. Give it a good stir to make sure everything is evenly distributed.
- Wet Ingredients Unite: In a separate large bowl, cream together the softened butter and the packed brown sugar until light and fluffy. You can use an electric mixer for this, or a good old-fashioned whisk and some arm power!
- Add the Eggs & Vanilla: Beat in the eggs one at a time, mixing well after each addition. Then, stir in the vanilla extract.
- Alternate & Combine: Now, we’re going to add our dry ingredients and the apple cider to the wet ingredients. Start by adding about a third of the dry mixture to the butter mixture, and mix until just combined. Then, add half of the apple cider and mix again. Repeat this process, alternating between the dry ingredients and the apple cider, ending with the dry ingredients. Be careful not to overmix! We want tender cakes, so just mix until no dry streaks remain.
- Scoop & Space: Use a medium cookie scoop (about 1.5 tablespoons) to drop rounded spoonfuls of batter onto your prepared baking sheets. Leave about 2 inches between each mound of batter, as they will spread a bit.
- Bake to Perfection: Bake for 8-10 minutes, or until the edges are lightly golden and a toothpick inserted into the center comes out clean.
- Cool Down: Let the cake rounds cool on the baking sheets for a couple of minutes before transferring them to a wire rack to cool completely. Patience here is key – you don’t want melty frosting!
For the Creamy Caramel Frosting:
- Soften the Butter: Make sure your unsalted butter is nice and soft.
- Cream & Sweeten: In a large bowl, beat the softened butter until smooth and creamy.
- Add the Rest: Gradually add the brown sugar and heavy cream to the butter, beating until the frosting is light, fluffy, and has a lovely caramel-like hue. Stir in the vanilla extract. If it seems a little too thick, you can add another tiny splash of heavy cream. If it’s too thin, pop it in the fridge for 15 minutes.
Assemble Your Masterpieces:
- Pair Up: Once your cake rounds are completely cool, it’s time to pair them up. Find similar-sized rounds to create your whoopie pie pairs.
- Frost Away: Generously spread or pipe the creamy caramel frosting onto the flat side of one cake round, then gently top with its matching round.
- Drizzle Delight (Optional but Highly Recommended!): For that extra touch of magic, I love to drizzle a little extra melted caramel sauce over the top of the assembled whoopie pies. It looks gorgeous and tastes even better!
Substitutions & Additions
Feeling creative? I love that about you! Here are some ways to make these Apple Cider Whoopie Pies your own:
- Spiced Up: Want more warmth? Add 1/4 teaspoon of ground ginger or cloves to your dry ingredients for an extra spicy kick.
- Apple Chunks: For a delightful texture surprise, fold in about 1/4 cup of finely diced fresh apple into the batter.
- Caramel Filling: Instead of or in addition to frosting, you can add a spoonful of your favorite store-bought or homemade caramel sauce into the center of the frosting before sandwiching the cakes.
- Dairy-Free? While it changes the texture a bit, you can try a plant-based butter and a rich, unsweetened plant-based milk (like oat or soy) for the frosting.
- Cinnamon Sugar Topping: Before baking, you can lightly dust the tops of the cookie mounds with a mixture of cinnamon and sugar for a sweet crunch.
Tips for Success
A few little secrets to make your baking journey smooth sailing:
- Room Temperature is Key: Make sure your butter and eggs are at room temperature. This is crucial for the batter to emulsify properly, resulting in soft, tender cakes.
- Don’t Overmix: Overmixing develops the gluten in the flour, which can lead to tough whoopie pies. Mix just until the ingredients are combined.
- Uniform Scoops: Using a cookie scoop helps ensure all your whoopie pies bake evenly, making assembly much easier.
- Cool Completely: I can’t stress this enough! Frosting warm cakes is a recipe for a melty mess. Let them cool fully on a wire rack.
- Prep Ahead: You can bake the cake rounds a day in advance and store them in an airtight container at room temperature. Make the frosting just before assembling for the best texture.
How to Store It
Once assembled, these delightful treats are best enjoyed within 2-3 days. Store them in an airtight container at room temperature. If your kitchen is particularly warm or humid, you might prefer to store them in the refrigerator, but let them come to room temperature for a few minutes before serving for the best frosting texture.
FAQs
- Q: Can I use apple juice instead of apple cider?
- A: While you can, apple cider will give you a richer, more complex apple flavor. Apple juice might be a bit too sweet and less nuanced.
- Q: How do I get my whoopie pies to be round?
- A: Using a cookie scoop of a consistent size is the best way! You can also lightly trace circles on your parchment paper as a guide, but remember to leave space for spreading.
- Q: My frosting is too runny, what should I do?
- A: Pop the bowl of frosting into the refrigerator for about 15-20 minutes, stirring occasionally. This will help the butter firm up and thicken the frosting.
- Q: Can I freeze these whoopie pies?
- A: It’s best to freeze the un-frosted cake rounds. Once cooled, wrap them tightly in plastic wrap and then place them in a freezer-safe bag or container for up to 2-3 months. Thaw at room temperature and then frost as usual.
Apple Cider Whoopie Pies with Caramel Drizzle
Equipment
- Baking sheets 2
- Parchment paper or silicone baking mats
- Medium bowl
- Large bowl
- Electric mixer or whisk
- Medium cookie scoop about 1.5 tablespoons
- Wire rack
Ingredients
Apple Cider Cake Rounds
- 2 large eggs room temperature
- 2 cups all-purpose flour
- 1 teaspoon baking soda
- 2 cups packed brown sugar
- 1 teaspoon ground cinnamon
- 0.5 teaspoon ground nutmeg
- 0.25 teaspoon salt
- 2 teaspoons vanilla extract
- 1 cup apple cider
- 1 cup unsalted butter, softened
Creamy Caramel Frosting
- 1 cup unsalted butter, softened
- 0.25 cup heavy cream
- 2 teaspoons vanilla extract
Instructions
- Preheat oven to 350°F (175°C). Line baking sheets with parchment paper or silicone baking mats.
- In a medium bowl, whisk together flour, baking soda, cinnamon, nutmeg, and salt.2 large eggs
- In a large bowl, cream together softened butter and brown sugar until light and fluffy.2 large eggs
- Beat in eggs one at a time, mixing well after each. Stir in vanilla extract.2 large eggs
- Alternately add dry ingredients and apple cider to the wet ingredients, beginning and ending with dry. Mix until just combined.2 large eggs
- Use a medium cookie scoop to drop rounded spoonfuls of batter onto prepared baking sheets, leaving 2 inches between each.
- Bake for 8-10 minutes, or until edges are lightly golden and a toothpick comes out clean.
- Let cool on baking sheets for 2 minutes, then transfer to a wire rack to cool completely.
- For the frosting: Beat softened butter until smooth and creamy. Gradually add brown sugar and heavy cream, beating until light and fluffy. Stir in vanilla extract.2 large eggs
- Once cake rounds are cool, pair similar-sized ones. Spread or pipe frosting onto the flat side of one cake round and top with its matching round.2 large eggs
- Optional: Drizzle with melted caramel sauce.