Introduction
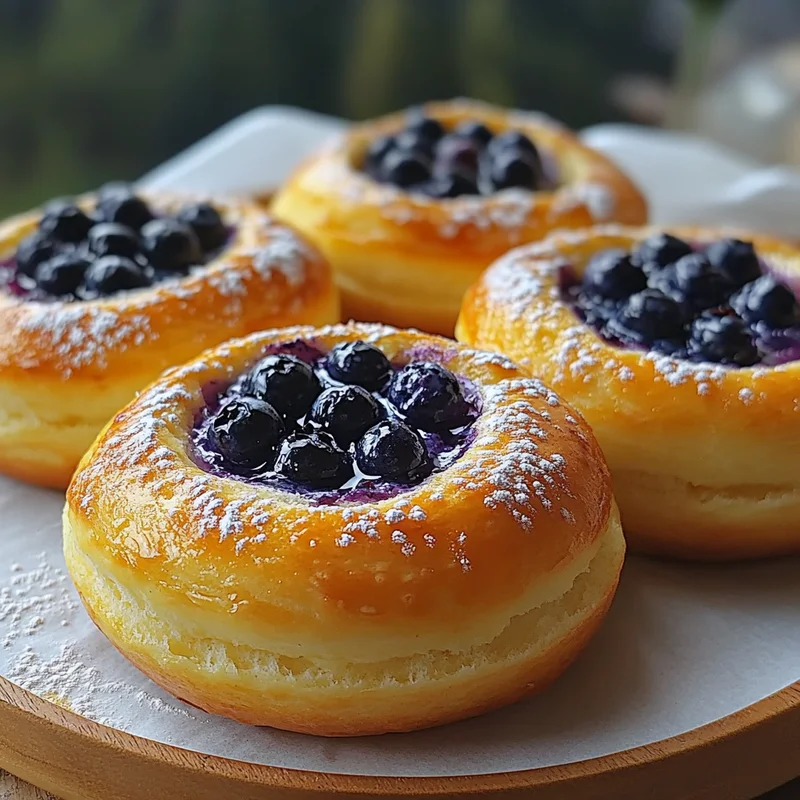
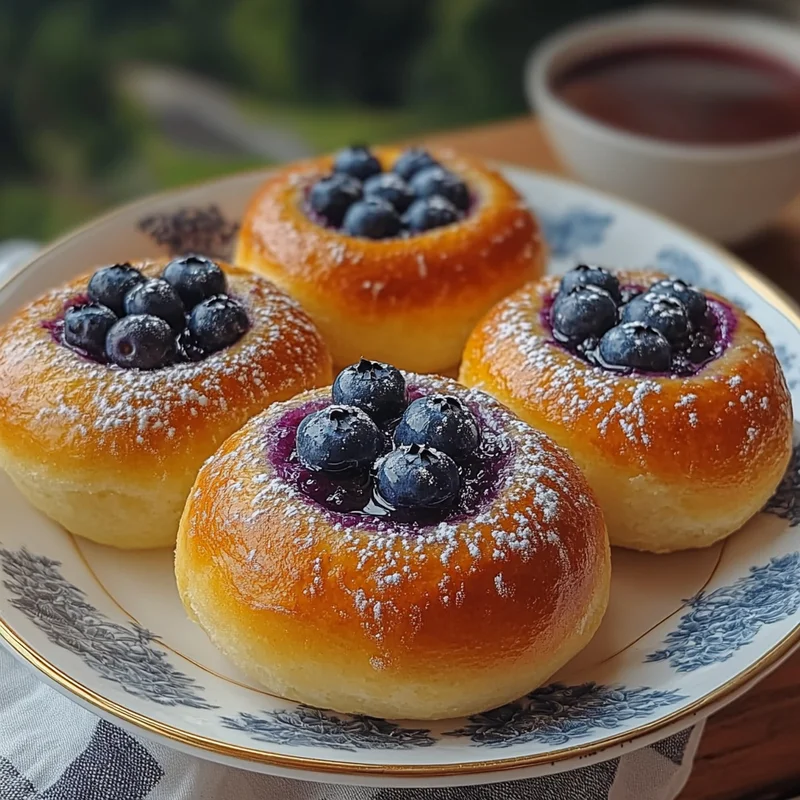
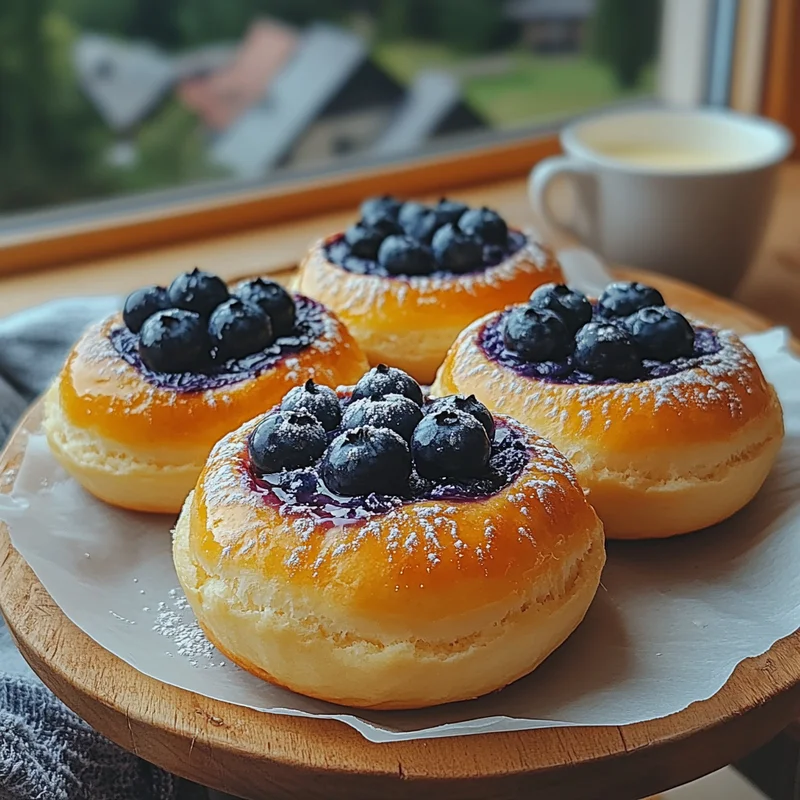
Oh, friend, let me tell you about these blueberry buns. Sometimes, all you need is that warm, comforting smell wafting from your oven to make everything feel right in the world. These aren’t just any buns; they’re little pockets of sunshine bursting with fresh blueberries and creamy goodness, all wrapped up in a soft, tender dough. They remind me of simpler times, maybe a lazy weekend morning or a special treat shared with loved ones.
And the best part? You don’t need to be a master baker to whip up a batch. This recipe for homemade blueberry buns is surprisingly easy, comes together quicker than you might think, and is guaranteed to bring smiles all around. Get ready to fill your home with the most incredible aroma!
Why You’ll Love This Recipe
- Fast
- Easy
- Giftable
- Crowd-pleasing
Ingredients
Gathering your ingredients is the first step to baking happiness! Here’s what you’ll need:
- For the Dough:
- 2 cups all-purpose flour: The foundation of our lovely soft dough.
- ½ cup lukewarm milk: Just warm enough to wake up our yeast, like a cozy blanket.
- 1 egg: Adds richness and helps bind everything together.
- 3 tablespoons soft butter: Makes the dough tender and delicious.
- 1 teaspoon dry yeast: Our little helper for that perfect rise.
- 2 tablespoons sugar: A little sweetness for the dough and food for the yeast.
- 1 pinch salt: Balances all the flavors beautifully.
- For the Filling:
- 1 cup quark or unsalted cream cheese: This is where the magic happens! Quark is traditional and wonderful, but cream cheese works great too for that creamy tang.
- ¼ cup sugar: Sweetens up that creamy base.
- 1 egg: Helps the filling set nicely as it bakes.
- 1 teaspoon vanilla extract: A touch of warmth and classic flavor.
- 1 teaspoon lemon juice: Brightens everything up and complements the blueberries.
- 1 tablespoon semolina: Helps absorb some moisture from the berries and filling, keeping things just right.
- Fresh blueberries: The stars of the show! Use plump, fresh ones for the best results.
- For Finishing:
- 1 egg yolk + milk (for brushing): Gives our buns a beautiful golden shine.
- Powdered sugar (for dusting): The perfect sweet snowy finish.
How to Make It
Ready to get your hands a little floury? Let’s bake some magic!
Step 1: Wake Up the Yeast. Grab a large bowl. Pour in the lukewarm milk, sprinkle the dry yeast over it, and add the sugar. Give it a gentle stir and let it sit for about 5-10 minutes. You’ll know it’s ready when it gets nice and foamy on top – that means your yeast is active and happy!
Step 2: Mix the Dough. Now, add the flour, egg, salt, and that lovely soft butter to the foamy yeast mixture. You can mix this with a sturdy spoon or, if you have a stand mixer with a dough hook, let it do the work! Mix until everything comes together into a shaggy dough.
Step 3: Knead It Out. Lightly flour your counter or a clean surface. Turn the dough out and start kneading! Push, fold, and turn it for about 5-8 minutes. You’re aiming for a smooth, elastic dough that springs back slightly when you poke it. It’s a bit of a workout, but so worth it for tender buns!
Step 4: Let It Rise (Round 1). Lightly oil a clean bowl (just a little swirl of vegetable oil or cooking spray). Place your beautiful ball of dough in the bowl, turn it once to coat, and cover it with a clean kitchen towel or plastic wrap. Find a cozy, warm spot in your kitchen – maybe near a sunny window or on top of your fridge. Let it rise for 1 to 1.5 hours, or until it has happily doubled in size. Patience is key here!
Step 5: Make the Creamy Filling. While the dough is on its first rise, let’s get the filling ready. In a bowl, combine the quark (or cream cheese), sugar, egg, vanilla extract, lemon juice, and semolina. Whisk or stir until it’s smooth and creamy. Now, gently fold in those gorgeous fresh blueberries. Try not to mash them; we want them whole and juicy!
Step 6: Shape the Buns. Your dough should be big and puffy by now! Gently punch it down – it feels good, right? Turn it out onto your lightly floured surface again. Divide the dough into equal pieces. I usually aim for 8 to 10 buns, but you can make them slightly bigger or smaller. Roll each piece into a ball or flatten it into a disc.
Step 7: Fill ‘Em Up! Now for the fun part. In the center of each dough ball/disc, create a nice little well or indentation. You can use your fingers or the back of a spoon. Spoon a generous amount of the blueberry filling into the center of each bun. Try to keep the filling neatly in the well so it doesn’t spill out everywhere when they bake.
Step 8: Second Rise. Line a baking sheet with parchment paper. Carefully place your filled buns onto the prepared sheet, leaving a little space between them. Cover them loosely with a towel or plastic wrap again. Let them rest and rise for another 20-30 minutes. They’ll puff up a bit more, getting ready for the oven.
Step 9: Preheat and Egg Wash. While the buns are on their second rise, preheat your oven to 375°F (190°C). In a small bowl, whisk the egg yolk with a splash of milk to make your egg wash. Just before they go into the oven, gently brush the tops of the buns with this mixture. This gives them that beautiful golden-brown crust.
Step 10: Bake! Pop the baking sheet into your preheated oven. Bake for 15-20 minutes. You’ll know they’re done when they’re golden brown and look cooked through. The filling might bubble a little – that’s okay!
Step 11: Cool. Let the buns cool on the baking sheet for just a few minutes before carefully transferring them to a wire rack to cool completely. This helps them firm up.
Step 12: Finish with Sweetness. Once the buns have cooled (or are still slightly warm – my favorite!), grab a fine-mesh sieve and dust them generously with powdered sugar. It’s the perfect finishing touch!
Now, find a quiet moment (or not so quiet, if you’re sharing!) and enjoy your absolutely delightful homemade blueberry buns. You made them!
Substitutions & Additions
One of the joys of home baking is making a recipe your own! Here are a few ideas:
- No Quark? No Problem! If you can’t find quark, unsalted cream cheese is a fantastic substitute. Just make sure it’s softened to room temperature before mixing.
- Other Berries: Feel free to swap blueberries for other fresh berries like raspberries, blackberries, or a mix!
- Lemon Zest: For an extra burst of citrusy brightness, add a teaspoon of fresh lemon zest to the filling along with the juice.
- Almond Extract: Swap or combine vanilla extract with a little almond extract in the filling for a different flavor profile.
- Cinnamon Swirl (Dough): Want a hint of spice in the dough? Add ½ teaspoon of cinnamon when you’re mixing the dry ingredients.
Tips for Success
Here are a few pointers I’ve picked up to help you get the best results:
- Lukewarm Milk is Key: If your milk is too hot, it can kill the yeast. Too cold, and the yeast won’t activate properly. Aim for around 105-115°F (40-46°C) – warm to the touch but not hot.
- Don’t Rush the Rise: Allowing the dough to rise properly in a warm place is crucial for soft, fluffy buns. Be patient!
- Contain the Filling: When creating the well for the filling, make sure the dough wall is thick enough to hold the filling in as it bakes. Don’t overfill them.
- Don’t Overbake: Keep an eye on them towards the end of the baking time. They can go from golden to overdone quickly.
- Prep Ahead: You can make the dough the night before. After the first rise (step 4), punch it down, cover it tightly, and pop it in the fridge. The next day, let it sit at room temperature for about 30-45 minutes to warm up slightly before dividing and shaping (step 6 onwards).
How to Store It
If you happen to have any left (a big IF!), these blueberry buns are best enjoyed fresh. Store cooled buns in an airtight container at room temperature for 1-2 days. For longer storage, you can keep them in the refrigerator for up to 4 days. You can also freeze cooled buns in a single layer until solid, then transfer them to a freezer-safe bag or container for up to 2-3 months.
To reheat, a few seconds in the microwave works wonders, or warm them gently in a low oven (about 300°F/150°C) until heated through.
FAQs
Q: Can I use frozen blueberries?
A: Yes, but you might want to toss them with a little extra semolina or a teaspoon of flour before folding into the filling to help absorb the extra moisture they release as they thaw and bake.
Q: What if my dough didn’t rise?
A: This usually means the yeast wasn’t active. Make sure your milk was lukewarm (not hot!), your yeast isn’t expired, and you gave it enough time in a warm spot.
Q: Can I make these gluten-free?
A: This recipe is written for all-purpose flour. Converting yeast doughs to gluten-free can be tricky, but you might have success with a good quality gluten-free all-purpose blend designed for yeast baking, following the package instructions for liquid ratios.
Q: Why is the filling runny?
A: Make sure you included the egg and semolina/flour as they help thicken the filling. Also, don’t overfill the buns, as excess moisture from the berries can sometimes seep out.

Easy Homemade Blueberry Buns
Equipment
- Large bowl
- Sturdy spoon or stand mixer with dough hook
- Stand Mixer optional, with dough hook
- Clean surface
- Kitchen towel
- Plastic wrap
- Baking Sheet
- Parchment paper
- Small bowl
- Fine-mesh sieve
- Wire rack
Ingredients
For the Dough
- 2 cups all-purpose flour The foundation of our lovely soft dough.
- 0.5 cup lukewarm milk Just warm enough to wake up our yeast, like a cozy blanket.
- 1 egg Adds richness and helps bind everything together.
- 3 tablespoons soft butter Makes the dough tender and delicious.
- 1 teaspoon dry yeast Our little helper for that perfect rise.
- 2 tablespoons sugar A little sweetness for the dough and food for the yeast.
- 1 pinch salt Balances all the flavors beautifully.
For the Filling
- 1 cup quark or unsalted cream cheese Quark is traditional and wonderful, but cream cheese works great too for that creamy tang.
- 0.25 cup sugar Sweetens up that creamy base.
- 1 egg Helps the filling set nicely as it bakes.
- 1 teaspoon vanilla extract A touch of warmth and classic flavor.
- 1 teaspoon lemon juice Brightens everything up and complements the blueberries.
- 1 tablespoon semolina Helps absorb some moisture from the berries and filling, keeping things just right.
- Fresh blueberries The stars of the show! Use plump, fresh ones for the best results.
For Finishing
- 1 egg yolk for brushing
- milk for brushing (a splash)
- Powdered sugar for dusting
Instructions
- Grab a large bowl. Pour in the {lukewarm milk~ing_milk_dough}, sprinkle the {dry yeast~ing_yeast_dough} over it, and add the {sugar~ing_sugar_dough}. Give it a gentle stir and let it sit for about 5-10 minutes until foamy.
- Add the {all-purpose flour~ing_flour_dough}, {egg~ing_egg_dough}, {salt~ing_salt_dough}, and {soft butter~ing_butter_dough} to the foamy yeast mixture. Mix until everything comes together into a shaggy dough.
- Lightly flour a surface. Turn the dough out and knead for about 5-8 minutes until smooth and elastic.
- Lightly oil a clean bowl. Place the dough in the bowl, turn to coat, and cover. Let it rise in a warm spot for 1 to 1.5 hours, or until doubled in size.
- While the dough rises, combine the {quark or unsalted cream cheese~ing_cheese_filling}, {sugar~ing_sugar_filling}, {egg~ing_egg_filling}, {vanilla extract~ing_vanilla_filling}, {lemon juice~ing_lemonjuice_filling}, and {semolina~ing_semolina_filling} in a bowl. Whisk until smooth. Gently fold in the {Fresh blueberries~ing_blueberries_filling}.
- Gently punch down the risen dough. Turn onto a lightly floured surface. Divide the dough into 8 to 10 equal pieces. Roll each piece into a ball or flatten into a disc.
- Create a well in the center of each dough piece. Spoon a generous amount of the blueberry filling into the center of each bun.
- Line a baking sheet with parchment paper. Place the filled buns onto the sheet, spaced apart. Cover loosely and let rest and rise for another 20-30 minutes.
- While the buns rise, preheat oven to 375°F (190°C). In a small bowl, whisk the {egg yolk~ing_eggyolk_finishing} with a splash of {milk~ing_milk_finishing} for the egg wash. Gently brush the tops of the buns with the egg wash before baking.
- Bake for 15-20 minutes, or until golden brown and cooked through.
- Let the buns cool on the baking sheet for a few minutes, then transfer to a wire rack to cool completely.
- Once cooled, dust the buns generously with {Powdered sugar~ing_powderedsugar_finishing} using a fine-mesh sieve.
Notes
Tips: Ensure milk is lukewarm (105-115°F / 40-46°C) to activate yeast. Don't rush the rising times. Make sure the dough well is thick enough to contain the filling. Don't overbake. Prep Ahead: The dough can be made the night before. After the first rise, punch it down, cover tightly, and refrigerate. The next day, let it warm up at room temperature for 30-45 minutes before dividing and shaping.
Storage: Store cooled buns in an airtight container at room temperature for 1-2 days, or in the refrigerator for up to 4 days. Freeze cooled buns for up to 2-3 months. Reheat in microwave or a low oven (300°F / 150°C).