Introduction
Oh, you guys! Do you ever have those moments when you just crave something savory, cheesy, and utterly delightful? Maybe you’re hosting an impromptu get-together, or perhaps you just want a little something special to munch on with your afternoon tea. Well, get ready, because I’ve got a recipe that’s going to become your new best friend: Cheddar & Herb Cheese Straws! They’re like little crispy, cheesy clouds of happiness, and the best part? They are surprisingly simple to whip up. Seriously, you’ll be wondering where these have been all your life!
Why You’ll Love This Recipe
- Fast to Make: From start to finish, these come together quicker than you might think.
- Easy Peasy: No fancy techniques needed here, just a few simple steps.
- Giftable Goodness: Package them up in a cute tin or bag – they make the most wonderful homemade gift!
- Crowd-Pleasing Charm: Everyone loves a good cheese straw, and these are guaranteed to disappear in a flash.
Ingredients
Let’s gather our goodies! The beauty of these cheese straws is that they use pantry staples you probably already have on hand. Here’s what you’ll need:
- 8 ounces grated extra-sharp cheddar cheese: I love using extra-sharp for that punchy flavor, but sharp cheddar works beautifully too. Make sure it’s finely grated for the best texture.
- 1½ cups all-purpose flour: Spooned into your measuring cup and leveled, this is the backbone of our straws.
- 1 teaspoon kosher salt: For that perfect savory balance.
- Scant teaspoon crushed red pepper flakes: This adds a tiny hint of warmth that’s just delightful. Don’t worry, it’s not too spicy!
- 1½ tablespoons roughly chopped fresh herbs: This is where you can get creative! Rosemary, thyme, chives, or even a little parsley are fantastic choices. Fresh is best for that vibrant flavor.
- 1 stick cold unsalted butter, cut into small pieces: Cold butter is key to that lovely flaky texture.
- 6 tablespoons heavy cream: Just enough to bind everything together into a beautiful dough.
How to Make It
Alright, let’s get our hands a little floured and make some magic happen! It’s a straightforward process, and I’ll walk you through it every step of the way.
- Mix the Dry Ingredients: Grab a nice big bowl. Toss in your grated cheddar cheese, flour, kosher salt, those little red pepper flakes, and your chopped fresh herbs. Give it a good swirl to combine everything.
- Cut in the Butter: Now, add those cold butter pieces to the bowl. This is where you can get your hands in there (my favorite part!) and use your fingertips, a pastry blender, or even a food processor to cut the butter into the dry ingredients. You’re aiming for a texture that looks like coarse crumbs, with some pea-sized pieces of butter still visible.
- Add the Cream: Time for the heavy cream! Drizzle in about one tablespoon at a time, mixing gently after each addition. You want the dough to just start coming together. Be careful not to overmix here – we don’t want tough straws!
- Form the Dough: Turn the dough out onto a lightly floured surface. Give it a gentle knead a few times, just enough to bring it all together into a nice, cohesive ball.
- Chill Out: Divide the dough in half. Wrap each half snugly in plastic wrap and flatten them into disks. This makes them easier to roll out later. Pop them into the refrigerator for at least 30 minutes, or until they feel nice and firm. This chilling step is important for keeping their shape.
- Get Ready to Bake: Preheat your oven to 375°F (190°C). Line a couple of baking sheets with parchment paper – this makes cleanup a breeze!
- Roll and Cut: Take one disk of chilled dough and place it on a lightly floured surface. Roll it out to about ¼-inch thickness. Now, get creative with your cutting! I like to cut mine into ½-inch wide strips, like little straws, but you can do whatever shapes you fancy.
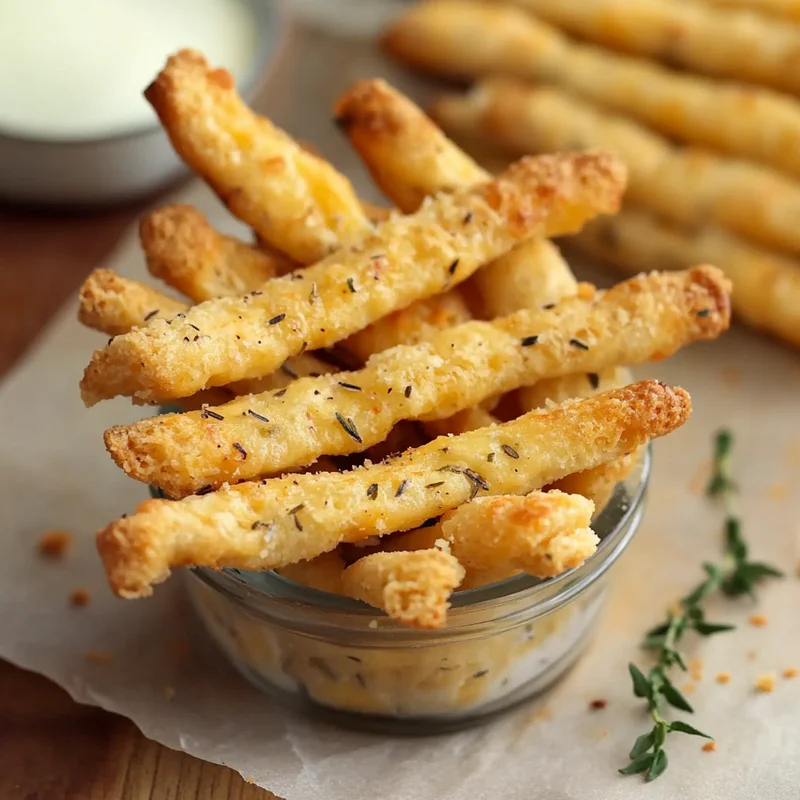
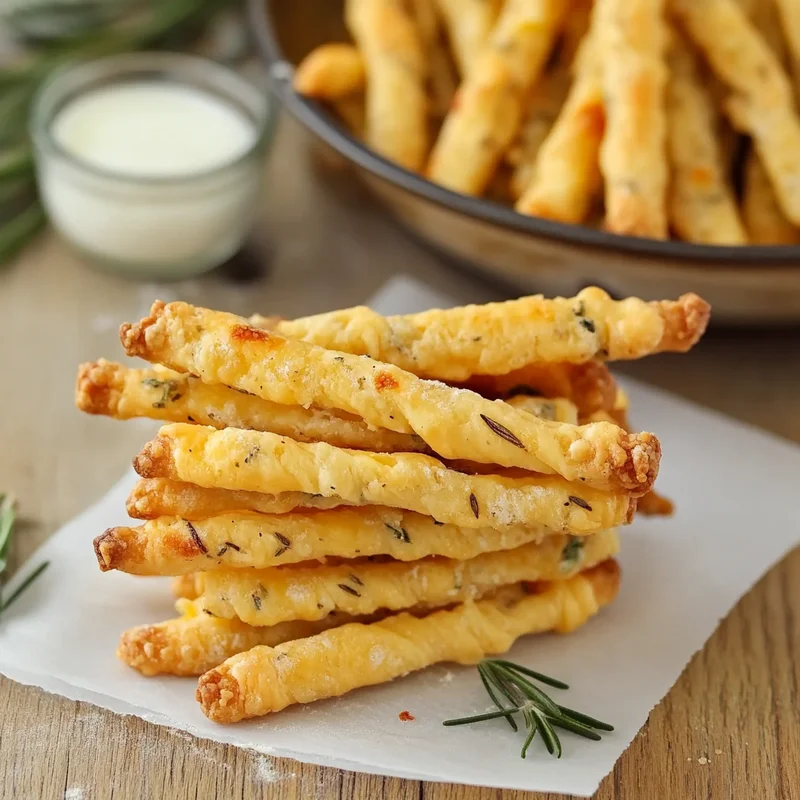
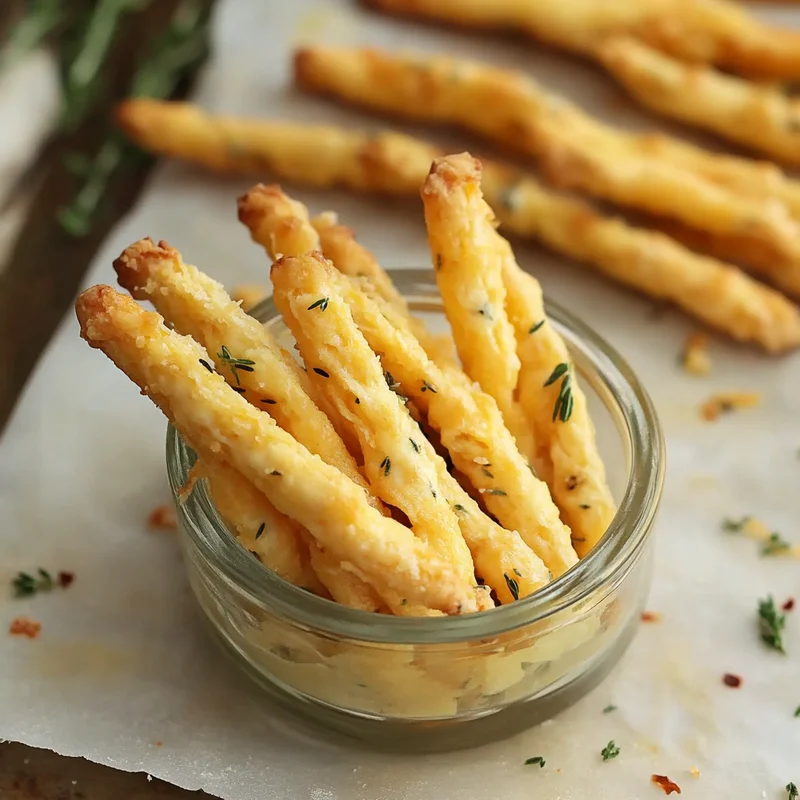
- Bake to Golden Perfection: Carefully transfer your straw shapes onto the prepared baking sheets, leaving a little bit of space between them. Pop them into the preheated oven and bake for 12-15 minutes. You’re looking for them to turn a beautiful golden brown and get wonderfully crisp.
- Cool Down: Let the straws cool on the baking sheets for a few minutes before gently transferring them to a wire rack to cool completely. This ensures they get extra crispy. Repeat the rolling and baking process with the remaining dough.
Substitutions & Additions
These cheese straws are fantastic as is, but if you’re feeling adventurous, here are a few ideas to jazz them up:
- Cheese Variations: Feel free to experiment with other cheeses! Gruyere, Parmesan, or even a spicy pepper jack would be delicious.
- Herb Power: Don’t have fresh herbs? You can use about ½ teaspoon of dried herbs (like Italian seasoning or herbes de Provence) in place of fresh.
- Spice It Up: Want more heat? Add a pinch more red pepper flakes, or even a dash of cayenne pepper.
- A Touch of Sweetness: For a sweet and savory twist, sprinkle a tiny bit of sugar over the straws before baking.
- Seed Sprinkle: Poppy seeds or sesame seeds sprinkled on top before baking add a nice crunch and visual appeal.
Tips for Success
A few little tricks can make all the difference!
- Keep it Cold: Make sure your butter and even your cream are nice and cold. This is crucial for a flaky texture.
- Don’t Overwork the Dough: Overmixing can lead to tougher straws. Mix until just combined.
- Even Thickness: Try to roll your dough to an even thickness so all the straws bake at the same rate.
- Prep Ahead: You can make the dough, wrap it, and refrigerate it for up to 2 days before you’re ready to roll and bake. It’s a great make-ahead treat!
How to Store It
Once your glorious cheese straws are completely cool, store them in an airtight container at room temperature. They’ll stay delightfully crisp for about 3-4 days. I like to put them in a pretty cookie tin for that extra touch of charm.
FAQs
Got questions? I’ve got answers!
- Can I make these gluten-free? While I haven’t personally tested it, you could try substituting a good-quality gluten-free all-purpose flour blend. You might need to adjust the liquid slightly.
- What’s the best way to cut the straws evenly? Using a ruler as a guide when you roll and cut can help ensure uniform shapes. A pizza cutter also works wonderfully for slicing strips!
- Can I freeze the dough? Yes, you can! Wrap the chilled dough disks tightly in plastic wrap and then again in foil. They’ll keep in the freezer for up to 3 months. Thaw them in the refrigerator overnight before rolling and baking.
So there you have it, friends! Simple, delicious, and oh-so-satisfying Cheddar & Herb Cheese Straws. Give them a try and let me know what you think in the comments below! Happy baking!

Cheddar & Herb Cheese Straws
Equipment
- bowl Large bowl for mixing
- pastry blender Or fingertips, or food processor for cutting in butter
- Food processor Optional for cutting in butter
- Plastic wrap For chilling dough
- Baking sheets
- Parchment paper For lining baking sheets
- Rolling Pin
- Pizza Cutter Optional for cutting straws
- Wire rack For cooling
- cookie tin For storage
Ingredients
Main ingredients
- 8 ounces grated extra-sharp cheddar cheese Finely grated
- 1.5 cups all-purpose flour Spoon and leveled
- 1 teaspoon kosher salt
- 0.75 teaspoon crushed red pepper flakes Scant teaspoon
- 1.5 tablespoons fresh herbs Roughly chopped (e.g., rosemary, thyme, chives, parsley)
- 1 stick cold unsalted butter Cut into small pieces
- 6 tablespoons heavy cream Cold
Instructions
- In a large bowl, combine the grated cheddar cheese, flour, kosher salt, crushed red pepper flakes, and chopped fresh herbs. Mix well.
- Add the cold butter pieces to the bowl. Use your fingertips, a pastry blender, or a food processor to cut the butter into the dry ingredients until the mixture resembles coarse crumbs with some pea-sized pieces of butter remaining.
- Gradually add the heavy cream, about one tablespoon at a time, mixing gently after each addition until the dough just begins to come together. Be careful not to overmix.
- Turn the dough out onto a lightly floured surface. Knead gently a few times to form a cohesive ball.
- Divide the dough in half. Wrap each half tightly in plastic wrap and flatten into disks. Refrigerate for at least 30 minutes, or until firm.
- Preheat your oven to 375°F (190°C). Line two baking sheets with parchment paper.
- Place one disk of chilled dough on a lightly floured surface and roll it out to about ¼-inch thickness.
- Cut the dough into desired shapes, such as ½-inch wide strips for straws.
- Arrange the straw shapes on the prepared baking sheets, leaving some space between them.
- Bake for 12-15 minutes, or until golden brown and crisp.
- Let the straws cool on the baking sheets for a few minutes before transferring them to a wire rack to cool completely.
- Repeat the rolling and baking process with the remaining dough.