Introduction
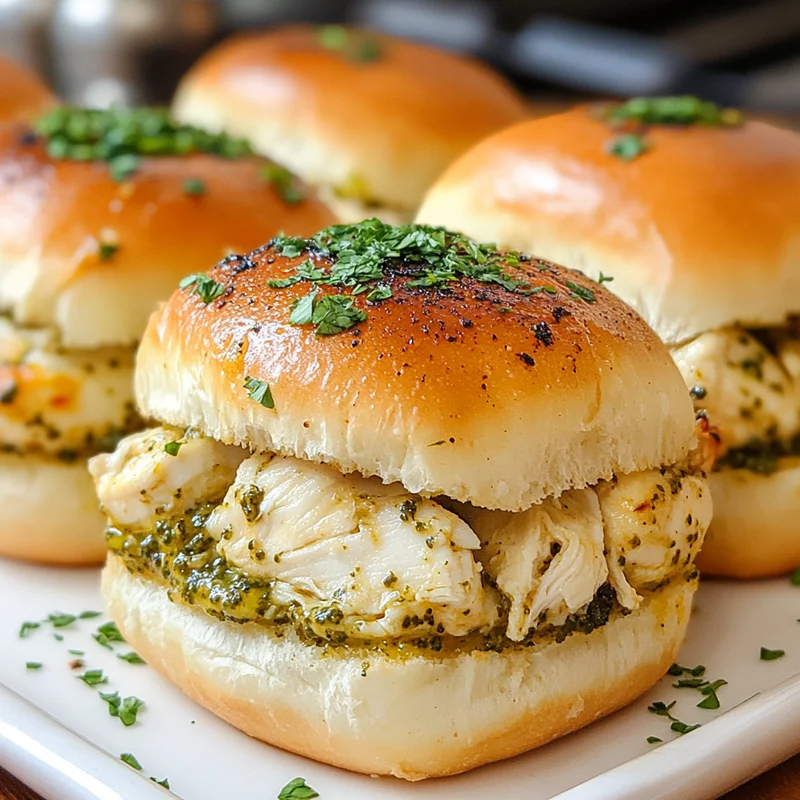
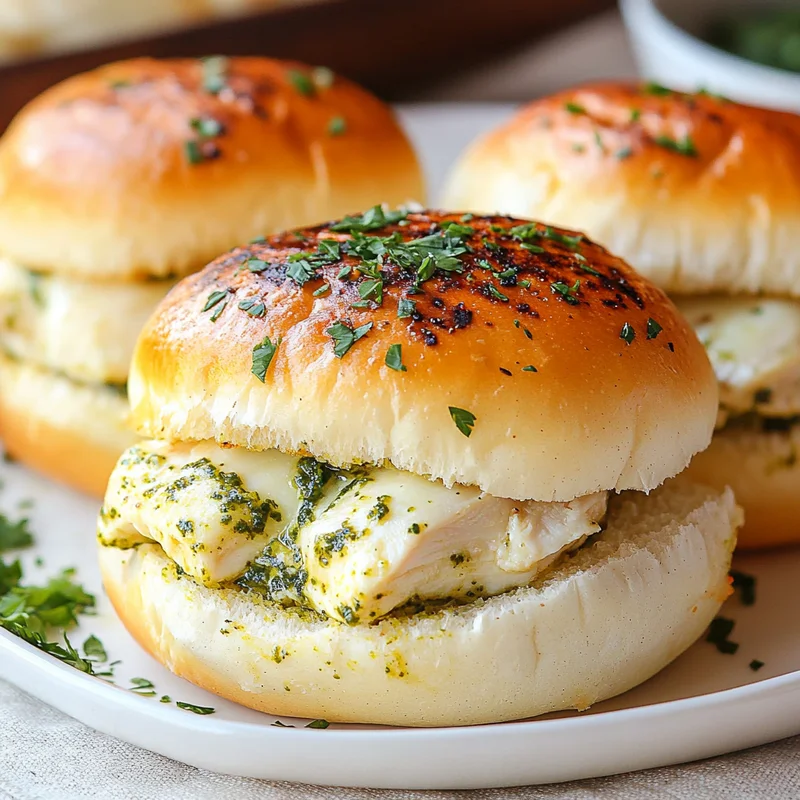
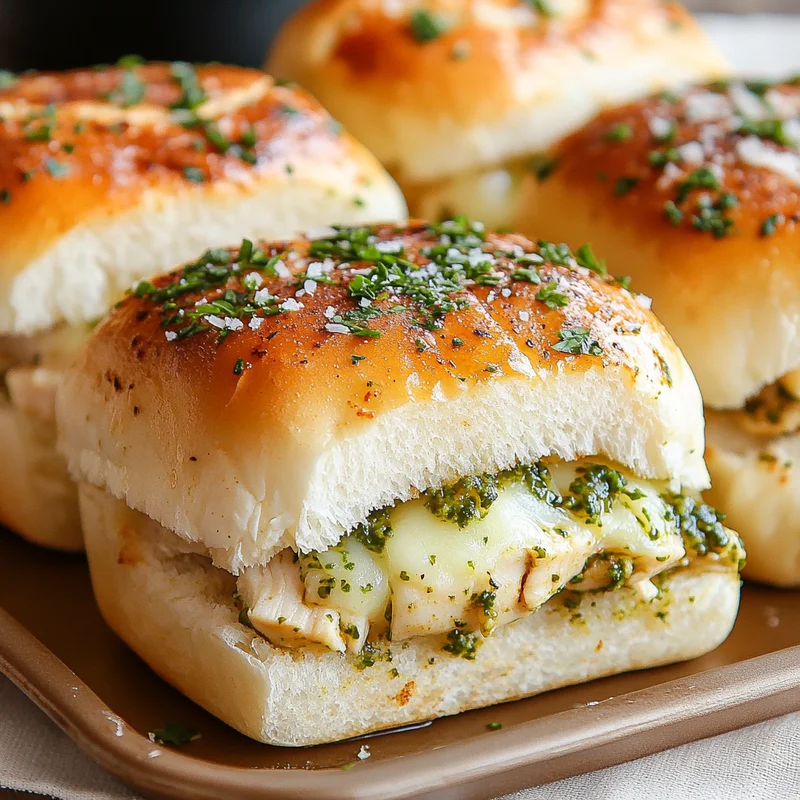
Hey there, friend! Ever have those moments when you need something utterly delicious, super easy, and guaranteed to disappear in minutes? Whether it’s a last-minute get-together, a game day feast, or just a cozy family dinner where everyone’s craving something fun, I’ve got just the thing for you. These Cheesy Garlic Pesto Chicken Sliders? Oh, they’re more than just a recipe; they’re a little bite of happiness! They bring together the classic comfort of warm rolls, savory chicken, fragrant pesto, and gooey cheese, all bathed in a glorious garlic butter sauce. Seriously, the aroma alone while these bake is enough to make your kitchen the happiest place on earth. And the best part? They are SO simple to throw together, even on your busiest day.
Why You’ll Love This Recipe
Okay, so why should THIS be the recipe you try next? Let me count the ways:
- Fast: Minimal prep and a quick bake time mean you can have these ready in under 30 minutes!
- Easy: We’re talking simple layering and one amazing butter sauce. No fancy techniques needed.
- Giftable: Taking a dish to a potluck or party? These are always a huge hit and travel well (just bake when you arrive!).
- Crowd-Pleasing: Kids and adults alike devour these. They’re the ultimate comfort food in slider form.
Ingredients
You won’t need a ton of crazy ingredients for these sliders. Most are probably already in your pantry or fridge! Here’s what you’ll need:
- 12 slider rolls: I love using those sweet Hawaiian rolls for a little extra something, but any soft slider or dinner rolls will work beautifully.
- 6 Tbsp unsalted butter, melted: This is the base of our glorious garlic butter topping. Unsalted lets you control the saltiness.
- 4 cloves garlic, finely minced: Fresh is best here! It infuses that amazing aroma and flavor into the butter.
- 2 tsp fresh parsley, minced: Adds a lovely fleck of green and a fresh finish to our butter topping.
- 2/3 cup basil pesto (divided): You can use your favorite store-bought jar or even homemade if you’re feeling ambitious! We’ll use most of it inside and a little bit later.
- 2 cups cooked and shredded chicken: This is where the “easy” really kicks in! Leftover chicken, rotisserie chicken, or chicken boiled and shredded specifically for this – anything works!
- 1 1/2 cups shredded mozzarella cheese: Because you can’t have cheesy sliders without plenty of cheese! Mozzarella melts like a dream.
- Salt to taste: Just a pinch to enhance those flavors.
- Pepper to taste: A little crack of black pepper adds a nice touch.
How to Make It
Alright, let’s get cooking! Follow these simple steps, and you’ll have warm, gooey sliders ready in no time.
First, preheat your oven to 350°F (175°C). Lightly grease a 9×13 inch baking dish. This helps prevent sticking and makes cleanup a breeze.
Next, carefully slice the entire slab of slider rolls in half horizontally, as if you were slicing a large bun for sandwiches. Try to keep the tops connected and the bottoms connected so you have two big pieces.
Place the bottom halves of the rolls into your prepared baking dish.
Now, grab about half of your pesto (around 1/3 cup) and spread it evenly over the bottom rolls. Get into all the nooks and crannies!
Evenly layer your cooked and shredded chicken over the pesto-coated rolls.
Generously sprinkle the shredded mozzarella cheese over the chicken. Make sure you get cheese in every corner so each slider is packed with cheesy goodness.
Place the top halves of the rolls back on top of the cheesy chicken layer.
In a small bowl, whisk together the melted unsalted butter, minced garlic, minced fresh parsley, the remaining 1/3 cup of basil pesto, a pinch of salt, and a pinch of pepper. This is your flavor magic!
Pour or brush this delicious butter mixture evenly over the tops of the rolls. Make sure you get some butter down the sides and between the individual rolls too, so that amazing garlic butter permeates everything!
Cover the baking dish tightly with aluminum foil. This is a key step to ensure the cheese melts completely and the rolls get warm without the tops burning.
Bake in your preheated oven for 15 minutes.
After 15 minutes, carefully remove the foil. The cheese should be mostly melted by now.
Return the dish to the oven, uncovered, and bake for another 5-10 minutes, or until the tops of the rolls are golden brown and the cheese is bubbly and completely melted. Keep an eye on them in this last step so they don’t burn.
Remove from the oven and let them cool for just a few minutes before slicing into individual sliders along the original cuts. Serve warm and watch them disappear!
Substitutions & Additions
One of the best things about sliders is how adaptable they are! Feel free to play around and make them your own:
- Switch the Cheese: Provolone, an Italian blend, Fontina, or even a mild cheddar could work instead of or mixed with mozzarella.
- Try a Different Pesto: Not a fan of basil? Use sun-dried tomato pesto or even a kale pesto for a twist.
- Add Veggies: Thinly sliced sun-dried tomatoes, roasted red peppers, or a layer of wilted spinach (make sure to drain it well!) would be delicious additions.
- Spice It Up: Add a pinch of red pepper flakes to the butter mixture or sprinkle them over the chicken layer for a little heat.
- Change the Protein: Leftover cooked turkey or even ham could work in a pinch, though the pesto pairs best with chicken.
Tips for Success
Want to make sure your sliders turn out perfect every time? Here are a few little tips I’ve picked up:
- Use COOKED Chicken: This recipe relies on pre-cooked chicken because the bake time isn’t long enough to cook raw meat. Rotisserie chicken is my go-to shortcut here!
- Slice Carefully: When slicing the rolls horizontally, use a serrated knife and take your time to keep the tops and bottoms as one piece.
- Don’t Skip the Foil: Baking covered initially is crucial for getting that perfectly melted, gooey cheese without the top rolls getting too dark or hard.
- Butter is Your Friend: Be generous with the garlic butter mixture! It adds so much flavor and helps the tops get that lovely golden crust. Try to get some in the cracks between the rolls.
- Prep Ahead: You can shred the chicken ahead of time and store it in the fridge. You can even assemble the entire pan of sliders (minus the butter topping) the morning of and keep it covered in the fridge. Add the butter just before baking!
How to Store It
Got leftovers? (It’s rare, but it happens!). Let the sliders cool completely before storing. The best way is to transfer them to an airtight container or wrap the baking dish tightly with plastic wrap or foil. They’ll keep in the refrigerator for 3-4 days.
To reheat, you can pop them in the microwave for a quick warm-up (though the rolls might get a little soft), or for best results, reheat in a preheated oven or toaster oven at 300°F (150°C) for about 10-15 minutes, or until heated through and the cheese is gooey again.
FAQs
Here are a couple of questions people often ask about making these sliders:
Can I use rotisserie chicken?
Absolutely, yes! That’s what I usually do. It’s a super easy shortcut and rotisserie chicken is already perfectly cooked and easy to shred.
Can I assemble these ahead of time?
Yes! You can assemble the layers in the baking dish, cover tightly with plastic wrap, and refrigerate for up to 24 hours. Prepare the butter mixture separately and store it in the fridge too. Add the butter mixture right before you’re ready to bake, then follow the baking instructions as written.
There you have it! Your new favorite easy, cheesy, incredibly delicious sliders. I can’t wait for you to make them!

Easy Cheesy Garlic Pesto Chicken Sliders
Equipment
- 9x13 inch baking dish
- Small bowl
- aluminum foil
- Serrated knife for slicing rolls
Ingredients
Hauptzutaten
- 12 slider rolls sweet Hawaiian or any soft
- 6 Tbsp unsalted butter melted
- 4 cloves garlic finely minced
- 2 tsp fresh parsley minced
- 0.67 cup basil pesto divided (2/3 cup total)
- 2 cups cooked and shredded chicken
- 1.5 cups shredded mozzarella cheese
- Salt to taste
- Pepper to taste
Instructions
- First, preheat your oven to 350°F (175°C). Lightly grease a 9x13 inch baking dish. This helps prevent sticking and makes cleanup a breeze.
- Next, carefully slice the entire slab of slider rolls in half horizontally, as if you were slicing a large bun for sandwiches. Try to keep the tops connected and the bottoms connected so you have two big pieces.
- Place the bottom halves of the rolls into your prepared baking dish.
- Now, grab about half of your pesto (around 1/3 cup) and spread it evenly over the bottom rolls. Get into all the nooks and crannies!
- Evenly layer your cooked and shredded chicken over the pesto-coated rolls.
- Generously sprinkle the shredded mozzarella cheese over the chicken. Make sure you get cheese in every corner so each slider is packed with cheesy goodness.
- Place the top halves of the rolls back on top of the cheesy chicken layer.
- In a small bowl, whisk together the melted unsalted butter, minced garlic, minced fresh parsley, the remaining 1/3 cup of basil pesto, a pinch of salt, and a pinch of pepper. This is your flavor magic!
- Pour or brush this delicious butter mixture evenly over the tops of the rolls. Make sure you get some butter down the sides and between the individual rolls too, so that amazing garlic butter permeates everything!
- Cover the baking dish tightly with aluminum foil. This is a key step to ensure the cheese melts completely and the rolls get warm without the tops burning.
- Bake in your preheated oven for 15 minutes.
- After 15 minutes, carefully remove the foil.
- Return the dish to the oven, uncovered, and bake for another 5-10 minutes, or until the tops of the rolls are golden brown and the cheese is bubbly and completely melted. Keep an eye on them in this last step so they don't burn.
- Remove from the oven and let them cool for just a few minutes before slicing into individual sliders along the original cuts. Serve warm and watch them disappear!
Notes
- Use COOKED Chicken (Rotisserie chicken is a great shortcut).
- Slice rolls carefully with a serrated knife to keep tops and bottoms connected.
- Don't skip covering with foil initially when baking for even melting.
- Be generous with the garlic butter mixture!
- Prep Ahead: Shred chicken ahead or assemble the layers (minus the butter topping) and refrigerate up to 24 hours. Add butter just before baking.
Storage:
- Store cooled leftovers in an airtight container in the refrigerator for 3-4 days.
Reheating:
- Reheat in microwave for a quick warm-up (rolls may soften) or in oven/toaster oven at 300°F (150°C) for 10-15 minutes until heated through and cheese is gooey.