
Introduction
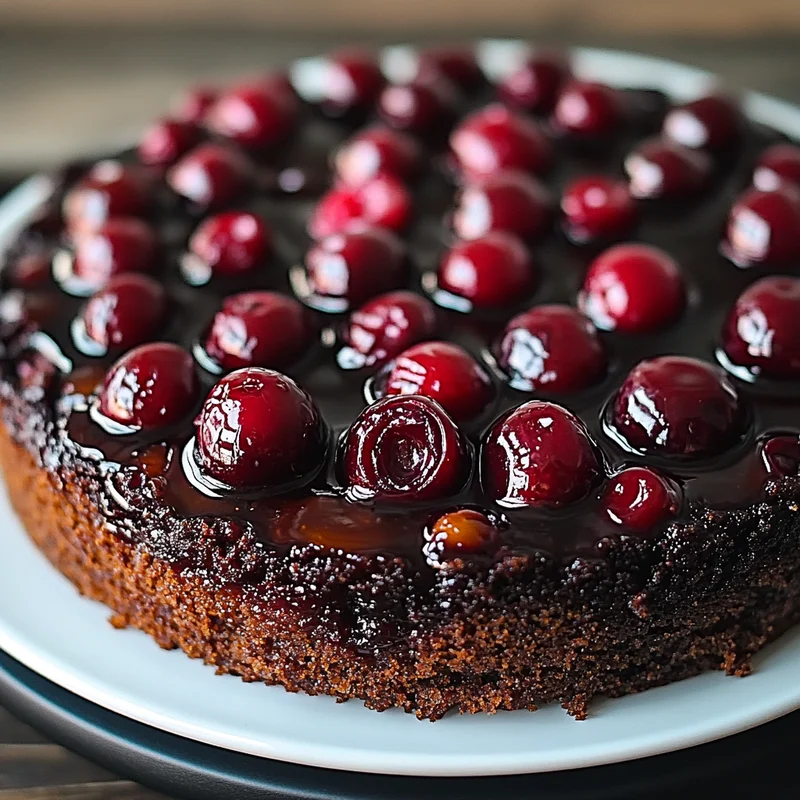
Hey there, friend! Get ready to sink your teeth into something truly special. This Chocolate Cherry Upside Down Cake is one of those recipes that just feels like coming home. It’s warm, gooey, chocolatey, and has that lovely burst of sweet cherries that makes you close your eyes and sigh with happiness. I remember the first time I made an upside down cake, thinking it was some kind of kitchen wizardry, but let me tell you, this version? It’s incredibly easy, uses simple ingredients, and tastes like pure comfort. It’s the perfect dessert for a weeknight treat or a casual get-together. Let’s bake some joy!
Why You’ll Love This Recipe
- Fast: Thanks to a little help from a box mix (shhh, it’s our secret!), this cake comes together in no time.
- Easy: Seriously, if you can stir and pour, you can make this cake. No complicated steps here!
- Giftable: Baked goods make the best gifts, and who wouldn’t love a slice of this?
- Crowd-Pleasing: Chocolate + cherries? It’s a combination everyone adores!

Ingredients
Gather ’round, grab your apron, and let’s talk ingredients. You likely have most of these staples hiding in your pantry right now!
- 1 can (21 oz) cherry pie filling: This is our magical, ready-to-go cherry layer. Pick your favorite brand!
- 1/4 cup unsalted butter, melted: Adds richness and helps create that wonderful sticky, caramel-like bottom (which becomes the top!).
- 1/4 cup brown sugar: Gives us that gorgeous, sweet, slightly caramelized topping when the cake is flipped. Dark or light brown works great.
- 1 box chocolate cake mix: Our trusty shortcut to a delicious, moist chocolate cake base. Any standard size (usually 15.25 oz) chocolate mix will work.
- 3 large eggs: Help bind everything together and give the cake structure.
- 1/2 cup vegetable oil: Adds moisture and tenderness to the cake.
- 1 cup water: The liquid that brings the cake mix to life!
- 1 teaspoon vanilla extract: A little splash of vanilla just enhances all those lovely flavors. Don’t skip it!
How to Make It
Okay, deep breaths! You’ve got this. Follow these simple steps, and you’ll have a stunning cake ready in no time.
- First things first, let’s get the oven ready. Preheat it according to the directions on your chocolate cake mix box – it’s usually around 350°F (175°C). While it’s heating up, go ahead and grease a 13×9 inch baking pan really well. You want that cake to flip out beautifully!
- Next, pour that lovely melted butter right into the bottom of your greased pan. Just tilt the pan around a little to coat the bottom evenly.
- Now, sprinkle the brown sugar evenly over the melted butter layer. This is where the magic starts!
- Carefully spoon the cherry pie filling over the brown sugar layer. Try to distribute it as evenly as you can so every slice gets plenty of cherries.
- In a big bowl, grab your electric mixer. Add the chocolate cake mix, the eggs, vegetable oil, water, and that splash of vanilla extract. Give it a gentle mix on low speed for about 30 seconds just to get everything incorporated. Then, crank it up to medium speed and beat for 2 minutes. You want the batter to be smooth and well combined.
- Here’s the slightly tricky part, but you can do it! Carefully, and I mean carefully, pour the cake batter over the cherry filling in the pan. Try to pour it gently over the cherries instead of in one big blob. Once it’s in, use a spatula or the back of a spoon to gently spread the batter to cover the cherry layer completely. Try not to disturb the cherry layer too much underneath.
- Pop the pan into your preheated oven. Bake according to the time listed on your cake mix box, which is usually between 30-35 minutes. You’ll know it’s done when a toothpick inserted into the center of the cake comes out clean (avoiding the cherry layer, of course!).
- Once it’s baked, take the cake out of the oven and place the pan on a wire rack. Let it cool in the pan for 10-15 minutes. This is crucial! Cooling it too long makes the topping stick, but flipping it too soon can cause it to fall apart. That 10-15 minute window is just right.
- Okay, the moment of truth! Grab the serving plate you want to use (make sure it’s large enough!). Place it upside down over the cake pan. Using oven mitts, firmly hold the plate and the pan together, and in one swift, confident motion, flip the whole thing over! Set the pan down on the counter and let it sit there for a minute or two. Gravity will help the cake release.
- Gently lift the pan off the cake. Ta-da! If any cherries or topping stick to the pan (it happens!), just carefully scrape them out with a spoon and put them back onto the cake.
- Serve it up! This cake is absolutely divine served warm, maybe with a scoop of vanilla ice cream or a dollop of whipped cream. It’s also lovely at room temperature. Enjoy every single bite!
Substitutions & Additions
One of the joys of baking is playing around! Here are a few ideas to make this cake your own:
- Different Fruit: No cherry pie filling? Try apple, peach, or even blueberry pie filling!
- Different Cake Mix: While chocolate is classic here, you could totally swap it for a vanilla, yellow, or even a dark chocolate mix.
- Add Chocolate Chips: Stir a handful of semi-sweet or dark chocolate chips into the cake batter for extra chocolatey goodness.
- Nuts: Sprinkle chopped pecans or walnuts over the brown sugar layer before adding the cherries for a little crunch.
- Almond Extract: Replace the vanilla extract with almond extract (or use half of each) for a lovely cherry-almond flavor twist.
Tips for Success
Want to make sure your upside down cake is a showstopper? Keep these little tips in mind:
- Grease Generously: Don’t be shy with the pan spray or butter! A well-greased pan is key to a clean flip.
- Don’t Overmix: Mix the cake batter only until just combined, following the box directions. Overmixing can lead to a tougher cake.
- Timing the Flip: That 10-15 minute cooling window is important. Flipping too hot means it might collapse; flipping too cool means the topping might stick. Set a timer!
- Prep Ahead: You can definitely get the bottom layer (butter, brown sugar, cherries) ready in the pan a little bit ahead of time if you’re feeling organized. Just cover it lightly until you’re ready to mix and pour the batter.
How to Store It
If you happen to have any leftovers (a big “if” in my house!), storing this cake is easy. Let it cool completely first. Then, cover the cake right in the pan with plastic wrap or transfer slices to an airtight container. It will keep at room temperature for 2-3 days. If you live in a warm climate or want it to last longer, you can store it in the refrigerator for up to 5 days. Just bring a slice to room temperature or warm it slightly before enjoying.
FAQs
- Can I use fresh cherries? While you could, this recipe relies on the thickness and sweetness of pie filling for that perfect gooey topping. Using fresh cherries would require cooking them down with sugar and thickeners first, which is a different process entirely!
- My topping stuck! What went wrong? This usually happens if the pan wasn’t greased well enough or if you let the cake cool in the pan for too long before flipping. Don’t worry, just scrape the stuck bits back onto the cake – it will still taste amazing!
- Can I make this in a different size pan? A 13×9 inch pan is ideal for this recipe as the cake mix amounts and baking time are calibrated for it. Using a different size might affect the thickness of the layers and require significant adjustments to baking time.
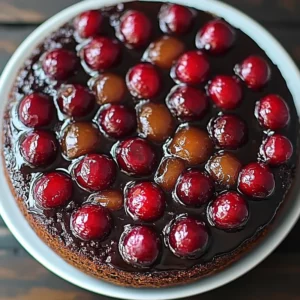
Easy Chocolate Cherry Upside Down Cake
Equipment
- Oven
- 13x9 inch baking pan
- Electric mixer
- Big bowl
- Spatula or back of a spoon
- Wire rack
- Serving plate
- Oven mitts
- Spoon
Ingredients
Main Ingredients
- 1 can cherry pie filling 21 oz
- 0.25 cup unsalted butter melted
- 0.25 cup brown sugar dark or light
- 1 box chocolate cake mix standard size (usually 15.25 oz)
- 3 large eggs
- 0.5 cup vegetable oil
- 1 cup water
- 1 teaspoon vanilla extract
Instructions
- First things first, let's get the oven ready. Preheat it according to the directions on your chocolate cake mix box – it's usually around 350°F (175°C). While it's heating up, go ahead and grease a 13x9 inch baking pan really well. You want that cake to flip out beautifully!
- Next, pour that lovely melted butter right into the bottom of your greased pan. Just tilt the pan around a little to coat the bottom evenly.
- Now, sprinkle the brown sugar evenly over the melted butter layer. This is where the magic starts!
- Carefully spoon the cherry pie filling over the brown sugar layer. Try to distribute it as evenly as you can so every slice gets plenty of cherries.
- In a big bowl, grab your electric mixer. Add the chocolate cake mix, the eggs, vegetable oil, water, and that splash of vanilla extract. Give it a gentle mix on low speed for about 30 seconds just to get everything incorporated. Then, crank it up to medium speed and beat for 2 minutes. You want the batter to be smooth and well combined.
- Here's the slightly tricky part, but you can do it! Carefully, and I mean carefully, pour the cake batter over the cherry filling in the pan. Try to pour it gently over the cherries instead of in one big blob. Once it's in, use a spatula or the back of a spoon to gently spread the batter to cover the cherry layer completely. Try not to disturb the cherry layer too much underneath.
- Pop the pan into your preheated oven. Bake according to the time listed on your cake mix box, which is usually between 30-35 minutes. You'll know it's done when a toothpick inserted into the center of the cake comes out clean (avoiding the cherry layer, of course!).
- Once it's baked, take the cake out of the oven and place the pan on a wire rack. Let it cool in the pan for 10-15 minutes. This is crucial! Cooling it too long makes the topping stick, but flipping it too soon can cause it to fall apart. That 10-15 minute window is just right.
- Okay, the moment of truth! Grab the serving plate you want to use (make sure it's large enough!). Place it upside down over the cake pan. Using oven mitts, firmly hold the plate and the pan together, and in one swift, confident motion, flip the whole thing over! Set the pan down on the counter and let it sit there for a minute or two. Gravity will help the cake release.
- Gently lift the pan off the cake. Ta-da! If any cherries or topping stick to the pan (it happens!), just carefully scrape them out with a spoon and put them back onto the cake.
- Serve it up! This cake is absolutely divine served warm, maybe with a scoop of vanilla ice cream or a dollop of whipped cream. It's also lovely at room temperature. Enjoy every single bite!
Notes
- Grease Generously: A well-greased pan is key to a clean flip.
- Don't Overmix: Mix the cake batter only until just combined.
- Timing the Flip: Cool in the pan for 10-15 minutes before flipping.
- Prep Ahead: The bottom layer (butter, brown sugar, cherries) can be prepared in the pan ahead of time. Storage:
- Let cool completely.
- Cover in the pan with plastic wrap or transfer slices to an airtight container.
- Keeps at room temperature for 2-3 days.
- Can be stored in the refrigerator for up to 5 days (warm slightly before serving if desired). FAQs:
- Can I use fresh cherries? This recipe relies on pie filling's thickness and sweetness; fresh cherries would require cooking down first.
- My topping stuck! This usually happens if the pan wasn't greased well enough or cooled too long before flipping. Scrape stuck bits back onto the cake.
- Can I make this in a different size pan? A 13x9 inch pan is ideal; using a different size might require significant adjustments.