
Introduction
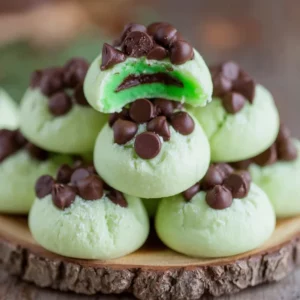
Remember those little chocolate mint candies that just melt in your mouth? The ones that taste like Christmas morning and cool, refreshing breezes all at once? I’ve got a recipe that’s going to bring all those cozy memories flooding back, and even better, it’s super simple to make right in your own kitchen! These Chocolate Mint Cream Cheese Buttons are a delightful little treat that are surprisingly easy to whip up, perfect for gifting, or just for treating yourself when that sweet tooth strikes.
Why You’ll Love This Recipe
- Fast: You can have these ready to chill in under an hour!
- Easy: No fancy techniques required, just a few simple steps.
- Giftable: Package them up in cute tins or jars for the perfect homemade present.
- Crowd-pleasing: Who can resist chocolate and mint? Everyone loves these!
Ingredients
Let’s gather our goodies! You probably have most of these in your pantry right now:
- 4 oz cream cheese, softened: Make sure this is nice and soft so it mixes up smoothly.
- 4 1/2 cups powdered sugar: This gives our buttons that lovely sweet, melt-in-your-mouth texture.
- 1/2 teaspoon mint extract: This is where the magic happens! Use a good quality extract for the best flavor.
- Several drops green gel food coloring: Just enough to give them a pretty pastel hue. Gel coloring gives the most vibrant color without adding too much liquid.
- 1 cup heavy whipping cream: This is for our luscious chocolate ganache topping.
- 10 oz semi-sweet chocolate chips: The classic choice for a rich, chocolatey finish.
How to Make It
Alright, let’s get our hands a little bit happy! This is where the fun really begins.
- In a big ol’ bowl, toss in your softened cream cheese and 1 cup of that powdered sugar. Give it a good mix until it’s all combined and looks like a smooth paste.
- Now, it’s time for that refreshing minty flavor! Add your mint extract and a few drops of that green gel food coloring. Mix it all up until it’s a lovely, uniform green.
- Gradually add the rest of the powdered sugar, mixing as you go. You want it to be combined, but don’t be afraid to get your hands in there if needed! Sometimes, the best way to get everything perfectly mixed is with your own two hands. Just make sure it’s all incorporated.
- Grab a large baking sheet and line it with some parchment paper. This makes cleanup a breeze, and your little buttons won’t stick.
- Scoop out about a teaspoon of your minty dough and roll it into a little ball between your palms. Place these little guys onto your prepared baking sheet. Keep going until all your dough is rolled into cute little balls.
- Now, for that signature button shape! Grab the end of a wooden spoon or a small measuring spoon and gently press down into the center of each ball to create a little indentation. If the spoon sticks, a little dusting of powdered sugar will do the trick!
- Pop that baking sheet into the fridge and let those mints chill for about an hour until they’re nice and firm. This is crucial for the next step!
- While your mints are chilling, let’s make that dreamy chocolate topping. Place your semi-sweet chocolate chips in a heat-proof bowl or a large measuring cup.
- Warm up your heavy whipping cream until it’s just simmering – you’ll see little bubbles around the edges. Carefully pour this hot cream right over your chocolate chips.
- Give it a gentle stir once or twice, then let it sit for about 2 minutes. Trust the process!
- After those 2 minutes, stir the mixture until the chocolate is completely melted and you have a smooth, glossy ganache. It’s going to look amazing!
- Pour your luscious ganache into a ziploc bag. Now, let it sit and thicken up to a consistency like thick yogurt. This usually takes about 30 minutes. If you’re in a hurry, you can pop it in the fridge, but keep a close eye on it so it doesn’t get too firm!
- Snip off a tiny corner of that ziploc bag. Now, you’re going to carefully pipe that thickened ganache right into the little indentation you made on each chilled mint button.
- Finally, pop them back into the fridge for another hour, or until that chocolate topping is set. And voilà! You’ve got yourself some beautiful Chocolate Mint Cream Cheese Buttons.
Substitutions & Additions
Want to put your own spin on these? I love that! Here are a few ideas:
- Chocolate Variations: Feel free to use milk chocolate or dark chocolate chips instead of semi-sweet for a different flavor profile.
- Peppermint Power: If you love a stronger mint flavor, you can add a tiny bit more mint extract, but be careful – a little goes a long way!
- Fun Sprinkles: Before the ganache sets, you can sprinkle some festive sprinkles on top for a pop of color and crunch.
- White Chocolate Drizzle: Melt some white chocolate and drizzle it over the set ganache for a pretty contrast.
Tips for Success
A few little tricks to make sure your buttons turn out perfectly every time:
- Softened Cream Cheese is Key: Don’t skip the softening step! It makes a huge difference in how smoothly your base comes together.
- Don’t Overmix the Dough: Mix until just combined to avoid a tough texture.
- Chill Time Matters: The chilling steps are important for the dough to firm up and the ganache to set properly.
- Ganache Consistency: If your ganache gets too thick in the fridge, just let it sit at room temperature for a few minutes to soften slightly.
- Prep Ahead: You can make the mint button bases a day or two in advance and store them in an airtight container in the refrigerator. Just add the ganache before you plan to serve or gift them.
How to Store It
These little gems are best stored in the refrigerator. Keep them in an airtight container, and they should stay fresh and delicious for about a week. They’re perfect for grabbing one (or two!) when you need a little pick-me-up.
FAQs
Got questions? I’ve got answers!
- Q: Can I use peppermint extract instead of mint extract?
A: Absolutely! Peppermint extract will give you a slightly different, often bolder, mint flavor. Just make sure to adjust the amount to your preference. - Q: My ganache is too thin. What should I do?
A: If your ganache is too thin, it needs more time to cool and thicken. Pop it back in the refrigerator for a little while, checking on it every 10-15 minutes and stirring occasionally. - Q: Can I freeze these?
A: While you can freeze them, the texture might change slightly upon thawing. If you do freeze them, store them in an airtight container with parchment paper between layers.
Chocolate Mint Cream Cheese Buttons
Equipment
- Mixing bowl large
- Baking Sheet large
- Parchment paper
- Wooden spoon or small measuring spoon
- heat-proof bowl
- Measuring cup large, for ganache
- Ziploc bag
Ingredients
Mint Cream Cheese Buttons
- 4 oz cream cheese softened
- 4.5 cups powdered sugar
- 0.5 teaspoon mint extract good quality
- drops green gel food coloring several
Chocolate Ganache
- 1 cup heavy whipping cream
- 10 oz semi-sweet chocolate chips
Instructions
- In a large bowl, combine softened cream cheese and 1 cup of powdered sugar. Mix until a smooth paste forms.
- Add mint extract and green gel food coloring. Mix until uniform in color.
- Gradually add the remaining powdered sugar, mixing until incorporated. You can use your hands if needed.
- Line a large baking sheet with parchment paper.
- Scoop about a teaspoon of dough and roll into balls. Place on the prepared baking sheet.
- Gently press the center of each ball with the end of a wooden spoon or small measuring spoon to create an indentation. Dust the spoon with powdered sugar if it sticks.
- Chill the baking sheet in the refrigerator for about an hour until firm.
- While the mints are chilling, make the ganache. Place chocolate chips in a heat-proof bowl.
- Warm heavy whipping cream until simmering. Pour over the chocolate chips.
- Let sit for 2 minutes, then stir until smooth and glossy.
- Pour ganache into a ziploc bag and let it thicken to a yogurt-like consistency (about 30 minutes). Refrigerate if in a hurry, but watch closely.
- Snip a tiny corner off the ziploc bag and pipe the ganache into the indentations of the chilled mint buttons.
- Return to the refrigerator for another hour, or until the chocolate topping is set.