Introduction
Hey there, friend! Remember those potlucks, backyard BBQs, or game day parties where there was always that dip? You know, the one everyone hovered around, spooning generous dollops onto their chips? For me, that was always 7 Layer Dip. It just screams “celebration” and good times. And guess what? It’s ridiculously easy to make yourself! Forget those store-bought versions; this homemade 7 layer dip is miles better, incredibly fresh, and comes together in a flash. It’s the kind of recipe that looks impressive but is secretly super simple – perfect for busy weeknights or last-minute gatherings. Let’s get dipping!
Why You’ll Love This Recipe
- Fast: Seriously, we’re talking minutes to assemble. Great for unexpected guests or when you’re short on time.
- Easy: No cooking required beyond perhaps warming the beans (your call!), just layering simple ingredients. It’s basically assembly!
- Giftable: Heading to a party? Pop this in a cute dish, wrap it up, and you’ve brought the most popular item.
- Crowd-Pleasing: Who doesn’t love layers of deliciousness? There’s a little something for everyone in this dip.
Ingredients
Here’s what you’ll need to create this layered masterpiece. Most of these are probably already in your pantry or easy to grab at the store!
- 1 (16 oz) can refried beans, or 2 cups homemade: The essential foundation! I usually use canned for speed, but homemade is lovely too. Warm them slightly if you like, it helps them spread easily.
- 1 (10 oz) can diced tomatoes with green chiles, drained: Adds a little zip and moisture. Make sure they are well-drained so your dip doesn’t get watery.
- 1 to 2 tbsp taco seasoning: To mix into the beans. Use 1 for mild flavor, 2 for more punch.
- 3 medium avocados: Ripe is key! These become our glorious guacamole layer.
- 1 lime, juiced (about 1 1/2 tbsp): Brightens up the avocado and helps prevent browning.
- 1/4 cup cilantro, chopped: Fresh and flavorful addition to the avocado layer. If you’re not a cilantro fan, you can omit it.
- 1 tsp garlic salt: Seasons the avocado layer perfectly.
- 1 1/2 cups sour cream: The cool, creamy layer that brings it all together. Full-fat is best for structure and flavor, but light works too.
- 2 cups cheddar cheese, finely shredded: Or a Mexican blend! Finely shredded melts and spreads better in layers.
- 1/3 cup black olives, sliced: A classic topping. Use pre-sliced for extra speed.
- 3/4 cup Roma tomatoes, diced: Fresh tomato goodness on top. Roma tomatoes are great because they have less water.
- 1/3 cup green onions, sliced: Adds a fresh, oniony bite to the top layer.
How to Make It
Alright, let’s assemble this beauty! Find a nice serving dish – a pie plate, a rectangular baking dish, or a large platter all work perfectly.
- First things first, let’s get the bean layer ready. In a small bowl, stir the taco seasoning into your refried beans until well combined. If your beans are cold and thick, warming them up for a minute in the microwave makes them much easier to spread. Gently spread this mixture as the first layer in the bottom of your serving dish.
- Next, grab that drained can of diced tomatoes with green chiles. Spoon this carefully over the bean layer. Try not to disturb the beans too much!
- Now for the glorious avocado layer! In a medium bowl, mash your ripe avocados with the lime juice, chopped cilantro, and garlic salt. You can make it smooth or a little chunky – totally up to you! Gently spread this avocado mixture evenly over the tomato layer. This is your guacamole layer, basically!
- Time for the cool and creamy layer. Spoon the sour cream over the avocado layer and spread it out smoothly to the edges.
- Sprinkle the shredded cheddar cheese generously over the sour cream layer. Make sure you get good coverage!
- Scatter the sliced black olives over the cheese layer.
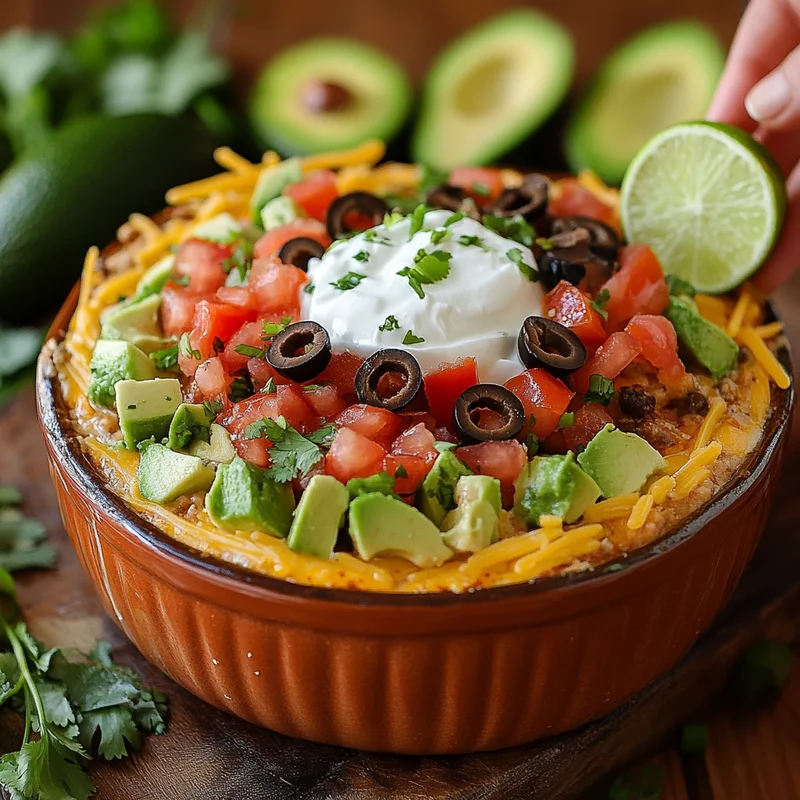
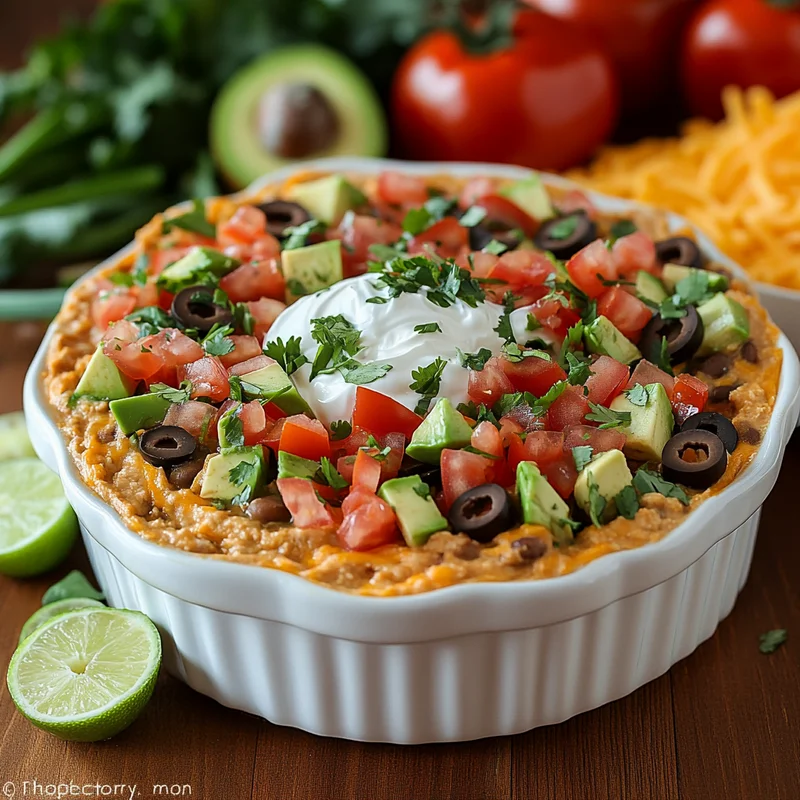
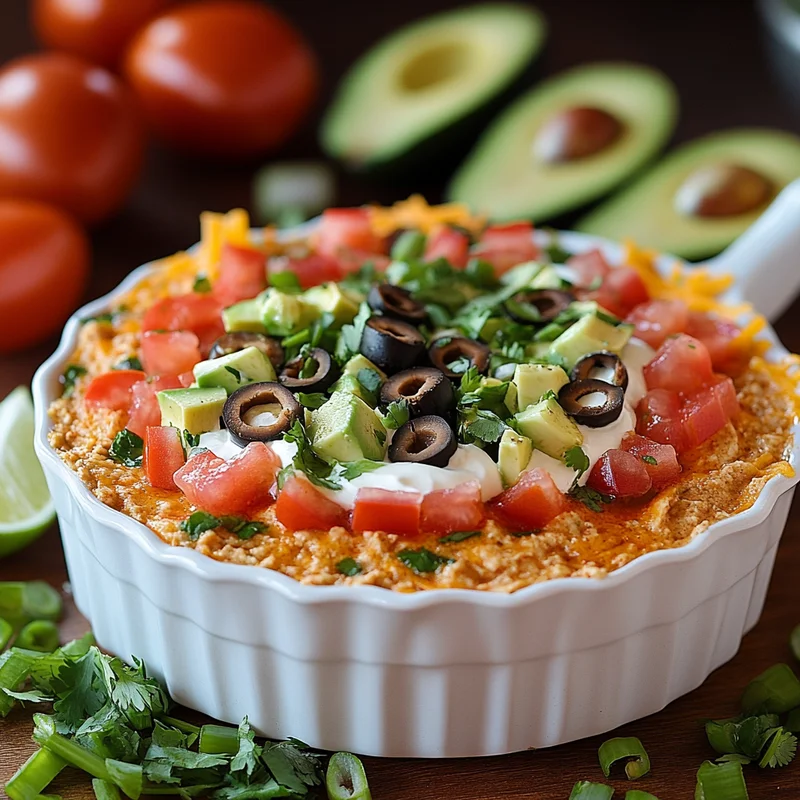
- Finally, top everything off with the diced Roma tomatoes and sliced green onions. Arrange them nicely so it looks as good as it tastes!
- And that’s it! Your 7 Layer Dip is ready to chill for a bit (if you have time!) or serve immediately with your favorite tortilla chips, Fritos, or veggie sticks.
Substitutions & Additions
This dip is super flexible! Feel free to mix things up based on your preferences or what you have on hand.
- Beans: Swap refried beans for black beans (mashed or whole) or even pinto beans.
- Cheese: Use Monterey Jack, a Mexican blend, Pepper Jack for a kick, or even a sprinkle of cotija cheese on top.
- Heat: Want more spice? Add a layer of pickled jalapeños, a dash of hot sauce to the beans, or use a spicier taco seasoning.
- Add-ins: Cooked ground taco meat (make it layer #2 after the beans!), a layer of salsa, pickled red onions, or corn are all delicious additions. Just remember, adding layers might mean it’s technically an 8 or 9 layer dip, but who’s counting?!
Tips for Success
A few little pointers to make your 7 layer dip experience even better!
- Drain Everything Well: This is key to avoiding a watery dip. Make sure those tomatoes and chiles are really drained, and if you add salsa, drain that too!
- Layer Gently: Spoon layers carefully, especially the softer ones like avocado and sour cream, to keep your layers distinct and pretty.
- Prevent Avocado Browning: The lime juice helps, but covering the dip pressed with plastic wrap directly touching the avocado layer before chilling is the best way to keep it green.
- Serve Chilled: While you can serve it right away, letting it chill for at least 30 minutes (or longer!) helps the flavors meld and makes it easier to scoop.
- Use the Right Dish: A wider, shallower dish is often better than a deep, narrow one, as it makes it easier for everyone to get a scoop with all the layers!
How to Store It
Got leftovers? (Highly unlikely, but just in case!) Simply cover the dish tightly with plastic wrap, pressing the wrap down onto the surface of the dip as much as possible (especially the avocado layer) to minimize air exposure. It will keep in the refrigerator for 3-4 days. The avocado layer might start to brown a little over time, but it’s still perfectly safe to eat. Just give it a gentle stir if the browning is just on the surface.
FAQs
Here are a few common questions I get about this dip:
Can I make 7 Layer Dip ahead of time?
Absolutely! You can make it a few hours or even up to a day ahead. Just be sure to cover it well, pressing plastic wrap onto the surface of the dip to prevent the avocado from browning. Add the freshest toppings (like the top layer of tomatoes and green onions) closer to serving time for the best look.
What kind of beans are best for the bottom layer?
Classic refried beans (either traditional or vegetarian) are the standard and work perfectly. You could also use mashed black beans seasoned with taco seasoning.
My avocado layer is turning brown! What can I do?
Lime juice helps, but the best defense is to press plastic wrap directly onto the surface of the dip before covering the dish. This removes air contact. If it still browns slightly, it’s usually just a thin surface layer you can gently scrape off or stir in; the dip is still fine!
What should I serve with 7 Layer Dip?
Classic tortilla chips are a must! Fritos are also amazing for scooping. For healthier options, serve with veggie sticks like carrots, celery, bell peppers, or cucumber slices.

Easy Classic 7 Layer Dip
Equipment
- Serving dish such as a pie plate, rectangular baking dish, or large platter
- Small bowl
- Medium bowl
Ingredients
Hauptzutaten
- 1 can refried beans 16 oz, or 2 cups homemade
- 1 can diced tomatoes with green chiles 10 oz, drained
- 1 to taco seasoning 2 tbsp
- 3 avocados medium, ripe
- 1 lime juiced (about 1 1/2 tbsp)
- 0.25 cup cilantro chopped
- 1 tsp garlic salt
- 1.5 cups sour cream
- 2 cups cheddar cheese finely shredded, or a Mexican blend
- 0.33 cup black olives sliced
- 0.75 cup Roma tomatoes diced
- 0.33 cup green onions sliced
Instructions
- First things first, let's get the bean layer ready. In a small bowl, stir the taco seasoning into your refried beans until well combined. If your beans are cold and thick, warming them up for a minute in the microwave makes them much easier to spread. Gently spread this mixture as the first layer in the bottom of your serving dish.
- Next, grab that drained can of diced tomatoes with green chiles. Spoon this carefully over the bean layer. Try not to disturb the beans too much!
- Now for the glorious avocado layer! In a medium bowl, mash your ripe avocados with the lime juice, chopped cilantro, and garlic salt. You can make it smooth or a little chunky – totally up to you! Gently spread this avocado mixture evenly over the tomato layer. This is your guacamole layer, basically!
- Time for the cool and creamy layer. Spoon the sour cream over the avocado layer and spread it out smoothly to the edges.
- Sprinkle the shredded cheddar cheese generously over the sour cream layer. Make sure you get good coverage!
- Scatter the sliced black olives over the cheese layer.
- Finally, top everything off with the diced Roma tomatoes and sliced green onions. Arrange them nicely so it looks as good as it tastes!
- And that's it! Your 7 Layer Dip is ready to chill for a bit (if you have time!) or serve immediately with your favorite tortilla chips, Fritos, or veggie sticks.
Notes
Tips: Drain wet ingredients well to avoid a watery dip. Layer gently to keep layers distinct. Prevent avocado browning by pressing plastic wrap directly onto the surface before chilling. Chilling helps flavors meld and makes scooping easier. A wider, shallower dish is best for serving.
Storage: Cover tightly with plastic wrap (pressing onto the surface) and store in the refrigerator for 3-4 days. Slight avocado browning is normal.
FAQs: Can be made ahead (a few hours or up to a day), adding fresh toppings closer to serving. Classic refried beans or mashed seasoned black beans are best for the base. Serve with tortilla chips, Fritos, or veggie sticks.