Introduction
Oh my gosh, remember those lazy summer afternoons? Or maybe stopping by a classic diner counter? There’s something so utterly simple, yet completely magical, about a really good float. And if you ask me, the Cream Soda Float holds a special place in that sweet, bubbly hall of fame. It’s creamy, it’s bubbly, and it instantly transports you back to carefree days. What if I told you you could recreate that pure joy in literally minutes with just a couple of ingredients? Seriously, this isn’t just a recipe; it’s a quick trip down memory lane that you can whip up anytime you need a smile.
This classic Cream Soda Float is probably one of the easiest treats you’ll ever make. No baking, no complicated steps, just pure, simple goodness. It’s the perfect little pick-me-up, a fantastic treat for kids (and grown-ups!), and a total crowd-pleaser without any fuss. Get ready to pour, scoop, and sip your way to happiness!
Why You’ll Love This Recipe
- Fast: Seriously, blink and you’ll miss how quickly you can make this!
- Easy: So simple, anyone can do it (even the kids!).
- Giftable: Okay, you can’t exactly gift a float, but you can gift the ingredients and the idea! Or just make one for someone.
- Crowd-pleasing: Who doesn’t love a classic float? It’s pure joy in a glass.

Ingredients
Gather ’round, friends! You really only need two main stars for this show, but a few extras can make it a party.
- 1 cup chilled cream soda: The bubblier and colder, the better! Make sure it’s well-chilled for the best fizz and less overflow.
- 2 scoops vanilla ice cream: Use your favorite! A good quality vanilla ice cream makes all the difference in that creamy texture.
- Whipped cream (optional): Because sometimes, you just need that cloud of sweet fluff on top.
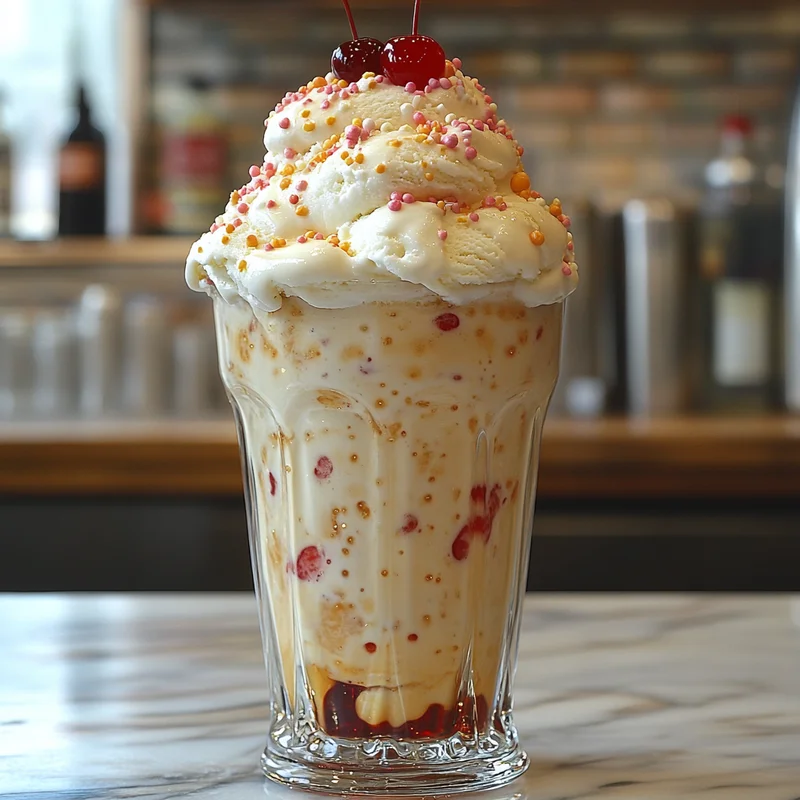
- Maraschino cherry or sprinkles (for topping, optional): Adds that perfect diner-style finishing touch and a pop of color!
- Flavored syrups (such as raspberry or orange, optional): Want to get fancy? A little drizzle of syrup adds another layer of flavor.
How to Make It
Alright, let’s make some magic happen! This is so easy, you barely need instructions, but I’m here for you.
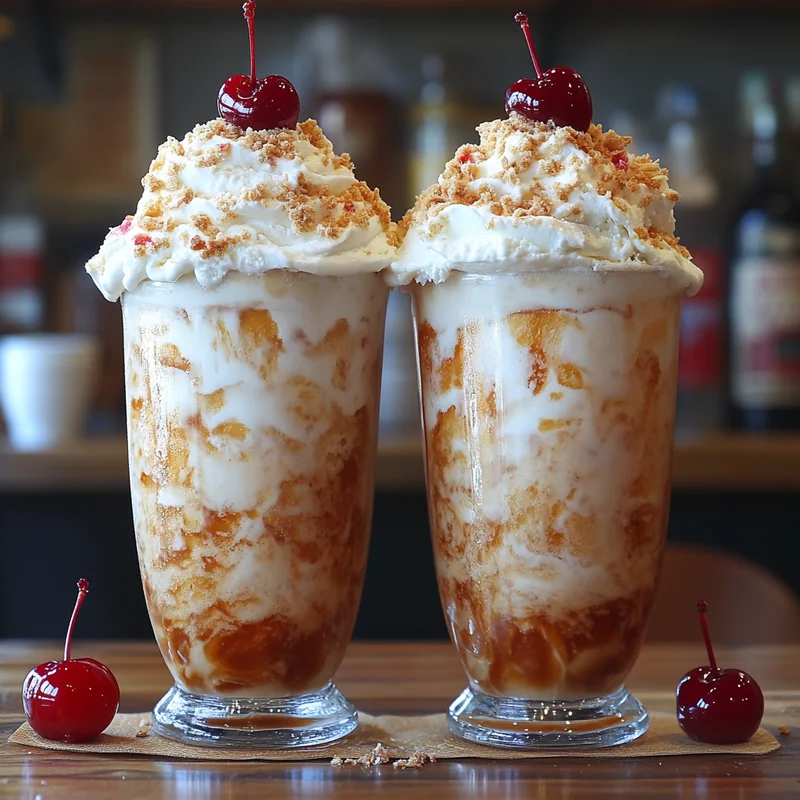
- Choose Your Glass: Grab a nice tall glass. A classic soda fountain glass is fun, but any tall glass will do!
- Scoop in the Ice Cream: Gently place your two scoops of vanilla ice cream into the bottom of the glass. Don’t press them down too hard!
- Slowly Add the Soda: This is the key step to avoiding a fizzy volcano! Slowly pour the chilled cream soda over the ice cream. Pouring it down the side of the glass can help control the foam. Watch the bubbles rise – it’s part of the fun!
- Add Your Toppings (Optional): Now for the best part – decorating! Top with a swirl of whipped cream, pop a bright red maraschino cherry on top, scatter some sprinkles, or drizzle with a little flavored syrup if you like.
- Serve Immediately: Grab a long spoon or a straw (or both!) and dive in right away while it’s bubbly and the ice cream is just starting to melt into that creamy, dreamy soda. Enjoy every sip!
Substitutions & Additions
Want to mix things up? Floats are super forgiving and fun to experiment with!
- Try Different Sodas: Root beer float is a classic, but cherry soda, orange soda (hello, creamsicle float!), or even cola work great.
- Swap the Ice Cream: Vanilla is traditional, but try strawberry ice cream, chocolate, or even a scoop of sherbet for a tangier version.
- Mix in Syrup: Add a tablespoon of chocolate syrup, caramel sauce, or a fruit syrup (like raspberry or strawberry) into the glass before the ice cream for an extra layer of flavor.
- Add Fruit: A few fresh raspberries or sliced strawberries can be a lovely addition, especially with a fruit-flavored syrup or ice cream.
Tips for Success
Making a float is hard to mess up, but a few little tricks can make it perfect every time!
- Chill Everything! Make sure your cream soda is super cold. This helps control the fizz and keeps the float colder longer.
- Pour Slowly: I know I said it before, but it’s worth repeating! Tilting the glass and pouring the soda slowly down the side is your best friend to prevent a massive overflow.
- Tall Glass is Best: Using a tall glass gives the foam room to rise without spilling over the top.
- Prep Ahead? (Sort Of): You can’t make the float ahead of time, but you can make sure your soda is ice cold and have your ice cream scoop and toppings ready to go!
How to Store It
Okay, here’s the truth: A finished float is a magical, fleeting creation meant to be enjoyed the moment it’s made. It doesn’t store well – the soda will go flat, and the ice cream will fully melt into a not-quite-floaty liquid.
However, you can easily store the components! Keep your cream soda chilled in the fridge and your ice cream firmly in the freezer. Whipped cream, cherries, and syrups should be stored according to their packaging. That way, you’re always just seconds away from float perfection!
FAQs
Got questions? I’ve got (quick!) answers!
Q: Why did my float fizz over so much?
A: Probably because you poured the soda too quickly or your ingredients weren’t cold enough! Remember to pour slowly and ensure everything is well-chilled.
Q: Can I use diet cream soda?
A: Absolutely! The flavor will be slightly different, and sometimes diet sodas can create even more foam, so pour extra carefully.
Q: Can I make this in a pitcher for a party?
A: Floats are best made individually, right before serving, to keep the fizz and texture perfect. Set up a “float bar” and let everyone make their own!
Q: What’s the best type of glass to use?
A: A tall, sturdy glass works best. It gives you plenty of room for the ice cream, soda, and that lovely layer of foam without overflowing.
Classic Cream Soda Float

Whip up nostalgia in minutes with this incredibly simple Cream Soda Float recipe. Requiring just two main ingredients, it’s a bubbly, creamy treat that transports you back to carefree days. Perfect for a quick pick-me-up, a fun kids’ treat, or a fuss-free crowd-pleaser.
- Tall glass
Float Components
- 1 cup chilled cream soda (The bubblier and colder, the better! Make sure it’s well-chilled for the best fizz and less overflow.)
- 2 scoops vanilla ice cream (Use your favorite! A good quality vanilla ice cream makes all the difference in that creamy texture.)
Optional Toppings & Additions
- Whipped cream (optional)
- Maraschino cherry (for topping, optional)
- Sprinkles (for topping, optional)
- Flavored syrups (such as raspberry or orange, optional)
- Choose Your Glass: Grab a nice tall glass. A classic soda fountain glass is fun, but any tall glass will do!
- Scoop in the Ice Cream: Gently place your two scoops of vanilla ice cream into the bottom of the glass. Don’t press them down too hard!
- Slowly Add the Soda: Slowly pour the chilled cream soda over the ice cream. Pouring it down the side of the glass can help control the foam. Watch the bubbles rise – it’s part of the fun!
- Add Your Toppings (Optional): Top with a swirl of whipped cream, pop a bright red maraschino cherry on top, scatter some sprinkles, or drizzle with a little flavored syrup if you like.
- Serve Immediately: Grab a long spoon or a straw (or both!) and dive in right away while it’s bubbly and the ice cream is just starting to melt into that creamy, dreamy soda. Enjoy every sip!
Making a float is hard to mess up, but a few little tricks can make it perfect every time: Make sure your cream soda is super cold; pour the soda slowly, tilting the glass down the side; use a tall glass for room for foam. A finished float doesn’t store well and should be enjoyed immediately.