Introduction
Remember those magical Christmases, filled with twinkling lights, the scent of pine, and the sweet, comforting taste of holiday treats? For me, one of the most cherished memories is decorating and devouring homemade candy cane cookies. They just scream festive, don’t they? Today, I’m so excited to share a recipe that’s not only incredibly easy to whip up, but also results in the most adorable, melt-in-your-mouth cookies that are perfect for sharing. Get ready to bring a little extra sparkle to your holiday baking!
Why You’ll Love This Recipe
- Fast: You can have these beauties ready to bake in under 20 minutes of active prep time.
- Easy: Seriously, if you can stir, you can make these cookies. No fancy techniques needed!
- Giftable: Package these in cute tins or cellophane bags, and you’ve got instant, thoughtful gifts for teachers, neighbors, or your holiday party hosts.
- Crowd-pleasing: The delicate peppermint flavor and charming design will have everyone asking for the recipe.
Ingredients
Gathering your ingredients is half the fun! Here’s what you’ll need to create these festive delights:
- 1 cup (2 sticks) unsalted butter, softened: This is our creamy base. Make sure it’s nice and soft so it creams beautifully.
- 1 cup powdered sugar: For sweetness and a lovely tender texture.
- 1 large egg: Binds everything together.
- 1 teaspoon vanilla extract: A classic flavor enhancer that complements the peppermint perfectly.
- ½ teaspoon peppermint extract: The star of the show! Adjust a touch more or less depending on how strong you like your peppermint punch.
- 2 ½ cups all-purpose flour: The backbone of our cookie dough.
- ½ teaspoon salt: Balances out the sweetness and enhances flavors.
- 1 teaspoon red food coloring: Just a little splash to make our candy canes pop! Gel food coloring works best for vibrant colors.
How to Make It
Alright, let’s get our hands a little floured and our kitchen smelling amazing! Follow these simple steps:
- Creamy Base: In a large bowl, beat the softened butter and powdered sugar together until the mixture is light, fluffy, and looks like pale yellow clouds. This usually takes a few minutes with an electric mixer.
- Wet Ingredients In: Now, beat in the egg, followed by the vanilla extract and peppermint extract. Make sure it’s all well combined and smooth.
- Dry Ingredients Ready: In a separate medium bowl, whisk together your flour and salt. This ensures the salt is evenly distributed throughout the dough.
- Combine Gently: Gradually add the dry ingredients to the wet ingredients. Mix on low speed, or with a spatula, until just combined. We don’t want to overmix here, as that can make cookies tough. Just until you don’t see any dry flour streaks.
- Divide and Conquer (with Color!): Divide the dough in half. To one half, add the red food coloring and gently knead or mix until you achieve a beautiful, uniform red color. You’ll now have a pale dough and a vibrant red dough.
- Chill Out: Wrap both halves of the dough separately in plastic wrap and pop them into the refrigerator for at least 1 hour. This chilling step is crucial! It makes the dough much easier to handle and prevents the cookies from spreading too much while baking.
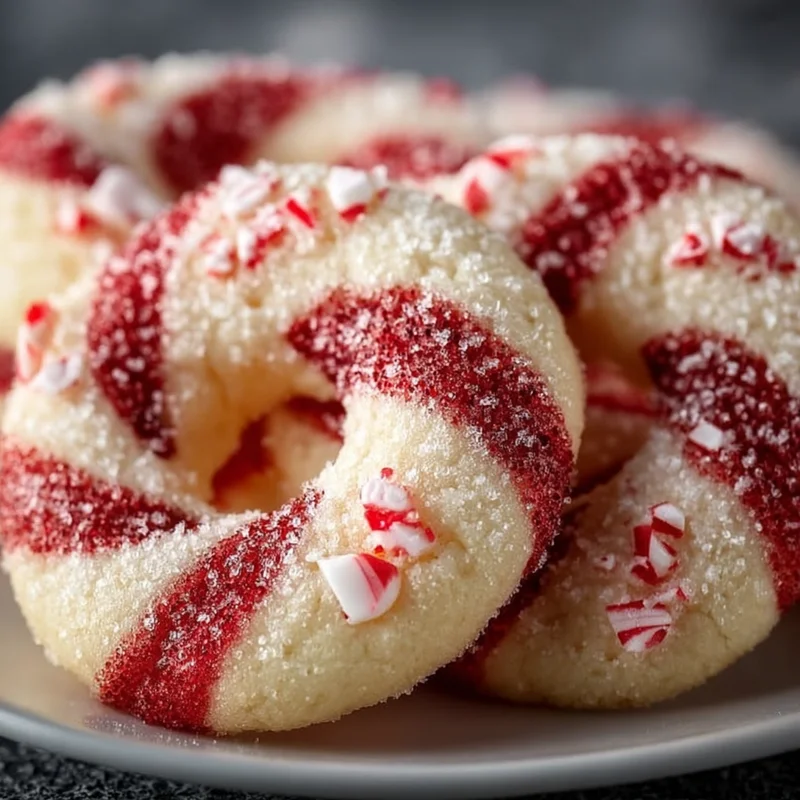
- Shape the Canes: Once chilled, take small portions of both the white and red dough. Roll each portion into a log (about 6-8 inches long). Gently twist the two logs together, then curve them into a classic candy cane shape. If the dough gets too soft while you’re working, pop it back in the fridge for a few minutes.
- Prep Your Pan: Line a baking sheet with parchment paper. This is my favorite trick for easy cleanup and to prevent cookies from sticking!
- Bake to Perfection: Place your candy cane cookies onto the prepared baking sheet, leaving a little space between them. Bake in a preheated oven at 375°F (190°C) for 8-10 minutes. You’re looking for the edges to be lightly golden. Don’t overbake, or they might get crispier than you’d like!
- Cool Down: Let the cookies cool on the baking sheet for a few minutes before carefully transferring them to a wire rack to cool completely. This helps them firm up properly.
Substitutions & Additions
Feeling a little creative? Here are some fun ways to switch things up!
- Different Extracts: Swap peppermint for almond extract for a classic marascharooon-like flavor, or try a little orange extract for a citrusy twist.
- Sprinkle Sparkle: Before baking, you can brush the cookies with a little egg wash (one egg beaten with a tablespoon of water) and sprinkle with colored sanding sugar for extra glitz.
- Chocolate Drizzle: Once completely cooled, a drizzle of melted white or dark chocolate can take these cookies to another level!
- No Red Food Coloring? You can absolutely make these all white, or even divide the dough again and tint one half green for striped cookies!
Tips for Success
A few little secrets from my kitchen to yours to ensure perfect candy cane cookies every time:
- Softened Butter is Key: Make sure your butter is truly softened, not melted! This is essential for achieving that light and fluffy texture when creaming with the sugar.
- Don’t Overmix the Flour: Overmixing develops gluten, which can lead to tough cookies. Mix only until the dry ingredients are just incorporated.
- Chilling is Not Optional: I know waiting can be tough, but chilling the dough is crucial for easy shaping and to prevent your candy canes from looking like blobs.
- Prep Ahead Power: You can make the dough a day or two in advance and keep it chilled in the refrigerator. Just let it soften slightly before shaping.
- Consistent Sizes: Try to roll your logs and shape your cookies to a similar size. This ensures they all bake evenly.
How to Store It
Once your beautiful candy cane cookies are completely cooled, you’ll want to store them properly to keep them fresh and delicious. I like to store them in an airtight container at room temperature. They should stay wonderfully fresh for about 3-5 days. If you want to freeze them, you can freeze them baked and cooled, layered between parchment paper in an airtight container for up to 3 months. Just thaw them at room temperature when you’re ready to enjoy!
FAQs
Can I use margarine instead of butter?
While you can, I highly recommend using unsalted butter. Butter provides the best flavor and texture for these delicate cookies. Margarine can sometimes lead to a greasier cookie that spreads more.
My dough is too sticky to shape, what should I do?
This usually means the dough needs a bit more chilling. Pop both dough halves back into the refrigerator for another 20-30 minutes. If it’s still a bit sticky, you can lightly dust your hands and the work surface with a little extra flour when shaping.
How long can I store these cookies?
Stored in an airtight container at room temperature, these candy cane cookies will stay fresh and delicious for about 3-5 days. For longer storage, freezing is your best bet!
Can I make these without peppermint extract?
Absolutely! If peppermint isn’t your favorite, you can omit it entirely for a simple vanilla cookie, or substitute it with another extract like almond or orange for a different flavor profile.
Candy Cane Cookies

An easy and adorable recipe for melt-in-your-mouth candy cane cookies, perfect for holiday gifting and baking.
- Electric mixer
- Baking Sheet
- Parchment paper
- Wire rack
- Plastic wrap
Main ingredients
- 1 cup unsalted butter (softened)
- 1 cup powdered sugar
- 1 large egg
- 1 teaspoon vanilla extract
- 0.5 teaspoon peppermint extract
- 2.5 cups all-purpose flour
- 0.5 teaspoon salt
- 1 teaspoon red food coloring (gel food coloring works best)
- In a large bowl, beat the softened butter and powdered sugar together until the mixture is light, fluffy, and looks like pale yellow clouds. This usually takes a few minutes with an electric mixer.
- Now, beat in the egg, followed by the vanilla extract and peppermint extract. Make sure it’s all well combined and smooth.
- In a separate medium bowl, whisk together your flour and salt. This ensures the salt is evenly distributed throughout the dough.
- Gradually add the dry ingredients to the wet ingredients. Mix on low speed, or with a spatula, until just combined. We don’t want to overmix here, as that can make cookies tough. Just until you don’t see any dry flour streaks.
- Divide the dough in half. To one half, add the red food coloring and gently knead or mix until you achieve a beautiful, uniform red color. You’ll now have a pale dough and a vibrant red dough.
- Wrap both halves of the dough separately in plastic wrap and pop them into the refrigerator for at least 1 hour. This chilling step is crucial! It makes the dough much easier to handle and prevents the cookies from spreading too much while baking.
- Once chilled, take small portions of both the white and red dough. Roll each portion into a log (about 6-8 inches long). Gently twist the two logs together, then curve them into a classic candy cane shape. If the dough gets too soft while you’re working, pop it back in the fridge for a few minutes.
- Line a baking sheet with parchment paper. This is my favorite trick for easy cleanup and to prevent cookies from sticking!
- Place your candy cane cookies onto the prepared baking sheet, leaving a little space between them. Bake in a preheated oven at 375°F (190°C) for 8-10 minutes. You’re looking for the edges to be lightly golden. Don’t overbake, or they might get crispier than you’d like!
- Let the cookies cool on the baking sheet for a few minutes before carefully transferring them to a wire rack to cool completely. This helps them firm up properly.
For longer storage, freeze baked and cooled cookies layered between parchment paper in an airtight container for up to 3 months. Thaw at room temperature.