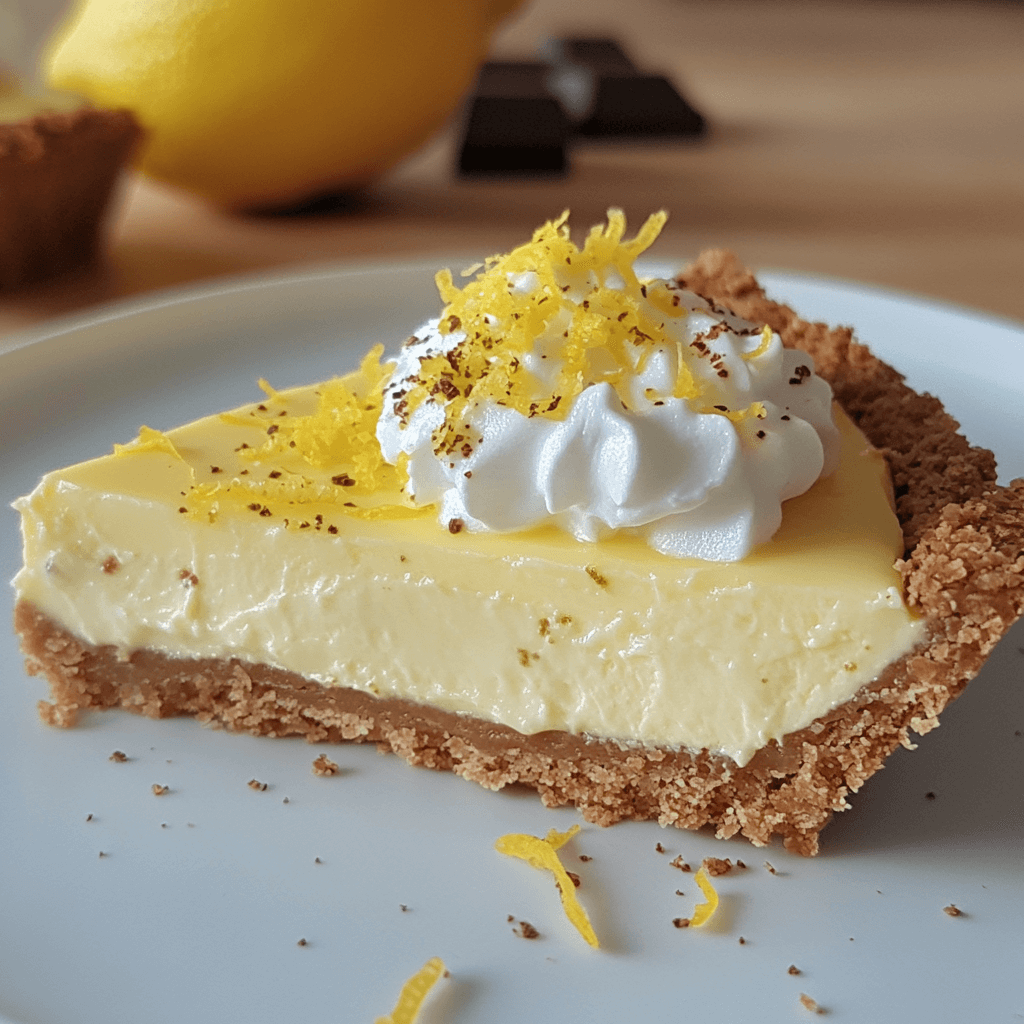

Lemon desserts are a crowd favorite for their refreshing tang and bright flavor, and the Easy & Delicious Lemon Bliss Tart is no exception. With a buttery, crisp biscuit crust, a creamy, zesty lemon filling, and a light, fluffy whipped cream topping, this tart brings together the perfect balance of tartness and sweetness. It’s the kind of dessert that feels light but indulgent, making it perfect for any occasion—be it a casual family gathering, a festive holiday celebration, or a treat to brighten up your day. This simple, no-bake recipe comes together quickly, requiring only a handful of ingredients that you likely already have in your kitchen.
Why You’ll Love This Easy & Delicious Lemon Bliss Tart?
- No-Bake Convenience: This tart is perfect for busy bakers or those looking for a quick dessert. There’s no need to turn on the oven—simply mix, chill, and serve!
- Perfect Balance of Flavors: The combination of tangy lemon juice and zest, creamy condensed milk, and fluffy whipped cream creates a perfectly balanced tart that’s not too sweet or too tart—just the right amount of zest to satisfy your taste buds.
- Light and Refreshing: Lemon desserts are known for their refreshing qualities, and this tart is no exception. It’s light, bright, and perfect for any time of year, though especially lovely on warm days when you want something fresh and light.
- Easy to Make: Even if you’re new to baking (or, in this case, no-bake desserts!), this recipe is simple and requires minimal effort. There’s no baking, and the steps are easy to follow, making it ideal for bakers of all levels.
- Customizable Topping: The topping is up to you—whipped cream for a light, airy finish, or a sprinkle of chocolate or lemon zest for a burst of flavor and decoration. The choice is yours!
- Impressive and Elegant: Despite being simple to make, this tart looks impressive when served at gatherings. The delicate whipped cream topping and perfect lemon filling make it both a visual and culinary treat.
What You’ll Need
Making this Easy & Delicious Lemon Bliss Tart is simple, and you likely already have many of the ingredients on hand. Here’s what you’ll need:
For the Crust:
- 1 packet digestive biscuits (approximately 200g), crushed 🍪
- 1/4 cup melted butter 🧈
Filling:
- 1 tin (395g) condensed milk 🥛
- 1/2 cup fresh lemon juice 🍋
- 1/4 cup lemon zest 🍋✨
For the Topping:
- 1 cup whipped cream 🩵
- 2 chocolates of your choice (e.g., dark or milk), crushed 🍫 (or extra lemon zest for garnish)

These ingredients combine to create a tart that’s smooth, flavorful, and decadent. You’ll also need a tart pan or pie dish, a mixing bowl, a whisk, and a spatula to put everything together.
Step-by-Step Instructions
1st step: Prepare the Biscuit Crust
- Crush the Biscuits: Begin by crushing the digestive biscuits into fine crumbs. You can place them in a large ziplock bag and use a rolling pin to crush them, or pulse them in a food processor for quicker results.
- Mix with Butter: Transfer the crushed biscuits into a mixing bowl and add the melted butter. Stir the mixture well until the crumbs are fully coated in the butter. The butter will help bind the crust together and give it a delicious, rich flavor.
- Press Into the Pan: Lightly grease the bottom of your tart pan or pie dish. Then, pour the biscuit-butter mixture into the pan and press it down firmly with the back of a spoon or your fingers to form a solid crust. Make sure the crust is even and compact.
- Chill the Crust: Once the crust is ready, place the pan in the fridge to chill for at least 15-20 minutes. This helps the crust set, making it easier to fill later.
2nd Step : Prepare the Lemon Filling
- Whisk the Condensed Milk and Lemon Juice: In a medium bowl, pour in the condensed milk and add the fresh lemon juice. Whisk the mixture until it’s smooth and fully combined. The acid from the lemon juice will help thicken the mixture, creating the perfect filling texture.
- Add Lemon Zest: Add the lemon zest to the mixture for an extra burst of citrus flavor. Stir until evenly distributed.
- Fill the Crust: After the biscuit crust has chilled and set, pour the lemon filling onto the crust. Use a spatula to spread the filling evenly, ensuring it covers the entire base.
3rd Step : Prepare the Whipped Cream Topping
- Whip the Cream: In a clean bowl, whip the cream until soft peaks form. You can use a hand whisk or an electric mixer for this step. Be careful not to overwhip the cream—soft peaks are ideal for this tart, as they provide a light and fluffy topping.
- Top the Tart: Once the whipped cream is ready, spread it generously over the lemon filling. You can use a spatula or the back of a spoon to create an even layer of whipped cream.
4th Step : Add the Finishing Touches
- Add Chocolate or Zest: For an extra touch, sprinkle the crushed chocolate over the whipped cream topping or add a little extra lemon zest for an additional burst of citrus flavor and a lovely visual element.
- Chill the Tart: Place the tart back into the fridge and allow it to chill for at least 2-3 hours, or overnight if possible. Chilling helps the tart set, making it easier to slice and serve.
5th Step : Serve and Enjoy!
- Serve: Once the tart has set and chilled, slice it into wedges and serve. Each bite will be a perfect balance of tangy lemon, creamy filling, and light whipped cream.
- Garnish: You can add more crushed chocolate or a sprinkle of lemon zest just before serving for an extra burst of flavor and visual appeal.

Tips for Success
- Use Fresh Lemons: Fresh lemon juice and zest are key to a vibrant, flavorful tart. Bottled lemon juice may not offer the same fresh citrusy kick, so it’s worth using fresh lemons for the best taste.
- Chill the Tart Long Enough: For the tart to hold its shape and be easy to slice, it’s essential to let it chill for a few hours or even overnight. This allows the filling to set and firm up.
- Customize the Topping: The whipped cream topping can be tailored to your preferences. If you want a more decadent finish, you can use a thicker layer of whipped cream, or you could even top the tart with fresh berries, a drizzle of chocolate, or more lemon zest for added texture and flavor.
- Adjust Sweetness: The condensed milk provides plenty of sweetness, but if you prefer a sweeter tart, you can adjust the lemon juice or add a touch of sugar to the filling before mixing.
- Don’t Overwhip the Cream: Whipping the cream to soft peaks is important for a fluffy and light topping. If you overwhip it, it could turn grainy and difficult to spread.
Variations to Try
- Berry Lemon Tart: Add a handful of fresh berries like raspberries, strawberries, or blueberries to the whipped cream topping for a burst of color and flavor. This adds a tart contrast to the creamy lemon filling.
- Coconut Lemon Tart: Add shredded coconut to the crust for a tropical twist. You could also sprinkle toasted coconut on top for extra texture and flavor.
- Lemon Meringue Twist: Instead of whipped cream, you could top the tart with a layer of sweet meringue. Simply whip egg whites with sugar and bake the meringue to a golden brown for a more traditional lemon meringue dessert.
- Chocolate-Lemon Layer: For chocolate lovers, create a thin layer of melted chocolate between the crust and lemon filling for a decadent twist on the classic lemon tart.
Storing and Reheating
- Storing: Store leftover tart in the refrigerator, covered with plastic wrap or in an airtight container, for up to 3-4 days. The tart is best enjoyed within a few days for maximum freshness.
- Freezing: While it’s not recommended to freeze the whipped cream topping, the lemon filling and crust can be frozen. To freeze, wrap the tart tightly in plastic wrap and foil and store it in the freezer for up to 1 month. When ready to serve, allow it to thaw in the refrigerator before topping with fresh whipped cream.
Frequently Asked Questions
Can I use a different kind of biscuit for the crust?
Yes! If you can’t find digestive biscuits, graham crackers or any other plain sweet biscuit would work well. You can even use gluten-free biscuits if needed.
Can I make this tart in advance?
Yes, this tart is perfect for making ahead of time. Just chill it for several hours or overnight before serving. This makes it ideal for parties or gatherings where you want to do as much prep ahead of time as possible.
Can I use a different topping instead of whipped cream?
Yes! You can top the tart with meringue, fresh fruit, or even a light layer of custard. Just make sure whatever topping you choose complements the tangy lemon filling.
What if I don’t like chocolate on my lemon tart?
No problem! You can skip the chocolate entirely and either add more lemon zest or fresh berries for a fresh, tangy finish. The tart is delicious either way!
The Final Word
This Easy & Delicious Lemon Bliss Tart is a simple yet elegant dessert that everyone will love. With its combination of crisp biscuit crust, zesty lemon filling, and creamy whipped cream topping, it’s the perfect way to end any meal or treat yourself on a sunny afternoon. Whether you’re a beginner baker or an experienced pro, this tart is a fantastic, foolproof recipe that will always impress. So, grab your ingredients, whip up this delightful treat, and enjoy the refreshing bliss of this lemony goodness!