
Whip Up Some Sweet Fun with This Easy Edible Playdough!
Remember those days of endless imaginative play, where your hands were always a little sticky and your heart was full of wonder? There’s something truly magical about playdough, isn’t there? It’s the gateway to tiny worlds, fantastical creatures, and hours of pure, unadulterated fun. And what if I told you that the playdough you loved as a kid could be even better? Meet our super-duper easy Edible Playdough! It’s so simple to make, you’ll be whipping up a batch in no time, and the best part? If a little (or a lot!) ends up in tiny mouths, there’s no need to panic. Get ready to unleash your inner artist and your sweet tooth with this incredibly delightful recipe!
Why You’ll Absolutely Adore This Edible Playdough
- Fast: Seriously, this comes together in minutes! Perfect for spontaneous creative sessions.
- Easy: No complicated steps or fancy equipment needed. You probably have everything in your pantry right now.
- Giftable: Package it up in cute jars or bags, and you’ve got the most charming homemade gift for little ones.
- Crowd-Pleasing: Whether it’s for a birthday party, a rainy day activity, or just an afternoon treat, everyone loves this sweet creation.

The Sweet & Simple Ingredients
Gather ’round, because this recipe is about as straightforward as it gets! You only need a few pantry staples to bring this colorful fun to life.
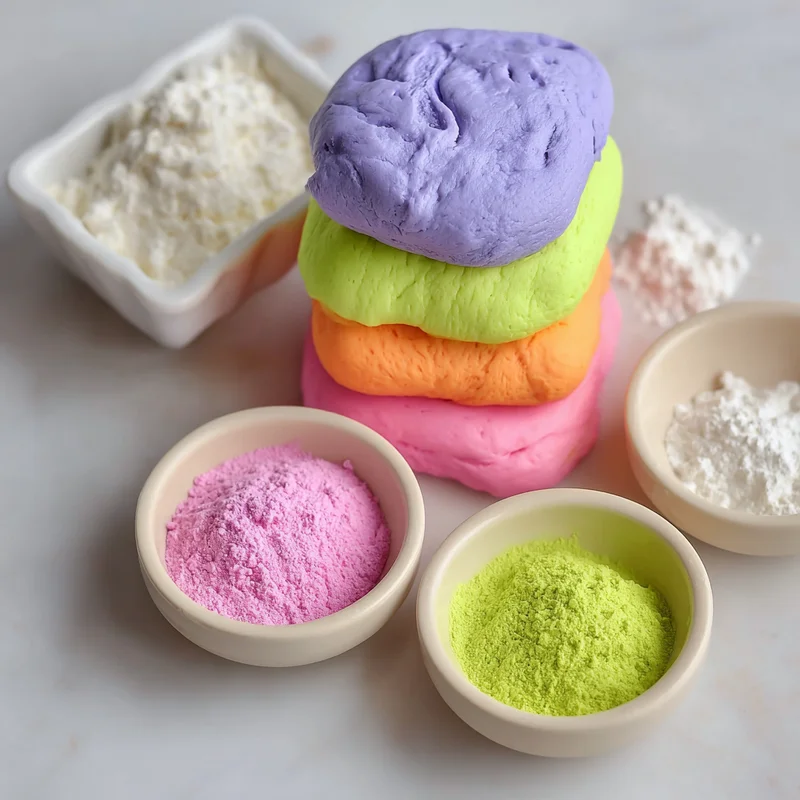
- 16 ounces tub of vanilla frosting: This is our magical base! It gives the playdough its wonderfully smooth texture and a hint of sweetness.
- 2-4 cups powdered sugar: Also known as confectioners’ sugar or icing sugar. This is what transforms our frosting into a moldable dough. You might not need the full 4 cups, so we’ll add it gradually!
- Neon gel food coloring packet (purple, neon green, neon pink, and orange): These are the stars of the show for vibrant, eye-catching colors! Gel coloring is best because it’s concentrated and won’t add too much liquid to our dough.
Let’s Get Our Hands Dough-ty!
Alright, apron on (or not, it’s that easy!) and let’s dive into making this delightful edible playdough. It’s a sensory experience from start to finish!
- Start with the Frosting: Grab a medium-sized bowl and plop the entire tub of vanilla frosting into it. Easy peasy!
- Gradually Add the Powdered Sugar: Now, begin adding the powdered sugar, a cup at a time. Mix it in with a sturdy spoon or even your hands (the best way, in my opinion!). Keep adding powdered sugar and mixing until the frosting starts to firm up and forms a dough-like consistency. It should be pliable and not too sticky. Don’t be surprised if you don’t use all 4 cups – it depends on the humidity and the specific frosting!
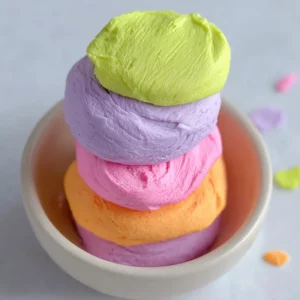
- Divide and Conquer the Colors: Once you have your basic dough, it’s time for the color party! Divide the dough into four equal portions.
- Add a Pop of Neon: Pick one portion of dough and add just a few drops of one of your neon gel food colors (let’s start with purple!).
- Knead it Like a Pro: Now, get your hands in there and knead the dough. Fold it, squish it, and work the color in until it’s evenly distributed. It might feel a little sticky at first, but keep kneading, and the color will spread beautifully.
- Repeat for More Fun: Grab another portion of dough and repeat steps 4 and 5 with a different neon color (hello, neon green!). Continue this process for the remaining dough portions with your neon pink and orange, until you have a dazzling array of colorful, edible playdough!
Spice It Up: Substitutions & Creative Additions
While this recipe is wonderfully simple, that doesn’t mean we can’t have a little fun with it! Here are some ideas to personalize your edible playdough:
- Flavor Boost: Want to add another layer of deliciousness? Add a drop or two of vanilla extract or even a touch of almond extract to the frosting before you start adding the sugar.
- Sparkle and Shine: For some extra magic, mix in edible glitter into individual colors! It’s like unicorn dust for your playdough.
- Different Frosting Flavors: While vanilla is classic, feel free to experiment with other frosting flavors like chocolate or strawberry! Just be aware that darker frostings might mute the neon colors a bit.
- Natural Food Coloring: If you prefer to avoid artificial colors, you can try using natural food colorings derived from fruits and vegetables. Keep in mind these might create softer, less vibrant colors.
Tips for a Smooth Sailing Playdough Experience
A few little pointers can make all the difference in achieving perfect edible playdough every time!
- Don’t Over-Mix: Once your playdough reaches the right consistency, stop adding powdered sugar. Too much can make it crumbly.
- Gloves are Your Friend: If you want to keep your hands from getting stained by the food coloring, wear disposable gloves while kneading the colors.
- Add Color Sparingly: Gel food coloring is potent! Start with a tiny amount and add more if needed to achieve your desired neon vibrancy.
- Prep Ahead: You can make the base dough ahead of time and store it in an airtight container. When it’s time to play, bring it out and divide/color it.
Keeping Your Playdough Fresh and Fun
Proper storage is key to enjoying your edible playdough for as long as possible!
- Airtight Containers: Store each color of playdough in its own airtight container or resealable plastic bag.
- Room Temperature: Keep your playdough at room temperature. Avoid the refrigerator, as it can make the dough too hard.
- Shelf Life: Generally, this edible playdough will stay fresh and delightful for about 1-2 weeks when stored properly. It’s made with frosting, so always trust your senses – if it smells or looks off, it’s time for a new batch!
Frequently Asked Questions
Got questions? We’ve got answers!
Q: Is this playdough really safe to eat?
A: Yes! Since it’s made with frosting and powdered sugar, it’s perfectly safe for little ones to nibble on. However, it’s still a craft activity, so we encourage mindful play and keeping consumption in moderation!
Q: My playdough is too sticky. What should I do?
A: Add a little more powdered sugar, a tablespoon at a time, and knead it in until it reaches a less sticky, more moldable consistency. Make sure to knead thoroughly!
Q: My playdough is too crumbly. Help!
A: This usually means you’ve added too much powdered sugar. Try adding a tiny bit more frosting (just a teaspoon at a time) and kneading it in until the dough comes back together. Alternatively, a tiny splash of water or vegetable oil can help if it’s very dry.
Edible Playdough
Equipment
- Medium-sized bowl
- Sturdy spoon or hands
- disposable gloves optional, for coloring
- Airtight containers for storage
Ingredients
Hauptzutaten
- 16 ounces tub of vanilla frosting This is our magical base! It gives the playdough its wonderfully smooth texture and a hint of sweetness.
- 2 cups powdered sugar Also known as confectioners' sugar or icing sugar. This is what transforms our frosting into a moldable dough. You might not need the full 4 cups, so we'll add it gradually!
- 1 packet Neon gel food coloring purple, neon green, neon pink, and orange. Gel coloring is best because it's concentrated and won't add too much liquid to our dough.
Instructions
- Grab a medium-sized bowl and plop the entire tub of vanilla frosting into it.
- Begin adding the powdered sugar, a cup at a time. Mix it in with a sturdy spoon or even your hands. Keep adding powdered sugar and mixing until the frosting starts to firm up and forms a dough-like consistency. It should be pliable and not too sticky. Don't be surprised if you don't use all 4 cups – it depends on the humidity and the specific frosting!
- Once you have your basic dough, divide the dough into four equal portions.
- Pick one portion of dough and add just a few drops of one of your neon gel food colors (let's start with purple!).
- Get your hands in there and knead the dough. Fold it, squish it, and work the color in until it's evenly distributed. It might feel a little sticky at first, but keep kneading, and the color will spread beautifully.
- Grab another portion of dough and repeat steps 4 and 5 with a different neon color (hello, neon green!). Continue this process for the remaining dough portions with your neon pink and orange, until you have a dazzling array of colorful, edible playdough!