Oh, Halloween! Does any other holiday bring out such a sense of playful magic and delicious indulgence? I still remember the thrill of trick-or-treating, the crisp autumn air, and the sheer joy of digging into a sweet treat. And you know what’s even better? Making those treats yourself! Today, I’m sharing a recipe that’s an absolute winner for Halloween parties, school treats, or just a fun afternoon activity with the kiddos: Easy Spooky Halloween Pudding Cups!
Seriously, if you’re looking for a way to get into the Halloween spirit without spending hours in the kitchen, you’ve found your match. These pudding cups are ridiculously simple to put together, which means more time for carving pumpkins or perfecting your costume. Plus, they’re so incredibly cute and customizable, everyone will be asking for the recipe!
Why You’ll Love These Easy Halloween Pudding Cups
- Fast: You can whip these up in under 30 minutes, making them perfect for last-minute party prep.
- Easy: So simple, even the littlest kitchen helpers can get involved. No fancy skills needed!
- Giftable: Package them up in cute cellophane bags, and you’ve got the perfect party favor or treat to share.
- Crowd-pleasing: Who doesn’t love chocolate pudding and Oreos? They’re a guaranteed hit with both kids and adults.
Gather Your Ghastly Goodies: Ingredients
Let’s get our spooky ingredients lined up! You probably have most of these on hand already:
- 3 cups instant chocolate pudding (prepared according to package directions): The star of the show! Make sure it’s nice and chocolaty.
- 30 Oreo cookies: These are our “dirt” or “graveyard” base. The more, the merrier!
- ¾ cup heavy cream, whipped to stiff peaks: This adds a lovely cloud-like texture. You can also use store-bought whipped topping if you’re in a real pinch.
- Assorted Halloween candy (e.g., candy corn, gummy worms, candy eyeballs, Halloween Peeps): This is where the magic happens! Get creative with your decorations.
Let’s Get Spooky: How to Make It
Alright, let’s dive into making these adorable Halloween pudding cups. It’s as easy as 1-2-3, or rather, 1-2-decorate!
-
Crush Your Oreos
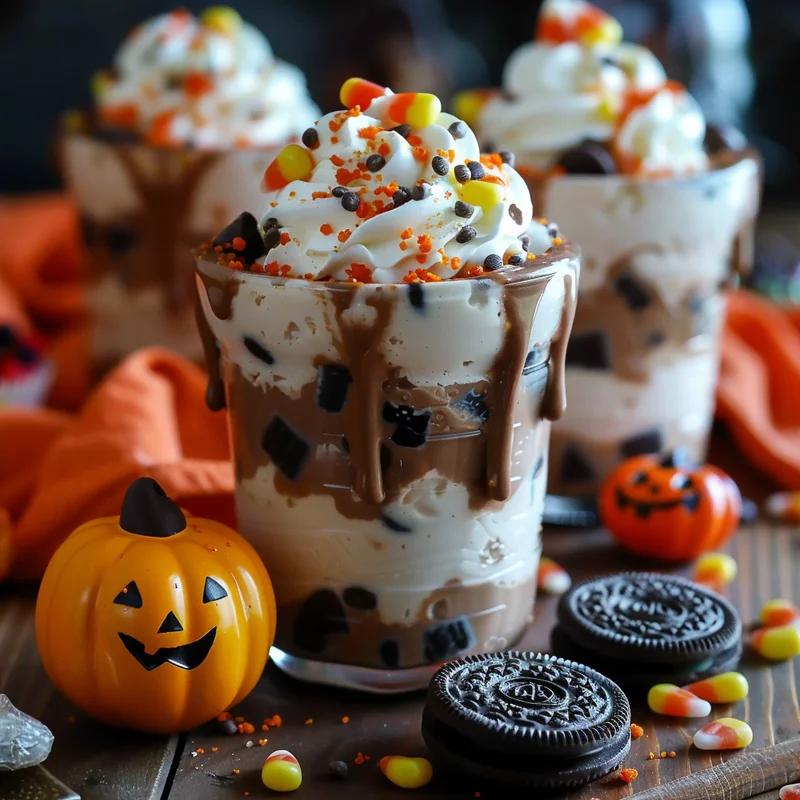
First things first, we need to make our spooky dirt! Take those Oreo cookies and pop them into a zip-top bag. Now, the fun part: get to crushing! You can use a rolling pin, the bottom of a heavy glass, or even let the kids stomp on them (just make sure the bag is sealed tightly!). You want a crumbly texture, not fine powder, so aim for a mix of crumbs and tiny cookie bits. This will give our pudding cups a nice texture.
-
Layer the Spookiness
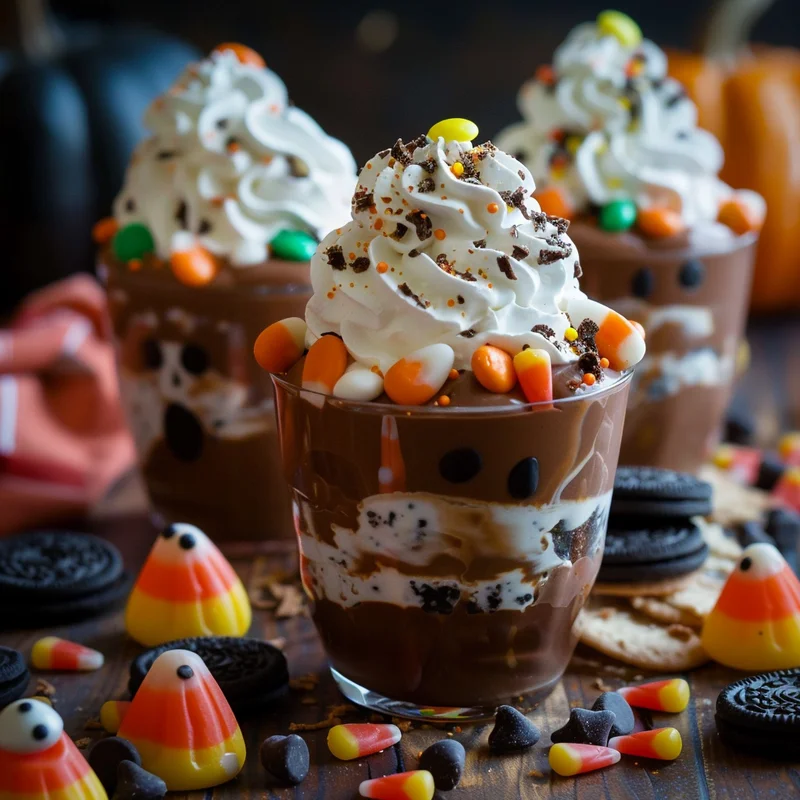
Now it’s time to assemble! Grab your individual serving cups. Clear plastic cups, mason jars, or even small glasses work wonderfully. Start by spooning a layer of your crushed Oreo cookies into the bottom of each cup. Then, add a generous spoonful of the prepared chocolate pudding. Next, dollop or pipe on a layer of your whipped cream. Repeat the layers – pudding, then whipped cream – until your cups are almost full. I like to end with whipped cream so it looks like fluffy clouds!
-
Decorate Like a Monster!
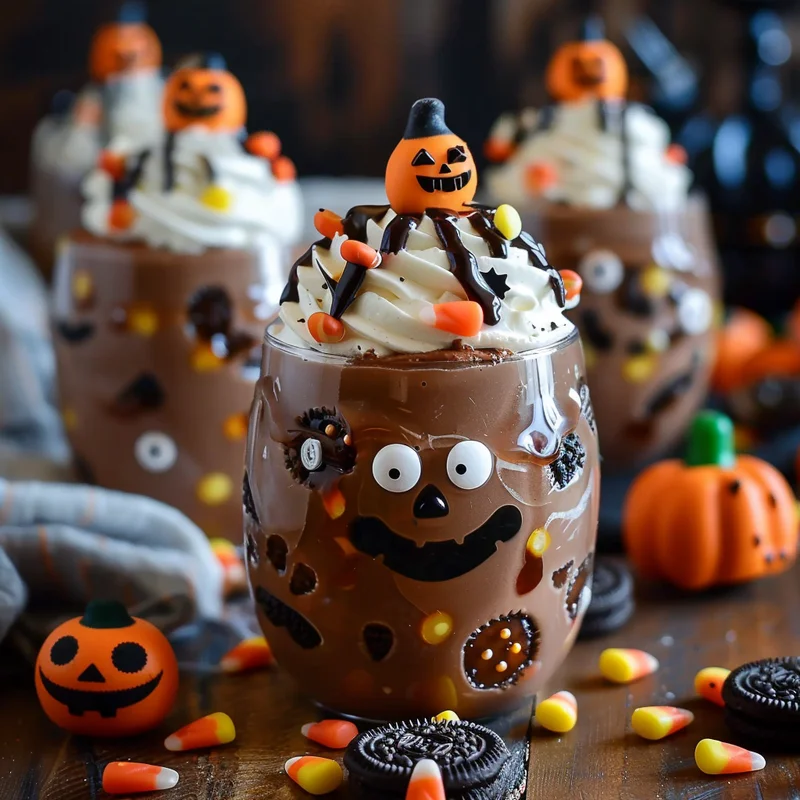
This is where your inner Halloween artist can shine! Now, let’s adorn the tops of our pudding cups with all that fun Halloween candy. Stick a few gummy worms crawling out of the “dirt” (crushed Oreos peeking through the top layer). Add candy eyeballs to look like little monsters peeking out. A sprinkle of candy corn or a tiny Halloween Peep can make these truly festive. Get creative and have fun with it!
Boo-tiful Variations: Substitutions & Additions
The beauty of these pudding cups is how easily you can customize them. Here are a few ideas to make them even more special:
- Pudding Flavors: Don’t love chocolate? Try vanilla, butterscotch, or even pumpkin spice pudding for a different vibe.
- Cookie Crumbs: Chocolate graham crackers or even crushed chocolate sandwich cookies can work as a substitute for Oreos.
- Whipped Cream Swaps: Cool Whip or stabilized whipped cream will hold its shape well. For a richer flavor, you could fold some melted chocolate or a touch of coffee liqueur into your whipped cream.
- Edible Decorations: Beyond candy, try edible glitter, chocolate sprinkles, or even a drizzle of chocolate syrup for extra decadence.
- “Graveyard” Twist: Place a Milano cookie or a Milano cookie shard into the top layer of pudding to serve as a tombstone, then write “RIP” on it with edible marker or black icing.
Tips for a Frightfully Good Time
To ensure your Halloween pudding cups are a smashing success, here are a few tips from my kitchen to yours:
- Don’t Over-Crush Your Oreos: I learned this the hard way when my first batch was just cookie dust! A little texture makes them more interesting.
- Chill Before Decorating: If your pudding or whipped cream is very soft, chilling the assembled cups for about 15-20 minutes before adding the final candy decorations can help prevent the candy from sinking too much.
- Prep Ahead: You can prepare the pudding and crush the Oreos up to a day in advance. Store the pudding in an airtight container in the fridge and the cookie crumbs in a sealed bag or container at room temperature. Assemble and decorate closer to serving time for the freshest look.
- Layering Tip: For cleaner layers, you can pipe the pudding and whipped cream using a piping bag with a star tip. It makes them look extra professional!
How to Store Your Spooky Creations
These pudding cups are best enjoyed fresh, especially if you want those decorations to stay perfectly in place. However, if you have leftovers or need to make them a bit ahead:
- Refrigeration: Store any assembled pudding cups tightly covered with plastic wrap or lids in the refrigerator. They’ll typically last for 2-3 days.
- Decoration Longevity: Be aware that some candies might soften or bleed colors if stored for too long, especially gummy candies. If you’re making them more than a day in advance, consider adding some of the more delicate decorations just before serving.
Frequently Asked Halloween Pudding Cup Questions
Here are a few common questions I get about these easy Halloween treats:
Q1: Can I make these gluten-free?
A1: Absolutely! You can easily swap out the regular Oreos for gluten-free chocolate sandwich cookies. The rest of the ingredients are naturally gluten-free.
Q2: How many servings do these typically make?
A2: It depends on the size of your serving cups! If you’re using standard 6-8 ounce plastic cups, you’ll likely get about 6-8 servings from this recipe. If you use smaller cups, you’ll get more.
Q3: Can I make the pudding from scratch?
A3: You sure can! If you prefer a homemade chocolate pudding, feel free to use your favorite recipe. Just ensure it’s chilled and ready to layer.
Q4: Are these suitable for a school party?
A4: Yes, they are perfect for school parties! They’re easy to handle, fun, and generally nut-free (always double-check your candy ingredients if you have severe allergies at your child’s school).
There you have it – a super simple, incredibly fun, and utterly delicious way to celebrate Halloween! These Easy Spooky Halloween Pudding Cups are sure to be a hit. Happy haunting and happy baking!

Easy Halloween Pudding Cups
Equipment
- zip-top bag for crushing cookies
- Rolling Pin or heavy glass for crushing cookies
- individual serving cups clear plastic cups, mason jars, or small glasses
- Piping bag optional, with a star tip for cleaner layers
Ingredients
Main ingredients
- 3 cups instant chocolate pudding prepared according to package directions
- 30 Oreo cookies crushed for "dirt"
- 0.75 cup heavy cream whipped to stiff peaks, or store-bought whipped topping
- assorted Halloween candy e.g., candy corn, gummy worms, candy eyeballs, Halloween Peeps
Instructions
- Crush the Oreo cookies in a zip-top bag until they have a crumbly texture, with a mix of crumbs and tiny cookie bits.
- Layer the crushed Oreo cookies into the bottom of individual serving cups. Spoon a layer of prepared chocolate pudding on top of the cookies.
- Add a dollop or piped layer of whipped cream. Repeat the layers of pudding and whipped cream until the cups are almost full, ending with whipped cream.
- Decorate the tops of the pudding cups with assorted Halloween candy, such as gummy worms, candy eyeballs, and candy corn, to create a spooky effect.