
Introduction
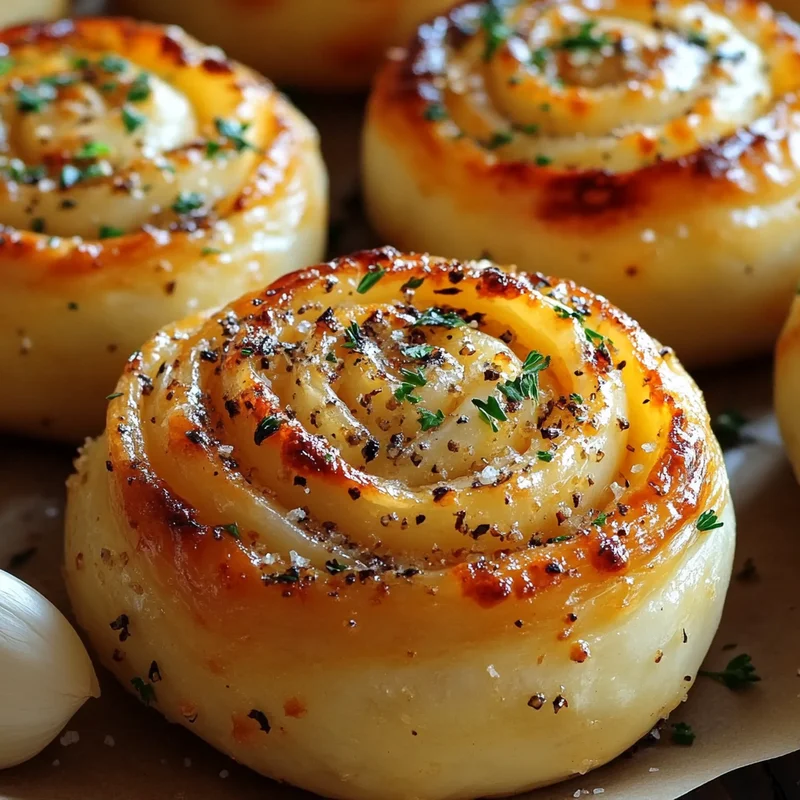
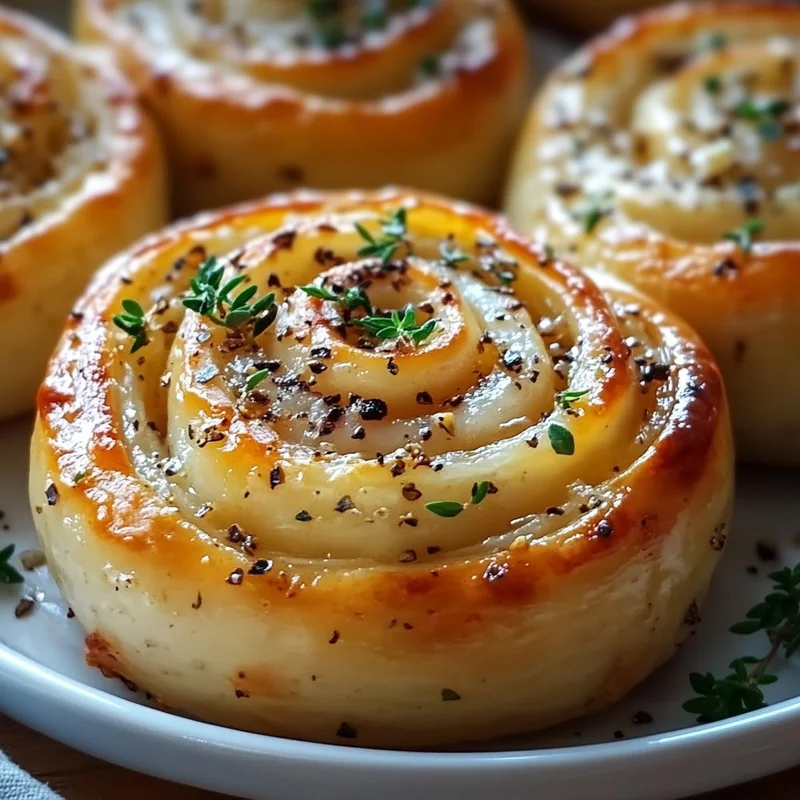
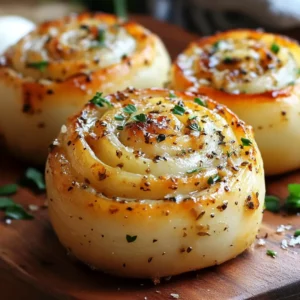
Hey there, fellow home bakers! Get ready to fill your kitchen with the most incredible aroma. There’s nothing quite like warm, homemade bread, right? It just screams comfort, cozy evenings, and gathering around the table. These Herb & Garlic Swirl Rolls? Oh boy, they take that feeling and crank it up to eleven! They’re soft, fluffy, packed with savory garlic and fresh herbs, and honestly, dangerously easy to devour straight from the oven.
Maybe you’re looking for the perfect side dish for your Sunday dinner, a show-stopping addition to a holiday feast, or just a simple, rewarding baking project for a lazy weekend. Whatever the reason, these swirl rolls are your answer. They look impressive, but trust me, they’re incredibly simple to make. Even if you’re new to working with yeast, I promise you can totally nail these. Let’s bake some magic!
Why You’ll Love This Recipe
- Relatively Quick & Easy: For a yeast roll, these come together surprisingly fast. Perfect for a weekend project or even a weeknight if you plan just a little!
- Beginner-Friendly: Don’t be intimidated by yeast! The steps are straightforward and forgiving.
- Perfectly Giftable: Bake a batch and share the love! They make a wonderful hostess gift or holiday treat.
- Seriously Crowd-Pleasing: Who can resist warm, buttery, garlicky bread? Absolutely nobody, that’s who.
Ingredients
Gather ’round, friends! Here’s what you’ll need to make these glorious rolls:
- 4 cloves Garlic: Fresh is best here! We’re going to mince it fine to get that lovely garlic punch in every bite.
- 1/4 cup Parsley, fresh: Bright, green, and full of flavor. Wash it well and give it a good chop. You could swap in other herbs too! (More on that later).
- 2 large Eggs: These add richness and help make the rolls tender. Room temperature is ideal if you can plan ahead!
- 2 1/4 tsp Active dry yeast: The magical stuff that makes our rolls rise and become light and fluffy. Make sure it’s fresh!
- 4 cups All-purpose flour: The workhorse of our dough. Standard all-purpose flour is perfect here.
- 1 tsp Salt (for the dough): Essential for flavor balance in the dough itself.
- Salt and pepper (for the filling): Just a little pinch of each to season that delicious herb-garlic butter.
- 2 tbsp Sugar: This feeds the yeast and helps give the rolls a little softness and a hint of sweetness to balance the savory.
- 1/2 cup Unsalted butter: We’ll melt this down and mix it with the herbs and garlic for that irresistible swirl filling. Using unsalted lets you control the salt level.
How to Make It
Alright, apron on? Let’s get baking! Don’t worry, we’ll go step-by-step.
First, you’ll want to wake up your yeast. In a small bowl, combine about 1/2 cup of warm water (think bathwater temperature, not hot!) with the sugar and the active dry yeast. Give it a gentle stir and let it sit for 5-10 minutes. You should see it get bubbly and foamy – that means your yeast is alive and happy and ready to work! If nothing happens, your water might have been too hot or cold, or your yeast might be old. Time to grab new yeast and try again.
While the yeast is blooming, in a large mixing bowl, whisk together the flour and the salt for the dough. Make a well in the center.
Once your yeast is bubbly, add it to the well in the flour mixture. Crack in your two large eggs. Now, it’s time to mix! You can use a wooden spoon, a spatula, or a stand mixer with a dough hook. Mix until everything just comes together into a shaggy dough. If you’re using a mixer, switch to the dough hook and knead for about 5-7 minutes on medium-low speed. If you’re kneading by hand, turn the dough out onto a lightly floured surface and knead for about 8-10 minutes. You’re looking for a smooth, elastic dough that springs back when you gently poke it.
Lightly grease a clean bowl (you can use a little oil or melted butter). Place the dough in the bowl, turning it to coat all sides. Cover the bowl tightly with plastic wrap or a damp kitchen towel. Find a warm, draft-free spot for it to rise. This first rise (or proof) will take about 1 to 1.5 hours, or until the dough has roughly doubled in size. Patience is a virtue in bread making, my friend!
While your dough is taking its sweet time rising, let’s make the glorious filling! Finely mince your garlic and chop your fresh parsley. In a small saucepan, melt the 1/2 cup of unsalted butter over low heat. Once melted, stir in the minced garlic, chopped parsley, and a pinch of salt and pepper. Let it simmer gently for a minute or two to let the flavors meld, then take it off the heat.
Once your dough has doubled, gently punch it down to release the air. Turn the dough out onto a lightly floured surface. Using a rolling pin, roll the dough into a rectangle, roughly 16×12 inches. Don’t worry too much about perfect measurements, just aim for a nice rectangle.
Now for the fun part! Generously brush the melted herb-garlic butter all over the rolled-out dough, leaving about a 1/2-inch border on one of the long sides. Get it all over! It’s the key to the flavor swirl.
Starting from the long side opposite the border you left plain, tightly roll up the dough into a log. Pinch the seam gently to seal it. Now, using a sharp knife or dental floss (it gives cleaner cuts!), slice the log into 12 equal-sized rolls. They should be about 1 to 1.5 inches thick.
Arrange the rolls, cut side up, in a lightly greased 9×13 inch baking dish or a 10-inch round pan. Try to space them relatively evenly.
Cover the pan again with plastic wrap or a damp towel and let the rolls rise for a second time in a warm spot. This usually takes about 30-45 minutes, or until the rolls are puffy and pressing together.
Towards the end of the second rise, preheat your oven to 375°F (190°C).
Once the oven is hot and the rolls are puffy, pop the baking dish in the oven. Bake for 20-25 minutes, or until the tops are golden brown and they sound hollow when gently tapped.
Remove from the oven and if you’re feeling extra decadent (which you should be!), you can brush them with a little more melted butter right away. Let them cool slightly in the pan for a few minutes before digging in. Serve them warm and watch them disappear!
Substitutions & Additions
This recipe is super versatile! Feel free to play around and make it your own:
- Herbs: Swap or add other fresh herbs like chives, dill, rosemary, or thyme. A mix is lovely! Dried herbs can work in a pinch, but use about 1/3 the amount of fresh.
- Cheese, Please!: Sprinkle some grated Parmesan, cheddar, or even a little mozzarella over the butter mixture before rolling.
- Spice It Up: Add a pinch of red pepper flakes to the butter for a little kick.
- Garlic Options: Use roasted garlic instead of minced fresh garlic for a sweeter, mellower flavor. Or, if you’re really in a rush, a teaspoon of garlic powder mixed into the butter could work, but fresh is truly superior here!
- Make it Dairy-Free: Use your favorite plant-based butter substitute in the filling.
Tips for Success
Baking bread is a joy, and these tips will help ensure your rolls turn out perfect every time:
- Check Your Yeast: Always proof your active dry yeast first! It’s a simple step that guarantees your dough will rise.
- Warm is Key: Make sure your water for proofing is warm (around 105-115°F or 40-46°C). Your rising spot should also be warm and draft-free.
- Don’t Add Too Much Flour: Resist the urge to add extra flour when kneading if the dough is a little sticky. A slightly sticky dough often results in softer rolls. Only add more flour a tablespoon at a time if it’s truly unmanageable.
- Knead Until Smooth: Proper kneading develops the gluten, which gives the rolls structure and a lovely texture. It should be smooth and elastic.
- The Poke Test: For the first rise, gently poke the dough with two fingers. If the indentations remain, it’s likely ready. For the second rise, a gentle poke should spring back slowly.
- Prep Ahead: You can make the dough, do the first rise, and then punch it down, cover it tightly, and refrigerate it overnight (up to 24 hours). The next day, let it sit at room temperature for 30-60 minutes, then roll, fill, slice, and proceed with the second rise and baking.
- Clean Cuts: Using dental floss to slice the log instead of a knife can give you really clean, even swirls without squishing the dough. Just slide a piece underneath the log, cross the ends over the top, and pull!
How to Store It
Let’s be honest, these are best enjoyed warm, fresh from the oven. But if you happen to have any leftovers (a rare occurrence in my house!), here’s how to store them:
Once completely cooled, store the rolls in an airtight container at room temperature for 2-3 days. For longer storage, you can refrigerate them for up to 5 days, or freeze them for up to 2-3 months. To freeze, wrap cooled rolls tightly in plastic wrap and then place them in a freezer-safe bag or container. To reheat, you can warm them gently in the microwave or, for best results, wrap them loosely in foil and warm in a 350°F (175°C) oven for 10-15 minutes until heated through.
FAQs
Q: Can I use instant yeast instead of active dry yeast?
A: Yes! Instant yeast is more vigorous and doesn’t need to be proofed first. You can typically just mix it directly into the dry ingredients along with the sugar and then add the warm water and eggs. Follow the recipe instructions from there.
Q: My dough isn’t rising. What went wrong?
A: The most common culprits are inactive yeast (make sure it proofs!), water that was too hot (it kills the yeast) or too cold (it won’t activate it), or the rising spot isn’t warm enough. Check your yeast expiry date and water temperature.
Q: Can I make the filling ahead of time?
A: Absolutely! You can melt the butter, mix in the garlic and herbs, and store it in an airtight container in the fridge for a couple of days. Gently warm it up before brushing it onto the dough.
Q: Why are my rolls tough?
A: This is usually due to adding too much flour or over-kneading the dough, which develops too much gluten. Ensure you measure flour accurately (scoop and level, or even better, use a scale) and stop kneading once the dough is smooth and elastic, not stiff.
Easy Homemade Fluffy Herb & Garlic Swirl Rolls
Equipment
- Small bowl
- Large mixing bowl
- Wooden spoon or spatula or Stand mixer with dough hook
- Rolling Pin
- Small saucepan
- Sharp knife or dental floss For slicing rolls
- 9x13 inch baking dish or 10-inch round pan Lightly greased
- Plastic wrap or damp kitchen towel For covering dough during rising
Ingredients
Hauptzutaten
- 4 cloves Garlic Fresh, minced fine
- 0.25 cup Parsley Fresh, chopped
- 2 large Eggs Room temperature is ideal
- 2.25 tsp Active dry yeast Make sure it's fresh
- 4 cups All-purpose flour
- 1 tsp Salt For the dough
- Salt and pepper For the filling, to taste
- 2 tbsp Sugar
- 0.5 cup Unsalted butter Melted, for the filling
- 0.5 cup Warm water About bathwater temperature, for proofing yeast
Instructions
- Wake up your yeast: In a small bowl, combine about 1/2 cup of warm water (think bathwater temperature, not hot!) with the sugar and the active dry yeast. Give it a gentle stir and let it sit for 5-10 minutes until bubbly and foamy.
- While the yeast is blooming, in a large mixing bowl, whisk together the flour and the salt for the dough. Make a well in the center.
- Combine ingredients: Once your yeast is bubbly, add it to the well in the flour mixture. Crack in your two large eggs. Mix using a wooden spoon, a spatula, or a stand mixer with a dough hook until everything just comes together into a shaggy dough.
- Knead the dough: If using a mixer, switch to the dough hook and knead for about 5-7 minutes on medium-low speed. If kneading by hand, turn the dough out onto a lightly floured surface and knead for about 8-10 minutes until smooth, elastic, and springs back when poked.
- First rise: Lightly grease a clean bowl. Place the dough in the bowl, turning it to coat all sides. Cover the bowl tightly with plastic wrap or a damp kitchen towel. Find a warm, draft-free spot for it to rise for about 1 to 1.5 hours, or until roughly doubled in size.
- Make the filling: While the dough is rising, finely mince your garlic and chop your fresh parsley. In a small saucepan, melt the 1/2 cup of unsalted butter over low heat. Once melted, stir in the minced garlic, chopped parsley, and a pinch of salt and pepper. Let it simmer gently for a minute or two to let the flavors meld, then take it off the heat.
- Punch down the dough: Once your dough has doubled, gently punch it down to release the air.
- Roll out the dough: Turn the dough out onto a lightly floured surface. Using a rolling pin, roll the dough into a rectangle, roughly 16x12 inches.
- Add the filling: Generously brush the melted herb-garlic butter all over the rolled-out dough, leaving about a 1/2-inch border on one of the long sides.
- Roll and slice: Starting from the long side opposite the border you left plain, tightly roll up the dough into a log. Pinch the seam gently to seal it. Using a sharp knife or dental floss, slice the log into 12 equal-sized rolls (about 1 to 1.5 inches thick).
- Arrange the rolls: Arrange the rolls, cut side up, in a lightly greased 9x13 inch baking dish or a 10-inch round pan. Space them relatively evenly.
- Second rise: Cover the pan again with plastic wrap or a damp towel and let the rolls rise for a second time in a warm spot for about 30-45 minutes, or until puffy and pressing together.
- Preheat oven: Towards the end of the second rise, preheat your oven to 375°F (190°C).
- Bake the rolls: Once the oven is hot and the rolls are puffy, pop the baking dish in the oven. Bake for 20-25 minutes, or until the tops are golden brown and they sound hollow when gently tapped.
- Finish and serve: Remove from the oven. Optionally, brush with a little more melted butter right away. Let them cool slightly in the pan for a few minutes before digging in. Serve them warm.
Notes
- Check Your Yeast: Always proof your active dry yeast first.
- Warm is Key: Use warm water for proofing (around 105-115°F / 40-46°C) and find a warm, draft-free rising spot.
- Don't Add Too Much Flour: Resist adding extra flour if the dough is slightly sticky; it results in softer rolls.
- Knead Until Smooth: Proper kneading develops gluten for structure and texture.
- The Poke Test: Use it to check if the dough is ready after rising.
- Prep Ahead: You can refrigerate the dough after the first rise (up to 24 hours). Let it warm up before proceeding.
- Clean Cuts: Use dental floss for cleaner cuts when slicing the log. Storage:
- Store completely cooled rolls in an airtight container at room temperature for 2-3 days.
- Refrigerate for up to 5 days.
- Freeze for up to 2-3 months by wrapping tightly in plastic wrap and placing in a freezer bag.
- To reheat, warm gently in microwave or wrap loosely in foil and warm in a 350°F (175°C) oven for 10-15 minutes. FAQs:
- Instant yeast can be used; mix directly into dry ingredients.
- Dough not rising is usually due to inactive yeast, wrong water temperature, or cold rising spot.
- Filling can be made ahead and stored in the fridge; gently warm before use.
- Tough rolls are usually due to too much flour or over-kneading.