Introduction
Hey there, friend! Close your eyes for a second and imagine this: the smell of warm apples and cinnamon wafting from your oven, a cozy kitchen, and that first spoonful of sweet, tender apples topped with a buttery, crunchy crisp. Doesn’t that just bring back memories of crisp autumn days, holidays, or maybe just a simple, perfect dessert? This easy apple crisp recipe is exactly that – pure comfort in a dish. It’s the kind of recipe that feels like a warm hug and is so simple, you’ll want to make it again and again. Trust me, if you’re looking for a dessert that’s quick to put together but tastes like you spent hours, this is it!
Why You’ll Love This Recipe
- Fast: Seriously, you can whip this up in no time!
- Easy: No fancy techniques, just simple mixing and baking.
- Giftable: Bake it in a pretty dish and share the love!
- Crowd-pleasing: Everyone, and I mean everyone, adores warm apple crisp.
Ingredients
Here’s what you’ll need to make this magic happen. Most of these are probably already hanging out in your pantry!
For the Apple Filling:
- 10 cups Granny Smith apples, peeled, cored, and sliced into ⅛ inch thick slices, then cut in half: Granny Smiths are my go-to here because their tartness balances the sweetness beautifully, but feel free to mix in some sweeter apples too! Slicing them thin helps them get perfectly tender.
- ½ cup light brown sugar, tightly packed: Gives that lovely caramel-y sweetness.
- ⅓ cup all-purpose flour: Helps thicken the apple juices just right.
- ¼ cup granulated sugar: Just a little extra sweetness boost.
- 2 teaspoons ground cinnamon: Can you even make apple anything without cinnamon?
- ½ teaspoon ground nutmeg: Cinnamon’s best friend, adds that classic cozy flavor.
- 1 teaspoon vanilla extract: Enhances all those warm, sweet flavors.
For the Crisp Topping:
- 1 ⅓ cups quick cooking oats: These are key to that perfectly textured topping.
- 1 ⅓ cups all-purpose flour: The base for our crumble.
- 1 cup light brown sugar, tightly packed: More brown sugar for that rich, sweet crumble!
- 1 ½ teaspoons ground cinnamon: Because more cinnamon is always a good idea!
- ½ teaspoon salt: Just a pinch to balance the sweetness.
- ½ teaspoon baking powder: Helps the topping get nice and crisp.
- ¾ cup unsalted butter, melted: The binding agent that makes it all golden and delicious.
How to Make It
Alright, let’s get baking! It’s super straightforward, promise.
First things first, go ahead and preheat your oven to 375°F (190°C). Grab a 9×13 inch baking dish – you can give it a light spray with cooking spray if you like, just to be safe.
Now, let’s tackle those apples. In a large bowl, toss together your sliced apples, light brown sugar, all-purpose flour, granulated sugar, cinnamon, nutmeg, and vanilla extract. Give it a good stir until all those apple slices are nicely coated. Pour this delicious apple mixture into your prepared baking dish and spread it out evenly.
Next up, the glorious crisp topping! In a separate medium bowl, combine the quick cooking oats, all-purpose flour, light brown sugar, cinnamon, salt, and baking powder. Whisk them together until they’re all mixed up.
Pour the melted butter over the dry ingredients for the topping. Now, using a fork or your fingers (I like using my fingers for that perfect crumbly texture!), mix everything together until you have lovely, moist crumbs. Sprinkle this topping evenly over the apple layer in your baking dish. Make sure you get good coverage!
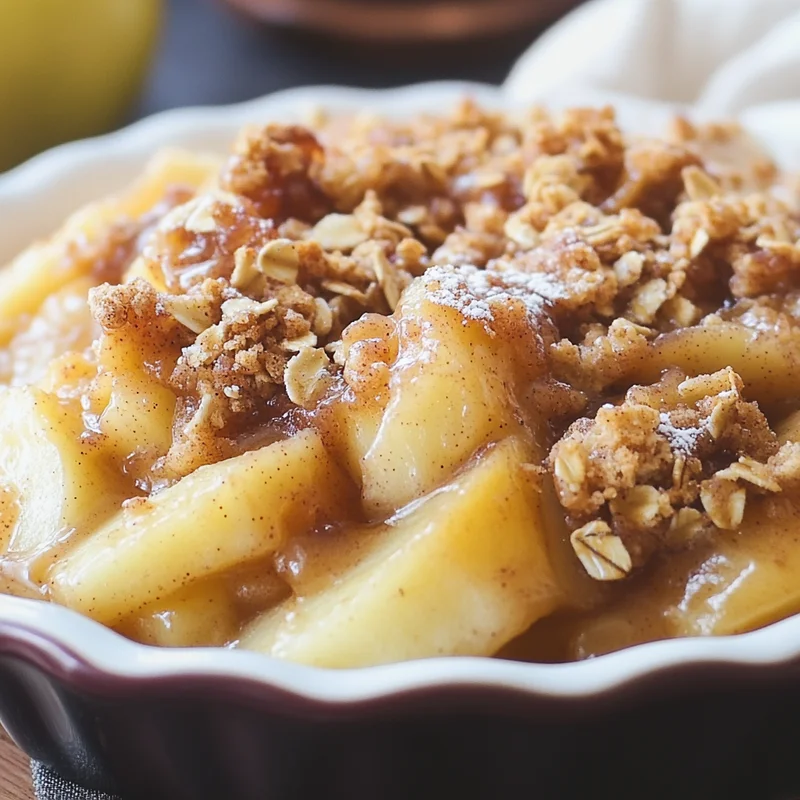
Pop the dish into your preheated oven. You’ll bake it for about 40 to 50 minutes, or until the topping is golden brown and you see that sweet apple filling bubbling up around the edges. That bubbling is your sign it’s ready!
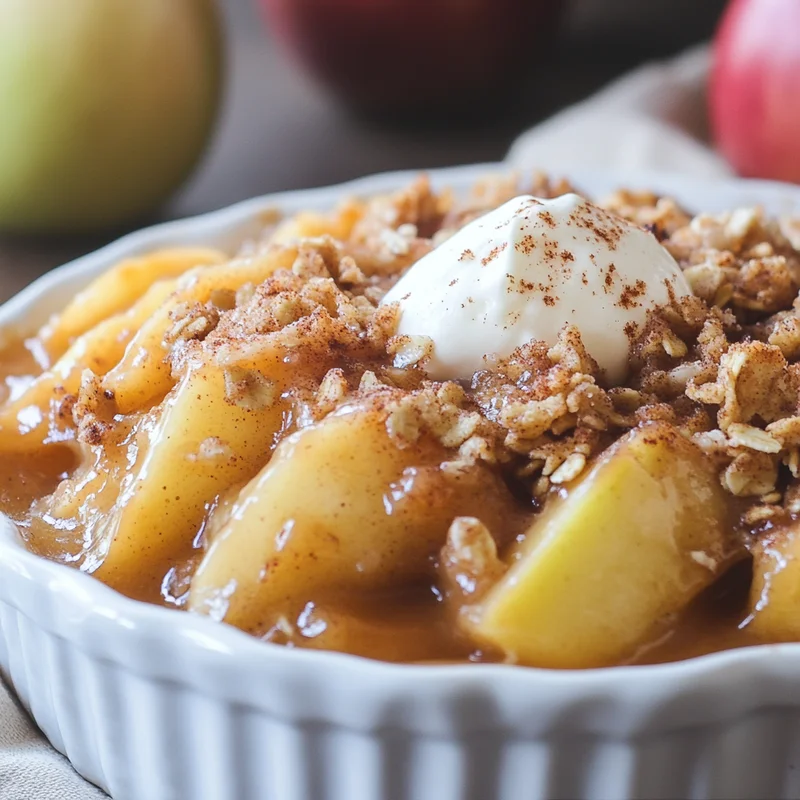
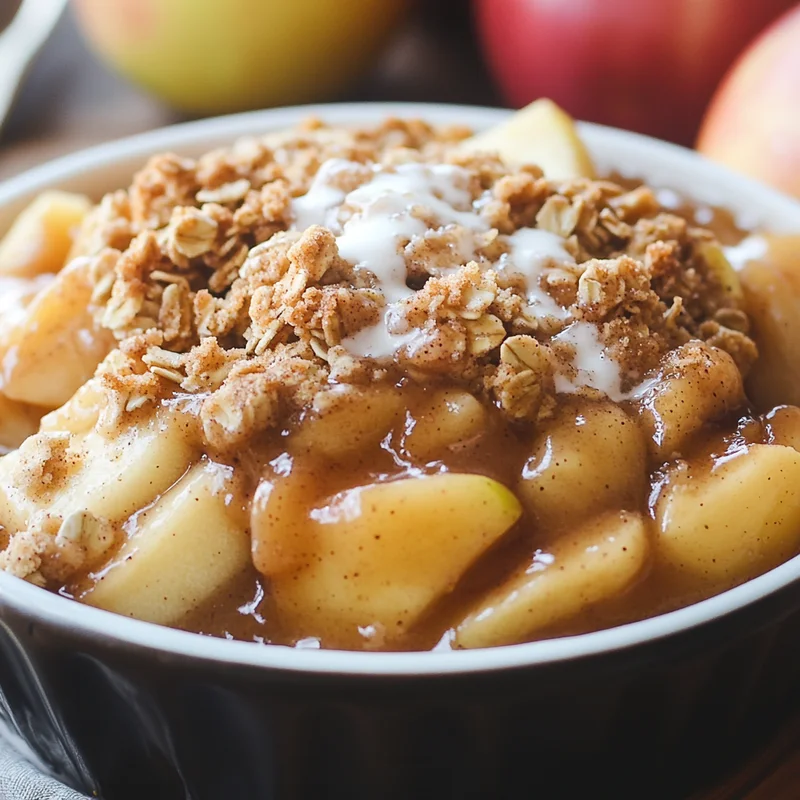
Let it cool for a few minutes before serving (that bubbling sugar is hot!). Serve it warm, perhaps with a scoop of vanilla ice cream or a dollop of whipped cream. Pure heaven!
Substitutions & Additions
Want to play around a bit? Here are some ideas!
- Apples: Feel free to use a mix of apples! Honeycrisp, Fuji, or Gala add sweetness and different textures alongside the tart Granny Smiths.
- Other Fruits: You could totally swap out some apples for pears, berries, or even peaches (fresh or frozen and thawed) when they’re in season.
- Nuts: Add ½ cup chopped pecans or walnuts to the crisp topping for extra crunch.
- Spices: A pinch of ground ginger or cardamom in the apple filling can add a fun twist.
- Caramel: Drizzle some caramel sauce over the apples before adding the topping for an extra decadent treat.
Tips for Success
- Apple Slices: Try to keep your apple slices relatively uniform in thickness so they cook evenly. ⅛ inch is pretty thin, which means they get lovely and tender without being mushy.
- Don’t Overmix Topping: When adding the butter to the dry ingredients for the topping, mix just until moist crumbs form. You want some texture, not a paste.
- Cooling Time: Giving the crisp a few minutes to cool helps the apple filling set up a bit. It also prevents you from burning your tongue in your eagerness!
- Prep Ahead: You can peel and slice the apples a few hours ahead and keep them in a bowl of cold water with a squeeze of lemon juice (to prevent browning), then drain very well before mixing with the sugar/flour. You can also mix the dry topping ingredients ahead of time.
How to Store It
If by some miracle you have leftovers, here’s how to keep them tasting great.
Let the crisp cool completely. You can cover the baking dish tightly with plastic wrap or aluminum foil and keep it at room temperature for a day or two. For longer storage, pop it in the refrigerator for up to 3-4 days. If you really want to plan ahead, you can bake the crisp, cool it completely, wrap it tightly, and freeze it for up to 3 months. Thaw overnight in the fridge before reheating.
To reheat, you can warm individual servings in the microwave, or put the covered dish back in a 350°F (175°C) oven until heated through (this helps the topping crisp back up a bit).
FAQs
Got questions? I’ve got answers!
What kind of apples are best?
While this recipe calls for Granny Smiths, a mix of tart and sweet apples (like Honeycrisp, Fuji, Gala, or Pink Lady) often gives the most complex and delicious flavor.
Can I use old-fashioned rolled oats instead of quick oats?
Yes, you can! Old-fashioned oats will give you a chewier topping texture compared to the quick oats, which absorb moisture faster and break down a bit more. It’s really up to your texture preference.
Can I make this gluten-free?
Absolutely! Use a good quality gluten-free all-purpose flour blend that contains xanthan gum, and be sure your oats are certified gluten-free.
Why is my topping soggy?
This can happen if the apples release too much liquid or if the crisp wasn’t baked long enough. Make sure your apples are well-drained if you prepped them with water, and bake until the filling is actively bubbling and the topping is deep golden brown.

The Easiest & Most Delicious Homemade Apple Crisp Recipe
Equipment
- Oven
- Baking dish 9x13 inch
- Large bowl
- Medium bowl
- Whisk
- Fork Optional, for mixing topping
- fingers Optional, for mixing topping
Ingredients
For the Apple Filling
- 10 cups Granny Smith apples peeled, cored, and sliced into ⅛ inch thick slices, then cut in half
- 0.5 cup light brown sugar tightly packed
- 0.33 cup all-purpose flour
- 0.25 cup granulated sugar
- 2 teaspoons ground cinnamon
- 0.5 teaspoon ground nutmeg
- 1 teaspoon vanilla extract
For the Crisp Topping
- 1.33 cups quick cooking oats
- 1.33 cups all-purpose flour
- 1 cup light brown sugar tightly packed
- 1.5 teaspoons ground cinnamon
- 0.5 teaspoon salt
- 0.5 teaspoon baking powder
- 0.75 cup unsalted butter melted
Instructions
- First things first, go ahead and preheat your oven to 375°F (190°C). Grab a 9x13 inch baking dish – you can give it a light spray with cooking spray if you like, just to be safe.
- Now, let's tackle those apples. In a large bowl, toss together your sliced apples, light brown sugar, all-purpose flour, granulated sugar, cinnamon, nutmeg, and vanilla extract. Give it a good stir until all those apple slices are nicely coated.
- Pour this delicious apple mixture into your prepared baking dish and spread it out evenly.
- Next up, the glorious crisp topping! In a separate medium bowl, combine the quick cooking oats, all-purpose flour, light brown sugar, cinnamon, salt, and baking powder. Whisk them together until they're all mixed up.
- Pour the melted butter over the dry ingredients for the topping. Now, using a fork or your fingers, mix everything together until you have lovely, moist crumbs.
- Sprinkle this topping evenly over the apple layer in your baking dish. Make sure you get good coverage!
- Pop the dish into your preheated oven. You'll bake it for about 40 to 50 minutes, or until the topping is golden brown and you see that sweet apple filling bubbling up around the edges. That bubbling is your sign it's ready!
- Let it cool for a few minutes before serving (that bubbling sugar is hot!). Serve it warm, perhaps with a scoop of vanilla ice cream or a dollop of whipped cream. Pure heaven!
Notes
Tips for Success: Keep apple slices uniform (⅛ inch thick) for even cooking. When adding butter to the topping, mix just until moist crumbs form – don't overmix. Allow cooling time for the filling to set. You can prep apples a few hours ahead (store in cold water with lemon juice, drain well before use) and mix dry topping ingredients ahead of time.
Storage: Cool completely. Store covered at room temp (1-2 days), in the fridge (3-4 days), or freeze (up to 3 months, thaw in fridge). Reheat in microwave or 350°F (175°C) oven.