
Introduction
Oh friends, there’s just something magical about opening a jar of homemade goodness, isn’t there? It takes me right back to my grandma’s pantry, filled with colorful jars holding summer’s bounty. And these Dill Pickled Green Beans? They are pure crunchy, dilly, garlicky perfection in a jar! Forget those bland store-bought versions; making your own “dilly beans” is surprisingly easy and incredibly rewarding. Whether you have a garden bursting with green beans or just found a fantastic deal at the farmers market, this recipe is your ticket to preserving that fresh flavor for months to come. Plus, that satisfying snap when you bite into one is just… chef’s kiss.
Why You’ll Love This Recipe
- Fast: Prep to pantry-ready in just over an hour (plus cooling time!).
- Easy: Simple ingredients and straightforward canning steps.
- Giftable: These make the most thoughtful, delicious homemade gifts!
- Crowd-pleasing: Great on snack boards, in Bloody Marys, or straight from the jar!
Ingredients
Gather your simple ingredients! You likely have most of these pantry staples already.
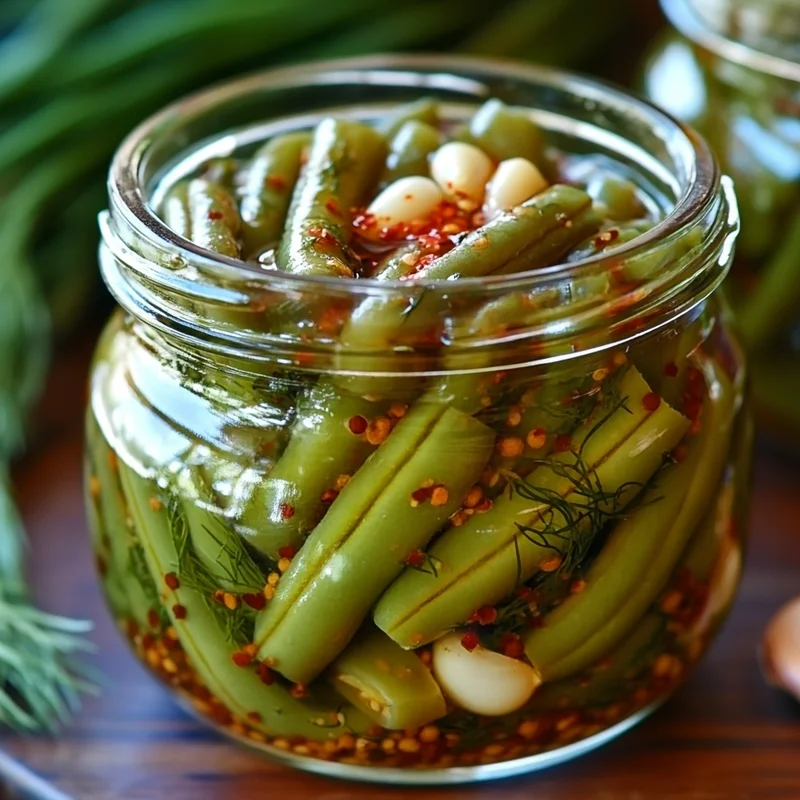
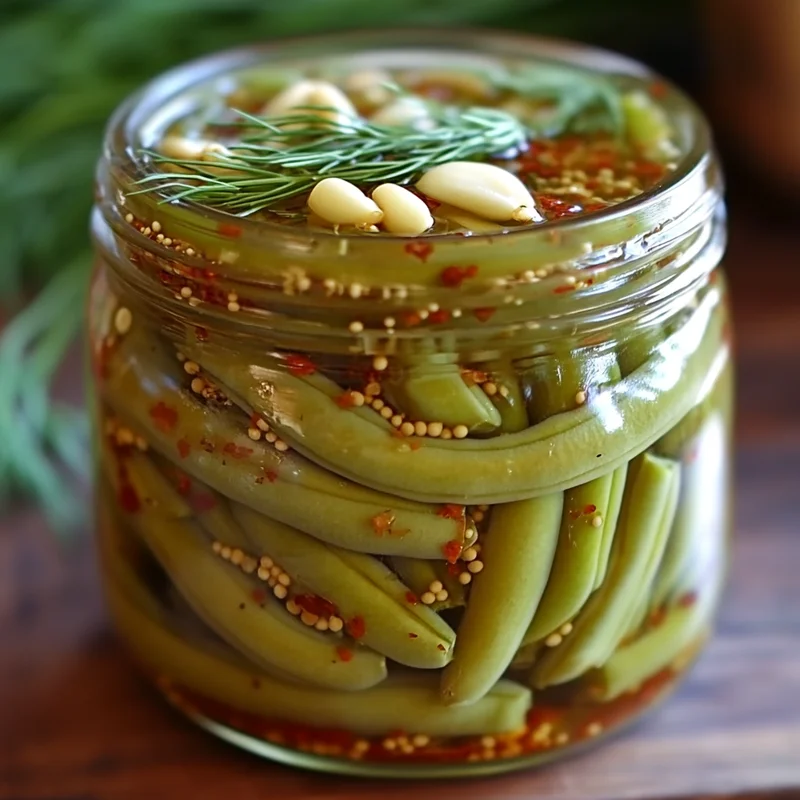
- 2 pounds fresh green beans, trimmed: Look for firm, vibrant beans. Give their ends a quick trim.
- 4 cups water: Good old H2O is the base of our brine.
- 3 cups white vinegar: The key to that lovely pickle tang. Make sure it’s at least 5% acidity for canning safety.
- 2 tablespoons salt: Use pickling or canning salt. Avoid iodized salt, which can make your brine cloudy.
- 4 cloves garlic, peeled and sliced: For that essential garlicky punch. Feel free to add a little more if you’re a garlic lover like me!
- 4 teaspoons dill seeds: Classic dill flavor comes from these little powerhouses.
- 2 teaspoons red pepper flakes: Gives a nice, subtle warmth. Add more if you like things spicy!
- 4 fresh dill sprigs: Tucks into the jars for extra fresh dill flavor and a beautiful look.
How to Make It
Alright, let’s get pickling! Follow these steps, and you’ll have jars of dilly bean goodness cooling on your counter in no time.
- First things first, give your gorgeous green beans a good wash and snap or trim off those stem ends.
- Now, let’s get those jars ready. You’ll need standard canning jars and lids. Make sure they are sparkling clean and sterilized according to standard canning procedures. This is super important for food safety! I usually run mine through the dishwasher on a sanitize cycle or immerse them in simmering water.
- In a nice big saucepan, combine the water, vinegar, and salt. Pop it on the stove over medium-high heat and bring that brine to a boil, stirring as it heats up to make sure all the salt dissolves. Once it’s boiling, reduce the heat but keep the brine hot.
- Here comes the fun part: packing! Carefully pack the trimmed green beans vertically into your prepared hot jars. Try to get them snug but not overly crammed. Leave about 1/2 inch of empty space (called headspace) at the top of the jar.
- Now, distribute the flavor makers! Add the sliced garlic, dill seeds, red pepper flakes, and a fresh dill sprig into each packed jar, tucking them in among the beans.
- Carefully pour the hot brine you made over the green beans in each jar. Use a funnel if you have one to make it easier and avoid spills. Again, make sure you maintain that 1/2 inch headspace at the top.
- See any little air bubbles clinging to the beans? Use a non-metallic utensil (a plastic chopstick or a special de-bubbler tool works great) to gently run around the inside edge of the jar and release them. This helps ensure a good seal.
- Wipe the rims of the jars clean with a damp cloth. Any little bit of food or brine on the rim can prevent a proper seal.
- Center the lids on the clean jar rims, then screw on the bands just until they are “fingertip tight.” This means snug, but not wrenched on as hard as you can.
- Process the filled jars in a boiling water canner. Carefully lower the jars into the canner filled with hot water, ensuring they are fully submerged by at least an inch of water. Bring the water to a rolling boil and process the pint jars for 10 minutes. Remember to adjust this time if you live at a higher altitude! Check a reliable canning guide for specific adjustments.
- Once the processing time is up, turn off the heat and carefully remove the jars from the canner using a jar lifter. Place them upright on a towel-lined surface (like your counter) in a draft-free spot to cool completely. You’ll likely hear the satisfying ping! sound as the lids seal over the next few hours.
- After the jars have cooled completely (usually 12-24 hours), check the seals. The center of the lid should be concave (sucked down) and shouldn’t flex up when you press on it. If a jar didn’t seal, pop it in the fridge and eat those beans first! Store properly sealed jars in a cool, dark place like a pantry. For the very best flavor, wait at least 24 hours (though a week or two is even better!) before you dig in.
Substitutions & Additions
This recipe is a fantastic base, but feel free to get creative!
- Vinegar: While white vinegar is standard for clarity and safety, you could experiment with apple cider vinegar for a slightly different flavor profile, ensuring it’s also 5% acidity.
- Spice Level: Love heat? Add more red pepper flakes or even a small dried whole chili pepper to each jar! Not a fan of spice? Omit the red pepper flakes entirely.
- Herbs: Don’t have fresh dill? You can use dried dill weed, but the fresh sprig adds wonderful aroma and looks beautiful. You could also try adding a sprig of fresh thyme or a few coriander seeds for variation.
- Garlic: Adjust the amount of garlic to your personal preference. Roasted garlic cloves could add a sweeter, mellow flavor before canning.
Tips for Success
A few little tricks can make sure your dilly beans turn out perfectly every time!
- Start with Fresh Beans: Use the freshest green beans you can find. Limp beans won’t give you that satisfying crunch.
- Mind the Headspace: Leaving the correct 1/2 inch headspace is crucial for proper sealing and processing. Too little, and brine might boil over; too much, and you might not get a good seal.
- Wipe Those Rims! This simple step is often overlooked but vital for ensuring a secure seal.
- Fingertip Tight is Right: Don’t overtighten the bands before processing. The lid needs to be able to vent air during canning.
- Altitude Adjustment: If you live at a high altitude, you absolutely MUST adjust the processing time. Check a reliable canning guide (like from the USDA or your local extension office) for the correct time. Safety first!
- Be Patient for Flavor: While safe to eat after cooling, the flavors really meld and develop after a few days, or even a couple of weeks, in the pantry. Try one right away, but hide a jar for later – you’ll taste the difference!
How to Store It
Properly sealed jars of dill pickled green beans can be stored in a cool, dark place (like a pantry or basement) for up to 1 year. Once you open a jar, store it in the refrigerator. They will last for several weeks in the fridge, though I bet they disappear much faster than that!
FAQs
Got questions? I’ve got answers!
Q: Do I have to can these? Can’t I just put them in the fridge?
A: This specific recipe is designed for safe boiling water bath canning for shelf stability. If you want refrigerator-only pickles, you’ll need a different recipe specifically formulated for that, often with a higher vinegar-to-water ratio and no processing step. For pantry storage, canning is necessary.
Q: My brine looks a little cloudy. Is that okay?
A: A little cloudiness can be normal! It might be due to starch from the beans, minerals in your water, or harmless bacteria. As long as the jar sealed properly and the beans don’t show signs of spoilage (like mold, weird smells, or bubbling), they should be fine.
Q: How long should I wait before eating them?
A: While technically safe to eat once cooled and sealed, the flavor improves dramatically if you wait at least 24 hours, and ideally a week or two, for the pickling brine to really work its magic on the beans.

Easy Homemade Dill Pickled Green Beans (Dilly Beans!)
Equipment
- Canning jars and lids
- Large saucepan
- non-metallic utensil plastic chopstick or de-bubbler tool
- Funnel optional
- boiling water canner
- Jar lifter
- damp cloth
- Towel-lined surface
Ingredients
Dilly Beans
- 2 pounds fresh green beans trimmed
- 4 cups water
- 3 cups white vinegar at least 5% acidity
- 2 tablespoons salt pickling or canning salt
- 4 cloves garlic peeled and sliced
- 4 teaspoons dill seeds
- 2 teaspoons red pepper flakes
- 4 fresh dill sprigs
Instructions
- First things first, give your gorgeous green beans a good wash and snap or trim off those stem ends.
- Now, let's get those jars ready. You'll need standard canning jars and lids. Make sure they are sparkling clean and sterilized according to standard canning procedures. This is super important for food safety! I usually run mine through the dishwasher on a sanitize cycle or immerse them in simmering water.
- In a nice big saucepan, combine the water, vinegar, and salt. Pop it on the stove over medium-high heat and bring that brine to a boil, stirring as it heats up to make sure all the salt dissolves. Once it's boiling, reduce the heat but keep the brine hot.
- Here comes the fun part: packing! Carefully pack the trimmed green beans vertically into your prepared hot jars. Try to get them snug but not overly crammed. Leave about 1/2 inch of empty space (called headspace) at the top of the jar.
- Now, distribute the flavor makers! Add the sliced garlic, dill seeds, red pepper flakes, and a fresh dill sprig into each packed jar, tucking them in among the beans.
- Carefully pour the hot brine you made over the green beans in each jar. Use a funnel if you have one to make it easier and avoid spills. Again, make sure you maintain that 1/2 inch headspace at the top.
- See any little air bubbles clinging to the beans? Use a non-metallic utensil (a plastic chopstick or a special de-bubbler tool works great) to gently run around the inside edge of the jar and release them. This helps ensure a good seal.
- Wipe the rims of the jars clean with a damp cloth. Any little bit of food or brine on the rim can prevent a proper seal.
- Center the lids on the clean jar rims, then screw on the bands just until they are "fingertip tight." This means snug, but not wrenched on as hard as you can.
- Process the filled jars in a boiling water canner. Carefully lower the jars into the canner filled with hot water, ensuring they are fully submerged by at least an inch of water. Bring the water to a rolling boil and process the pint jars for 10 minutes. Remember to adjust this time if you live at a higher altitude! Check a reliable canning guide for specific adjustments.
- Once the processing time is up, turn off the heat and carefully remove the jars from the canner using a jar lifter. Place them upright on a towel-lined surface (like your counter) in a draft-free spot to cool completely. You'll likely hear the satisfying ping! sound as the lids seal over the next few hours.
- After the jars have cooled completely (usually 12-24 hours), check the seals. The center of the lid should be concave (sucked down) and shouldn't flex up when you press on it. If a jar didn't seal, pop it in the fridge and eat those beans first! Store properly sealed jars in a cool, dark place like a pantry. For the very best flavor, wait at least 24 hours (though a week or two is even better!) before you dig in.