Introduction
Oh my goodness, remember Jell-O Pudding Pops? Those creamy, dreamy frozen treats that were the absolute highlight of a hot summer day or a cozy afternoon snack? They were pure magic! Well, guess what? You can totally recreate that childhood joy right in your own kitchen, and it’s way easier than you might think. This recipe is simple, quick, and brings back all the best memories. Get ready to whip up a batch of pure frozen nostalgia!
Why You’ll Love This Recipe
You’re going to fall head over heels for how simple and satisfying making your own pudding pops is. Here’s why they’re a winner:
- Fast
- Easy
- Crowd-pleasing
- Totally nostalgic!

Ingredients
You only need a few simple things to make this classic treat come to life. Chances are, you might even have them lurking in your pantry already!
- 1 (3.3 oz) box White Chocolate Instant Jell-O Pudding Mix (or Vanilla): This is our base for that lovely creamy vanilla layer. Vanilla works just as well if you can’t find white chocolate.
- 1 (3.3 oz) box Chocolate Instant Jell-O Pudding Mix: For the classic chocolatey goodness!
- 3.5 cups whole milk, divided: Whole milk is key here! It gives you that wonderfully rich and creamy texture that makes these pops truly special.
How to Make It
Alright, let’s get whisking! Making these pudding pops is seriously simple, perfect for a fun afternoon activity with the kids or just for treating yourself.
First things first, grab a medium bowl and pour in the White Chocolate (or Vanilla, whichever you chose!) pudding mix. Now, measure out 1.75 cups of that lovely cold whole milk and add it to the bowl with the pudding mix.
Grab your whisk and go to town! Whisk the mixture vigorously for about 2 minutes. You’ll see it start to thicken up nicely as you whisk. Make sure it’s smooth with no dry bits lurking around the bottom or sides of the bowl.
Now, let’s do the same for the chocolate! Get another medium bowl and add the Chocolate instant pudding mix. Pour in the remaining 1.75 cups of whole milk.
Whisk this chocolate mixture for another 2 minutes, just like you did with the white chocolate/vanilla. It should also get smooth and thick. You’ll have two beautiful bowls of creamy pudding ready to go!
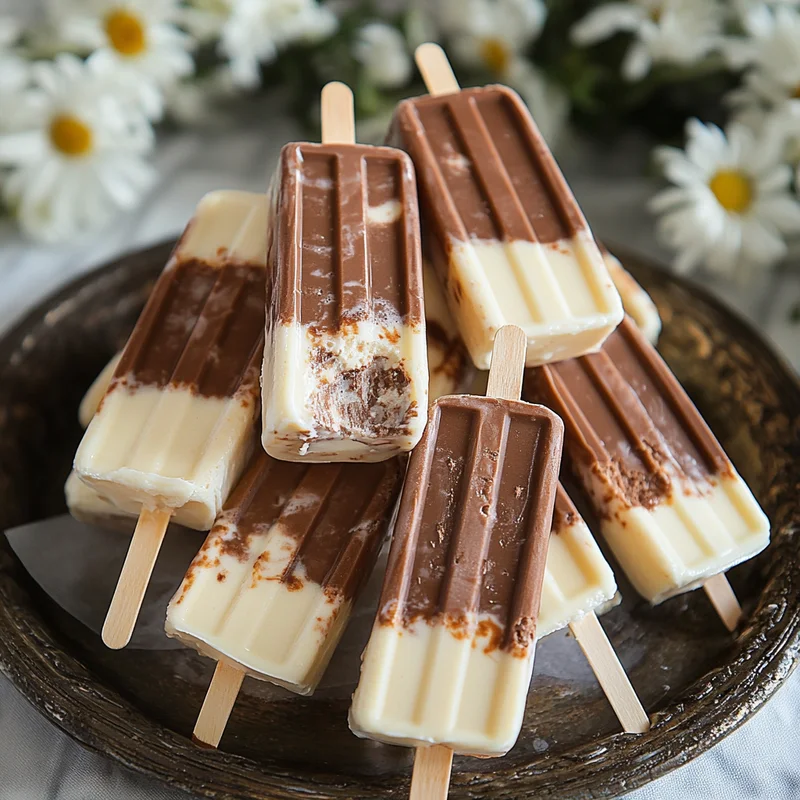
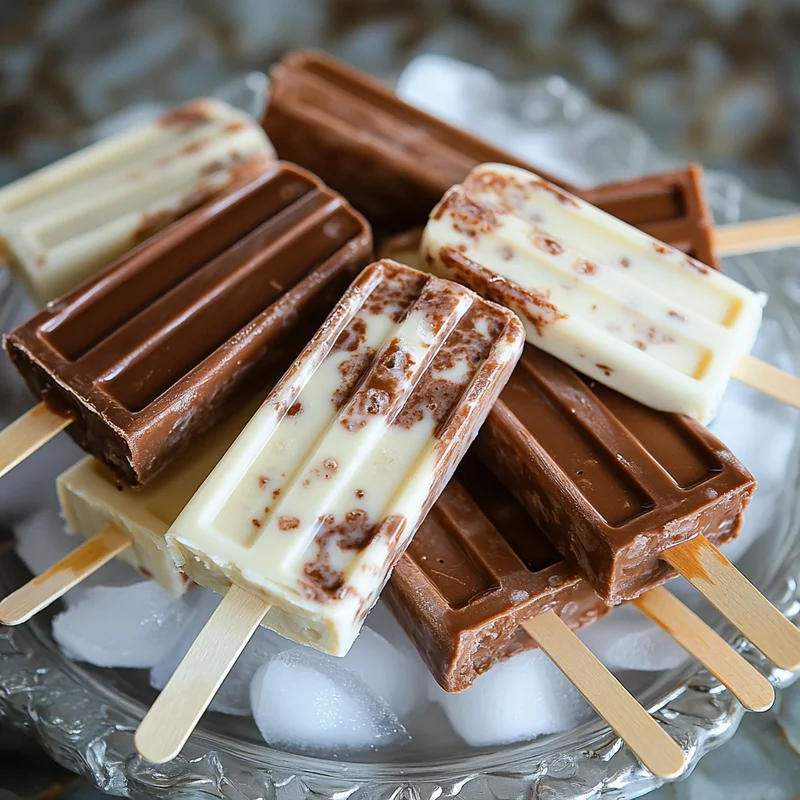
Okay, time to fill those popsicle molds! This is where you get creative. You can spoon in dollops of each flavor, creating a lovely swirl effect (my favorite way!), or layer them one on top of the other for distinct stripes. Don’t fill the molds quite to the very top, as they’ll expand a tiny bit when freezing.
Gently insert your popsicle sticks into each mold. Make sure they’re standing up straight and centered!
Pop the filled molds into the freezer. Now comes the hardest part: waiting! Let them freeze until they are completely solid. This usually takes about 4-6 hours, but it can depend on how cold your freezer is. I often make them in the evening so they’re ready by morning!
Once they’re frozen solid, it’s time to free your delicious pops! To get them out easily, quickly dip the entire mold (or individual pops if your mold allows) into a bowl of warm water for just 10-15 seconds. Don’t let them sit too long or you’ll have melted edges! Give a gentle tug on the stick, and they should slide right out. Enjoy immediately!
Substitutions & Additions
Want to switch things up or add some extra flair to your pudding pops? Here are a few ideas to get your creative juices flowing:
- Pudding Flavors: Feel free to swap the white chocolate/vanilla or chocolate for other instant pudding flavors! Think butterscotch, strawberry, cheesecake, or even lemon. The possibilities are endless, though the chocolate/vanilla swirl is a classic for a reason!
- Milk: While whole milk gives the best creamy texture because of its fat content, you can use 2% milk, but the pops might be a little icier and less creamy. I honestly don’t recommend skim milk or non-dairy milk for these if you’re looking for that classic, creamy pudding pop texture.
- Mix-Ins: Want some fun texture? Stir in mini chocolate chips, sprinkles, or even crushed cookies after whisking the pudding but before pouring into the molds. Just make sure they’re small so they fit in the molds!
- Swirl Technique: For a more defined, beautiful swirl, you can fill a piping bag or a Ziploc bag with a corner snipped off for each flavor and pipe them into the molds, alternating as you go.
Tips for Success
Making pudding pops is pretty straightforward, but a few little pointers can help you get perfect results every single time:
- Use INSTANT Pudding: This is crucial! Make absolutely sure you’re using instant pudding mix, not cook-and-serve. Instant pudding sets up quickly with cold milk, which is exactly what we need for freezing. Cook-and-serve requires heat and won’t work the same way here.
- Whisk Thoroughly: Don’t skimp on the whisking time. Make sure you whisk each flavor for the full 2 minutes until the pudding is noticeably thickened and smooth. This prevents lumps and ensures the right set for freezing.
- Don’t Over-Dip: When it’s time to release those frozen beauties, only dip the mold in warm water for a very short time – just those 10-15 seconds. Too long and you’ll start melting the outside of your pop!
- Be Patient with Freezing: I know the waiting is tough, but don’t try to pull them out too soon. They need to be rock solid all the way through to come out cleanly and have that perfect, firm texture.
How to Store It
Once your beautiful pudding pops are freed from their molds, you’ll want to keep them nice and frozen and prevent pesky ice crystals from forming.
The best way I’ve found is to wrap each individual pop tightly in plastic wrap after removing it from the mold. This creates a protective barrier. Then, place the wrapped pops in an airtight freezer bag or a rigid freezer container. Stored this way, they should stay delicious in the freezer for up to 2-3 months, retaining their creamy texture and flavor. Though honestly, mine never last that long – they get eaten too fast!
FAQs
Got questions about whipping up these nostalgic treats? Here are a few common ones:
- Can I use sugar-free pudding? Yes, absolutely! You can easily substitute sugar-free instant pudding mixes for the regular ones listed in the recipe, using the same milk ratios.
- Can I use less milk for a thicker pop? The recipe uses the amount of milk recommended on the pudding box specifically for pie filling, which results in a thicker pudding than the amount for regular pudding. This thicker consistency is perfect for freezing into a creamy pop. Using less might make it too thick to pour easily, but using the recommended 1.75 cups per box gives a nice, scoopable-then-freezable consistency. Stick to that ratio for best results!
- How long do these last in the freezer? If stored properly by wrapping individually and keeping in an airtight container, they’re best enjoyed within 2-3 months for optimal texture and flavor. They’ll likely be safe to eat for longer, but the quality might start to decrease.
- What if my pudding didn’t thicken after whisking? This usually happens if you accidentally used cook-and-serve instead of instant pudding mix, or if you didn’t whisk vigorously for the full 2 minutes, or if your milk wasn’t cold enough. Make sure you have instant pudding and whisk well with cold milk for the full time specified.
Easy Homemade Jell-O Pudding Pops: A Classic Nostalgic Treat

Recreate the creamy, dreamy frozen Jell-O Pudding Pops from your childhood with this simple, quick, and nostalgic recipe. Only a few ingredients needed for this classic treat.
- : Lara
Ingredients
Hauptzutaten
- 1 box White Chocolate Instant Jell-O Pudding Mix (or Vanilla, 3.3 oz)
- 1 box Chocolate Instant Jell-O Pudding Mix (3.3 oz)
- 3.5 cups whole milk (divided, cold)
Instructions
- Grab a medium bowl and pour in the White Chocolate (or Vanilla) pudding mix. Add 1.75 cups of cold whole milk.
- Whisk the white chocolate/vanilla mixture vigorously for about 2 minutes until thickened and smooth.
- In another medium bowl, add the Chocolate instant pudding mix and the remaining 1.75 cups of whole milk.
- Whisk the chocolate mixture for another 2 minutes until smooth and thick.
- Fill the popsicle molds with dollops or layers of each flavor, leaving a little room at the top.
- Gently insert popsicle sticks into each mold, ensuring they are straight and centered.
- Freeze the filled molds until completely solid, usually 4-6 hours.
- To release, quickly dip the mold in warm water for 10-15 seconds.
- Give a gentle tug on the stick to slide the pops out.
- Enjoy immediately!
Notes
Use INSTANT pudding mix, not cook-and-serve. Whisk thoroughly for the full 2 minutes per flavor. Do not over-dip molds in warm water when releasing. Be patient with freezing time; they must be solid. For storage, wrap each pop individually in plastic wrap and place in an airtight freezer bag or container for up to 2-3 months.