Introduction

Hey there, lovely bakers! There’s something truly magical about a slice of perfect cheesecake, isn’t there? It conjures up memories of special occasions, Sunday dinners, or just cozy nights in. But sometimes, the idea of making one from scratch feels a little… intimidating. Well, let me tell you, it doesn’t have to be! This Homemade Strawberry Cheesecake recipe is here to change that. It’s surprisingly straightforward, packed with creamy, tangy goodness, and bursts with fresh strawberry flavor. Forget those store-bought versions; this is the one you’ll make again and again. Get ready to impress everyone (including yourself!) with this absolute showstopper that’s way easier than you think.
Why You’ll Love This Recipe
- Fast(ish)! Okay, “fast” for cheesecake means relatively quick prep time compared to the long chilling, but it comes together beautifully!
- Easy Peasy: No fancy techniques here, just simple steps for a perfect result.
- Giftable Goodness: Wrap up a slice or a whole cake for a thoughtful homemade gift.
- Crowd-Pleasing Champion: Seriously, who doesn’t love strawberry cheesecake? It’s a guaranteed hit at any gathering.
Ingredients
Gather ’round, friends! Here’s what you’ll need to whip up this creamy dream:
- 2 cups graham cracker crumbs: You can buy them pre-crushed or make your own by whizzing graham crackers in a food processor or crushing them in a bag with a rolling pin.
- 1/2 cup unsalted butter, melted: Gives our crust that necessary bind and buttery flavor.
- 24 oz cream cheese, softened: This is the heart of our cheesecake! Make SURE it’s truly soft (leave it out for a couple of hours or gently microwave for a few seconds). Cold cream cheese leads to lumps!
- 1 cup granulated sugar: Just the right amount of sweetness.
- 1 tsp vanilla extract: Essential for that classic cheesecake flavor.
- 4 large eggs: Help give structure and richness. Make sure they are at room temperature too!
- 1 cup sour cream: Adds that signature tang and incredibly smooth texture.
- 1/4 cup all-purpose flour: A little bit of flour helps prevent cracks – our secret weapon!
- 1/2 cup strawberry puree: This is where the beautiful strawberry flavor comes in! Blend fresh or thawed frozen strawberries until smooth.
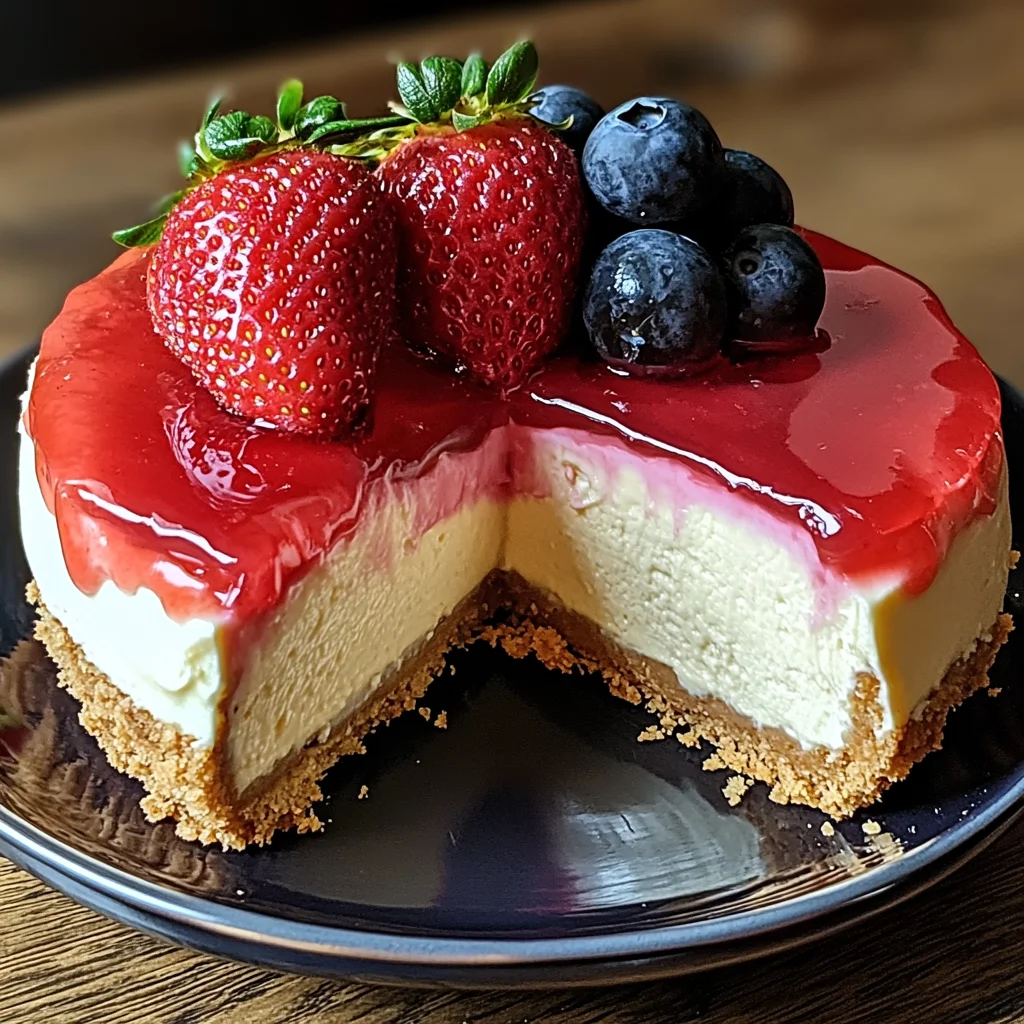
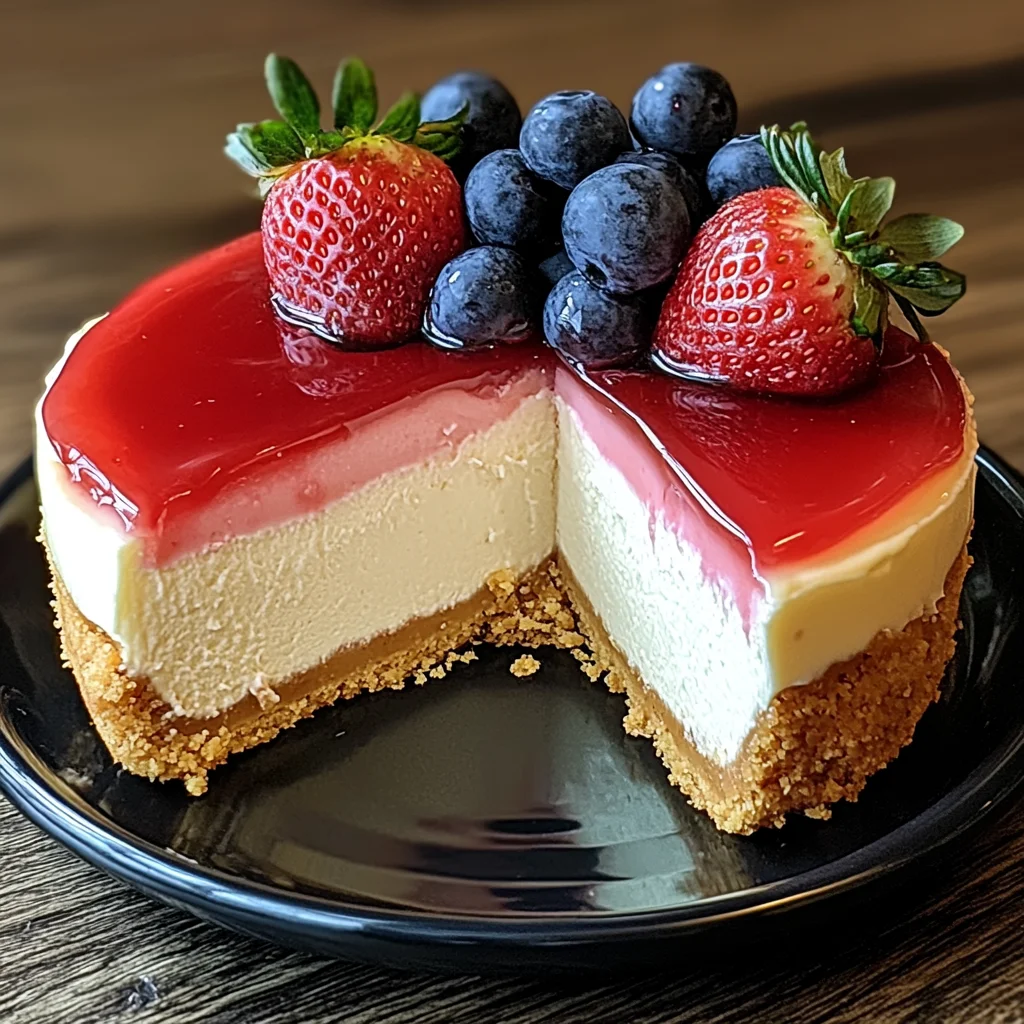
- Fresh strawberries for garnish: Because it’s not strawberry cheesecake without fresh berries on top, right?
How to Make It
Alright, apron on? Let’s do this! Follow these simple steps and you’ll have a gorgeous cheesecake cooling in no time.
1. Preheat your oven to 350°F (175°C). Get it nice and warm for our crust and batter.
2. Time for the crust! In a medium bowl, toss together those graham cracker crumbs and the melted butter. Stir it until it looks like wet sand. Now, grab your 9-inch springform pan (trust me, springform is your friend for easy release!). Pour the crumb mixture in and press it firmly into the bottom and slightly up the sides. You can use the bottom of a glass or a flat measuring cup to really pack it down. Pop that crust into the preheated oven for just 8-10 minutes until it smells wonderfully toasted. Let it cool completely while you make the filling.
3. Now for the creamy magic! In a large bowl, beat your softened cream cheese with the granulated sugar. Beat, beat, beat until it’s super smooth and fluffy, with no lumps in sight. This might take a few minutes with an electric mixer.
4. Stir in the vanilla extract. Smells good already, right?
5. Add the eggs, but here’s a pro tip: add them ONE at a time. Beat well after each addition, just until the egg is incorporated. This helps keep your batter smooth and prevents overmixing later.
6. Gentle hands now! Stir in the sour cream and the all-purpose flour. Mix just until everything is combined and the batter is smooth. Whatever you do, do NOT overmix at this stage! Overmixing can incorporate too much air, which can cause cracks later.
7. Pour that luscious cream cheese mixture over your cooled graham cracker crust in the springform pan.
8. Time for the strawberry swirl! Take spoonfuls of your beautiful strawberry puree and dollop them randomly over the top of the cheesecake batter. Now, grab a knife or a skewer and gently swirl the puree through the batter. Don’t go too crazy, just a few elegant swirls will do!
9. This next step is CRUCIAL for a smooth, crack-free cheesecake: the water bath! Get a larger baking pan (like a roasting pan or a 10-inch cake pan). Place your springform pan inside the larger pan. Carefully pour about an inch of hot (or boiling) water into the larger pan, around the springform pan. Make sure the water doesn’t get into the springform pan! This creates a humid environment in the oven, which helps the cheesecake bake evenly and prevents cracking.
10. Carefully transfer the whole setup (large pan with water and springform pan inside) to your preheated oven. Bake for 60-75 minutes. How do you know it’s done? The edges should look set and slightly puffed, but the center (about a 2-3 inch circle) should still be a little jiggly. Don’t wait until the center is completely firm; it will continue to set as it cools.
11. Patience, my friend! Once the baking time is up, turn off the oven. PRO TIP: Prop the oven door open slightly (you can use a wooden spoon handle). Let the cheesecake cool slowly in the oven for 1 full hour. This slow cooling is another key step to preventing those pesky cracks!
12. After its hour in the warm, turned-off oven, carefully remove the cheesecake from the oven and lift the springform pan out of the water bath. Place the springform pan on a wire rack to cool completely at room temperature. This can take another hour or two.
13. Almost there! Once it’s completely cool, cover the springform pan loosely with plastic wrap. Now for the hardest part: chill it in the refrigerator for at least 4 hours. Overnight is even better if you can wait! This chilling time is essential for the cheesecake to firm up and develop its perfect texture.
14. The grand finale! When you’re ready to serve, release the springform pan sides. Garnish the top with beautiful, fresh strawberries. Slice with a sharp knife dipped in hot water between cuts for the cleanest slices. Enjoy your masterpiece!
Substitutions & Additions
Want to mix things up? Here are a few ideas:
- Crust Variations: Try using vanilla wafers, shortbread cookies, or even chocolate wafers instead of graham crackers.
- Berry Puree Swaps: Not a strawberry fan? Swap the strawberry puree for raspberry, blueberry, or even a mix of berries!
- Add Zest: A little lemon or orange zest in the cream cheese batter can really brighten the flavor.
- Chocolate Swirl: Melt some chocolate chips or use a chocolate syrup instead of the strawberry puree for a different kind of swirl.
- Top It Off: Beyond fresh berries, consider adding a dollop of whipped cream, chocolate shavings, or a homemade strawberry sauce just before serving.
Tips for Success
Cheesecake can seem finicky, but these tips will help you nail it every time:
- Room Temperature Ingredients are Key: I can’t stress this enough! Cream cheese, eggs, and sour cream should all be at room temp for a smooth, lump-free batter.
- Don’t Overmix: Especially after adding the eggs and flour. Mix just until combined.
- The Water Bath is Your Friend: Seriously, don’t skip this! It creates a humid environment that prevents cracks and ensures even baking.
- Slow Cooling Prevents Cracks: Let it cool gradually in the turned-off oven first, then on a wire rack. Sudden temperature changes are the enemy of a perfect cheesecake top.
- Chill Time is Non-Negotiable: That long chilling period in the fridge is essential for the cheesecake to firm up properly.
- Prep Ahead: You can bake the cheesecake a day or two in advance, which gives it plenty of time to chill and makes serving day stress-free!
How to Store It
Once your beautiful cheesecake is baked and chilled, here’s how to keep it fresh:
Store leftover cheesecake slices or the whole cake in an airtight container in the refrigerator. It will keep well for 4-5 days. If you need to store it longer, cheesecake freezes beautifully! Wrap individual slices or the whole chilled cake (without the springform ring) tightly in plastic wrap, then in foil. It can be frozen for 1-2 months. Thaw overnight in the refrigerator before serving.
FAQs
Got questions? I’ve got answers!
- Why do I need a water bath? A water bath (or “bain-marie”) provides gentle, even heat and creates a humid environment in the oven. This helps the cheesecake bake slowly and evenly from the edges to the center, preventing the top from drying out and cracking.
- How do I prevent my cheesecake from cracking? Using room temperature ingredients, not overmixing, using the water bath, and letting it cool slowly (in the oven first, then on a rack) are the best ways to prevent cracks. A little flour also helps!
- Can I use frozen strawberries for the puree? Absolutely! Thaw them first, drain any excess liquid, then blend into a puree.
- Why does it need to chill for so long? The long chilling time allows the cheesecake’s structure to set completely and its flavors to meld and develop. It makes the cheesecake firm enough to slice cleanly and gives it that signature dense, creamy texture.
Easy & Dreamy Homemade Strawberry Cheesecake
A surprisingly straightforward recipe for a creamy, tangy homemade strawberry cheesecake bursting with fresh flavor. Perfect for special occasions or cozy nights in, and much easier than you think.
- Cook Time: 1 hour
- Total Time: 1 hour
- : Lara
Ingredients
Crust
- 2 cup graham cracker crumbs (store-bought or homemade)
- 0.5 cup unsalted butter (melted)
Filling
- 24 oz cream cheese (softened, room temperature)
- 1 cup granulated sugar
- 1 tsp vanilla extract
- 4 large eggs (room temperature)
- 1 cup sour cream (room temperature)
- 0.25 cup all-purpose flour
- 0.5 cup strawberry puree (blend fresh or thawed frozen strawberries until smooth)
Garnish
- 0 Fresh strawberries (for garnish)
Instructions
- Preheat your oven to 350°F (175°C).
- Time for the crust! In a medium bowl, toss together graham cracker crumbs and melted butter. Stir it until it looks like wet sand. Pour the crumb mixture into a 9-inch springform pan and press it firmly into the bottom and slightly up the sides. Bake in the preheated oven for just 8-10 minutes until toasted. Let it cool completely while you make the filling.
- Now for the creamy magic! In a large bowl, beat your softened cream cheese with the granulated sugar until super smooth and fluffy, with no lumps.
- Stir in the vanilla extract.
- Add the eggs, one at a time. Beat well after each addition, just until the egg is incorporated.
- Gently stir in the sour cream and the all-purpose flour. Mix just until everything is combined and the batter is smooth. Do NOT overmix at this stage!
- Pour the cream cheese mixture over your cooled graham cracker crust in the springform pan.
- Time for the strawberry swirl! Take spoonfuls of your strawberry puree and dollop them randomly over the top of the cheesecake batter. Grab a knife or a skewer and gently swirl the puree through the batter.
- This next step is CRUCIAL for a smooth, crack-free cheesecake: the water bath! Get a larger baking pan (like a roasting pan or a 10-inch cake pan). Place your springform pan inside the larger pan. Carefully pour about an inch of hot (or boiling) water into the larger pan, around the springform pan. Make sure the water doesn’t get into the springform pan!
- Carefully transfer the whole setup (large pan with water and springform pan inside) to your preheated oven. Bake for 60-75 minutes. The edges should look set and slightly puffed, but the center (about a 2-3 inch circle) should still be a little jiggly. Don’t wait until the center is completely firm.
- Patience, my friend! Once the baking time is up, turn off the oven. Prop the oven door open slightly (you can use a wooden spoon handle). Let the cheesecake cool slowly in the oven for 1 full hour.
- After its hour in the warm, turned-off oven, carefully remove the cheesecake from the oven and lift the springform pan out of the water bath. Place the springform pan on a wire rack to cool completely at room temperature. This can take another hour or two.
- Almost there! Once it’s completely cool, cover the springform pan loosely with plastic wrap. Chill it in the refrigerator for at least 4 hours. Overnight is even better if you can wait!
- The grand finale! When you’re ready to serve, release the springform pan sides. Garnish the top with beautiful, fresh strawberries. Slice with a sharp knife dipped in hot water between cuts for the cleanest slices. Enjoy your masterpiece!
Notes
Tips for Success:
– Ensure cream cheese, eggs, and sour cream are at room temperature for a smooth batter.
– Do not overmix the batter, especially after adding eggs and flour.
– The water bath creates a humid environment for even baking and prevents cracks.
– Slow cooling (first in the oven, then on a rack) is crucial to prevent cracks.
– Chill the cheesecake for at least 4 hours (preferably overnight) to set properly.
Storage:
– Store leftover cheesecake in an airtight container in the refrigerator for 4-5 days.
– Cheesecake freezes well. Wrap chilled slices or the whole cake tightly in plastic wrap, then foil. Freeze for 1-2 months.
– Thaw frozen cheesecake overnight in the refrigerator.