Introduction
Hey cookie lovers! Sometimes you just need a little burst of color and pure, simple happiness in your kitchen, right? These Easy & Cheerful Jello Cookies are exactly that. They’re not just cookies; they’re like edible rays of sunshine!
These cookies remind me of school bake sales and simple pleasures. They’re so incredibly easy to whip up, making them perfect for when you need a pop of color and fun without a lot of fuss. Seriously, if you can measure and stir, you can make these! Get ready for smiles.
Why You’ll Love These Cookies
Why should these Jello cookies jump to the top of your baking list? Let me tell you!
- Fast: No complicated steps or fancy techniques here!
- Easy: Perfect for beginner bakers or a fun project with kids.
- Giftable: Who wouldn’t love a box of colorful, cheerful cookies? They make fantastic edible gifts!
- Crowd-Pleasing: Kids and adults adore the fun colors and sweet, slightly tangy flavor.
Gather Your Ingredients
You probably have most of these pantry staples already! The star, of course, is the Jello!
- ¾ cup unsalted butter, softened: Make sure it’s truly softened, not melted, for that perfect creamy base.
- 1 cup granulated sugar: Just classic white sugar works perfectly here.
- 1 egg: Helps bind everything together.
- 2 ½ cups all-purpose flour: Your standard cookie flour.
- 1 teaspoon baking powder: Gives them a little lift.
- ¼ teaspoon salt: Balances the sweetness.
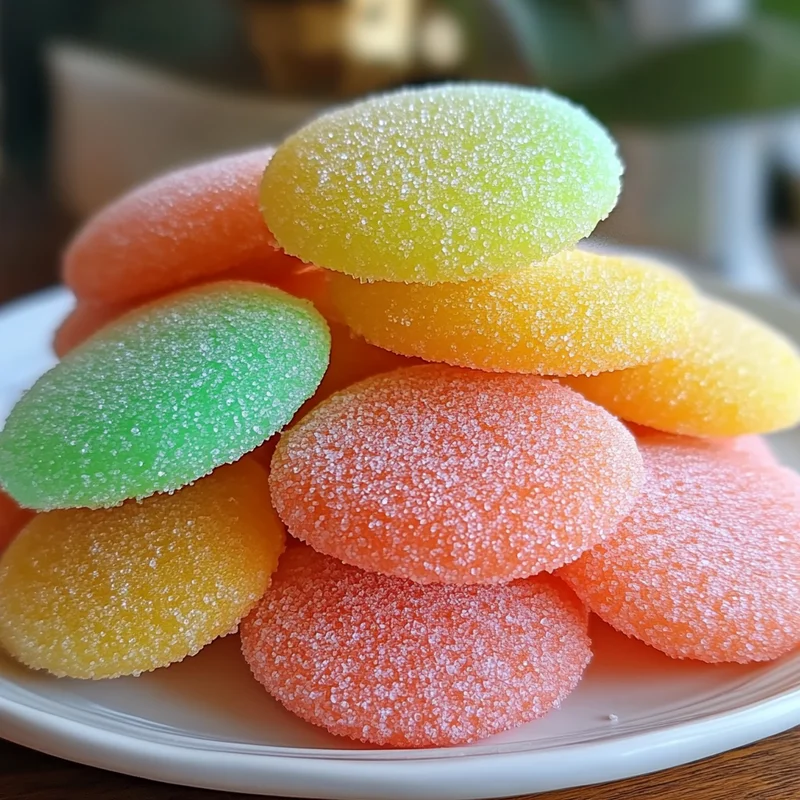
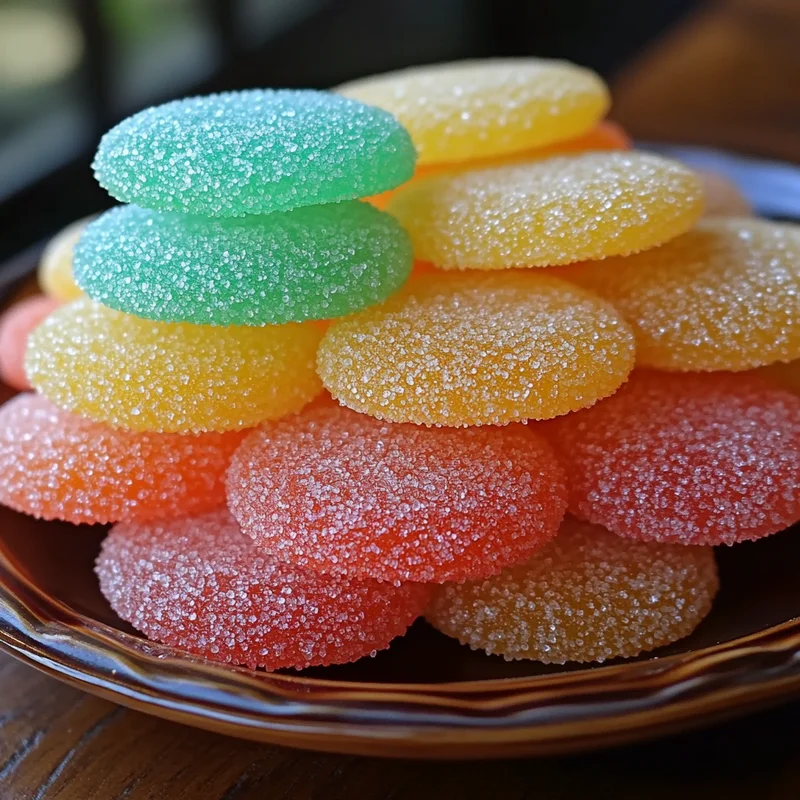
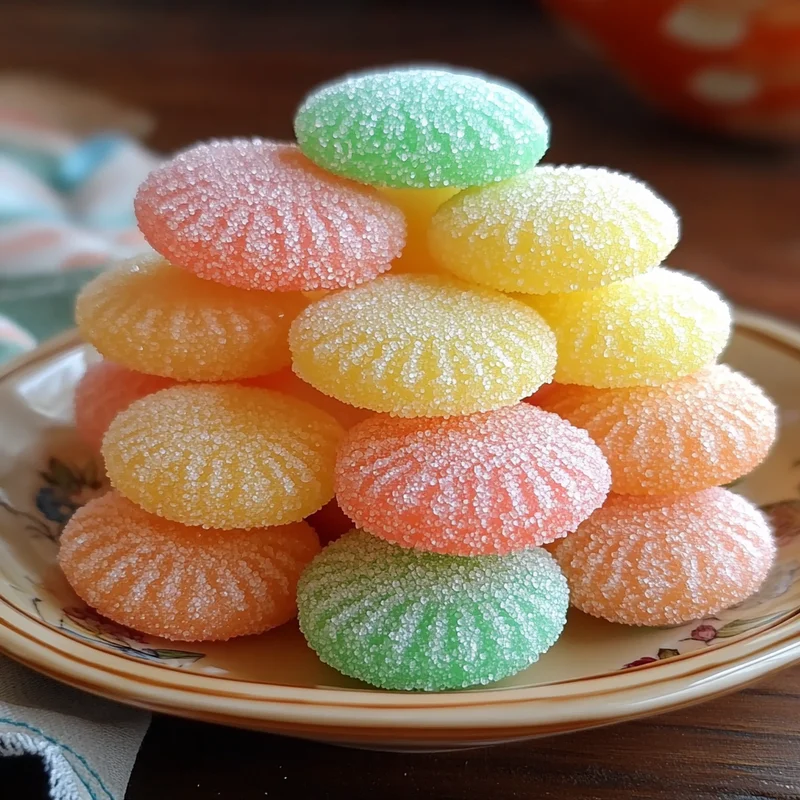
- 2 packages (3 oz each) Jello: This is where the magic happens! Pick your favorite flavors and colors! Cherry, lemon, lime, orange, strawberry… mix and match for a rainbow!
Oh, and optional: a little extra granulated sugar for rolling the dough balls in before baking. Adds a nice sparkle!
Let’s Make Some Jello Cookies!
Alright, time to turn these simple ingredients into colorful treats! Follow these steps and you’ll have warm cookies ready in no time.
Step 1: Cream Butter & Sugar. In a large bowl, beat together the softened butter and granulated sugar until the mixture is light and fluffy. This usually takes 2-3 minutes with an electric mixer. You can do it by hand, but it’s a bit of a workout!
Step 2: Add the Egg. Beat in the egg until it’s fully incorporated. Scrape down the sides of the bowl to make sure everything is mixed.
Step 3: Whisk Dry Ingredients. In a separate medium bowl, whisk together the all-purpose flour, baking powder, salt, and both packages of Jello powder. Make sure that Jello powder is evenly distributed!
Step 4: Combine Wet & Dry. Gradually add the dry ingredients to the wet ingredients, mixing on low speed (or stirring by hand) until just combined. Don’t overmix! The dough will be thick and might look a little crumbly, but it will come together.
Step 5: Chill the Dough. This is important! Cover the bowl with plastic wrap and refrigerate the dough for at least 30 minutes. This makes it much easier to handle and helps the cookies hold their shape.
Step 6: Preheat Oven & Prep. While the dough is chilling, preheat your oven to 375°F (190°C). Line baking sheets with parchment paper or silicone baking mats.
Step 7: Shape the Cookies. Take spoonfuls of the chilled dough and roll them into balls, about 1 inch in size. If you like, roll these balls in a little extra granulated sugar for a sparkly finish! Place the balls about 2 inches apart on the prepared baking sheets.
Step 8: Bake! Bake for 8-10 minutes, or until the edges are lightly set but the centers still look soft. They shouldn’t really brown much because of the Jello.
Step 9: Cool. Let the cookies cool on the baking sheets for a couple of minutes before carefully transferring them to a wire rack to cool completely.
Mix It Up! Substitutions & Additions
One of the fun things about these cookies is how easily you can play around with them!
- Jello Flavors: The possibilities are endless! Try grape, blue raspberry, orange, lime… or even a mix of flavors in one batch (though the colors might get muddy). I often make separate batches with different colors for a vibrant platter.
- Extracts: Add a little almond extract or vanilla extract (in addition to or instead of some Jello) for another layer of flavor. Start with ½ teaspoon.
- Sprinkles: Press some festive sprinkles into the tops of the dough balls before baking for extra fun!
- White Chocolate Chips: A handful of white chocolate chips would be delicious with certain Jello flavors like raspberry or strawberry.
Tips for Your Best Jello Cookies
Keep these little pointers in mind for cookie perfection!
- Soften Butter Properly: If your butter is too hard, it won’t cream correctly. If it’s melted, your cookies might spread too much. Aim for easily dented but not liquid.
- Don’t Skip the Chill Time: Chilling is crucial! It helps the dough stiffen up, making it easier to roll and preventing excessive spreading in the oven.
- Measure Flour Correctly: Don’t scoop directly from the bag – you’ll likely get too much flour. Spoon the flour into your measuring cup and level it off with a knife.
- Bake Just Until Set: Overbaking will make these cookies dry. Pull them out when the edges are just starting to look firm.
Storing Your Cheerful Cookies
Want to make these ahead or save some for later? Here’s how.
- Room Temperature: Store cooled cookies in an airtight container at room temperature for up to 3-4 days.
- Freezing Baked Cookies: Place cooled cookies in a single layer on a baking sheet to flash freeze, then transfer to a freezer-safe bag or container. They’ll keep for up to 3 months. Thaw at room temperature.
- Freezing Dough: You can also freeze the dough! Roll it into a log or shape into balls, then wrap tightly in plastic wrap and foil. Freeze for up to 3 months. Thaw in the refrigerator before slicing (if log) or baking from frozen (might need an extra minute or two).
Frequently Asked Questions
Got questions? I’ve got answers!
Can I use sugar-free Jello?
Yes, absolutely! Sugar-free Jello works perfectly fine in this recipe and is a great alternative if you’re watching sugar intake.
Why did my cookies spread too much?
This could be due to a few things: butter that was too soft/melted, not chilling the dough long enough, or your oven temperature being off (a common culprit!). Make sure your butter is softened, not melted, and definitely chill that dough!
Can I mix different Jello flavors in one batch?
You can, but be aware that the colors might blend into a brownish or muddy shade depending on the flavors you choose. I prefer making separate batches for distinct colors.

Easy & Cheerful Jello Cookies: A Burst of Fun!
Equipment
- Large bowl
- Electric mixer Optional, but helpful
- Medium bowl
- Plastic wrap
- Baking sheets
- Parchment paper or silicone baking mats For lining baking sheets
- Wire rack For cooling
- Airtight container For storage
Ingredients
Hauptzutaten
- 0.75 cup unsalted butter softened
- 1 cup granulated sugar
- 1 egg
- 2.5 cup all-purpose flour
- 1 teaspoon baking powder
- 0.25 teaspoon salt
- 2 package Jello 3 oz each; pick your favorite flavors and colors
- granulated sugar extra, for rolling the dough balls in (optional)
Instructions
- Cream Butter & Sugar: In a large bowl, beat together the softened butter and granulated sugar until the mixture is light and fluffy (2-3 minutes with an electric mixer).
- Add the Egg: Beat in the egg until it's fully incorporated. Scrape down the sides of the bowl.
- Whisk Dry Ingredients: In a separate medium bowl, whisk together the all-purpose flour, baking powder, salt, and both packages of Jello powder. Ensure the Jello powder is evenly distributed.
- Combine Wet & Dry: Gradually add the dry ingredients to the wet ingredients, mixing on low speed (or stirring by hand) until just combined. Do not overmix. The dough will be thick and might look crumbly initially.
- Chill the Dough: Cover the bowl with plastic wrap and refrigerate the dough for at least 30 minutes. This makes it easier to handle and helps cookies hold shape.
- Preheat Oven & Prep: While chilling, preheat your oven to 375°F (190°C). Line baking sheets with parchment paper or silicone baking mats.
- Shape the Cookies: Take spoonfuls of the chilled dough and roll them into balls, about 1 inch in size. Optionally, roll these balls in a little extra granulated sugar for a sparkly finish. Place balls about 2 inches apart on prepared baking sheets.
- Bake! Bake for 8-10 minutes, or until edges are lightly set but centers still look soft. They should not brown much.
- Cool: Let the cookies cool on the baking sheets for a couple of minutes before carefully transferring them to a wire rack to cool completely.
Notes
- Soften butter properly: Easily dented, not liquid.
- Don't skip the chill time: Crucial for handling and preventing spread.
- Measure flour correctly: Spoon into cup and level off.
- Bake just until set: Avoid overbaking to prevent dryness. Storage:
- Room Temperature: Store cooled cookies in an airtight container for up to 3-4 days.
- Freezing Baked Cookies: Flash freeze on a baking sheet, then transfer to freezer-safe container/bag. Store up to 3 months. Thaw at room temp.
- Freezing Dough: Roll into log or balls, wrap tightly. Freeze up to 3 months. Thaw in fridge before baking.