Introduction
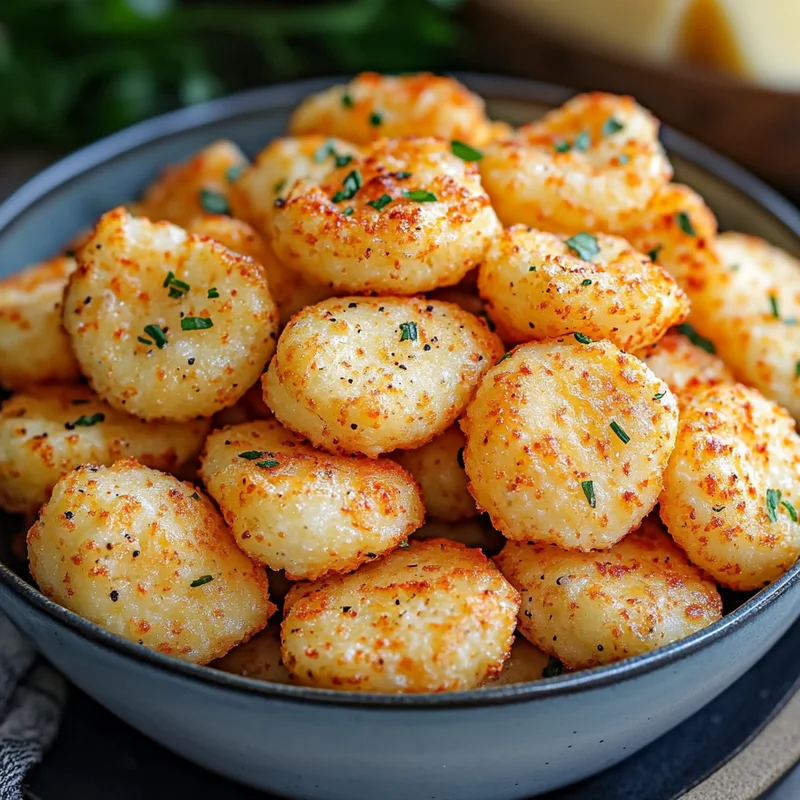
Oh, friend, do you ever just crave a little crunchy, savory snack? Like, the kind that melts in your mouth but still gives you that satisfying bite? For the longest time, finding a low-carb option that actually hit the spot felt impossible. Everything was either cardboard-y, complicated, or just… sad. But guess what? I stumbled upon this little gem of a recipe, and let me tell you, it’s a game-changer! These Keto Cheese Puffed Snacks are ridiculously easy, come together in a flash, and are so addictively good, you’ll wonder where they’ve been all your keto journey. They remind me of cozy movie nights or that perfect little bite alongside a soup or salad. Seriously, get ready to fall in love!
Why You’ll Love This Recipe
- Fast
- Easy
- Giftable
- Crowd-pleasing
Let’s break it down. “Fast” and “Easy” mean you can whip up a batch of these whenever the craving strikes, no elaborate planning needed. “Giftable”? Absolutely! Pack them up in a cute jar or bag for a keto-friendly treat your friends will rave about. And “Crowd-pleasing”? Even your non-keto pals will be reaching for these cheesy, puffy bites. They’re just universally delicious!

Ingredients
Gather ’round, let’s talk about the simple magic that makes these puffs happen:
- 1 cup Shredded Cheddar cheese: Gotta have that classic cheddar flavor! Sharp or mild, totally up to you.
- 1 cup Shredded Mozzarella cheese: This is key for that amazing melty, puffy texture. The stringy goodness helps bind everything.
- 1 large Egg: Our essential binder! Helps everything hold together and contributes to the puff.
- 1/4 cup Almond flour: Just a little bit to give them some structure without adding many carbs. Make sure it’s finely ground.
- 1 tsp Garlic powder: Adds that little savory kick that makes snacks irresistible.
- 1 tsp Onion powder: Garlic’s best friend! Deepens the savory flavor.
- 1/2 tsp Paprika: Brings a lovely color and a touch of warmth. Smoked paprika is also divine here!
- 1/4 tsp Salt: Enhances all those delicious flavors.
- 1/4 tsp Black pepper: A little pinch for a touch of heat.
How to Make It
Alright, let’s get our hands dirty – but not too dirty, this is super simple!
First things first, you’ll want to preheat your oven to 350°F (175°C). Line a baking sheet with parchment paper or a silicone baking mat. This is super important for preventing sticking and easy cleanup!
In a medium-sized bowl, combine both the shredded cheddar and mozzarella cheeses, the egg, almond flour, garlic powder, onion powder, paprika, salt, and black pepper.
Now, grab a spatula or even just use your hands (clean ones, of course!) and mix everything together until it’s well combined. It will be a thick, slightly sticky dough. Don’t overmix, just get everything incorporated.
Next, scoop small portions of the mixture onto your prepared baking sheet. I like to use a small cookie scoop (about 1 to 1.5 teaspoons) or just roll little balls between my palms, about the size of a walnut. Leave a little space between each one, as they will puff up slightly.
Pop the baking sheet into your preheated oven and bake for 15-20 minutes, or until the puffs are golden brown around the edges and look nicely puffed up in the center. Baking time can vary depending on your oven and the size of your puffs, so keep an eye on them.
Once they’re done, carefully remove the baking sheet from the oven. Let the cheese puffs cool on the sheet for just a few minutes before transferring them to a wire rack to cool completely. This cooling time is important for them to firm up and develop that perfect snack texture.
Substitutions & Additions
Feel free to play around with this base recipe! It’s super forgiving.
- Cheese: Swap cheddar or mozzarella for Monterey Jack, Pepper Jack (for a little heat!), or even a mix of your favorites. Just make sure they are shreddable cheeses that melt well.
- Spices: Get creative! Add a pinch of chili powder, Italian seasoning, dried herbs like chives or parsley, or even a dash of cayenne for heat.
- Mix-ins: For extra flavor, you could gently fold in some finely chopped chives, a tiny bit of crumbled cooked bacon, or even some finely minced jalapeño (if you like spice!) into the dough before scooping.

Tips for Success
- Use pre-shredded cheese, but beware of additives: While convenient, some pre-shredded cheeses contain starches to prevent clumping. This can sometimes affect the texture or carb count slightly. If you want the purest result, shredding your own cheese is a great option, though I find pre-shredded works just fine for these!
- Don’t pack them too tightly: Give those little puffs room to breathe and puff up in the oven.
- Cooling is key: It might be tempting to devour them straight from the oven, but letting them cool helps them firm up and gives you that lovely snackable texture.
- Watch your oven: All ovens are different! Keep an eye on them the first time you make them to find the perfect baking time for your kitchen.
How to Store It
Once completely cooled, store your Keto Cheese Puffed Snacks in an airtight container at room temperature. They usually stay fresh and delicious for about 2-3 days. If you want them to last longer, you can pop the container in the fridge, where they’ll keep for about a week. Just know that they might lose a little of their crispness over time.
FAQs
Are these really keto?
Yes! Made primarily from cheese, egg, and a small amount of almond flour, these are very low in carbs, making them perfect for a ketogenic lifestyle.
Can I make these in an air fryer?
Absolutely! Preheat your air fryer to 350°F (175°C). Arrange the scooped dough balls in a single layer in the air fryer basket, making sure not to overcrowd. Air fry for 8-12 minutes, checking frequently, until golden brown and puffed. Air frying often yields a slightly crispier result!
Can I use coconut flour instead of almond flour?
Coconut flour is much more absorbent than almond flour, so a 1:1 substitution won’t work. You would need significantly less coconut flour (likely just a tablespoon or two) and might need to adjust other ingredients. I recommend sticking to almond flour for this specific recipe unless you’re experienced with coconut flour substitutions.
Can I freeze them?
You could try freezing the baked and cooled puffs in a single layer on a baking sheet, then transferring to a freezer-safe bag or container. Reheat gently in the oven or air fryer. However, I find they are best enjoyed fresh or stored short-term.
Happy snacking, friend!

Easy Keto Cheese Puffed Snacks
Equipment
- Baking Sheet
- Parchment paper or silicone baking mat For lining the baking sheet.
- Medium-sized bowl
- Spatula Optional, for mixing
- small cookie scoop Optional, about 1 to 1.5 teaspoons size, for scooping
- Wire rack For cooling
Ingredients
Ingredients
- 1 cup Shredded Cheddar cheese Sharp or mild
- 1 cup Shredded Mozzarella cheese Key for texture
- 1 large Egg Essential binder
- 0.25 cup Almond flour Finely ground
- 1 tsp Garlic powder
- 1 tsp Onion powder
- 0.5 tsp Paprika Smoked paprika is also divine
- 0.25 tsp Salt
- 0.25 tsp Black pepper
Instructions
- First things first, you'll want to preheat your oven to 350°F (175°C). Line a baking sheet with parchment paper or a silicone baking mat. This is super important for preventing sticking and easy cleanup!
- In a medium-sized bowl, combine both the shredded cheddar and mozzarella cheeses, the egg, almond flour, garlic powder, onion powder, paprika, salt, and black pepper.
- Now, grab a spatula or even just use your hands (clean ones, of course!) and mix everything together until it's well combined. It will be a thick, slightly sticky dough. Don't overmix, just get everything incorporated.
- Next, scoop small portions of the mixture onto your prepared baking sheet. I like to use a small cookie scoop (about 1 to 1.5 teaspoons) or just roll little balls between my palms, about the size of a walnut. Leave a little space between each one, as they will puff up slightly.
- Pop the baking sheet into your preheated oven and bake for 15-20 minutes, or until the puffs are golden brown around the edges and look nicely puffed up in the center. Baking time can vary depending on your oven and the size of your puffs, so keep an eye on them.
- Once they're done, carefully remove the baking sheet from the oven.
- Let the cheese puffs cool on the sheet for just a few minutes before transferring them to a wire rack to cool completely. This cooling time is important for them to firm up and develop that perfect snack texture.
Notes
- Use pre-shredded cheese, but be aware some contain starches. Shredding your own is an option for the purest result.
- Don't pack them too tightly on the baking sheet.
- Cooling is key for firming up the texture.
- Watch your oven as baking times can vary. Storage:
- Store completely cooled puffs in an airtight container at room temperature for 2-3 days.
- For longer storage (about a week), store in the fridge (they might lose some crispness).
- Can potentially freeze baked puffs, reheating gently in the oven or air fryer. Air Fryer Option:
- Preheat air fryer to 350°F (175°C).
- Arrange dough balls in a single layer.
- Air fry for 8-12 minutes, checking frequently, until golden brown and puffed.

