
Introduction
Oh, pizza. Just saying the word brings back so many happy memories, right? Movie nights on the couch, impromptu get-togethers, the pure joy of biting into that perfect slice. But if you’re navigating the world of keto or low-carb eating, sometimes it feels like pizza night is a distant dream. Well, friend, I’m here to tell you it absolutely doesn’t have to be! I’ve been on the hunt for the perfect low-carb pizza crust, and I’m so excited to share my absolute favorite go-to recipes with you. That’s right, two of them! One uses almond flour, and the other uses coconut flour, so you can pick the one that suits your pantry (or your mood!). Both are unbelievably easy, surprisingly quick, and create a sturdy, delicious base for all your favorite toppings. Get ready to reclaim pizza night!
Why You’ll Love This Recipe
- Fast: Seriously, you can have this crust ready for toppings in under 20 minutes.
- Easy: It uses simple ingredients and comes together without any complicated kneading or rising.
- Giftable: (Okay, maybe not the dough itself, but knowing you can whip this up anytime is a gift!) More like, perfect for sharing when friends come over.
- Crowd-Pleasing: Even your non-keto friends will be impressed by how good this low-carb crust is.
Ingredients
Here’s what you’ll need for these magical crusts. Both versions start the same way before adding the flour and egg!
- Mozzarella cheese (shredded): We use 1 ½ cups for both. This is key to the “fathead” style dough, giving it structure and chew. Use pre-shredded or shred your own!
- Cream cheese (cut into cubes): You’ll need 2 tablespoons for both. This adds richness and helps create that pliable dough consistency.
-
Now, here’s where they differ based on the flour:
- For the Almond Flour Version:
- Large Egg (beaten): Just one! It helps bind the dough and gives it structure as it bakes.
- Blanched Almond Flour: You’ll need ¾ cup. Make sure it’s blanched (skins removed) for the best texture.
- For the Coconut Flour Version:
- Large Eggs (whisked): You’ll need two large eggs for this one. Coconut flour is very absorbent, so it needs more liquid.
- Wholesome Yum Coconut Flour: We use ⅓ cup. I always recommend a fine, consistent coconut flour for the best results.
- For the Almond Flour Version:
How to Make It
Okay, let’s get cooking! The first few steps are the same no matter which flour you choose. We’ll melt the cheese first!
- Grab a microwave-safe bowl. Add your 1 ½ cups of shredded mozzarella cheese and 2 tablespoons of cubed cream cheese.
- Pop the bowl in the microwave and heat it in 30-second intervals, stirring well after each time, until the cheese is completely melted and looks smooth and gooey. This usually takes about 1.5 to 2 minutes total. You want it fully melted and easy to stir into a dough.
-
Now, time to incorporate the rest of the ingredients. You’ll need to work fairly quickly while the cheese is still warm and pliable:
- If making the Almond Flour Version: Add your 1 beaten egg and ¾ cup blanched almond flour to the melted cheese. Stir everything together with a spoon or spatula until it starts coming together into a shaggy dough.
- If making the Coconut Flour Version: Add your 2 whisked eggs and ⅓ cup coconut flour to the melted cheese. Stir well until a dough forms.
- Once the dough is mostly combined, turn it out onto a piece of parchment paper. If it’s sticky, you can lightly wet your hands or use a little extra flour from your measured amount.
- Place another piece of parchment paper on top of the dough. Using a rolling pin (or even your hands!), roll or press the dough out into your desired pizza shape and thickness. A circle about 10-12 inches in diameter works great, or make it a rectangle for a sheet pan pizza. Don’t make it too thin, or it might break!
- Carefully peel off the top piece of parchment paper. Slide the parchment paper with the crust onto a baking sheet.
- Preheat your oven to 400°F (200°C).
- Bake the crust (without toppings!) for 8-12 minutes, or until it’s lightly golden brown around the edges and looks set. Keep an eye on it, as ovens vary!
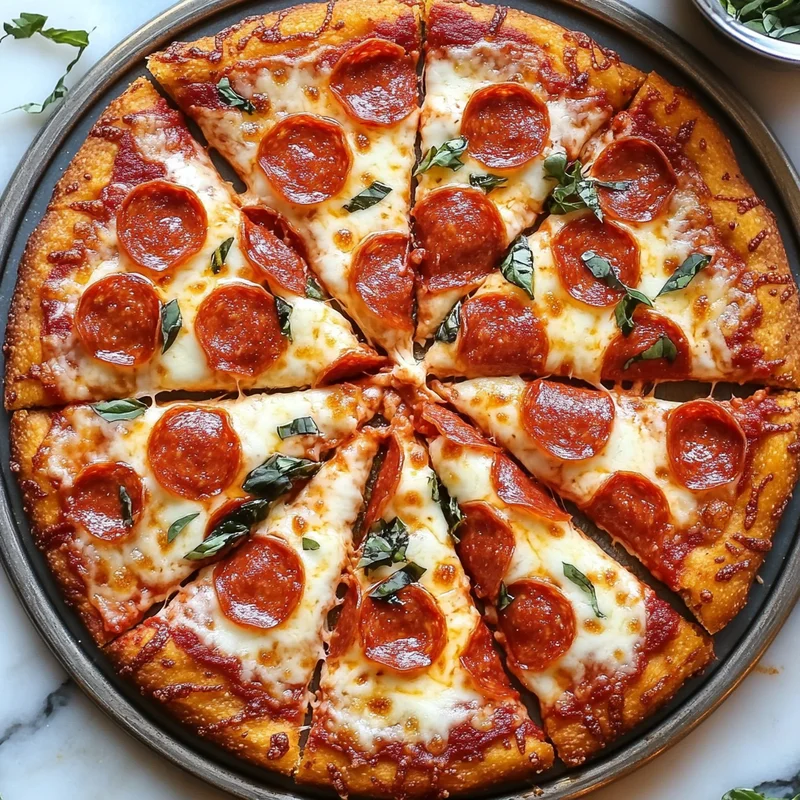
- Remove the pre-baked crust from the oven. Now it’s ready for your favorite keto-friendly pizza sauce and toppings!
- Add your toppings and return the pizza to the oven for another 5-10 minutes, or until the cheese is melted and bubbly and the toppings are heated through.
- Let it cool slightly, slice, and enjoy your low-carb pizza masterpiece!
Substitutions & Additions
Want to shake things up or don’t have exactly what the recipe calls for? Here are a few ideas:
- Cheese Swap: While mozzarella is classic for its melting properties, you could experiment with part cheddar, provolone, or a blend in place of a portion of the mozzarella for different flavors. Stick to mozzarella for the bulk though, as it gives the best texture.
- Add Flavor: Before you bake the crust, try mixing in a teaspoon of garlic powder, onion powder, Italian seasoning, or dried oregano into the dough. You can also sprinkle a little coarse salt or everything bagel seasoning on the edges before the first bake.
- Make Mini Pizzas: Instead of rolling one large crust, divide the dough into smaller portions and make individual pizzas. Perfect for portion control or picky eaters!

Tips for Success
Making keto dough is a little different than traditional dough, but these tips will help you nail it:
- Work Fast: The key is to mix the flour and egg into the melted cheese while it’s still warm and pliable. If it cools too much, it gets hard to work with. If this happens, you can pop it back in the microwave for 15-20 seconds to soften it up.
- Use Parchment Paper: This dough is sticky! Rolling it between two sheets of parchment paper is essential and makes cleanup a breeze. Don’t skip this step.
- Don’t Over-Bake the Crust: Watch it closely during the first bake. You want it just golden and set, not burnt around the edges. It will bake again with the toppings.
- Texture Difference: The almond flour crust tends to be a bit more tender and slightly crispier. The coconut flour crust can be a little more “bread-like” and absorbent. Both are delicious, just different!
How to Store It
Have leftover crust? Here’s how to keep it fresh:
- Cooked Crust (without toppings): Let the pre-baked crust cool completely. You can store it wrapped tightly in plastic wrap or in an airtight container in the refrigerator for 3-4 days.
- Cooked Pizza (with toppings): Store leftover slices in an airtight container in the fridge for 2-3 days. Reheat gently in the oven or a skillet for the best texture.
- Freezing: You can freeze the pre-baked crust! Once completely cool, wrap it tightly in plastic wrap, then in foil or a freezer bag. It should keep well in the freezer for 1-2 months. Thaw in the fridge or on the counter before adding toppings and baking.
FAQs
Got questions? I’ve got answers!
- Which crust is better, almond or coconut? It really comes down to personal preference! The almond flour crust is a bit easier to work with initially and tends to be crispier. The coconut flour crust is great if you prefer coconut flour or have an almond allergy, but it requires a bit more egg and can be slightly trickier to get the consistency right at first. Try both and see which one you love!
- Can I use regular flour? No, this recipe relies on the properties of almond or coconut flour combined with melted cheese to create a low-carb, gluten-free dough without yeast. Regular flour will not work in this recipe.
- Why do I need to pre-bake the crust? Pre-baking helps the crust set up and become sturdy enough to hold your toppings. If you don’t pre-bake, it can end up too soft or soggy in the center.
- Is this crust chewy like regular pizza? It has a pleasant chew thanks to the mozzarella, but it’s not identical to a traditional yeasted wheat flour crust. It’s surprisingly close and totally satisfying for a low-carb option!

Easy Keto Pizza Crust Recipe: Two Ways (Almond Flour & Coconut Flour)
Equipment
- Microwave-safe bowl
- Spoon or spatula
- Parchment paper Essential for rolling
- Baking Sheet
- Rolling Pin Or use your hands
Ingredients
Common Ingredients
- 1.5 cup Shredded Mozzarella cheese Key to the 'fathead' style dough
- 2 tablespoon Cream cheese Cut into cubes
For Almond Flour Version
- 1 Large Egg Beaten
- 0.75 cup Blanched Almond Flour Use blanched for best texture
For Coconut Flour Version
- 2 Large Eggs Whisked
- 0.33 cup Coconut Flour Recommend fine, consistent flour
Instructions
- Grab a microwave-safe bowl. Add your 1 ½ cups of shredded mozzarella cheese and 2 tablespoons of cubed cream cheese.
- Pop the bowl in the microwave and heat it in 30-second intervals, stirring well after each time, until the cheese is completely melted and looks smooth and gooey. This usually takes about 1.5 to 2 minutes total.
- Now, time to incorporate the rest of the ingredients. You'll need to work fairly quickly while the cheese is still warm and pliable: If making the Almond Flour Version: Add your 1 beaten egg and ¾ cup blanched almond flour to the melted cheese. Stir everything together with a spoon or spatula until it starts coming together into a shaggy dough. If making the Coconut Flour Version: Add your 2 whisked eggs and ⅓ cup coconut flour to the melted cheese. Stir well until a dough forms.
- Once the dough is mostly combined, turn it out onto a piece of parchment paper. If it's sticky, you can lightly wet your hands or use a little extra flour from your measured amount.
- Place another piece of parchment paper on top of the dough. Using a rolling pin (or even your hands!), roll or press the dough out into your desired pizza shape and thickness. A circle about 10-12 inches in diameter works great, or make it a rectangle. Don't make it too thin, or it might break!
- Carefully peel off the top piece of parchment paper. Slide the parchment paper with the crust onto a baking sheet.
- Preheat your oven to 400°F (200°C).
- Bake the crust (without toppings!) for 8-12 minutes, or until it's lightly golden brown around the edges and looks set. Keep an eye on it, as ovens vary!
- Remove the pre-baked crust from the oven. Now it's ready for your favorite keto-friendly pizza sauce and toppings!
- Add your toppings and return the pizza to the oven for another 5-10 minutes, or until the cheese is melted and bubbly and the toppings are heated through.
- Let it cool slightly, slice, and enjoy your low-carb pizza masterpiece!