
Introduction
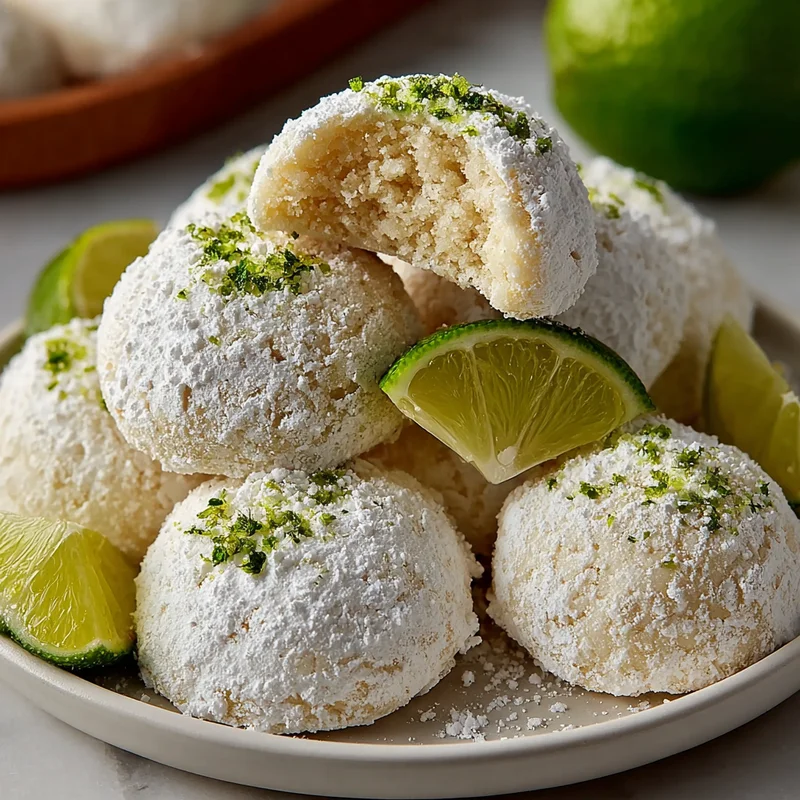
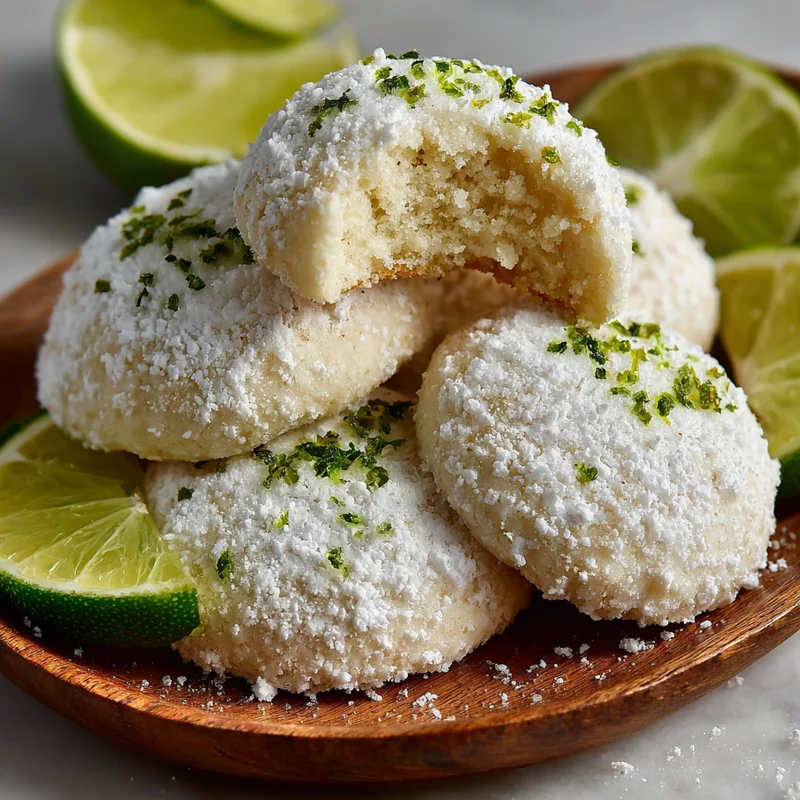
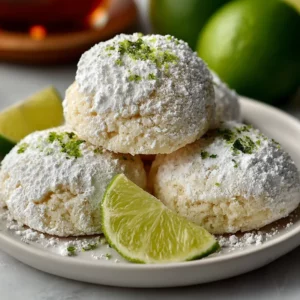
Oh, hello there, cookie lover! Do you ever just crave something bright, a little tangy, and wonderfully sweet? Something that feels like a tiny vacation in your mouth? Well, I’ve got just the thing for you! Today, we’re diving into the world of Key Lime Cooler Cookies. These little beauties are like a sunshine-filled hug for your taste buds. They’re so incredibly easy to whip up, and the flavor is just out-of-this-world delicious. I remember the first time I made these, and they were a huge hit! They have this delightful melt-in-your-mouth texture that just melts away the moment you take a bite, leaving behind that irresistible key lime tang. Get ready to impress yourself and everyone around you!
Why You’ll Love This Recipe
- Fast to Make: Even with chilling time, these come together surprisingly quickly for such a special cookie.
- Super Easy: No complicated techniques here! Perfect for beginners or when you need a quick bake.
- Perfect for Gifting: Packaged up in a cute tin or bag, these cookies are a thoughtful homemade gift that always gets rave reviews.
- Guaranteed Crowd-Pleaser: That unique key lime flavor is loved by so many, making them ideal for parties, bake sales, or just a treat for your family.
Ingredients
Alright, let’s gather our goodies! You probably have most of these in your pantry already:
- 3 cups All-Purpose Flour: The sturdy base of our cookie.
- 1/2 teaspoon Baking Powder: To give our cookies just a touch of lift.
- 1/4 teaspoon Salt: To balance out all that sweetness and enhance the flavors.
- 2 sticks (1 cup) Unsalted Butter, softened: Make sure it’s nice and soft for that creamy texture.
- 3 cups Powdered Sugar, divided: We’ll use some in the dough and some for that dreamy glaze.
- 1 large Egg Yolk: This adds richness and helps bind everything together.
- 1/4 cup Fresh Key Lime Juice: The star of the show! If you can’t find key limes, regular lime juice is perfectly fine.
- 1 tablespoon Key Lime Zest: For an extra punch of that amazing lime flavor.
How to Make It
Ready to get your bake on? Let’s do this step-by-step!
- Mix the Dry Stuff: In a medium bowl, grab a whisk and give your flour, baking powder, and salt a good whirl. This just makes sure everything is evenly distributed.
- Cream the Butter and Sugar: In a bigger bowl, use your electric mixer (or a good arm workout!) to cream together the softened butter and 1 cup of the powdered sugar. You want it to look light and fluffy, like a cloud!
- Add the Wet Goodies: Now, beat in the egg yolk, that wonderful key lime juice, and the zesty lime zest. Mix it all up until everything is beautifully combined.
- Combine Wet and Dry: Slowly add your dry ingredients to the wet ingredients. Mix on low speed, or just gently fold it in with a spatula, until it’s just combined. Don’t overmix!
- Chill Out Time: Cover that dough with plastic wrap and pop it in the refrigerator for at least 1 hour. This makes it much easier to handle and roll.
- Preheat & Prep: While the dough is chilling, preheat your oven to 350°F (175°C). Line your baking sheets with parchment paper – this is my secret for easy cleanup and perfectly baked cookies!
- Roll and Cut: On a lightly floured surface, roll out your chilled dough to about 1/4-inch thickness. Get creative with your cookie cutters!
- Bake to Perfection: Place your cut-out cookies onto the prepared baking sheets. Pop them into the oven and bake for 8-10 minutes, or until the edges just start to turn a lovely light golden brown.
- Cool Down: Let the cookies cool on the baking sheets for a few minutes. Then, carefully transfer them to a wire rack to cool completely. Patience is key here for the glaze!
- Whip Up the Glaze: While those cookies are cooling, let’s make the glaze! In a small bowl, whisk together the remaining 2 cups of powdered sugar with about 1-2 tablespoons of extra key lime juice. You want it to be smooth and pourable, like thin icing.
- Get Glazed! Once your cookies are totally cool (this is important!), you can either drizzle the glaze over them with a fork or dip the tops right into the bowl.
- Let it Set: Allow the glaze to dry and set before stacking or serving. And voilà! You’ve got yourself some stunning Key Lime Cooler Cookies.
Substitutions & Additions
Feeling adventurous? You can absolutely play with this recipe! Here are a few ideas:
- Lime Flavor Boost: If you’re a true lime fanatic like me, add a tiny bit more zest or a splash more juice to the dough.
- Citrus Swap: Lemon or even a touch of orange zest and juice can create a delightful citrusy variation.
- Sprinkles: Add some colorful sprinkles to the dough before baking, or dip the glazed cookies into sprinkles for extra sparkle.
- Jam-Filled: Make two cookies and spread a little lime curd or your favorite berry jam between them for a sandwich cookie!
Tips for Success
A few little tricks I’ve learned along the way to make these cookies absolutely perfect:
- Don’t Overmix the Dough: Overmixing can make your cookies tough. Mix just until everything is combined.
- Chill is Crucial: Don’t skip the chilling step! Cold dough is much easier to roll and cut, and it helps the cookies keep their shape.
- Watch Your Oven: Ovens can vary, so keep an eye on those cookies. They go from perfect to a little too brown very quickly!
- Glaze Consistency: If your glaze is too thick, add a tiny bit more lime juice (like, 1/2 teaspoon at a time) until it’s pourable. If it’s too thin, add a little more powdered sugar.
- Prep Ahead: You can make the cookie dough a day or two in advance and keep it chilled in the fridge. You can also bake the cookies a day ahead and store them in an airtight container, then glaze them just before serving for the freshest look.
How to Store It
Once your cookies are completely cool and the glaze has set, you can store them in an airtight container. They’ll stay wonderfully fresh at room temperature for about 3-5 days. If you’re feeling super organized, you can also freeze the unglazed, baked cookies for up to 3 months. Just thaw them and then glaze them when you’re ready to enjoy!
FAQs
Got a few lingering questions? I’ve got answers!
- Can I use regular limes instead of key limes? Absolutely! Regular lime juice and zest will work perfectly and still give you that lovely citrusy flavor.
- My dough is too sticky to roll, what should I do? Make sure you chilled it for the full hour. If it’s still a bit soft, add a touch more flour, a tablespoon at a time, until it’s manageable. Rolling between two sheets of parchment paper can also help!
- How do I get a super smooth glaze? Whisk the powdered sugar and liquid really well, and sieve your powdered sugar beforehand if you have any lumps.
Happy baking, friends! I hope you adore these Key Lime Cooler Cookies as much as I do. They’re truly a little bite of sunshine!
Key Lime Cooler Cookies
Equipment
- Whisk
- Electric mixer
- Spatula
- Plastic wrap
- Baking sheets
- Parchment paper
- Cookie cutters
- Wire rack
- Airtight container
Ingredients
Cookie Dough
- 3 cups All-Purpose Flour The sturdy base of our cookie.
- 0.5 teaspoon Baking Powder To give our cookies just a touch of lift.
- 0.25 teaspoon Salt To balance out all that sweetness and enhance the flavors.
- 2 sticks (1 cup) Unsalted Butter Make sure it's nice and soft for that creamy texture.
- 1 cup Powdered Sugar Used in the dough.
- 1 large Egg Yolk Adds richness and helps bind everything together.
- 0.25 cup Fresh Key Lime Juice The star of the show! If you can't find key limes, regular lime juice is perfectly fine.
- 1 tablespoon Key Lime Zest For an extra punch of that amazing lime flavor.
Glaze
- 2 cups Powdered Sugar For that dreamy glaze.
- 1 to 2 tablespoons Key Lime Juice For the glaze, adjust to desired consistency.
Instructions
- In a medium bowl, whisk together flour, baking powder, and salt.3 cups All-Purpose Flour
- In a larger bowl, cream together softened butter and 1 cup of powdered sugar until light and fluffy.3 cups All-Purpose Flour
- Beat in the egg yolk, key lime juice, and key lime zest until combined.3 cups All-Purpose Flour
- Gradually add the dry ingredients to the wet ingredients, mixing on low speed or folding until just combined. Do not overmix.3 cups All-Purpose Flour
- Cover the dough with plastic wrap and refrigerate for at least 1 hour.
- Preheat oven to 350°F (175°C) and line baking sheets with parchment paper.
- Roll out the chilled dough on a lightly floured surface to about 1/4-inch thickness. Use cookie cutters to cut out shapes.
- Place cookies on prepared baking sheets and bake for 8-10 minutes, or until edges are lightly golden brown.
- Let cookies cool on baking sheets for a few minutes, then transfer to a wire rack to cool completely.
- While cookies cool, whisk together the remaining 2 cups of powdered sugar with 1-2 tablespoons of key lime juice to create a smooth, pourable glaze.3 cups All-Purpose Flour
- Once cookies are completely cool, drizzle or dip the tops into the glaze.
- Allow the glaze to dry and set before stacking or serving.