Introduction
Hey there, sweet friends! Get ready to bring a little ray of sunshine into your kitchen. Does anything scream “happy” quite like the vibrant, tangy taste of key lime? It always reminds me of warm breezes and happy times. While a key lime pie is classic, sometimes you just need that zing in a quick, delightful bite. That’s where this incredible Key Lime Fudge comes in!
Forget complicated candy-making! This recipe is incredibly easy, ridiculously fast, and doesn’t require a candy thermometer. It’s the kind of treat you can whip up when you need a little cheer, have unexpected guests, or just want a taste of something wonderfully bright. Trust me, once you try it, you’ll be making excuses to make it again and again!
Why You’ll Love This Recipe
- Fast: From start to finish, you can have a batch ready to chill in under 15 minutes of active time. Seriously!
- Easy: No fussy steps, no reaching specific temperatures. If you can melt chocolate and stir, you can make this fudge.
- Giftable: Cut into pretty squares, this fudge makes a beautiful and delicious homemade gift that everyone will adore.
- Crowd-Pleasing: The tangy key lime cuts through the sweetness of the white chocolate, creating a balanced flavor that appeals to just about everyone.

Ingredients
Here’s what you’ll need to gather from your pantry:
- One 5-ounce can 2% evaporated milk: This gives the fudge its creamy, smooth texture. Don’t substitute regular milk!
- 1⅔ cups granulated white sugar: Standard sugar works perfectly here.
- ½ teaspoon salt: Just a pinch to balance out all that sweetness and enhance the lime flavor.
- 12 large marshmallows, quartered: These help with the texture and ease of melting. Quartering helps them melt faster.
- 2 cups white chocolate chips: Use good quality chips for the best flavor and smoothest melt.
- ¼ cup grated lime zest (about 5 limes): The zest is where the real citrus punch is! Make sure to only grate the green part, not the bitter white pith underneath.
- 2 tablespoons key lime juice (5 to 7 limes): Freshly squeezed is always best for that vibrant flavor!
How to Make It
Ready? Let’s get cooking! You’ll need a medium-sized saucepan, a whisk, and an 8×8 inch pan lined with parchment paper (leave some overhang so you can lift the fudge out easily!).
- First things first, get your 8×8-inch pan ready. Line it with parchment paper, letting the paper hang over the sides. This makes lifting the set fudge out so much easier!
- In your medium saucepan, combine the evaporated milk, granulated sugar, and salt. Place the pan over medium heat.
- Bring the mixture to a boil, stirring constantly with a whisk or wooden spoon to prevent it from sticking to the bottom.
- Once it reaches a full rolling boil (that’s when it continues to boil even while you’re stirring), boil for exactly 5 minutes, still stirring frequently. Don’t wander off during this crucial step!
- Remove the pan from the heat. Immediately add the quartered marshmallows and white chocolate chips to the hot mixture.
- Let it sit for about 5 minutes without stirring. This lets the residual heat melt the marshmallows and chocolate.
- Now, grab your whisk or spoon and stir until the mixture is completely smooth and glossy. Make sure there are no lumps of chocolate or marshmallow left.
- Quickly stir in the fresh key lime zest and key lime juice. Stir just until they are evenly incorporated. The mixture might thicken slightly.
- Pour the fudge mixture into your prepared 8×8-inch pan. Use a spatula to spread it evenly into the corners.
- Let the fudge cool at room temperature for about 15-20 minutes, then transfer it to the refrigerator for at least 2-3 hours, or until it’s completely set.
- Once firm, use the parchment paper overhang to lift the fudge out of the pan. Place it on a cutting board and cut into squares. I like to wipe my knife with a hot, damp cloth between cuts for cleaner slices!
- Enjoy your sunshiney fudge!
Substitutions & Additions
Want to play around with the recipe? Here are a few ideas:
- Lime Type: While Key Limes have that distinct tartness, you can definitely use regular Persian limes. You might just need a little less juice as they can be more acidic, and perhaps a bit more zest for flavor.
- Chocolate: Not a white chocolate fan? This recipe specifically relies on white chocolate for its sweetness and ability to pair with the lime. Semi-sweet or milk chocolate won’t give you that bright key lime flavor profile. However, you could experiment with a blend of white and maybe a little cream cheese for a tangier base (though that changes the recipe significantly).
- Add-ins: Stir in a handful of chopped macadamia nuts or shredded coconut with the zest and juice for extra texture and flavor.
- Color: For a vibrant green fudge, you can add a drop or two of green food coloring when you add the lime juice.

Tips for Success
Even though this recipe is easy, a couple of pointers will ensure perfect fudge every time:
- Measure Carefully: Baking (or candy making!) is a science. Be precise with your ingredient measurements, especially the sugar and liquid.
- Don’t Overcook: Boiling for exactly 5 minutes after it reaches a full boil is key. Too short and it might not set; too long and it could be grainy.
- Stir Constantly (while boiling): Prevent scorching by keeping that mixture moving while it boils.
- Use Fresh Ingredients: Freshly squeezed lime juice and zest make a world of difference in the flavor compared to bottled juice.
- Line Your Pan: Seriously, don’t skip the parchment paper! It makes removing and cutting the fudge so much easier.
- Be Patient While Setting: Allow the full chilling time. Trying to cut it too soon will result in a sticky mess.
How to Store It
Once your beautiful Key Lime Fudge is cut into squares, you’ll want to store it properly to keep it fresh.
Store fudge in an airtight container at room temperature for up to a week, or in the refrigerator for up to two weeks. If storing in layers, place a piece of parchment or wax paper between the layers to prevent them from sticking together. For longer storage, you can freeze fudge in an airtight container or freezer bag for up to 3 months. Thaw in the refrigerator or at room temperature before enjoying.
FAQs
Got questions? I’ve got answers!
Can I use bottled key lime juice?
While fresh juice gives the best, most vibrant flavor, you can use bottled key lime juice in a pinch. Use the same amount. The flavor might be slightly less intense.
Why is my fudge grainy?
Graininess usually happens when the sugar crystallizes. This can be caused by not stirring enough while boiling, overcooking the mixture, or sugar crystals sticking to the side of the pan. Make sure to wipe down the sides of the pan with a wet pastry brush if you see crystals forming during the boil.
Do I really need to use marshmallows?
Marshmallows help achieve a smooth texture and make this particular no-fail method work. Substituting them would require a different type of fudge recipe entirely.
Can I make this ahead of time?
Absolutely! Fudge is a fantastic make-ahead treat. Prepare it, let it set, cut it, and store it as directed until you’re ready to serve.
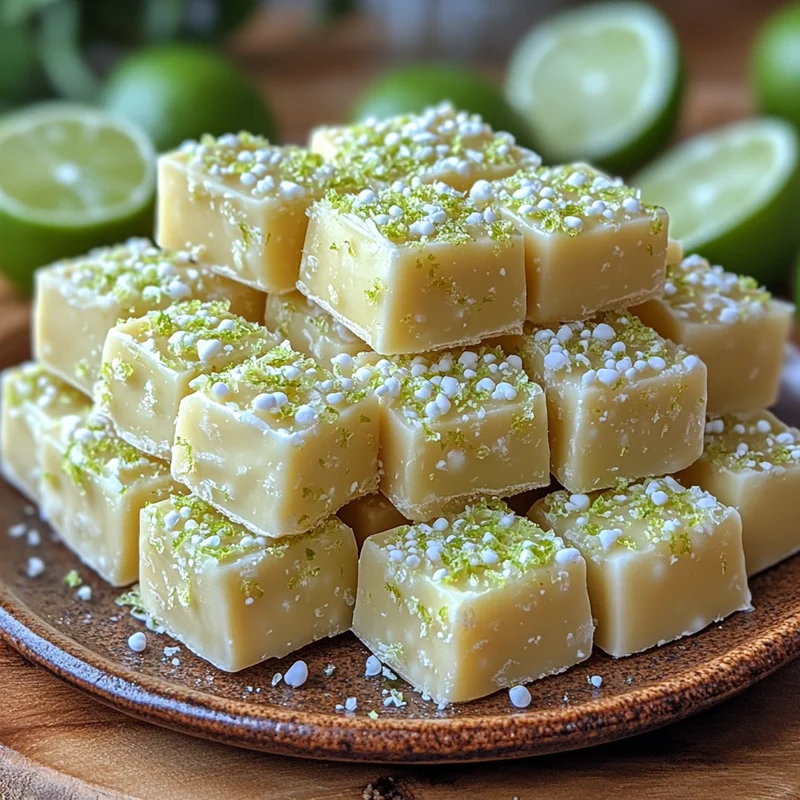
Bright & Easy Key Lime Fudge Recipe (No Candy Thermometer Needed!)
This Key Lime Fudge recipe is incredibly easy, ridiculously fast, and doesn’t require a candy thermometer. It’s a quick, delightful bite with a vibrant, tangy taste.
- medium-sized saucepan
- Whisk
- 8×8 inch pan
- Parchment paper
- Spatula
- Cutting board
- Knife
Hauptzutaten
- 5 ounce can 2% evaporated milk (Don’t substitute regular milk!)
- 1.67 cups granulated white sugar
- 0.5 teaspoon salt (to balance out sweetness and enhance lime flavor)
- 12 large marshmallows (quartered; help with the texture and ease of melting)
- 2 cups white chocolate chips (Use good quality chips for the best flavor and smoothest melt)
- 0.25 cup grated lime zest (about 5 limes; Make sure to only grate the green part)
- 2 tablespoons key lime juice (5 to 7 limes; Freshly squeezed is always best)
- First things first, get your 8×8-inch pan ready. Line it with parchment paper, letting the paper hang over the sides. This makes lifting the set fudge out so much easier!
- In your medium saucepan, combine the evaporated milk, granulated sugar, and salt. Place the pan over medium heat.
- Bring the mixture to a boil, stirring constantly with a whisk or wooden spoon to prevent it from sticking to the bottom.
- Once it reaches a full rolling boil (that’s when it continues to boil even while you’re stirring), boil for exactly 5 minutes, still stirring frequently. Don’t wander off during this crucial step!
- Remove the pan from the heat. Immediately add the quartered marshmallows and white chocolate chips to the hot mixture.
- Let it sit for about 5 minutes without stirring. This lets the residual heat melt the marshmallows and chocolate.
- Now, grab your whisk or spoon and stir until the mixture is completely smooth and glossy. Make sure there are no lumps of chocolate or marshmallow left.
- Quickly stir in the fresh key lime zest and key lime juice. Stir just until they are evenly incorporated. The mixture might thicken slightly.
- Pour the fudge mixture into your prepared 8×8-inch pan. Use a spatula to spread it evenly into the corners.
- Let the fudge cool at room temperature for about 15-20 minutes, then transfer it to the refrigerator for at least 2-3 hours, or until it’s completely set.
- Once firm, use the parchment paper overhang to lift the fudge out of the pan. Place it on a cutting board and cut into squares. I like to wipe my knife with a hot, damp cloth between cuts for cleaner slices!
- Enjoy your sunshiney fudge!
Tips for Success:
– Measure Carefully: Baking (or candy making!) is a science. Be precise with your ingredient measurements, especially the sugar and liquid.
– Don’t Overcook: Boiling for exactly 5 minutes after it reaches a full boil is key. Too short and it might not set; too long and it could be grainy.
– Stir Constantly (while boiling): Prevent scorching by keeping that mixture moving while it boils.
– Use Fresh Ingredients: Freshly squeezed lime juice and zest make a world of difference in the flavor compared to bottled juice.
– Line Your Pan: Seriously, don’t skip the parchment paper! It makes removing and cutting the fudge so much easier.
– Be Patient While Setting: Allow the full chilling time. Trying to cut it too soon will result in a sticky mess.
Storage:
– Store fudge in an airtight container at room temperature for up to a week, or in the refrigerator for up to two weeks.
– If storing in layers, place a piece of parchment or wax paper between the layers to prevent them from sticking together.
– For longer storage, you can freeze fudge in an airtight container or freezer bag for up to 3 months. Thaw in the refrigerator or at room temperature before enjoying.
FAQs:
– Bottled key lime juice can be used but fresh is best for flavor.
– Graininess is usually caused by sugar crystallization from not stirring enough while boiling, overcooking, or crystals sticking to the pan sides (wipe with a wet pastry brush if seen).
– Marshmallows are necessary for this specific no-fail method’s texture.