Introduction
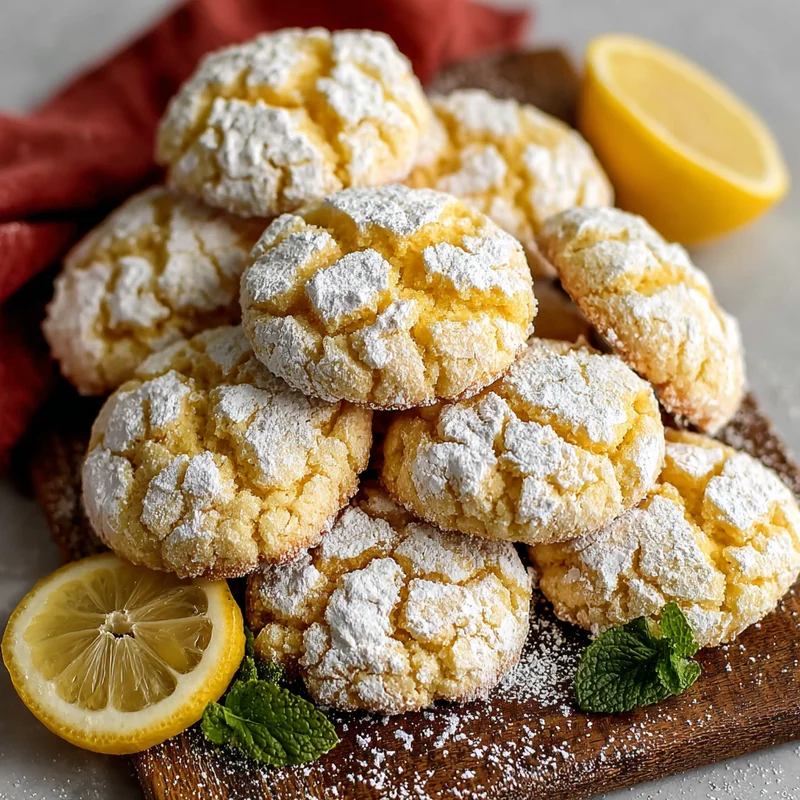
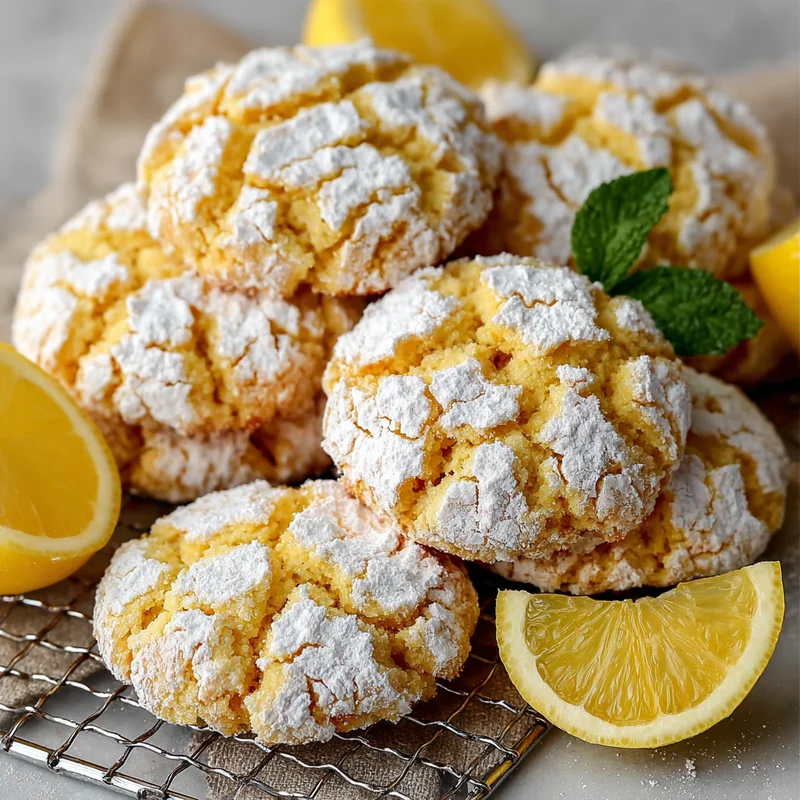
Oh, the memories! There’s something about a perfectly crinkled cookie, especially one bursting with bright lemon flavor, that just takes me right back to simpler times. Maybe it was grandma’s kitchen, or a bake sale on a sunny afternoon, but these Very Lemon Crinkle Cookies are pure sunshine in edible form. And the best part? They’re incredibly simple to whip up, making them perfect for a quick treat or a delightful baking project with the kids.
Why You’ll Love This Recipe
- Fast: While the dough needs a chill, the active prep time is super quick!
- Easy: No fancy techniques required, just simple mixing and rolling.
- Giftable: Pack these into a cute tin or bag – they make the sweetest homemade gifts!
- Crowd-pleasing: That irresistible lemon tang and sugary crust have a way of making everyone smile.

Ingredients
Gathering your ingredients is the first step to cookie bliss! Here’s what you’ll need:
- 2 ½ cups (313g) all-purpose flour, spooned and leveled: This is our sturdy base.
- 1 teaspoon cornstarch: A little secret ingredient for extra tenderness!
- 1 teaspoon baking soda: Our leavening agent for that perfect lift.
- ½ teaspoon salt: It balances out all the sweetness and brightens the flavors.
- ¾ cup (170g) unsalted butter, softened: Make sure it’s nice and soft for easy creaming.
- 1 cup + 2 tablespoons (225g) granulated sugar: For that classic sweetness and a touch of chewiness.
- 1 large egg: It binds everything together beautifully.
- ¼ cup (60ml) lemon juice: Freshly squeezed is always best for that vibrant flavor!
- 1 tablespoon lemon zest: Don’t skip this! It’s where all that intense lemon perfume comes from.
- 1 teaspoon vanilla extract: A little splash of warmth to round out the flavors.
For Rolling:
- 3 tablespoons (35g) granulated sugar (optional): This adds a little extra crunch and sparkle before the main event.
- 1 cup (120g) confectioners’ sugar: This is what gives our cookies their signature frosty, crinkled look!
How to Make It
Alright, let’s get our aprons on and make some magic! Follow these simple steps, and you’ll be enjoying these delightful cookies in no time.
- Whisk the Dry Ingredients: In a medium bowl, grab a whisk and combine your flour, cornstarch, baking soda, and salt. Give them a good swirl to make sure everything is evenly distributed.
- Cream Butter and Sugar: In a big bowl (your stand mixer or a trusty hand mixer will be your best friend here!), cream together the softened butter and granulated sugar. You want this mixture to become light and fluffy – think pale yellow and airy.
- Add the Wet Ingredients: Now, beat in the egg, lemon juice, lemon zest, and vanilla extract. Mix until everything is beautifully combined and looks wonderfully smooth.
- Combine Wet and Dry: Gradually add those dry ingredients you whisked earlier into the wet ingredients. Mix on low speed (or gently by hand) until just combined. We don’t want to overmix here!
- Chill the Dough: This is important for those perfect crinkles! Cover the dough tightly and pop it into the refrigerator for at least 2 hours, or until it’s firm enough to handle. This makes rolling much easier and prevents the cookies from spreading too much.
- Preheat and Prep: While the dough chills, preheat your oven to 350°F (175°C). Line your baking sheets with parchment paper – this is a game-changer for easy cleanup!
- Sugar Coating Station: In a small bowl, combine the confectioners’ sugar and the optional granulated sugar. This is where the crinkly magic happens!
- Roll into Balls: Once your dough is nice and firm, scoop out rounded tablespoons of dough. Roll each one into a smooth ball between your palms.
- Coat Generously: Now, roll each dough ball generously in the sugar mixture until it’s thoroughly coated. Don’t be shy with the sugar – that’s what creates those beautiful cracks!
- Bake to Perfection: Place the sugar-coated cookie balls onto your prepared baking sheets, leaving about 2 inches between them so they have room to spread a little.
- The Bake: Bake for 10-12 minutes. You’re looking for the edges to be lightly golden, but the centers should still look soft. They’ll continue to firm up as they cool.
- Cool Down: Let the cookies cool on the baking sheets for a few minutes. This helps them set up. Then, carefully transfer them to a wire rack to cool completely. I usually can’t resist trying one while they’re still warm, though!
Substitutions & Additions
Feeling creative? I love how adaptable this recipe is! Here are a few ideas:
- Lime Zest & Juice: For a different citrusy twist, try using lime instead of lemon!
- Orange Zest & Juice: A touch of orange can add a lovely warmth and sweetness.
- Extra Lemon Flavor: If you’re a true lemon lover, you can add another teaspoon of lemon zest.
- Poppy Seeds: Stir a tablespoon or two of poppy seeds into the dough for a little texture and visual appeal.
- Dip in White Chocolate: Once cooled, drizzle or dip the bottoms in melted white chocolate for an extra decadent treat.
Tips for Success
A few little tricks up my sleeve to make sure your crinkle cookies are absolutely perfect:
- Don’t Overmix: Overmixing the dough can lead to tough cookies. Mix just until combined.
- Chill Time is Key: Resist the urge to skip or shorten the chilling time. It really makes a difference in the cookie’s texture and how it bakes.
- Roll Them Well: Make sure you roll the dough balls generously in the confectioners’ sugar. This is what creates those signature crinkles.
- Watch the Bake Time: Cookies can go from perfectly baked to overdone very quickly. Keep an eye on them, especially during the last couple of minutes.
- Prep Ahead: You can make the dough, chill it, and even roll and coat the cookie balls a day in advance. Store them in an airtight container in the fridge until you’re ready to bake.
How to Store It
Once these beauties have completely cooled, you’ll want to store them properly to keep them fresh and delicious. Pop them into an airtight container at room temperature. They’ll stay wonderfully soft and flavorful for about 3-4 days. If you can resist, that is!
FAQs
Got a burning question? I’ve got answers!
Why aren’t my cookies crinkling?
Usually, this comes down to not rolling the dough balls generously enough in the confectioners’ sugar before baking, or not chilling the dough long enough. Make sure they’re well coated and firm!
Can I use lemon extract instead of fresh lemon juice and zest?
You can, but fresh lemon juice and zest provide a much brighter, more authentic lemon flavor. If you do use extract, start with about 1 teaspoon of lemon extract and adjust to your taste, but you’ll miss out on that lovely zest aroma.
How long does the dough last in the fridge?
The dough can be stored in the refrigerator for up to 3 days. You might need to let it soften slightly before rolling if it becomes too firm.
Can I freeze these cookies?
Yes! You can freeze the baked and cooled cookies in an airtight container for up to 2-3 months. Or, you can freeze the dough balls before baking (don’t roll in sugar yet). Place them on a baking sheet to freeze individually, then transfer to a freezer bag. When ready to bake, roll the frozen dough balls in the sugar mixture and bake as directed, adding a minute or two to the baking time.
Very Lemon Crinkle Cookies
Bright, zesty, and wonderfully crinkled, these easy lemon cookies are a sunshiney treat perfect for baking with kids or gifting.
- Medium bowl
- Whisk
- Big bowl
- Stand Mixer
- Hand mixer
- Small bowl
- Baking sheets
- Parchment paper
- Wire rack
- Airtight container
Main ingredients
- 2.5 cups all-purpose flour (spooned and leveled)
- 1 teaspoon cornstarch
- 1 teaspoon baking soda
- 0.5 teaspoon salt
- 0.75 cup unsalted butter (softened)
- 1.0833 cup granulated sugar
- 1 large egg
- 0.25 cup lemon juice (Freshly squeezed)
- 1 tablespoon lemon zest
- 1 teaspoon vanilla extract
For Rolling
- 3 tablespoons granulated sugar (optional)
- 1 cup confectioners’ sugar
- Whisk the Dry Ingredients: In a medium bowl, grab a whisk and combine your flour, cornstarch, baking soda, and salt. Give them a good swirl to make sure everything is evenly distributed.
- Cream Butter and Sugar: In a big bowl (your stand mixer or a trusty hand mixer will be your best friend here!), cream together the softened butter and granulated sugar. You want this mixture to become light and fluffy – think pale yellow and airy.
- Add the Wet Ingredients: Now, beat in the egg, lemon juice, lemon zest, and vanilla extract. Mix until everything is beautifully combined and looks wonderfully smooth.
- Combine Wet and Dry: Gradually add those dry ingredients you whisked earlier into the wet ingredients. Mix on low speed (or gently by hand) until just combined. We don’t want to overmix here!
- Chill the Dough: This is important for those perfect crinkles! Cover the dough tightly and pop it into the refrigerator for at least 2 hours, or until it’s firm enough to handle. This makes rolling much easier and prevents the cookies from spreading too much.
- Preheat and Prep: While the dough chills, preheat your oven to 350°F (175°C). Line your baking sheets with parchment paper – this is a game-changer for easy cleanup!
- Sugar Coating Station: In a small bowl, combine the confectioners’ sugar and the optional granulated sugar. This is where the crinkly magic happens!
- Roll into Balls: Once your dough is nice and firm, scoop out rounded tablespoons of dough. Roll each one into a smooth ball between your palms.
- Coat Generously: Now, roll each dough ball generously in the sugar mixture until it’s thoroughly coated. Don’t be shy with the sugar – that’s what creates those beautiful cracks!
- Bake to Perfection: Place the sugar-coated cookie balls onto your prepared baking sheets, leaving about 2 inches between them so they have room to spread a little.
- The Bake: Bake for 10-12 minutes. You’re looking for the edges to be lightly golden, but the centers should still look soft. They’ll continue to firm up as they cool.
- Cool Down: Let the cookies cool on the baking sheets for a few minutes. This helps them set up. Then, carefully transfer them to a wire rack to cool completely. I usually can’t resist trying one while they’re still warm, though!
For extra lemon flavor, add another teaspoon of lemon zest. You can also substitute lime or orange for lemon. Poppy seeds or a white chocolate drizzle are also great additions.