Introduction
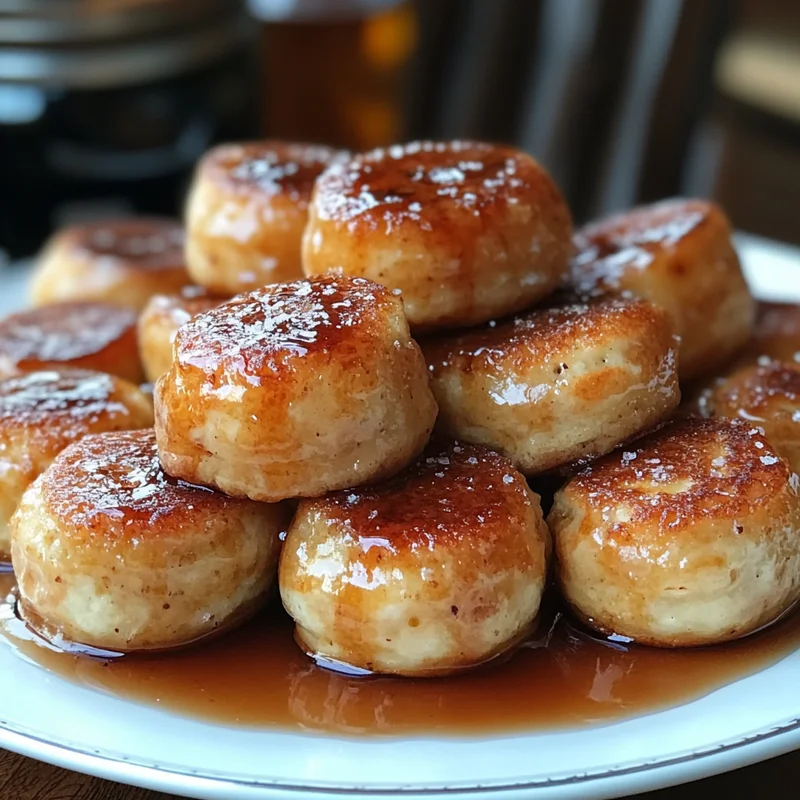
Remember those lazy Saturday mornings growing up? The smell of pancakes wafting through the house? There’s just something so comforting about pancakes, right? Well, get ready to bring a little bit of that magic back, but with a fun, modern twist! These Maple Pancake Poppers are everything you love about classic pancakes – that fluffy texture, that hint of sweet maple – but baked up into adorable, bite-sized little puffs. Forget standing over a hot griddle flipping pancakes one by one! This recipe is so incredibly easy, quick, and mess-free, you’ll wonder why you didn’t make them sooner. They’re perfect for busy mornings, fun brunch get-togethers, or just because you deserve a little bite of happiness. Trust me, these are going to become a family favorite in no time!
Why You’ll Love This Recipe
- Fast: Ready in under 20 minutes from start to finish!
- Easy: Simple ingredients, simple steps, foolproof results.
- Giftable: Pack them up in a cute tin for a sweet breakfast treat gift!
- Crowd-pleasing: Kids and adults alike adore these mini bites.
- Mess-Free: No greasy griddle or splattering batter.
Ingredients
Here’s what you’ll need to whip up a batch of these delightful little poppers. Most of these are probably already hanging out in your pantry!
- 1 ½ cups all-purpose flour: Just your standard flour works perfectly here to build that fluffy structure.
- 2 tablespoons granulated sugar: A little touch of sweetness to make them extra yummy.
- 2 teaspoons baking powder: This is the magic leavening agent that makes them rise and get all fluffy! Make sure it’s fresh.
- ½ teaspoon salt: Just a pinch to balance out the sweetness and enhance the flavors.
- 1 large egg: Helps bind everything together and adds richness.
- 1 cup milk: Any kind of milk works! Whole milk will give you a slightly richer result, but 2% or even non-dairy milk is fine.
- 2 tablespoons unsalted butter, melted: Butter adds moisture and that delicious classic pancake flavor. Melting it helps it incorporate smoothly into the batter.
- 1 teaspoon maple extract: This is where the big maple flavor comes in! It gives you that lovely taste without needing loads of syrup mixed into the batter itself. You can find this in the baking aisle.
- Non-stick cooking spray or melted butter, for greasing pan: Essential to make sure those little guys pop right out of the tin!
How to Make It
Let’s get baking! It’s truly as simple as mix, pour, and bake.
- Okay, first things first, let’s get the oven ready. Preheat your oven to 375°F (that’s 190°C). While it’s heating up, grab your mini muffin tin. Give it a good spray with non-stick cooking spray or brush a little melted butter into each cup. You want to make sure these don’t stick!
- Now, in a large bowl, grab your dry ingredients: the flour, sugar, baking powder, and salt. Give them a good whisk together. This helps distribute everything evenly, especially that baking powder!
- In a separate, medium bowl, whisk together your wet ingredients: the egg, milk, that lovely melted butter, and the star of the show, the maple extract. Whisk until everything is well combined.
- Time to bring the wet and dry together! Pour the wet ingredients mixture right into the bowl with the dry ingredients. Now, stir gently until just combined. You’ll likely see a few small lumps, and that is totally okay! Resist the urge to keep stirring and make it perfectly smooth. Overmixing is the enemy of fluffy pancakes (and poppers!). Stop as soon as there’s no dry flour visible.
- Alright, batter ready! The easiest way to get the batter into the tiny muffin cups is to either carefully spoon it in or, even better, pour it from a measuring cup with a spout or transfer it to a piping bag (or a zip-top bag with a corner snipped off). Fill each mini muffin well about two-thirds full. They will rise!
- Pop the tin into your preheated oven. Bake for 10-12 minutes. You’ll know they’re done when they look golden brown around the edges and a toothpick inserted into the center of one comes out clean.
- Once they’re baked, take them out of the oven and let them hang out in the tin for just 2-3 minutes. This helps them firm up a little before you try to move them.
- After the short cooling time in the tin, gently remove the poppers. A small offset spatula or even just your fingers can help pop them out. Transfer them to a wire rack to cool slightly more, if you can resist!
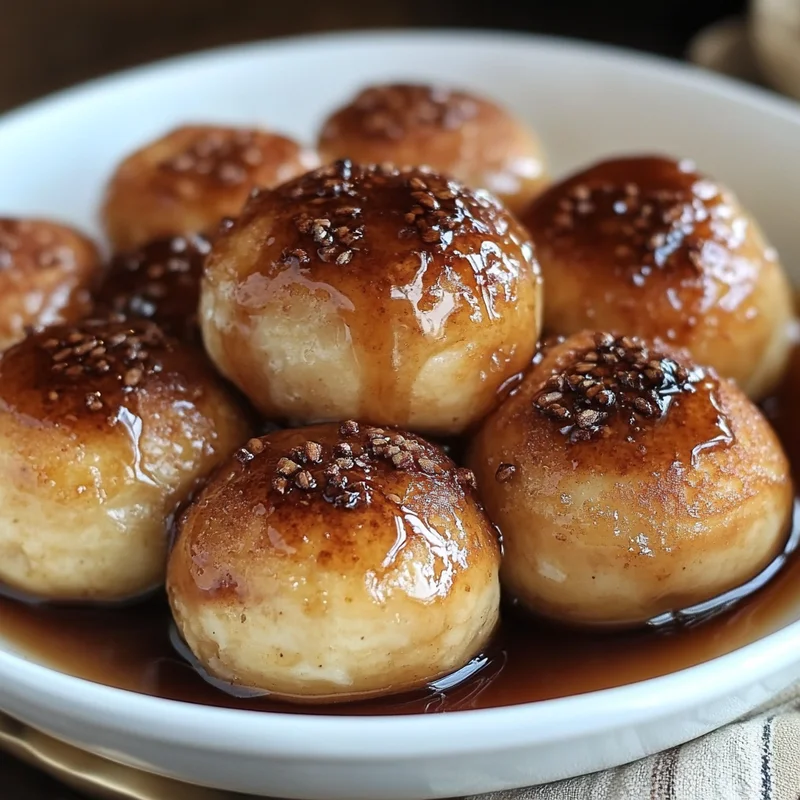
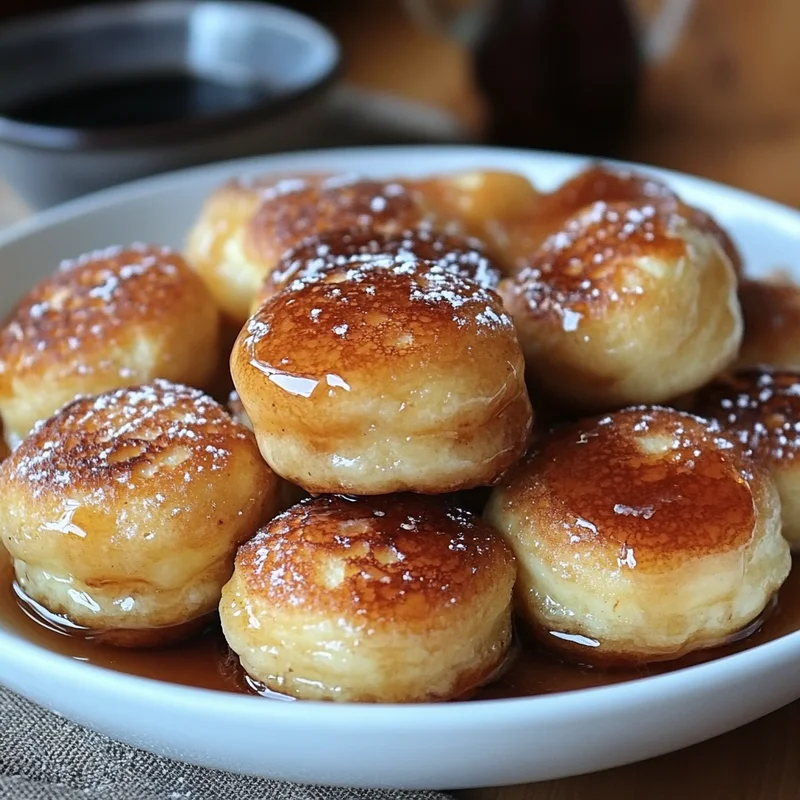
- Serve them warm! These are amazing on their own, but even better with a little drizzle of extra maple syrup for dipping, a dusting of powdered sugar, or alongside some fresh fruit. Enjoy!
Substitutions & Additions
Want to play around with the recipe? Here are a few fun ideas!
- Chocolate Chip Power! Stir in a ¼ cup of mini chocolate chips to the batter before baking. Everything is better with chocolate, right?
- Berry Burst: Gently fold in a few fresh blueberries or chopped strawberries into the batter.
- Different Extract: No maple extract? Try vanilla extract, almond extract, or even a little lemon zest for a different flavor profile.
- Spiced Up: Add a pinch of cinnamon or nutmeg to the dry ingredients for a warm spice flavor.
- Make them Gluten-Free: While I haven’t personally tested it with this specific recipe, you could likely substitute the all-purpose flour with a good quality gluten-free all-purpose blend (one that contains xanthan gum). Follow the rest of the steps as written.
Tips for Success
Here are a few little pointers to make sure your pancake poppers turn out perfect every time:
- Don’t Overmix! I know I said it before, but it’s the most important tip. Lumps are good! Overmixing develops the gluten and makes the poppers tough instead of light and fluffy.
- Check Your Baking Powder: If your baking powder is old, your poppers won’t rise properly. To test if it’s still good, put a teaspoon in a bowl and pour a little hot water over it. If it fizzes vigorously, it’s good to go!
- Grease Generously: Make sure every single cup in that mini muffin tin is well-greased. It makes removal so much easier!
- Fill Appropriately: Filling the wells about two-thirds full gives them enough room to rise without spilling over.
- Prep Ahead? You can mix the dry ingredients in one bowl and the wet in another the night before. In the morning, just combine them quickly and bake. This saves a few minutes when you’re in a rush!
How to Store It
These are best enjoyed fresh and warm, but if you happen to have any leftovers (a rare occurrence in my house!), here’s how to keep them:
- Let them cool completely on a wire rack.
- Store them in an airtight container at room temperature for up to 2 days, or in the refrigerator for up to 4 days.
- To reheat, pop them in the microwave for a few seconds or warm them gently in a toaster oven until heated through.
- You can also freeze them! Once completely cool, place them in a single layer on a baking sheet and freeze until solid. Then transfer them to a freezer-safe bag or container. They should keep for up to 2-3 months. Reheat directly from frozen in the microwave or toaster oven.
FAQs
Got questions? Here are a few common ones!
Can I make these in a regular-sized muffin tin?
You could, but they wouldn’t be “poppers” anymore! The baking time would also be longer, likely closer to 15-20 minutes. Keep an eye on them and test with a toothpick.
What should I serve with these?
Oh, the possibilities! They’re fantastic with a drizzle of maple syrup, a dusting of powdered sugar, fresh berries, a side of bacon or sausage, or a dollop of whipped cream. They’re also fun to serve as part of a larger brunch spread.
Can I skip the maple extract?
Yes, you can! If you don’t have maple extract, just omit it. They’ll still be delicious mini pancake bites, but without that strong maple flavor baked in. You can always add extra maple syrup for dipping!
Are these good for meal prep?
Absolutely! They store and reheat well, making them perfect for a quick grab-and-go breakfast during the week.
Easy Maple Pancake Poppers
Equipment
- Mini muffin tin
- Large bowl
- Medium bowl
- Whisk
- Measuring cup with a spout, piping bag, or zip-top bag For filling tin
- toothpick For testing doneness
- Wire rack For cooling
- Small offset spatula or fingers For removing poppers
Ingredients
Hauptzutaten
- 1.5 cups all-purpose flour
- 2 tablespoons granulated sugar
- 2 teaspoons baking powder
- 0.5 teaspoon salt
- 1 large egg
- 1 cup milk Any kind
- 2 tablespoons unsalted butter melted
- 1 teaspoon maple extract
- Non-stick cooking spray or melted butter for greasing pan
Instructions
- Preheat your oven to 375°F (190°C). Grease a mini muffin tin generously with non-stick cooking spray or melted butter.
- In a large bowl, whisk together the flour, sugar, baking powder, and salt.
- In a separate medium bowl, whisk together the egg, milk, melted butter, and maple extract.
- Pour the wet ingredients into the dry ingredients. Stir gently until just combined. Do not overmix; a few lumps are okay.
- Spoon or pour the batter into the prepared mini muffin cups, filling each about two-thirds full.
- Bake for 10-12 minutes, or until golden brown and a toothpick inserted into the center comes out clean.
- Let the poppers cool in the tin for 2-3 minutes before gently removing them.
- Transfer to a wire rack to cool slightly more.
- Serve warm, plain or with toppings like maple syrup or powdered sugar.