
Introduction
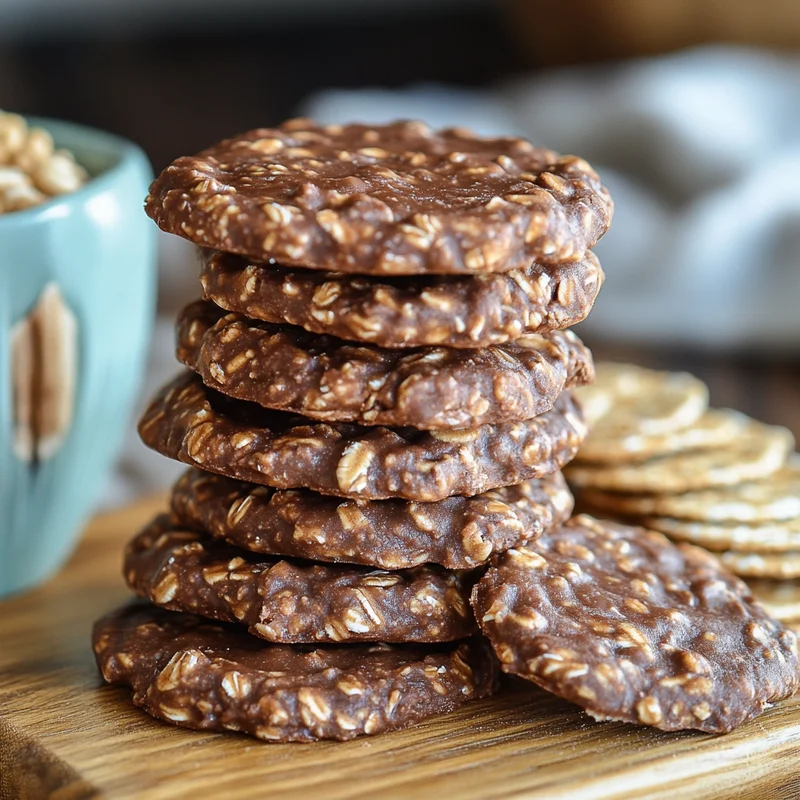
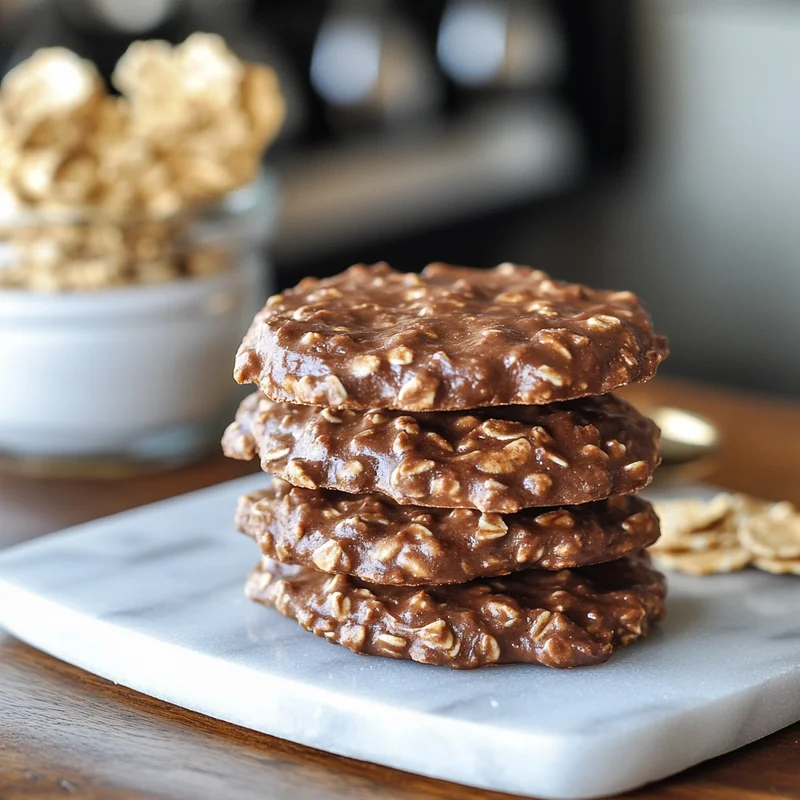
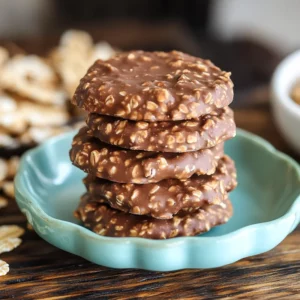
Oh my goodness, do you remember these? Those magical cookies that didn’t require turning on the oven, perfect for scorching summer days or rainy afternoons stuck inside? These Easy No Bake Chocolate Peanut Butter Cookies are pure nostalgia in edible form. I bet your mom or grandma made them, just like mine did! There’s something so comforting and wonderfully simple about them. And the best part? You can whip up a batch of these sweet, fudgy, peanut buttery delights in about 10 minutes flat, plus cooling time. They’re practically foolproof, even if you’re a kitchen newbie. Get ready to make some happy memories (and a mess of delicious cookies!).
Why You’ll Love This Recipe
Seriously, what’s not to love about a cookie you don’t have to bake? But if you need more convincing, here’s why these will become your new go-to:
- Fast: From pot to paper in under 15 minutes active time.
- Easy: If you can stir, you can make these. No fancy equipment needed!
- Giftable: Package them up nicely and they make a fantastic homemade gift.
- Crowd-pleasing: Who can resist the classic combo of chocolate and peanut butter? They disappear fast!
Ingredients
Gathering your ingredients is the first step to cookie bliss! Here’s what you’ll need:
- 1/2 cup unsalted butter: This is our base, bringing richness.
- 1/3 cup cocoa powder: For that essential chocolatey goodness. Use unsweetened for best results.
- 1/2 cup milk: Any kind works – whole, 2%, or even non-dairy if you’re experimenting!
- 1 1/2 cups granulated sugar: The main sweetener.
- 1/3 cup brown sugar (light or dark): Adds a little depth and chewiness that granulated sugar alone won’t give you.
- 3 cups quick oats: Quick oats are key here! They absorb the liquid just right. Don’t substitute with old-fashioned or steel-cut oats, or your texture will be off.
- 2/3 cup creamy peanut butter: Gotta have that peanut butter swirl! Creamy works best for that smooth texture.
- 2 tsp vanilla extract: A touch of vanilla rounds out all the flavors beautifully.
- 1/2 tsp salt: Just a pinch to balance all that sweetness and make the chocolate and peanut butter flavors pop.
How to Make It
Okay, let’s get cooking! Get your wax paper or parchment paper ready on your counter or baking sheets, because once the mixture is ready, you need to move fast!
- Grab a medium-sized saucepan. Toss in the butter, cocoa powder, milk, granulated sugar, and brown sugar. This is your base mixture that’s going to get bubbly!
- Place the saucepan over medium heat. Start stirring constantly as it heats up. You want everything to melt together and then come to a rolling boil – that’s when you see big, active bubbles all over the surface, not just around the edges. Keep stirring!
- Once it hits that rolling boil, set a timer. You need to let it boil for exactly 1 to 2 minutes. This step is crucial for the cookies to set properly, so don’t guess on the time!
- After the 1-2 minutes of boiling, immediately take the saucepan off the heat. No more cooking!
- Now, this is where you need to be quick! Dump in the quick oats, creamy peanut butter, vanilla extract, and salt. Stir, stir, stir! Mix it all together really well until everything is combined and the peanut butter is fully incorporated. You’ll notice it starts to thicken up pretty fast.
- Working as quickly as you can before the mixture sets up completely, drop spoonfuls (about a tablespoon or two each) onto your prepared wax paper or parchment paper. I like using two spoons or a small cookie scoop for this. Don’t worry if they aren’t perfectly round – the rustic look is part of their charm!
- Let the cookies cool completely at room temperature. This takes about 30 to 60 minutes, depending on how warm your kitchen is and how big your cookies are. They’ll start out glossy and soft and become duller and firm as they cool and set. Resist the urge to move them too soon!
Substitutions & Additions
While the classic is amazing, you can totally play around with these cookies! Here are a few ideas:
- Peanut Butter Swap: Don’t like peanut butter or have an allergy? You can often swap creamy almond butter or even sunflower seed butter (SunButter) 1:1. The flavor will change, of course!
- Dairy-Free: Use a plant-based milk (like almond or soy) and a dairy-free butter substitute that bakes well.
- Add-Ins: Once you take the pot off the heat and before stirring in the oats/PB, you can stir in a handful of chopped nuts (like walnuts or pecans), shredded coconut, or even mini chocolate chips for extra texture and flavor!
- Extract Variations: Try adding a touch of almond extract along with or instead of vanilla for a different twist.
Tips for Success
These cookies are easy, but there are a couple of things that can trip you up. Here’s how to avoid common pitfalls:
- Boil Time is King: Seriously, boiling for too short a time means they won’t set, leaving you with a delicious, but messy, puddle. Boiling for too long means they’ll be dry and crumbly. Set a timer for 1 minute and go from there. If it’s a humid day, you might lean towards the 2-minute mark.
- Use Quick Oats: I know I said it in the ingredients, but it’s worth repeating! Old-fashioned oats don’t absorb the liquid the same way and your cookies won’t have the right texture.
- Work Quickly: Once you add the oats and peanut butter, the mixture starts to set almost immediately. Have your parchment paper ready and scoop quickly!
- Don’t Chill Early: Let them cool completely at room temp. Putting them in the fridge too soon can sometimes mess with the texture and cause them to “sweat.”
How to Store It
Once your delicious cookies are fully set and cooled, store them in an airtight container. They keep well at room temperature for about 3-5 days. If you want them to last longer, you can pop the container in the fridge for up to a week. For longer storage, you can even freeze them in a freezer-safe container for a couple of months. Just let them thaw at room temperature for a bit before enjoying!
FAQs
Got questions? I’ve got answers!
Why didn’t my no bake cookies set?
The most common reason is not boiling the sugar mixture long enough. It needs that full 1-2 minutes of a rolling boil to reach the proper temperature for setting. Humidity can also sometimes affect setting.
My cookies are dry and crumbly, what happened?
This usually means you boiled the sugar mixture for too long, evaporating too much liquid. Stick to that strict 1-2 minute boil time!
Can I use natural peanut butter?
Natural peanut butter (the kind that separates and needs stirring) usually has a different fat and sugar content than conventional creamy peanut butter. It can sometimes prevent the cookies from setting up correctly. For best results with this specific recipe, I recommend using conventional creamy peanut butter.
What’s a rolling boil?
A rolling boil is when the mixture is bubbling vigorously all over the surface, not just around the edges. The bubbles won’t disappear when you stir it.
Classic Easy No Bake Chocolate Peanut Butter Cookies
Equipment
- medium-sized saucepan
- wax paper or parchment paper
- timer
- spoons or small cookie scoop
Ingredients
Hauptzutaten
- 0.5 cup unsalted butter
- 0.33 cup cocoa powder unsweetened
- 0.5 cup milk any kind
- 1.5 cup granulated sugar
- 0.33 cup brown sugar light or dark
- 3 cup quick oats
- 0.67 cup creamy peanut butter
- 2 tsp vanilla extract
- 0.5 tsp salt
Instructions
- Grab a medium-sized saucepan. Toss in the butter, cocoa powder, milk, granulated sugar, and brown sugar.
- Place the saucepan over medium heat. Start stirring constantly as it heats up. You want everything to melt together and then come to a rolling boil – that's when you see big, active bubbles all over the surface, not just around the edges. Keep stirring!
- Once it hits that rolling boil, set a timer. You need to let it boil for exactly 1 to 2 minutes. This step is crucial for the cookies to set properly, so don't guess on the time!
- After the 1-2 minutes of boiling, immediately take the saucepan off the heat. No more cooking!
- Now, this is where you need to be quick! Dump in the quick oats, creamy peanut butter, vanilla extract, and salt. Stir, stir, stir! Mix it all together really well until everything is combined and the peanut butter is fully incorporated. You'll notice it starts to thicken up pretty fast.
- Working as quickly as you can before the mixture sets up completely, drop spoonfuls (about a tablespoon or two each) onto your prepared wax paper or parchment paper. I like using two spoons or a small cookie scoop for this. Don't worry if they aren't perfectly round – the rustic look is part of their charm!
- Let the cookies cool completely at room temperature. This takes about 30 to 60 minutes, depending on how warm your kitchen is and how big your cookies are. They'll start out glossy and soft and become duller and firm as they cool and set. Resist the urge to move them too soon!