Introduction
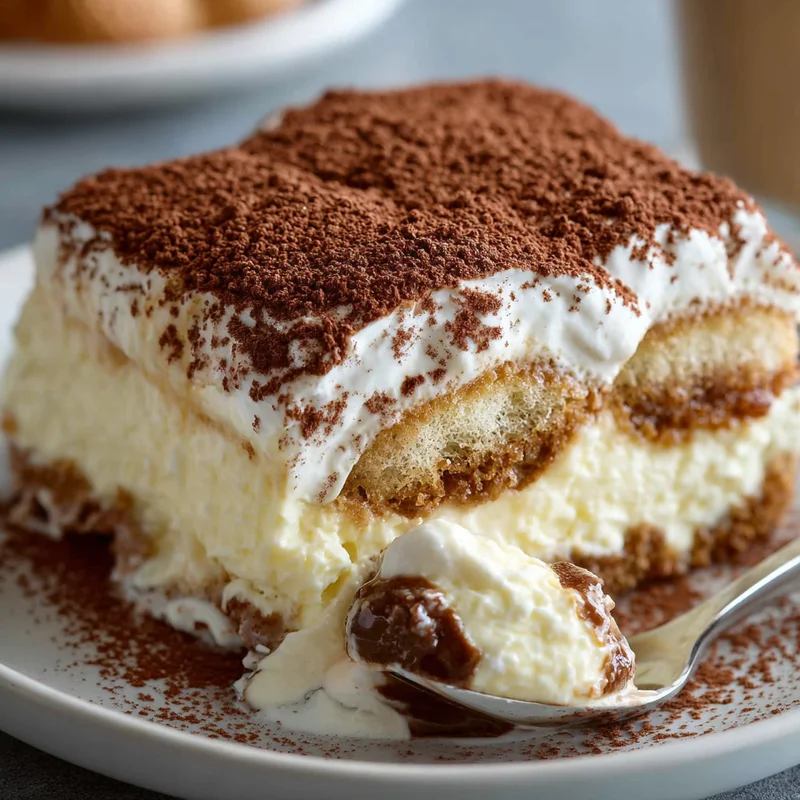
Oh, Tiramisu! Just saying the name brings back memories of cozy Italian cafes and the pure joy of that first creamy, coffee-kissed bite. This classic Italian Tiramisu recipe is a game-changer, my friends. It’s that perfect dessert that feels fancy and impressive, but honestly, it’s ridiculously easy to make. No fancy techniques, no baking required – just pure, unadulterated deliciousness that will have everyone asking for seconds (and the recipe!).
Why You’ll Love This Recipe
- Fast: Once you’ve got your ingredients, this comes together in a flash.
- Easy: Seriously, if you can whisk and layer, you can make this Tiramisu.
- Giftable: Pack it up nicely, and it makes a stunning homemade gift for any occasion.
- Crowd-Pleasing: This is a dessert that pretty much everyone adores. It’s rich, creamy, and perfectly balanced.
Ingredients
Let’s gather our goodies. The beauty of this recipe is its simplicity, so using good quality ingredients really makes a difference!
- 1 1/2 cups espresso (or strong coffee), room temperature: The backbone of that classic Tiramisu flavor. Make it strong and let it cool down so it doesn’t make our ladyfingers too soggy.
- 6 Tbsp golden rum, divided: A little splash of rum adds that signature warmth and depth. If you prefer not to use alcohol, you can skip it or use a coffee liqueur.
- 40 ladyfingers: These are the perfect vehicle for soaking up all that delicious coffee and rum.
- 6 large egg yolks: These create the rich, creamy custard base.
- 3/4 cup granulated sugar: To sweeten our custard and give it that lovely texture.
- 16 oz mascarpone, cold: Ah, mascarpone! This Italian cream cheese is what makes Tiramisu so incredibly luscious and smooth. Make sure it’s nice and cold.
- 2 cups heavy whipping cream, cold: We’ll whip this up to make the Tiramisu light and airy.
- 2-3 Tbsp unsweetened cocoa powder, for dusting: The final, beautiful flourish.
How to Make It
Alright, chef, let’s get our aprons on! This is going to be so much fun.
- Prep the Coffee Soak: First things first, let’s get that coffee ready. In a shallow dish (a pie plate works perfectly!), combine your cooled espresso with 4 tablespoons of the golden rum. Give it a little stir.
- Whip Up the Yolk Mixture: In a medium bowl, grab your whisk and beat together the egg yolks and granulated sugar. Keep whisking until the mixture is pale yellow and looks slightly thicker and fluffier. This is the start of our creamy magic!
- Smooth Out the Mascarpone: In a separate, larger bowl, get your cold mascarpone cheese. Beat it with your whisk or a hand mixer until it’s nice and smooth. No one likes lumpy mascarpone!
- Combine Mascarpone and Yolk Mixture: Now, gently fold the egg yolk mixture into the smooth mascarpone. Be gentle here! You want to incorporate it without deflating all that lovely air we’re building.
- Whip the Cream: In another bowl (yes, we’re using a few bowls, but it’s worth it!), whip the cold heavy cream until it forms stiff peaks. You know it’s ready when you can turn the bowl upside down (carefully!) and nothing falls out.
- Fold in the Whipped Cream: Now, the most important step for a light Tiramisu: gently fold the whipped cream into the mascarpone mixture. Use a spatula and a light hand, as if you’re folding clouds together.
- Dip the Ladyfingers: This is where we get our ladyfingers ready. Quickly dip each ladyfinger into the espresso-rum mixture. Don’t let them soak for too long – just a quick dunk on each side! We want them moist, not mushy.
- First Layer of Ladyfingers: Grab your serving dish (an 8×8 inch square dish or a similar rectangular dish is perfect). Arrange a single layer of your dipped ladyfingers snugly on the bottom.
- First Layer of Cream: Spread half of that glorious mascarpone mixture evenly over the ladyfingers. Make sure it goes all the way to the edges.
- Repeat the Layers: Now, repeat the magic! Lay down another layer of dipped ladyfingers, then top with the remaining mascarpone mixture. Smooth it out one last time.
- Chill Time: Cover your Tiramisu tightly with plastic wrap. Pop it into the refrigerator for at least 4 hours. But if you can resist (and I know it’s hard!), overnight is even better. This gives all those flavors a chance to meld together beautifully.
- The Grand Finale: Just before you’re ready to serve, take your Tiramisu out of the fridge. Dust the top generously with unsweetened cocoa powder using a fine-mesh sieve. It looks so elegant and tastes even better!
Substitutions & Additions
Feeling creative? Here are some fun ways to play with this classic!
- Booze Alternatives: If rum isn’t your thing, try coffee liqueur (like Kahlua) or even a touch of Marsala wine. For an alcohol-free version, just omit it and maybe add a splash of vanilla extract to the coffee.
- Coffee Variations: While espresso is traditional, strong brewed coffee or even cold brew will work in a pinch.
- Chocolate Lovers: Add a sprinkle of mini chocolate chips between the layers for an extra chocolatey kick.
- Citrus Zest: A little bit of orange zest folded into the mascarpone mixture can add a bright, unexpected flavor note.
Tips for Success
A few little tricks up my sleeve to make your Tiramisu absolutely perfect every time.
- Don’t Over-Soak Ladyfingers: This is the most common pitfall! A quick dip is all they need. Soggy ladyfingers will make your Tiramisu watery.
- Cold Ingredients for Whipping: Make sure your mascarpone and heavy cream are well-chilled. This is key for getting the right texture.
- Gentle Folding: When combining the mascarpone and whipped cream, fold gently. You want to keep that lovely airiness.
- Prep Ahead: Tiramisu actually tastes BETTER the next day, so it’s a perfect make-ahead dessert for parties or holidays.
- Room Temperature Coffee: Using hot coffee will make your ladyfingers disintegrate. Make sure it’s cooled to room temperature.
How to Store It
Once your Tiramisu is made and chilled, it’s best to keep it in the refrigerator. It will stay delicious for about 3-4 days. I like to dust with cocoa powder right before serving, as the cocoa can sometimes get a bit damp if it sits for too long.
FAQs
Got questions? I’ve got answers!
Q: Can I make Tiramisu without raw eggs?
A: Some recipes use a cooked custard base to avoid raw eggs. This classic version uses raw egg yolks, which are generally considered safe when whisked thoroughly with sugar. If you’re concerned, you can look for pasteurized eggs.
Q: How do I get my ladyfingers to be the right texture?
A: The key is a quick dip! Dunk them just long enough to moisten them without them falling apart. You want them to soften as the Tiramisu chills.
Q: Can I freeze Tiramisu?
A: While you can freeze Tiramisu, the texture of the mascarpone and cream might change slightly upon thawing, becoming a bit softer. It’s best enjoyed fresh or after refrigeration.
Classic Italian Tiramisu
Equipment
- Shallow dish for coffee soak, a pie plate works perfectly
- Medium bowl for whisking egg yolks and sugar
- larger bowl for mascarpone and combining mixtures
- Hand mixer optional for smoothing mascarpone
- another bowl for whipping cream
- Serving dish an 8x8 inch square dish or similar rectangular dish
- Plastic wrap for covering the tiramisu
- Fine-mesh sieve for dusting cocoa powder
Ingredients
For the Coffee Soak
- 1.5 cups espresso or strong coffee room temperature
- 4 Tbsp golden rum divided
For the Tiramisu
- 40 ladyfingers
- 6 large egg yolks
- 0.75 cup granulated sugar
- 16 oz mascarpone cold
- 2 cups heavy whipping cream cold
- 2 Tbsp unsweetened cocoa powder for dusting
Instructions
- Prep the Coffee Soak: In a shallow dish, combine cooled espresso with 4 tablespoons of golden rum. Give it a stir.
- Whip Up the Yolk Mixture: In a medium bowl, beat together egg yolks and granulated sugar until pale yellow and slightly thicker and fluffier.
- Smooth Out the Mascarpone: In a separate, larger bowl, beat cold mascarpone cheese until smooth.
- Combine Mascarpone and Yolk Mixture: Gently fold the egg yolk mixture into the smooth mascarpone.
- Whip the Cream: In another bowl, whip cold heavy cream until it forms stiff peaks.
- Fold in the Whipped Cream: Gently fold the whipped cream into the mascarpone mixture using a spatula.
- Dip the Ladyfingers: Quickly dip each ladyfinger into the espresso-rum mixture, just on each side, do not over-soak.
- First Layer of Ladyfingers: Arrange a single layer of dipped ladyfingers snugly on the bottom of the serving dish.
- First Layer of Cream: Spread half of the mascarpone mixture evenly over the ladyfingers.
- Repeat the Layers: Lay down another layer of dipped ladyfingers, then top with the remaining mascarpone mixture. Smooth it out.
- Chill Time: Cover tightly with plastic wrap and refrigerate for at least 4 hours, or preferably overnight.
- The Grand Finale: Just before serving, dust the top generously with unsweetened cocoa powder using a fine-mesh sieve.