Introduction
Hey there, sweet friend! Are you like me and absolutely adore the cozy, comforting flavors of pecan pie, but maybe don’t always have the time (or energy!) to bake a whole one from scratch? Especially when the holidays roll around and your to-do list is a mile long? Well, get ready for a little kitchen magic because I’ve got a recipe that’s going to make your taste buds sing and your life a whole lot easier. These Pecan Pie Balls capture all that warm, nutty, caramel-y goodness of a classic pecan pie but in a simple, bite-sized, no-bake package. Seriously, they are dangerously delicious and ridiculously easy to whip up. Perfect for gifting, sharing, or just hiding in the fridge for a secret snack (I won’t tell!). Let’s make some joy!
Why You’ll Love This Recipe
- Fast: No baking required, just mixing and chilling! You can have these ready in under an hour, plus chilling time.
- Easy: If you can stir ingredients together and roll a ball, you can make these. No fancy equipment needed!
- Giftable: They look adorable and taste amazing, making them perfect for holiday cookie plates or hostess gifts.
- Crowd-pleasing: Who doesn’t love the taste of pecan pie? These little bites disappear quickly at parties and gatherings.
Ingredients
Gather your goodies! Here’s what you’ll need to make these irresistible treats:
- 1½ cups pecans, finely chopped: The star of the show! Get them nice and finely chopped so they mix in smoothly. You can pulse them in a food processor if you like.
- ¾ cup graham cracker crumbs: These bind everything together and add that classic pie crust vibe.
- ⅔ cup brown sugar: Brings that warm, molasses-y sweetness essential for pecan pie flavor.
- ¼ cup maple syrup: Use real maple syrup for the best flavor! It adds moisture and that unmistakable syrupy note.
- 2 tablespoons light corn syrup: Helps with texture and binding, giving them a nice chew.
- 2 tablespoons salted butter, melted: Butter makes everything better, right? Adds richness and helps hold it all together.
- ¼ teaspoon almond extract: This is my secret weapon! It really enhances the pecan flavor beautifully.
- ¾ teaspoon rum extract: Gives it that classic, warm, boozy (but alcohol-free!) depth often found in pecan pie. Trust me on this one!
- 12 ounces chocolate melting discs: These melt smoothly and harden nicely for dipping. Much easier than tempering chocolate!
- Holiday themed sprinkles, optional garnish: For making them extra festive and pretty!
How to Make It
Okay, let’s get this party started! Making these Pecan Pie Balls is super straightforward. Just follow these simple steps:
Step 1: Mix the Dry Stuff. Grab a medium bowl. Toss in your finely chopped pecans, graham cracker crumbs, and brown sugar. Give it a good stir with a spoon or spatula to make sure everything is nicely combined.
Step 2: Add the Wet Stuff. In a separate, smaller bowl (or even just drizzle it right into the dry ingredients if you’re feeling brave!), combine the maple syrup, light corn syrup, melted butter, almond extract, and rum extract. Whisk it together briefly.
Step 3: Combine Wet and Dry. Pour the wet ingredient mixture into the bowl with the dry ingredients. Now comes the fun part! Use your spatula or even your hands (my preferred method – just make sure they’re clean!) to mix everything together until it’s well combined and resembles a thick, slightly sticky dough.
Step 4: Roll the Balls. Get a small scoop (a cookie scoop or a tablespoon works perfectly) or just eyeball it, and roll the mixture into bite-sized balls, about 1-inch in diameter. Place the rolled balls on a baking sheet lined with parchment paper or wax paper. This recipe should make about 24-30 balls, depending on size.
Step 5: Chill Out. Pop that baking sheet into the refrigerator for at least 30 minutes. This helps the balls firm up, making them much easier to dip in chocolate later.
Step 6: Melt the Chocolate. While your balls are chilling, melt your chocolate melting discs. You can do this in a microwave-safe bowl, heating in 30-second intervals and stirring in between, until smooth. Or use a double boiler on the stovetop. Be careful not to overheat!
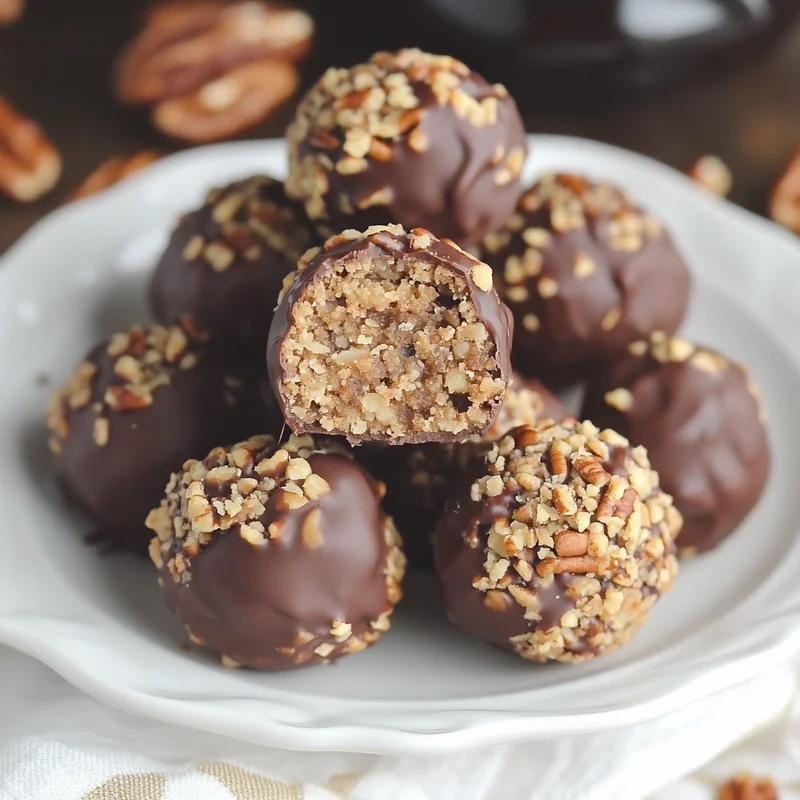
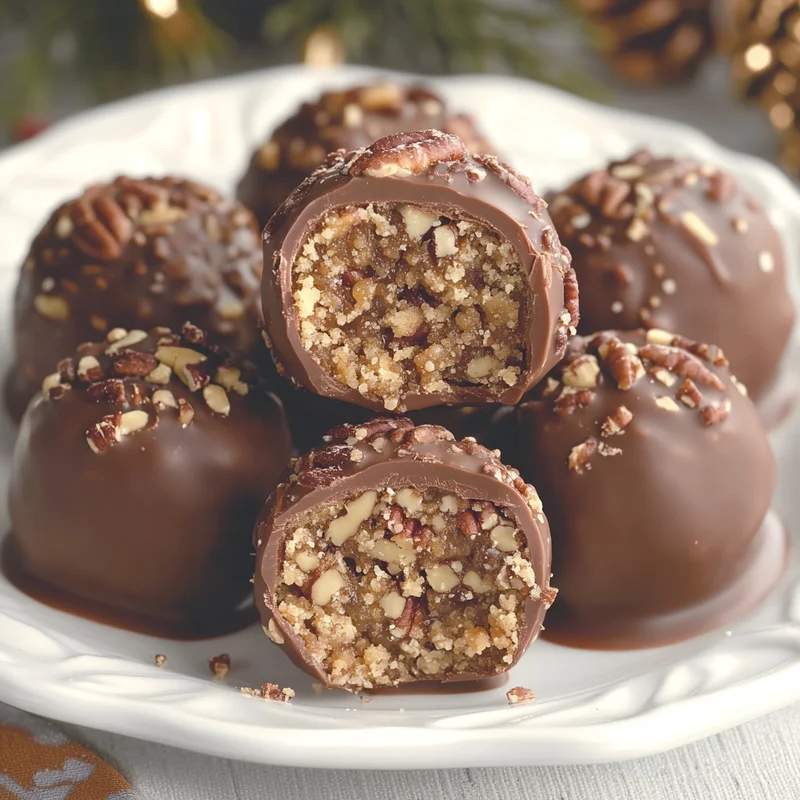
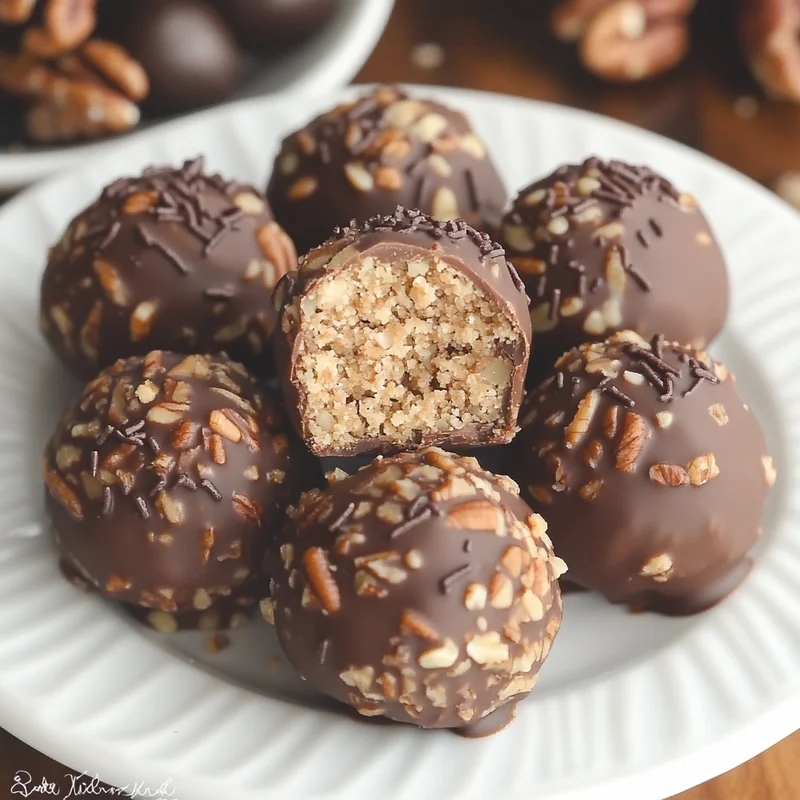
Step 7: Dip and Decorate! Once the balls are firm, it’s dipping time! Use a fork or a dipping tool to carefully dip each ball into the melted chocolate, letting any excess drip off. Place the coated balls back onto the parchment-lined baking sheet. If you’re using sprinkles, add them right away while the chocolate is still wet.
Step 8: Let Them Set. Return the baking sheet with the chocolate-covered balls to the refrigerator for another 15-30 minutes, or until the chocolate is completely set and firm.
Step 9: Enjoy! Once they’re set, pile them onto a pretty plate and get ready for rave reviews!
Substitutions & Additions
Want to play around with the recipe? Here are a few ideas:
- Different Nuts: Not a pecan fan? Walnuts or even almonds would work here, though they’ll change the flavor profile slightly.
- Add Spice: A pinch of cinnamon or nutmeg in the dry mix would give them an extra layer of warmth.
- Bourbon Boost: If you like a little kick, try replacing half of the rum extract with a tiny splash (like ½ teaspoon) of bourbon or bourbon extract.
- Chocolate Swap: Use milk chocolate, dark chocolate, or even white chocolate melting wafers instead of semi-sweet.
- Roll in Powdered Sugar: Instead of chocolate coating, you could roll the chilled balls in powdered sugar for a snow-dusted look.
Tips for Success
- Fine Chop is Key: Make sure your pecans are really finely chopped. Big chunks won’t bind as well and will make the balls harder to roll smoothly.
- Mix Thoroughly: Spend a little time mixing the wet and dry ingredients. You want a uniform texture that holds together when you squeeze it.
- Don’t Skip the Chill: Chilling before dipping is crucial! It helps the balls hold their shape and prevents them from falling apart in the warm chocolate.
- Melt Chocolate Gently: Overheating melting wafers can make the chocolate seize or become thick. Go slow and stir frequently.
- Prep Ahead: You can make the balls and roll them, then store them in an airtight container in the fridge for a couple of days before dipping them in chocolate.
How to Store It
These Pecan Pie Balls are best stored in an airtight container. You can keep them in the refrigerator for up to 1-2 weeks, or at cool room temperature for about 3-4 days, though I find the fridge keeps them firm and fresh longest. If your house is warm, definitely go with the fridge!
FAQs
Got questions? I’ve got answers!
Can I use regular chocolate chips instead of melting discs?
You can, but they don’t melt and set quite as smoothly or firmly as melting discs or tempering chocolate. If you use chips, you might need to add a tiny bit of shortening or coconut oil (like ½ – 1 teaspoon per cup of chips) when melting to help with consistency.
Can I skip the almond and rum extracts?
Yes, you can, but I wouldn’t recommend it! These extracts add SO much of that classic pecan pie depth and warmth. If you only have one, use the rum extract as it’s a more signature pie flavor.
My mixture is too crumbly/too wet, what happened?
If it’s too crumbly, your wet ingredients might not have been measured quite right, or maybe your pecans weren’t finely chopped enough. Try adding another tiny splash (½ teaspoon) of maple syrup or corn syrup. If it’s too wet and sticky, you might have added too much liquid. You can try adding another tablespoon or two of graham cracker crumbs or finely chopped pecans to balance it out.
Are these freezer-friendly?
Yes! Once the chocolate is fully set, you can place the balls in a single layer on a baking sheet to flash freeze for about 30 minutes, then transfer them to a freezer-safe airtight container or bag. They should keep for a couple of months. Thaw them in the refrigerator before serving.

Easy No-Bake Pecan Pie Balls
Equipment
- Medium bowl
- Smaller bowl
- Spoon or spatula
- Spatula or hands
- Small scoop a cookie scoop or a tablespoon works perfectly, about 1-inch in diameter
- Baking Sheet lined with parchment paper or wax paper
- Microwave-safe bowl or use a double boiler
- Fork or a dipping tool
Ingredients
Hauptzutaten
- 1.5 cup pecans finely chopped
- 0.75 cup graham cracker crumbs
- 0.67 cup brown sugar
- 0.25 cup maple syrup use real maple syrup
- 2 tablespoons light corn syrup
- 2 tablespoons salted butter melted
- 0.25 teaspoon almond extract
- 0.75 teaspoon rum extract
- 12 ounces chocolate melting discs
- Holiday themed sprinkles optional garnish
Instructions
- Mix the Dry Stuff. Grab a medium bowl. Toss in your finely chopped pecans, graham cracker crumbs, and brown sugar. Give it a good stir with a spoon or spatula to make sure everything is nicely combined.
- Add the Wet Stuff. In a separate, smaller bowl (or even just drizzle it right into the dry ingredients if you're feeling brave!), combine the maple syrup, light corn syrup, melted butter, almond extract, and rum extract. Whisk it together briefly.
- Combine Wet and Dry. Pour the wet ingredient mixture into the bowl with the dry ingredients. Now comes the fun part! Use your spatula or even your hands (my preferred method – just make sure they're clean!) to mix everything together until it's well combined and resembles a thick, slightly sticky dough.
- Roll the Balls. Get a small scoop (a cookie scoop or a tablespoon works perfectly) or just eyeball it, and roll the mixture into bite-sized balls, about 1-inch in diameter. Place the rolled balls on a baking sheet lined with parchment paper or wax paper. This recipe should make about 24-30 balls, depending on size.
- Chill Out. Pop that baking sheet into the refrigerator for at least 30 minutes. This helps the balls firm up, making them much easier to dip in chocolate later.
- Melt the Chocolate. While your balls are chilling, melt your chocolate melting discs. You can do this in a microwave-safe bowl, heating in 30-second intervals and stirring in between, until smooth. Or use a double boiler on the stovetop. Be careful not to overheat!
- Dip and Decorate! Once the balls are firm, it's dipping time! Use a fork or a dipping tool to carefully dip each ball into the melted chocolate, letting any excess drip off. Place the coated balls back onto the parchment-lined baking sheet. If you're using sprinkles, add them right away while the chocolate is still wet.
- Let Them Set. Return the baking sheet with the chocolate-covered balls to the refrigerator for another 15-30 minutes, or until the chocolate is completely set and firm.
- Enjoy! Once they're set, pile them onto a pretty plate and get ready for rave reviews!