Introduction
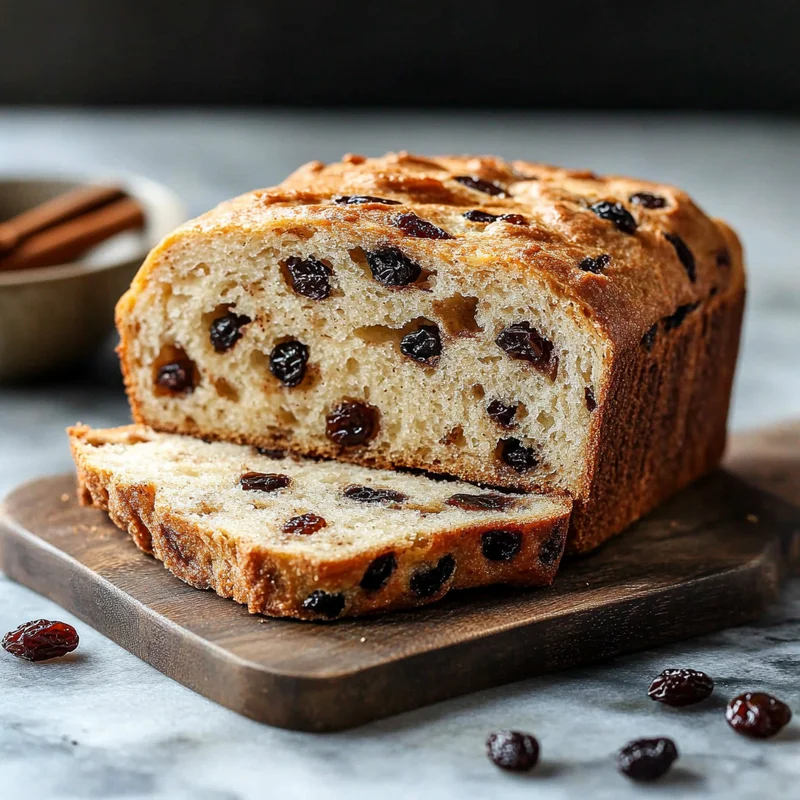
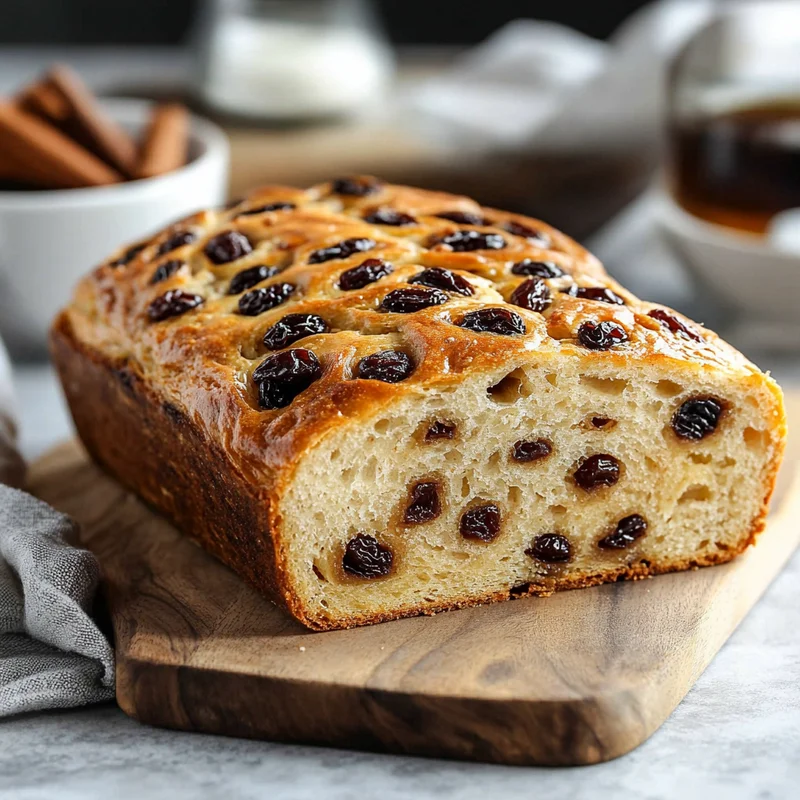
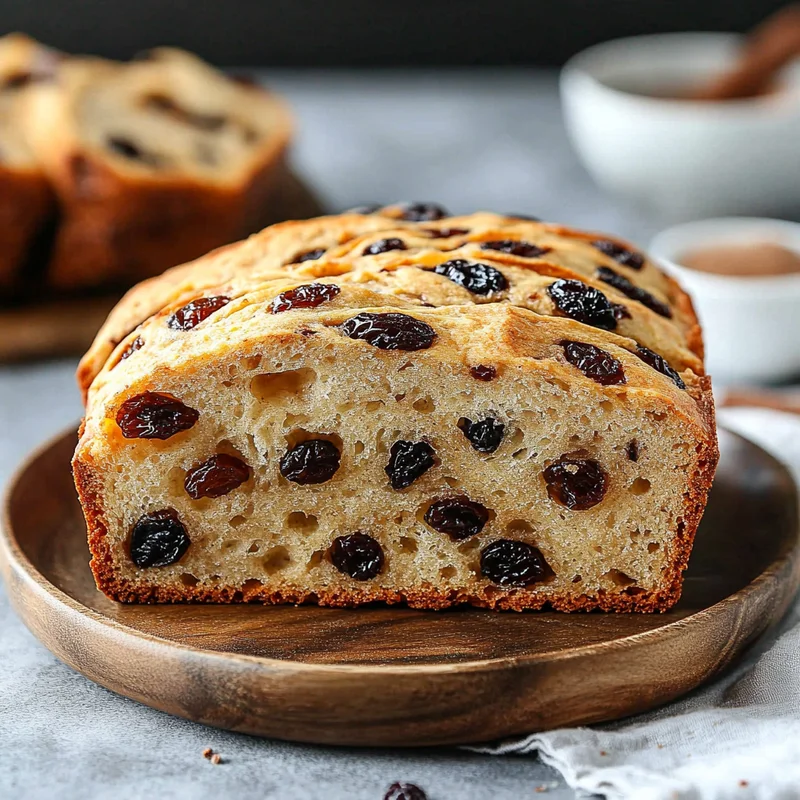
Picture this: a cozy Saturday morning, the air filled with the comforting scent of warm cinnamon and sweet raisins baking in the oven. Now, imagine achieving that blissful moment with hardly any effort at all! Seriously. This isn’t some complicated bakery-level project you need hours and strong arms for. This is the magic of no-knead bread, and we’re adding everyone’s favorite warm, spicy, fruity twist: cinnamon raisin!
If you’ve ever been intimidated by baking bread, this recipe is your golden ticket. It’s incredibly forgiving, ridiculously simple, and delivers a loaf so delicious, you’ll wonder why you didn’t try it sooner. It’s the perfect companion to your morning coffee, afternoon tea, or just because you deserve a slice of pure comfort.
Why You’ll Love This Recipe
Get ready to fall head over heels for this loaf! Here’s why:
- Fast (Hands-On Time, Anyway!): While the dough rests for a long time, your actual work is maybe 10 minutes total. Easy peasy!
- Easy: No tricky kneading techniques, no fancy equipment needed (just a bowl and a pot!). If you can stir, you can make this bread.
- Giftable: Wrap up a warm loaf, and you’ve got the most thoughtful, delicious gift for a friend, neighbor, or host.
- Crowd-Pleasing: Who can resist warm bread? Add cinnamon and raisins, and you’ve got a guaranteed hit. Great for brunches, holidays, or just sharing.
Ingredients
Gather your simple ingredients. Most of these are probably already hanging out in your pantry!
- 3 cups all-purpose flour: Your basic building block! Keep it simple.
- 1 teaspoon salt: Don’t skip this! It balances the sweetness and brings out all the flavors.
- ½ teaspoon active dry yeast: Just a tiny bit! This slow, cold rise is what gives you amazing flavor and texture with no kneading.
- 1 tablespoon ground cinnamon: The star spice! Make sure yours is fresh for maximum warmth.
- 1 cup raisins: Those sweet little gems that plump up as the bread bakes. Feel free to adjust the amount if you’re a super-fan or prefer slightly less.
- 1½ cups lukewarm water (105°F to 115°F): Think warm bathwater, not hot tub! Too hot will kill the yeast; too cold, and they won’t activate properly. This is crucial for your yeasties to get to work.
- 3 tablespoons brown sugar: Adds a lovely depth of sweetness and helps create that beautiful golden crust.
How to Make It
Alright, let’s get baking! Remember, the hardest part is waiting.
1. In a nice big bowl, measure out your dry ingredients: the flour, salt, active dry yeast, cinnamon, and brown sugar. Give them a quick stir with a spoon or whisk just to make sure everything is distributed evenly. You’ve already done most of the work!
2. Now, toss in those lovely raisins. Give them a little stir to get them coated in the flour mixture so they don’t all sink to the bottom. You want those sweet bursts scattered throughout the loaf.
3. Pour in the lukewarm water. Grab your spoon or a sturdy spatula and mix everything together. It’s going to look super shaggy and sticky – like a messy, wet dough. This is exactly what you want! Don’t try to make it smooth; just mix until there are no dry bits of flour left.
4. Time for its long nap. Cover the bowl tightly with plastic wrap. You want a good seal here to keep the moisture in and let the magic happen.
5. Find a cozy spot in your kitchen for the bowl. It doesn’t need to be warm, just room temperature. Let it sit there for 12 to 18 hours. Yes, that long! This slow rise is what develops all that amazing flavor and texture without you lifting a finger. You’ll know it’s ready when it has doubled (or more!) in size and you see lots of little bubbles on the surface.
6. Okay, after its beauty rest, the dough is ready. Generously flour your work surface – don’t be shy! The dough will be very sticky, which is normal for no-knead doughs. Use a bowl scraper or spatula to gently scrape the dough out onto the floured surface.
7. Now, we just need to give it a little shape. Think of it like folding a letter. Grab the edges of the dough and gently fold them towards the center a few times. You’re not kneading, just encouraging it into a rough ball or oblong loaf shape. This helps create a little tension for a better structure.
8. Lightly sprinkle a little more flour on top of your shaped dough, just enough so it doesn’t stick to the cover. Loosely cover it with plastic wrap or a clean kitchen towel. Let it rest for a final 30 minutes. This short rest helps the dough relax before baking.
9. About 30 minutes before that final rest is up, pop your heavy, oven-safe pot (like a Dutch oven) with its lid into the oven. Preheat the oven to a hot 450°F (230°C). Heating the pot is key to getting that amazing, crispy crust.
10. Carefully, using oven mitts, remove the very hot pot from the oven. Be cautious!
11. Now for the transfer! Uncover your dough. You can either carefully lift the dough and gently drop it into the hot pot (it might spread out a bit, that’s okay!), or my preferred method: gently turn the dough out onto a piece of parchment paper, then use the parchment paper like handles to lower the dough with the paper into the hot pot. Trim any excess parchment that hangs over the edge if you like.
12. Pop the lid back onto the pot. Place the covered pot carefully back into the hot oven.
13. Bake for 30 minutes with the lid on. This traps steam, which helps the dough expand beautifully and creates that lovely initial crust.
14. After 30 minutes, carefully remove the lid. Look at that gorgeous puffed-up bread! Bake uncovered for another 15 to 25 minutes. This is where the crust gets its deep golden brown color and becomes wonderfully crispy. You want it nice and dark brown for best flavor and texture. You can check its internal temperature with a thermometer – it should be around 200°F (93°C).
15. Once it’s beautifully golden, carefully remove the very hot pot from the oven.
16. This is the hardest step! Carefully lift the bread out of the pot (use the parchment paper if you used it, or gently tip it out) and transfer it to a wire rack. It needs to cool completely before you slice into it. I know, the smell is incredible, but slicing too soon can make the inside gummy. Give it at least an hour, preferably longer.
Substitutions & Additions
Want to play around? Go for it! This recipe is super flexible.
- Other Dried Fruits: Swap the raisins for dried cranberries, chopped dried apricots, chopped dates, or even a mix!
- Nuts: Stir in ½ cup of chopped walnuts or pecans along with the raisins for added crunch.
- Extra Spice: Add a pinch of nutmeg or cardamom along with the cinnamon for more warm flavor complexity.
- Sweet Glaze: Once the bread is cool, you could whisk together some powdered sugar with a tiny splash of milk or orange juice and drizzle over the top. Pure decadence!

Tips for Success
A few little pointers to make sure your loaf is perfect every time:
- Check Your Yeast: Make sure your active dry yeast isn’t expired. If you’re unsure, you can proof it first by mixing it with a little warm water and a pinch of sugar. If it gets foamy after 5-10 minutes, it’s good to go!
- Lukewarm is Key: That water temperature really does matter. Too hot = dead yeast. Too cold = sleepy yeast. Aim for that 105-115°F range.
- Don’t Fear the Stickiness: No-knead dough is supposed to be wet and sticky. That high hydration is what gives it its amazing texture and crisp crust. Flour your hands and surface generously when shaping, but don’t try to add too much flour to the dough itself during mixing or the short rest.
- Use Parchment Paper: Seriously, using parchment paper to transfer the dough into the hot Dutch oven is a game-changer. It makes it so much easier and safer.
- Get it Golden Brown: Don’t underbake! That deep golden color means you’ve developed great flavor and the crust is perfectly crispy.
- Cool Completely: I’m repeating myself, but it’s important! Warm bread is tempting, but the internal structure is still setting as it cools. Slicing too soon can result in a gummy interior.
How to Store It
Once completely cool, store your beautiful bread. It’s best enjoyed within the first day or two for that ultimate crusty goodness. Wrap the cooled loaf tightly in plastic wrap, foil, or keep it in a bread box at room temperature.
For longer storage, slice the cooled bread and store the slices in an airtight container or freezer bag in the freezer for up to 2-3 months. You can pop slices directly into a toaster from frozen!
FAQs
Got questions? Let’s tackle a couple of common ones!
Q: Can I use instant yeast instead of active dry yeast?
A: Yes, you can often substitute instant yeast 1:1 for active dry yeast in no-knead recipes. The rise time might be slightly shorter, but the long fermentation is still key for flavor.
Q: What if my dough isn’t bubbly after 12 hours?
A: Check the temperature of your room and the water you used. If it’s cool, it might just need more time. Give it another few hours. Ensure your yeast wasn’t expired and your water wasn’t too hot or cold initially.
Q: Do I have to use a Dutch oven?
A: The Dutch oven is highly recommended because it traps steam, creating that amazing crust. If you don’t have one, you can try baking the dough on a baking sheet or in a loaf pan, but you won’t get the same crust development. You can also try placing a pan of hot water on the rack below your bread to create steam, but it’s not quite the same effect as the trapped steam in a Dutch oven.

Easy No-Knead Cinnamon Raisin Bread
Equipment
- Large bowl
- spoon or whisk for mixing dry ingredients
- sturdy spatula or spoon for mixing dough
- Plastic wrap for covering dough during rise
- work surface for shaping
- bowl scraper or spatula for scraping dough
- Clean kitchen towel or plastic wrap for second rest
- Oven preheated to 450°F (230°C)
- heavy oven-safe pot with lid like a Dutch oven, must be preheated
- Parchment paper optional, for transferring dough
- Oven mitts
- Wire rack for cooling
- Instant-read thermometer optional, to check internal temperature (should be around 200°F / 93°C)
Ingredients
Hauptzutaten
- 3 cups all-purpose flour Your basic building block!
- 1 teaspoon salt Balances sweetness and enhances flavor.
- 0.5 teaspoon active dry yeast Just a tiny bit for a slow rise.
- 1 tablespoon ground cinnamon Ensure it's fresh for maximum warmth.
- 1 cup raisins Feel free to adjust amount.
- 1.5 cups lukewarm water 105°F to 115°F (40°C to 46°C). Crucial temperature for yeast.
- 3 tablespoons brown sugar Adds sweetness and helps crust development.
Instructions
- In a large bowl, measure out the flour, salt, active dry yeast, cinnamon, and brown sugar. Stir with a spoon or whisk until evenly distributed.
- Add the raisins to the bowl and stir to coat them in the dry mixture, helping them disperse evenly later.
- Pour in the lukewarm water. Using a spoon or sturdy spatula, mix until all dry bits of flour are incorporated. The dough will be very shaggy and sticky.
- Cover the bowl tightly with plastic wrap to create a good seal.
- Let the dough rest at room temperature for 12 to 18 hours, or until it has doubled in size and has bubbles on the surface. This long, slow rise develops flavor and texture.
- Generously flour your work surface. Use a bowl scraper or spatula to gently scrape the sticky dough out onto the floured surface.
- Gently fold the edges of the dough towards the center a few times to shape it into a rough ball or oblong loaf. You are not kneading.
- Lightly sprinkle a little more flour on top of the shaped dough. Loosely cover it with plastic wrap or a clean kitchen towel.
- Let the dough rest for a final 30 minutes.
- About 30 minutes before the final rest is up, place your heavy, oven-safe pot with its lid into the oven. Preheat the oven to 450°F (230°C). This is key for a crispy crust.
- Carefully, using oven mitts, remove the hot pot from the oven.
- Uncover the dough. Either carefully lift and drop the dough into the hot pot, or gently turn the dough out onto a piece of parchment paper and use the paper to lower it into the pot (trim excess parchment if needed).
- Place the lid back onto the pot and carefully return the covered pot to the hot oven.
- Bake for 30 minutes with the lid on. This traps steam, helping the dough rise.
- After 30 minutes, carefully remove the lid. Bake uncovered for another 15 to 25 minutes, or until the crust is deep golden brown and crispy. An instant-read thermometer should register around 200°F (93°C).
- Once baked, carefully remove the hot pot from the oven.
- Carefully lift the bread out of the pot (using parchment paper if you used it) and transfer it to a wire rack. Allow it to cool completely (at least an hour, preferably longer) before slicing to prevent a gummy interior.
Notes
- Ensure active dry yeast isn't expired. Proofing can confirm vitality.
- Use lukewarm water (105-115°F) as too hot kills yeast, too cold makes it sluggish.
- No-knead dough is meant to be wet and sticky. Use generous flour on the surface and hands when shaping.
- Using parchment paper to transfer dough to the hot pot makes it easier and safer.
- Bake until deep golden brown for best flavor and crust.
- Cool completely on a wire rack before slicing to prevent a gummy texture. Storage:
Store cooled bread tightly wrapped in plastic wrap, foil, or in a bread box at room temperature for 1-2 days.
For longer storage, slice and freeze in an airtight container or bag for up to 2-3 months. Slices can be toasted directly from frozen. Substitutions & Additions:
- Substitute raisins with other dried fruits like cranberries, apricots, or dates.
- Stir in ½ cup chopped walnuts or pecans with the raisins for crunch.
- Add a pinch of nutmeg or cardamom for extra spice complexity.
- Drizzle with a powdered sugar glaze once cool. FAQ Notes:
- Instant yeast can often be substituted 1:1 for active dry yeast; rise time may be slightly shorter.
- If dough isn't bubbly after 12 hours, room temperature might be too cool; allow more time. Ensure yeast wasn't expired and water temperature was correct initially.
- A Dutch oven is highly recommended for crust development due to trapped steam. Alternatives like baking sheets or loaf pans can be used but won't yield the same crust; adding a pan of hot water below the bread can help generate some steam.


